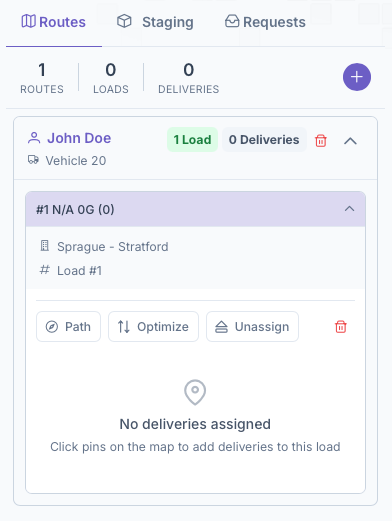
Manually Adding Customers to Load/Route
Next is adding customers. Once a load has been created, customers can be added on to the load. Customers can be added to a load even if the load itself isn't part of a route yet. If not part of a route, adding customers must be done on the staging part of the toolbar but if the load is on a route, then it will be done on the Routes part of the toolbar under the driver.
- To begin, press the dropdown on the load to pull up the load
- Next select the customer by finding them on the map or doing a customer search

- Click on the Customer to bring up their black info card
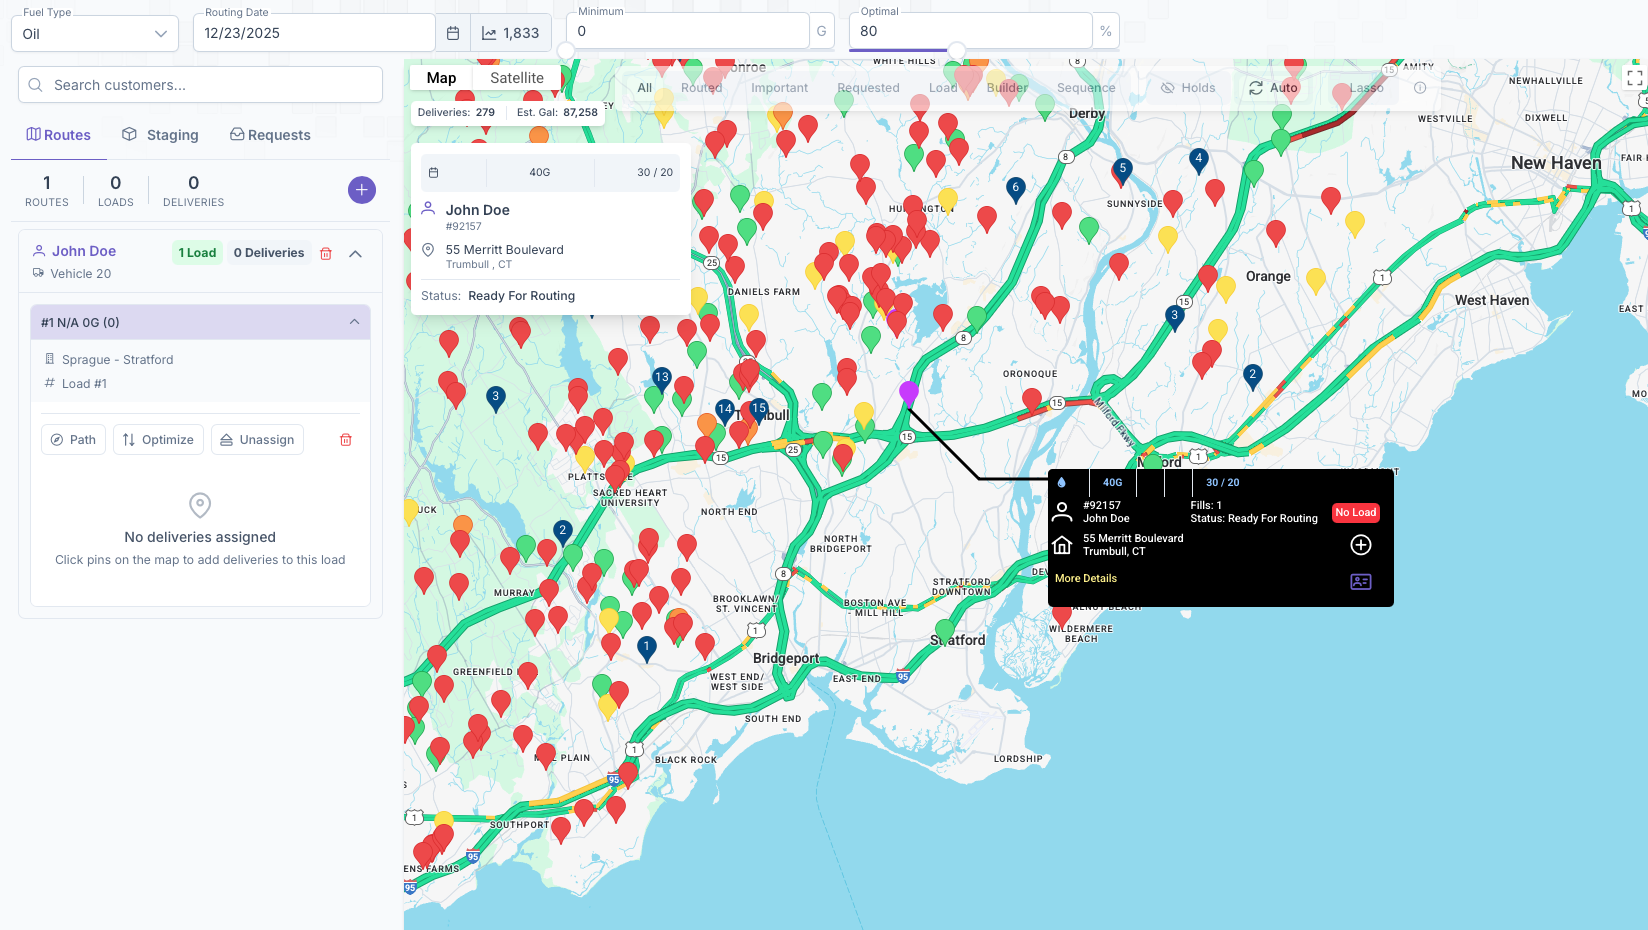
- A plus should now appear on the box, clicking on the plus will now add them onto the load.

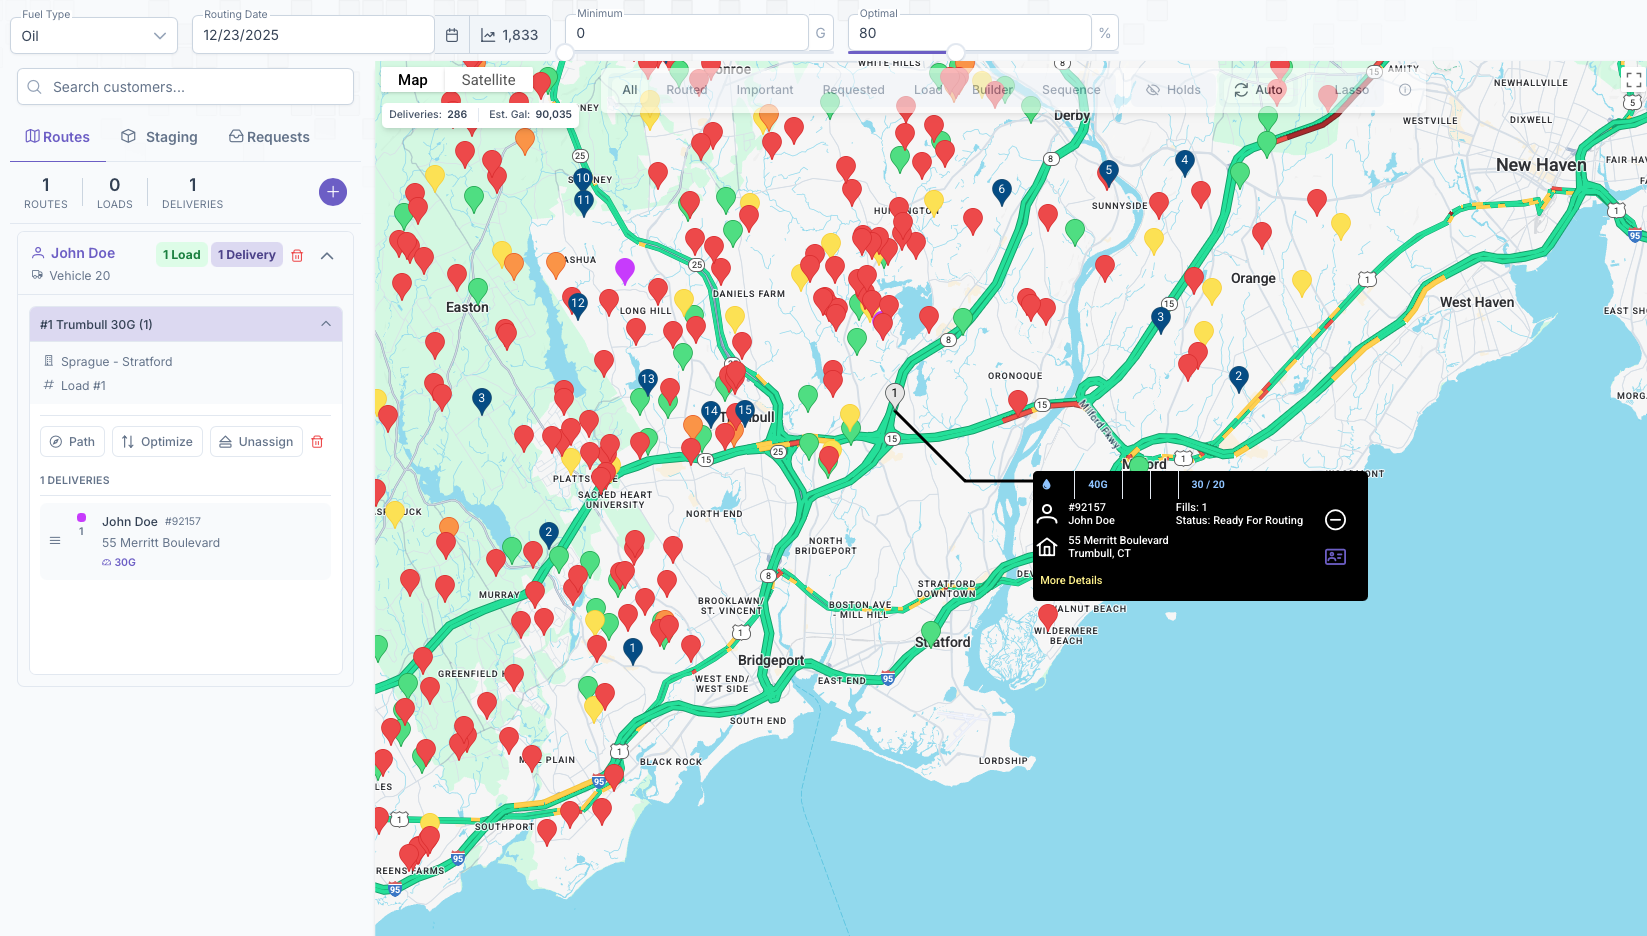
- Repeat the process to continue adding more customers to the delivery
Once completed, a list will appear under the loads showing all customers added. The order that they appear in is the order that they will be delivered to. This list can be rearranged by clicking and dragging the 3 bars next to the name of the customer. Once all customers for that delivery are added and arranged in prefered delivery order, the route is now ready for shipping. Clicking on the path button will create a path on the map starting with the terminal and going in order of the customers list. Clicking on Optimize will optimize the route in a matter that saves time by putting the customers in a more efficient order. If added to a route, clicking on unassign will remove the load from the route in the case that it needs to be reassigned or for any reason. The Lasso Tool from earlier can also be used here. By creating a zone around a particular area, all customers in that area can now be added to a load rather than clicking on each individually.
No comments to display
No comments to display