Billing
Billing
Introduction
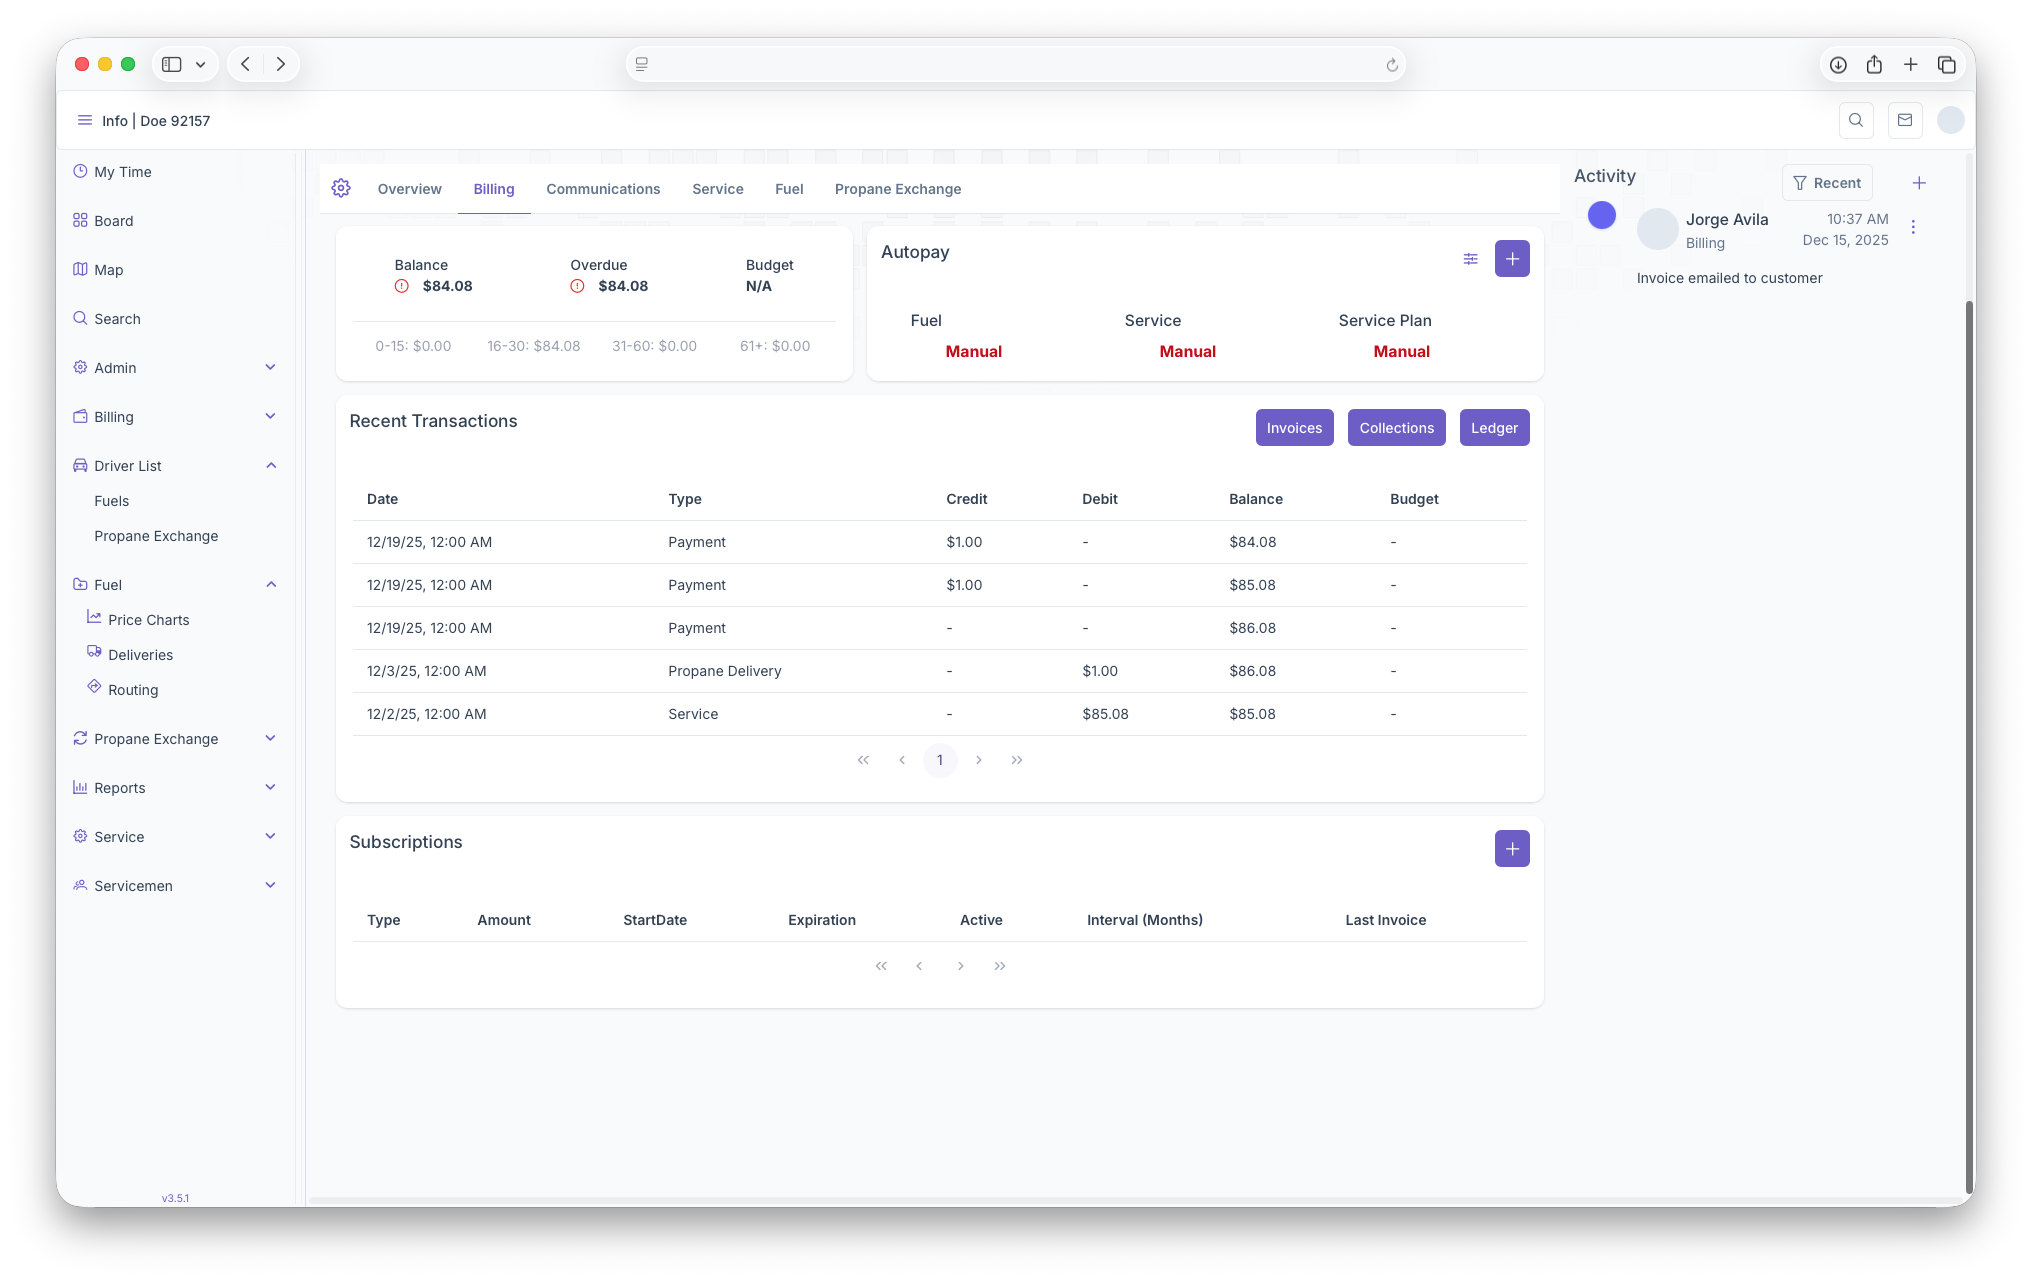
The Billing section of the Customer Account is where all information regarding customer billing can be seen. This includes a balance overview, a section for Autopay, any recent trasactions that have been made on the account and any subscriptions that the customer has on their account.

Balances
The first thing seen on the Billing page is the Balances box. Here Balances will be shown, Overdue ammounts, Budget as well as an aging report for the customer
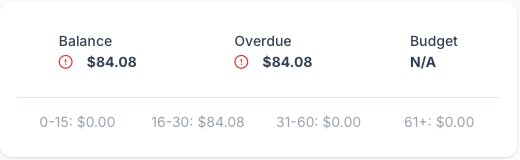
- Balance - The overall Balance on the customers account can be seen here
- Overdue - The Overdue ammount will be shown here
- Budget - The Customers budget plan will be shown here
- Aging Report - The Customers individual Aging Report can be seen here: 0-15 days, 16-30 days, 31-60 days and 61+ days. Each one has balances attached to show how long the balance has been aging for
Autopay
The Autopay section is where credit cards can managed for autopay purposes, this includes adding new cards to the account. A more detailed look can be seen on the Autopay/Adding Credit Cards page.

Recent Transactions
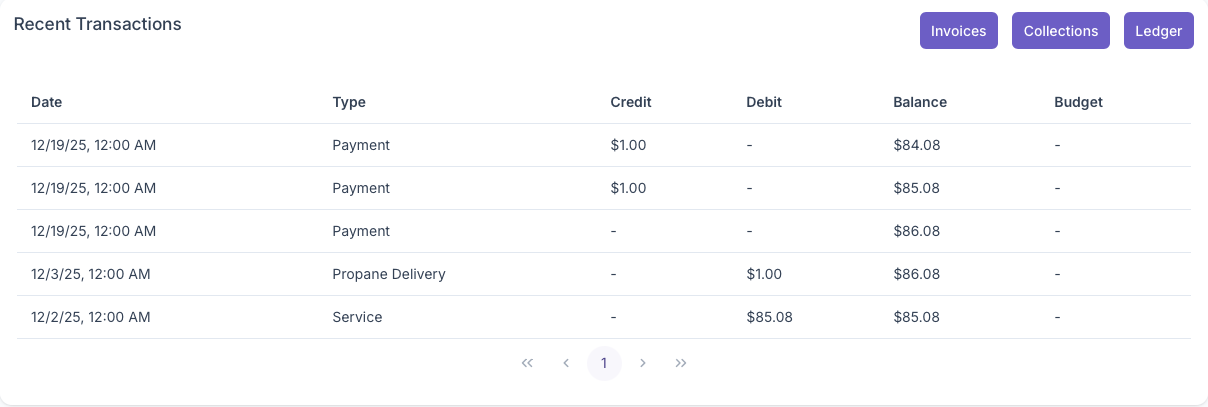
The Recent Transactions sections shows any recent invoices or receipts that were added onto the account. A more detailed look at Invoices, Collections and Ledgers can also be seen from here by clicking on each respective button. A more in depth look at Recent Transactions can be seen on the Recent Transactions page.
Subscriptions
The Subscriptions section is where all subscriptions the custmer has can be seen and added. When first looking at the subscriptions section, a table will generate with each subscription being a line item and with the following columns

- Type - Shows the type of subcription
- Amount - How much is charged for the subscription
- StartDate - The effective start date of the subscription
- Expiration - When the subscription ends, if applicable
- Active - If the subscription is currently active
- Interval (Months) - when the subscription is charged
- Last Invoice - Shows the date of the most recent invoice of the subscription
Subscriptions can then be added by clicking on the add button on the top right corner of the subscriptions box. Clicking on it will bring up the Edit Subscriptions popup which will generate the following fields
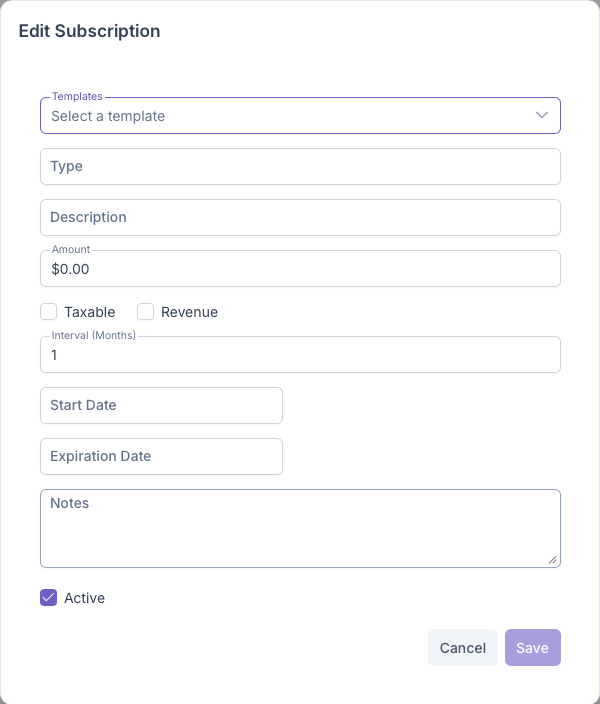
- Template - Select the template to be used with the subscription
- Type - The type of the subscription
- Description - A brief description of the subscription
- Amount - How much will be charged on the subscription
- Taxable/Revenue - Toggle whether subscription is Taxable and/or Revenue
- Interval - The rate at which the subscription is charged
- Start Date - Start date of the subcription
- Expiration Date - Expiration date of the subscription if applicable
- Notes - Any notes on the subscription can be added here
- Active - Toggle whether the subscription is active or not
Once all fields have been filled out, clicking on save will add the subscription to the account and clicking on cancel will void out any information and close the popup. Existing subscriptions can edited by clicking on an exiting one. The same popup as the add Subscription will show with all fields already filled out and can be edited if need be
Autopay/Adding Credit Cards
Overview
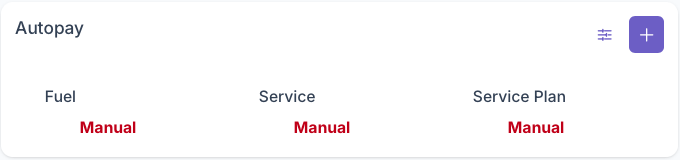
The Autopay section of billing is where credit cards on a customers account can be managed. This includes adding credit cards to the account and what autopay features are placed on said cards. All autopay services will appear as manual until a card is added for the purposes of being autumatically billed. If the customer decides not to be auto charged, all services can be set to manual as well
Adding Cards
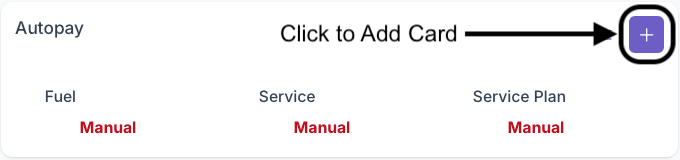
Clicking on the Add button on the top right of the box will bring up the add card page. The following fields must be filled out for a card to be added on to the account
-
Billing Information
- First Name
- Last Name
- Company (Optional)
- Email (Optional)
- Phone Number
- Billing Address
- Adress Line 2 (Optional)
- City
- State
- Zip Code
-
Payment
- Card Number
- Expiration Date
- CVV
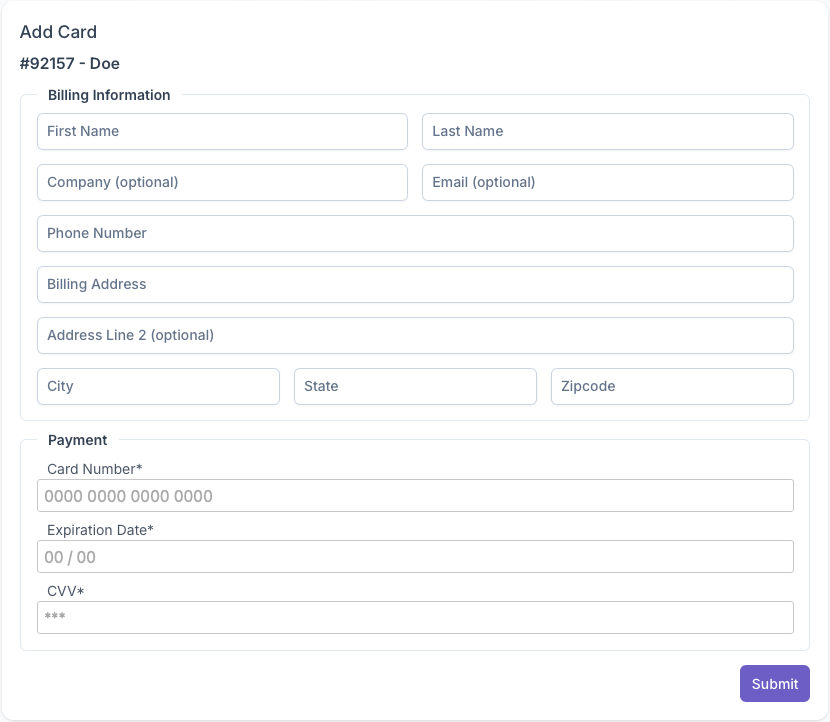
Once all fields have been filled out, clicking on submit will add the credit card onto the customers account and can now be managed for autopay purposes.
Managing Cards
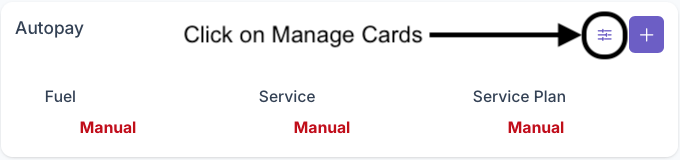
Clicking on the Manage Cards button will bring up the Cards Setting popup. Here all cards on the account can be seen and managed for autopay purposes. The popup will generate with each card as a line item and with the following columns
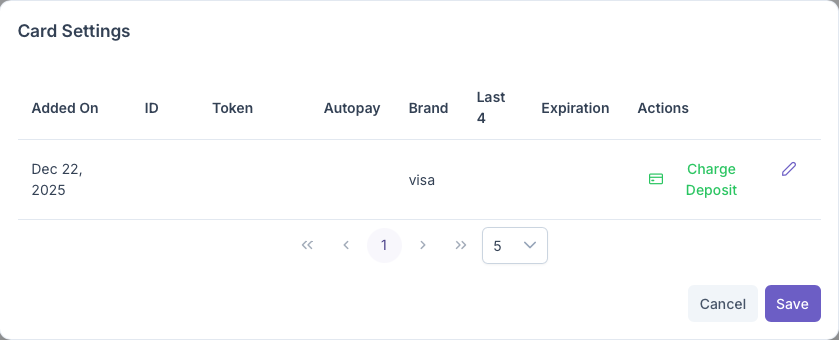
- Added On - When the Card was added on to the account
- ID - An ID given to the Credit Card
- Token - A placeholder number used for digital purchases
- Autopay - What autopay services are used with this card (Fuel, Service, Service Plan)
- Brand - Brand of the Credit Card
- Last 4 - The last four digits of the caredit card
- Expiration - The expiration date of the credit card
- Actions - Can charge a deposit by clicking under Actions, for more information, see below
- Edit - Allows for editing card for Autopay purposes, for more information, see below
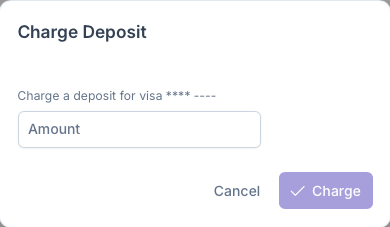
Charge Deposit
Clicking on Charge Deposit under the actions column of a credit card allows for the card to be charged a deposit for a future service. This can only be done if a credit card has been added to the system. After clicking on Charge Deposit, a Charge Deposit popup will appear and however much the customer is going to be charged will be filled out in the amount field. After adding an amount, click on Charge to charge the card for the deposit made. This will be reflected as a credit on the Customers Account and will be be used as well for any outstanding balances already on the account. This same credit will be applied as well for future deliveries or any services provided to the customer.
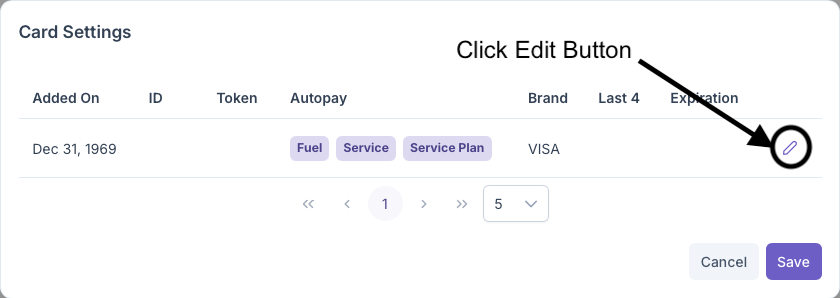
Edit Card
Clicking on the edit button will allow for a card to be edited for Autopay puroses. Once a card is added on to the account, the card itself cannot be edited. The Edit Card popup will then generate, which allows for autopay edits and will show the following information
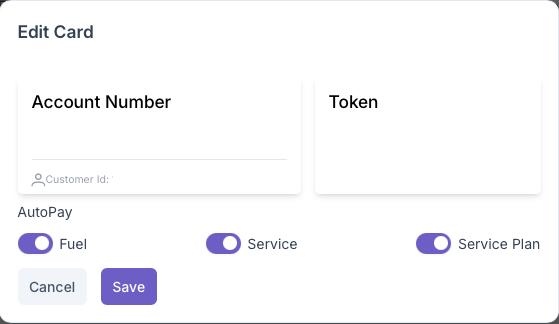
- Account Number - Shows the Customer Account Number
- Token - A placeholder number used for digital purchases
- Customer ID - An ID number assigned to the customer that isn't the account number
- Autopay - Here is where autopay can be edited for the card by toggling autopay on or off for each service: Fuel, Service and Service Plan
Once an autopay has been decided for each service, clicking on save will save the changes made to the card and clicking on cancel will cancel out any changes made. If a customer decides to have autopay features placed on their cards, the autopay box will now show each service with a card attached to the service. The customer also has the option to have each service have their own card if applicable. Once closed, the Card Settings popup must also be saved for any changes to take effect

This option can always be edited in the case of a customer getting a new card or even if the customer decides not to do autopay anymore
Recent Transactions
Overview
This section of Billing shows all recent transactions that have been made on the account including payments, deliveries, service, subscriptions and etc. The section appears as a table with line items being transactions with the following columns

- Date - The Date of the transaction
- Type - The Type of transaction
- Credit - Any credit that was made on the transaction
- Debit - Shows the amount owed on the account
- Balance - What the current balance is on the account
- Budget - Shows the budget that the Customer is on
The Section also gives a more in depth look into Invoices, Collections and Ledgers by clicking on each one
Invoices
Clicking on invoices will bring up the Invoices page. Here a more detailed look at each invoice will be shown. The page will appear as a table with each invoice as a line item and with the following columns
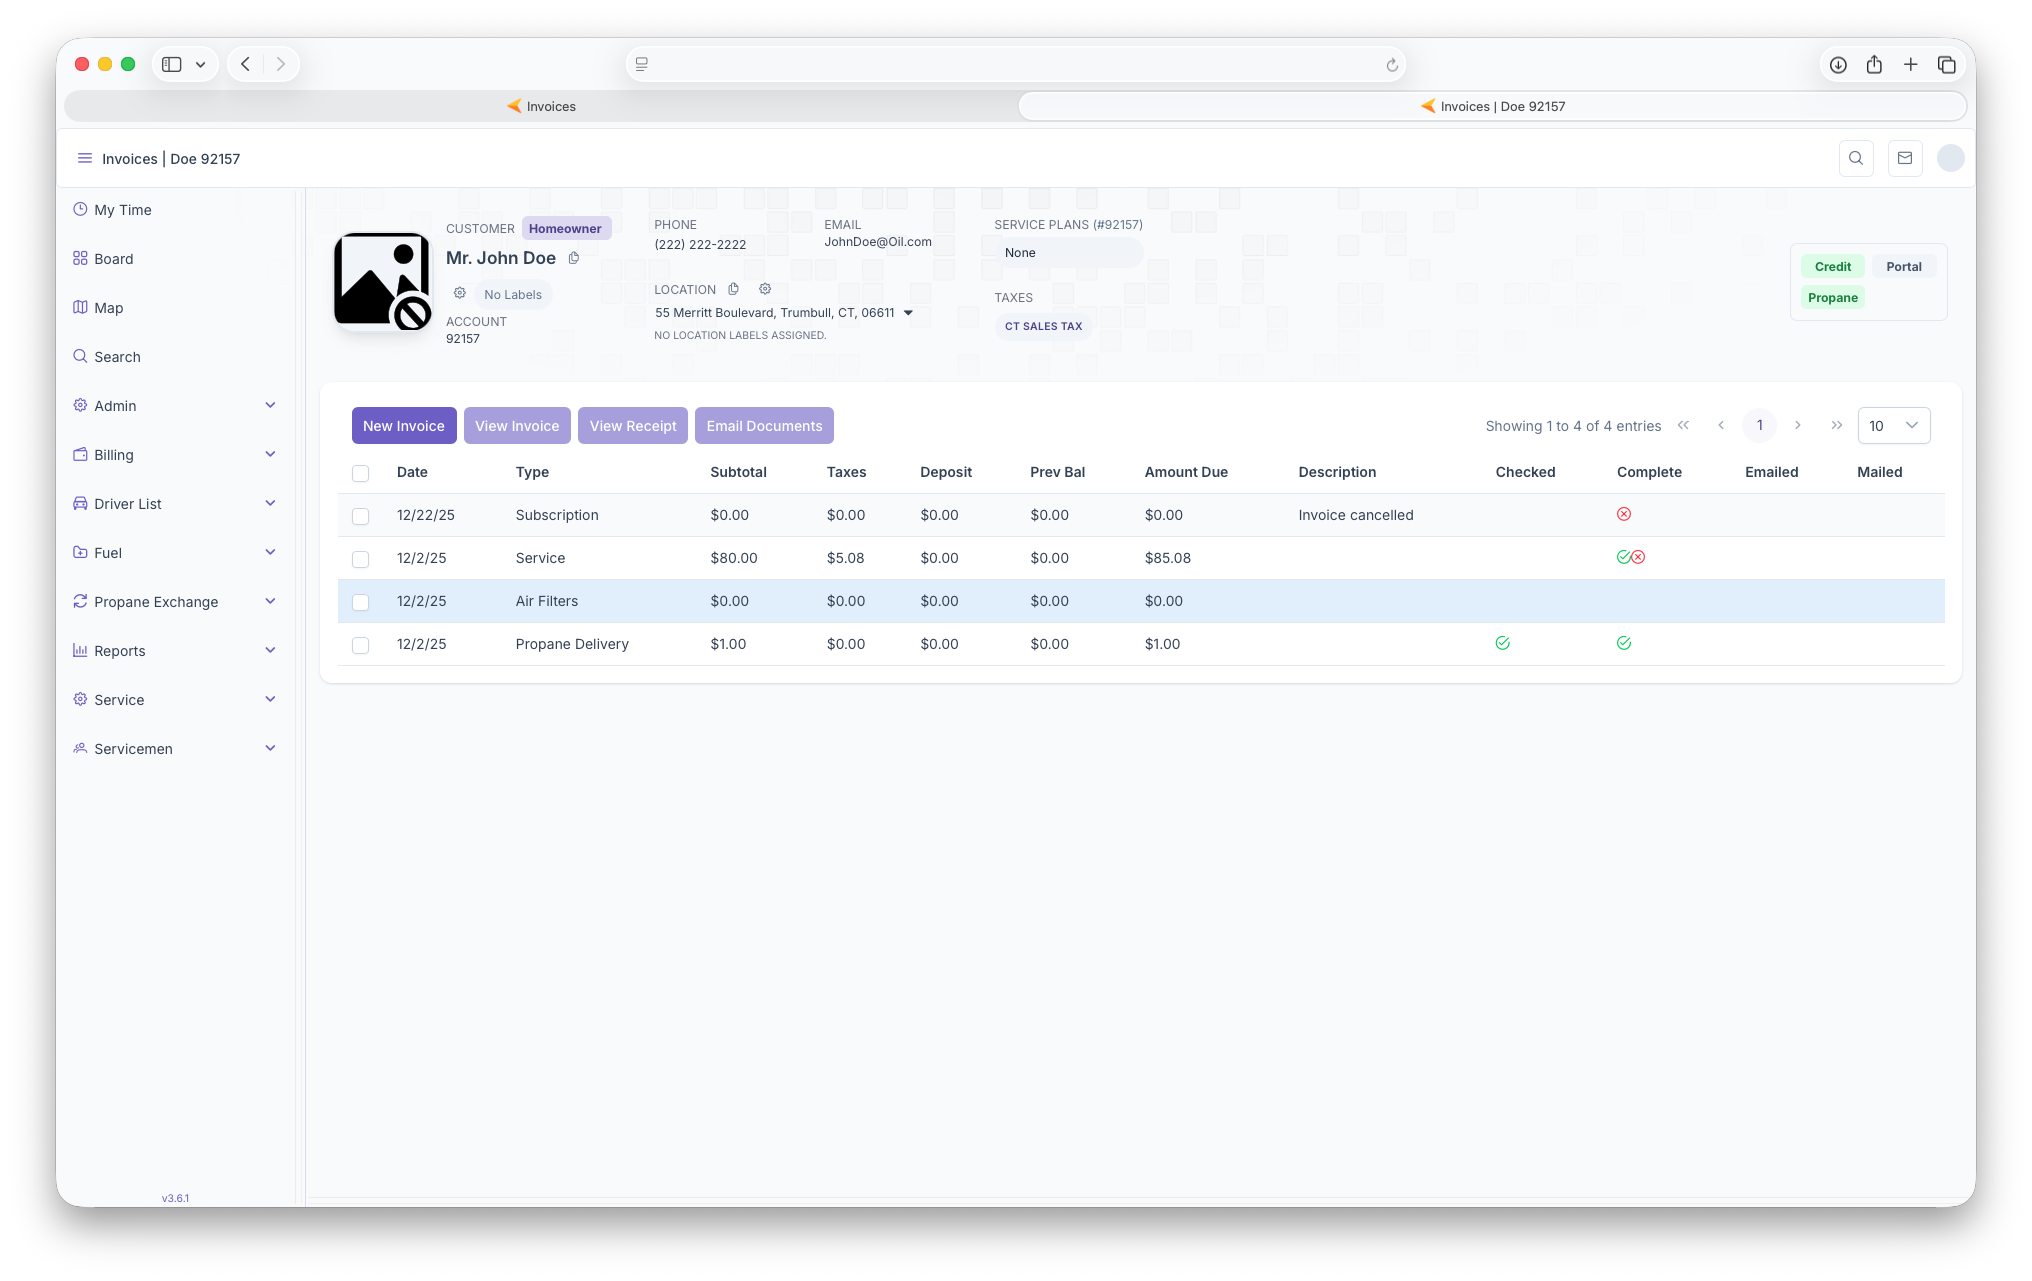
- Date - The date of the invoice
- Type - The type of service the invoice is for
- Subtotal - The subtotal for the service done
- Taxes - Taxes that were applied to the service
- Deposit - Any deposits made for the service
- Previous Balance - Any previous balances on the account
- Amount Due - Shows the total amount due
- Description - A description of actions taken on the invoice
- Checked - Shows if the work was completed
- Complete - Shows if the invoice was completed
- Emailed/Mailed - Shows if the invoice was sent to customer whether through Email or Mail
Along with showing the invoices, double clicking on an invoice will bring up the full details of the invoice itself. A more detailed look at invoices can be seen on the ... page. A new invoice can also be created here simply by clicking on the New Inoice button. A new line item will appear and can be edited by double clicking the new invoice. The invoices can also be exported by clicking on View Invoice which makes for easier printing and sharing. A receipt of the invoice can also be printed by clicking on View Receipt and finally the invoice can be emailed to the customer by clicking on Email Documents. An invoice must be selected by selecting the invoice with a check next to it to be able to perform the previous actions.
Collections
Clicking on the collections button will bring up the collections page for each invoice that was created for a completed project. The in depth look shows specifics for the invoice selected.
Invoice Details
This part of the page will show specifics of the Invoice selected. when generated, it will shows the following
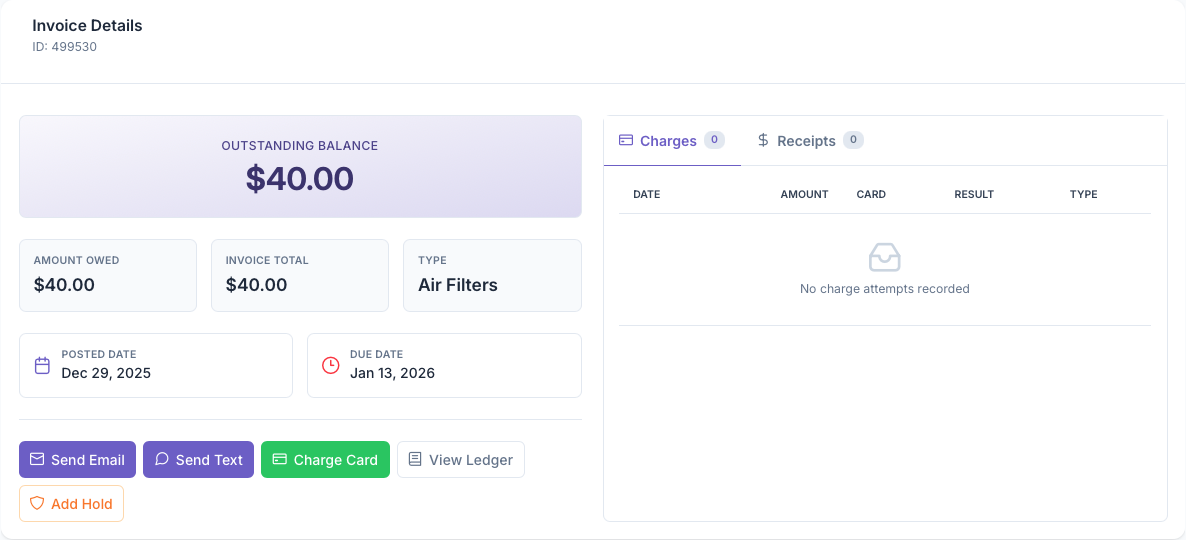
- ID - The ID Associated with the invoice
- Outstanding Balance - Shows the balance owed on the invoice
- Amount Owed - Shows the current amount owned
- Invoice Total - Shows the original total amount on the Invoice
- Type - What service was provided on the invoice
- Posted Date - The date that the Invoice was posted
- Due Date - When the total amount is due
The page then gives the option to take actions on the invoice
-
Send Email - Clicking here emails the customer a copy of the invoice
-
Send Text - Gives the option to send the customer a text of the invoice
-
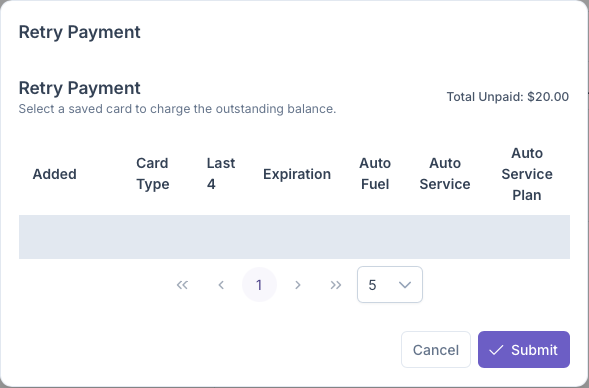
Charge Card - Clicking here allows the for the customers card on file to be charged for the invoice. The following pop up generates with the following information
- Added - When the card was added
- Card Type - The brand of the Card
- Last 4 - The last four digits of the card on file
- Expiration - The expiration date of the card
- If the card is aset up for auto-pay with the following - Fuel, Service and/or Service Plan
- View Ledger - Clicking here will bring up the customer Ledger page. A more in depth look can be seen under the Balance section of the Overview page
- Add Hold - Clicking here adds a credit hold on the account if a payment hasn't been made. See the Overview page under the holds section for a more detailed look
Next to that will be a Charge and Receipt tab which shows all Charges and Receipts associated with the invoice
-
Charges - Shows all charges that are made on that invoice and shows the following with each charge being a line item
- Date - The date of the charge
- Amount - The Amount that was charged
- Card - The card on file that was charged
- Result - shows if the payment went through
- Type - The Type of charge
-
Receipts - Shows the receipts of the payments made and shows the following with each receipt being a line item
- Date - Shows the date of the Receipt
- Amount - Shows the amount paid
- Card - Shows the card used for payment
- Created By - Shows who the receipt was created by
- Deposit - Shows the Deposit Number
A look at all collections can be seen on the billing section of the app and a more in depth look at Collections can be seen on the Collections guide
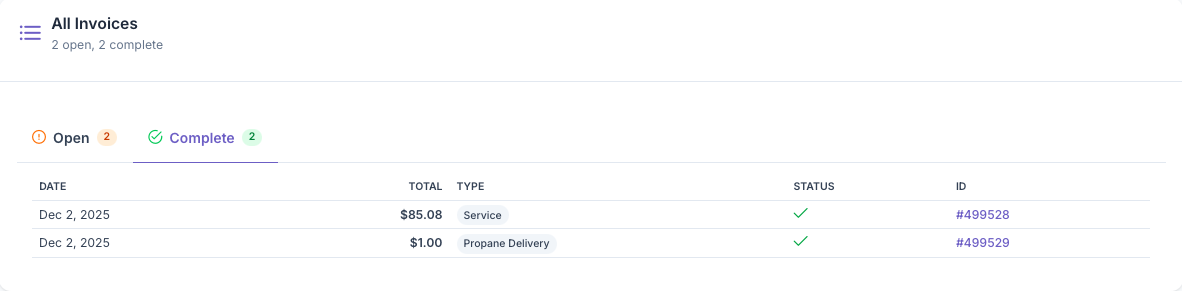
All Invoices
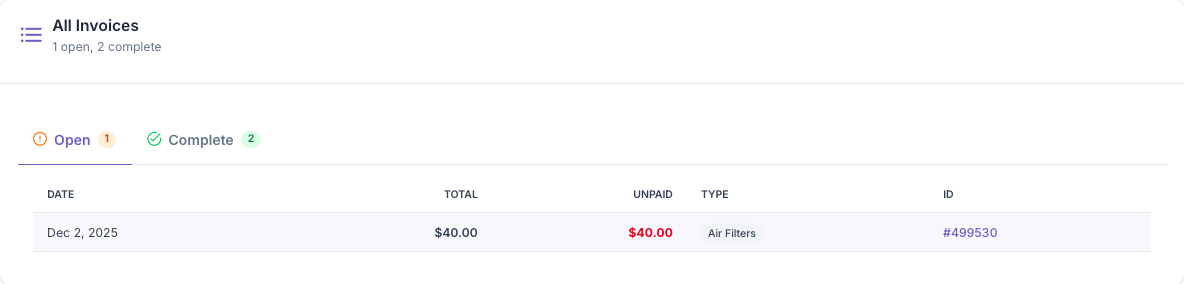
This section of the page shows all invoice that the customer has on file. This includes all open invoices that show up on the Open Tab and all completed invoices which are under the Complete Tab. Clicking on an invoice will generate all it's information that was shown in the Invoice Detals section above
-
Open - Clicking on the Open Tab will shows all invoices that are currently open and have an open balance and will generate with each open Invoice as a line item with the following information
- Date - Shows the date of the open invoice
- Total - Shows the total amount of invoice
- Unpaid - Shows the amount of the invoice that needs to be paid
- Type - Shows what the invoice is billing for
- ID - The ID generated for The Invoice
-
Complete - Clicking on the Complete Tab shows all completed invoices and will generate with each finished invoice as a line item with the following information
- Shows The Date the invoice was posted
- Total - Shows the total amount of the original invoice
- Type - The Type of service that was performed
- Status - Shows the status of the Invoice
- ID - The ID generated for the Invoice