Billing
Introduction
The Billing section of the Customer Account is where all information regarding customer billing can be seen. This includes a balance overview, a section for Autopay, any recent trasactions that have been made on the account and any subscriptions that the customer has on their account.
Balances
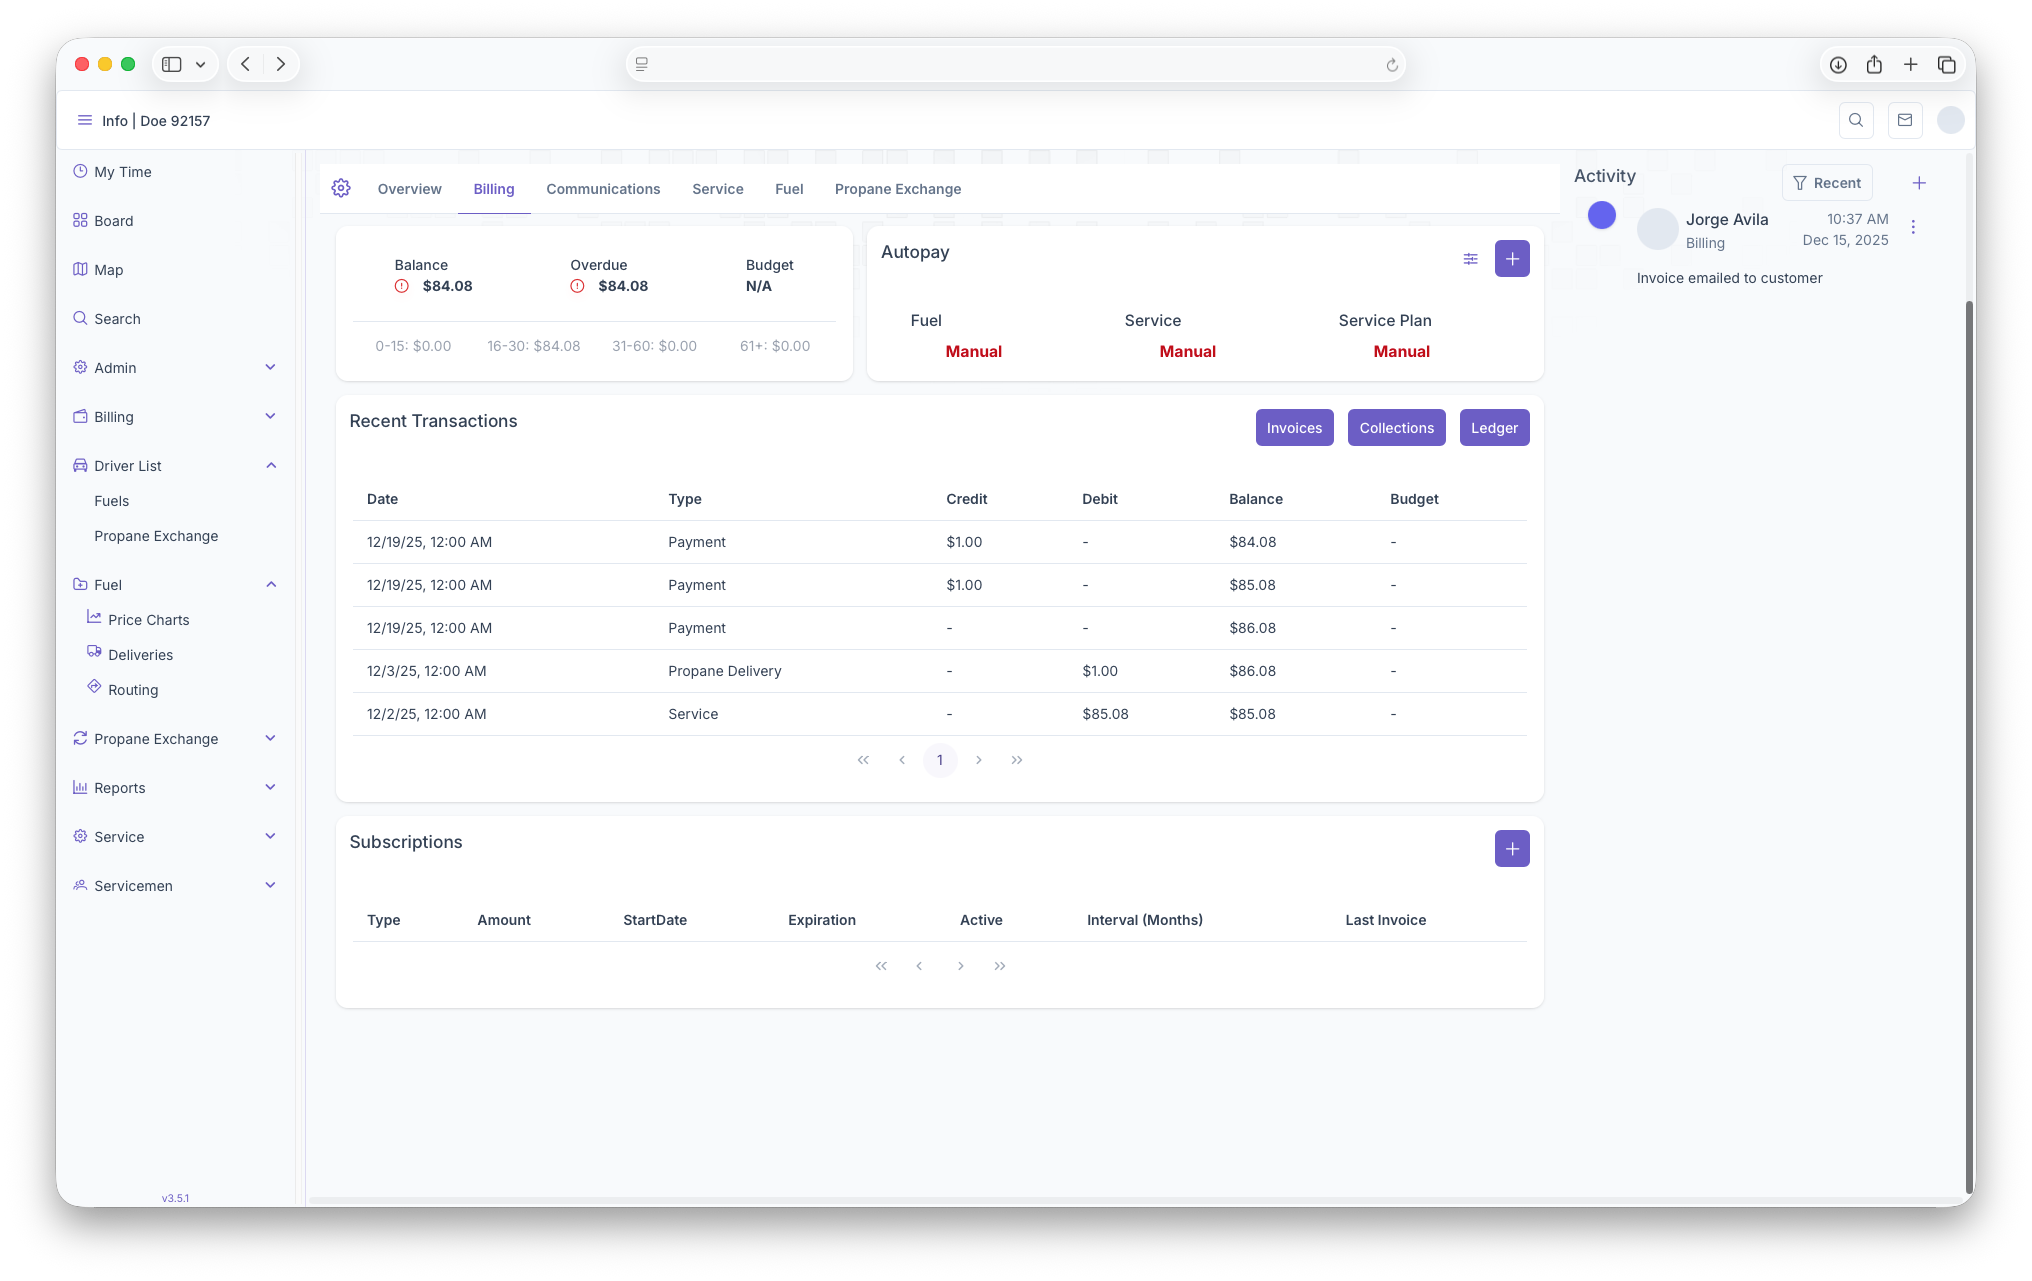
The first thing seen on the Billing page is the Balances box. Here Balances will be shown, Overdue ammounts, Budget as well as an aging report for the customer
- Balance - The overall Balance on the customers account can be seen here
- Overdue - The Overdue ammount will be shown here
- Budget - The Customers budget plan will be shown here
- Aging Report - The Customers individual Aging Report can be seen here: 0-15 days, 16-30 days, 31-60 days and 61+ days. Each one has balances attached to show how long the balance has been aging for
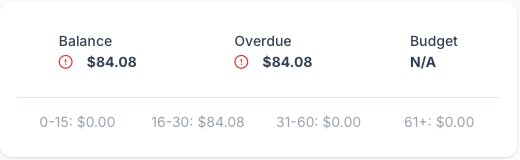
Autopay
The Autopay section is where credit cards can managed for autopay purposes, this includes adding new cards to the account. A more detailed look can be seen on the Autopay/Adding Credit Cards page.
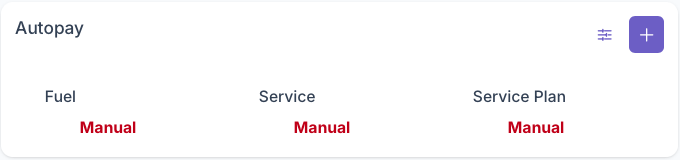
Recent Transactions
The Recent Transactions sections shows any recent invoices or receipts that were added onto the account. A more detailed look at Invoices, Collections and Ledgers can also be seen from here by clicking on each respective button. A more in depth look at Recent Transactions can be seen on the ... page.
Subscriptions
The Subscriptions section is where all subscriptions the custmer has can be seen and added. When first looking at the subscriptions section, a table will generate with each subscription being a line item and with the following columns

- Type - Shows the type of subcription
- Ammount - How much is charged for the subscription
- StartDate - The effective start date of the subscription
- Expiration - When the subscription ends, if applicable
- Active - If the subscription is currently active
- Interval (Months) - when the subscription is charged
- Last Invoice - Shows the date of the most recent invoice of the subscription
Subscriptions can then be added by clicking on the add button on the top right corner of the subscriptions box. Clicking on it will bring up the Edit Subscriptions popup which will generate the following fields
- Template - Select the template to be used with the subscription
- Type - The type of the subscription
- Description - A brief description of the subscription
- Amount - How much will be charged on the subscription
- Taxable/Revenue - Toggle whether subscription is Taxable and/or Revenue
- Interval - The rate at which the subscription is charged
- Start Date - Start date of the subcription
- Expiration Date - Expiration date of the subscription if applicable
- Notes - Any notes on the subscription can be added here
- Active - Toggle whether the subscription is active or not
Once all fields have been filled out, clicking on save will add the subscription to the account and clicking on cancel will void out any information and close the popup. Existing subscriptions can edited by clicking on an exiting one. The same popup as the add Subscription will show with all fields already filled out and can be edited if need be