Adding a New Customer
This guide walks you through creating a new customer from search to first location setup. It matches the in-app flow used by customer service and onboarding teams.
Quick flow
- Start on Search check to see if they have an account. If so, use that Customer account and do not create a new customer.
- If they don't exist yet, click Add Customer next to the search bar.
- Enter the customer’s details and save.
- You’ll land on the Customer Dashboard.
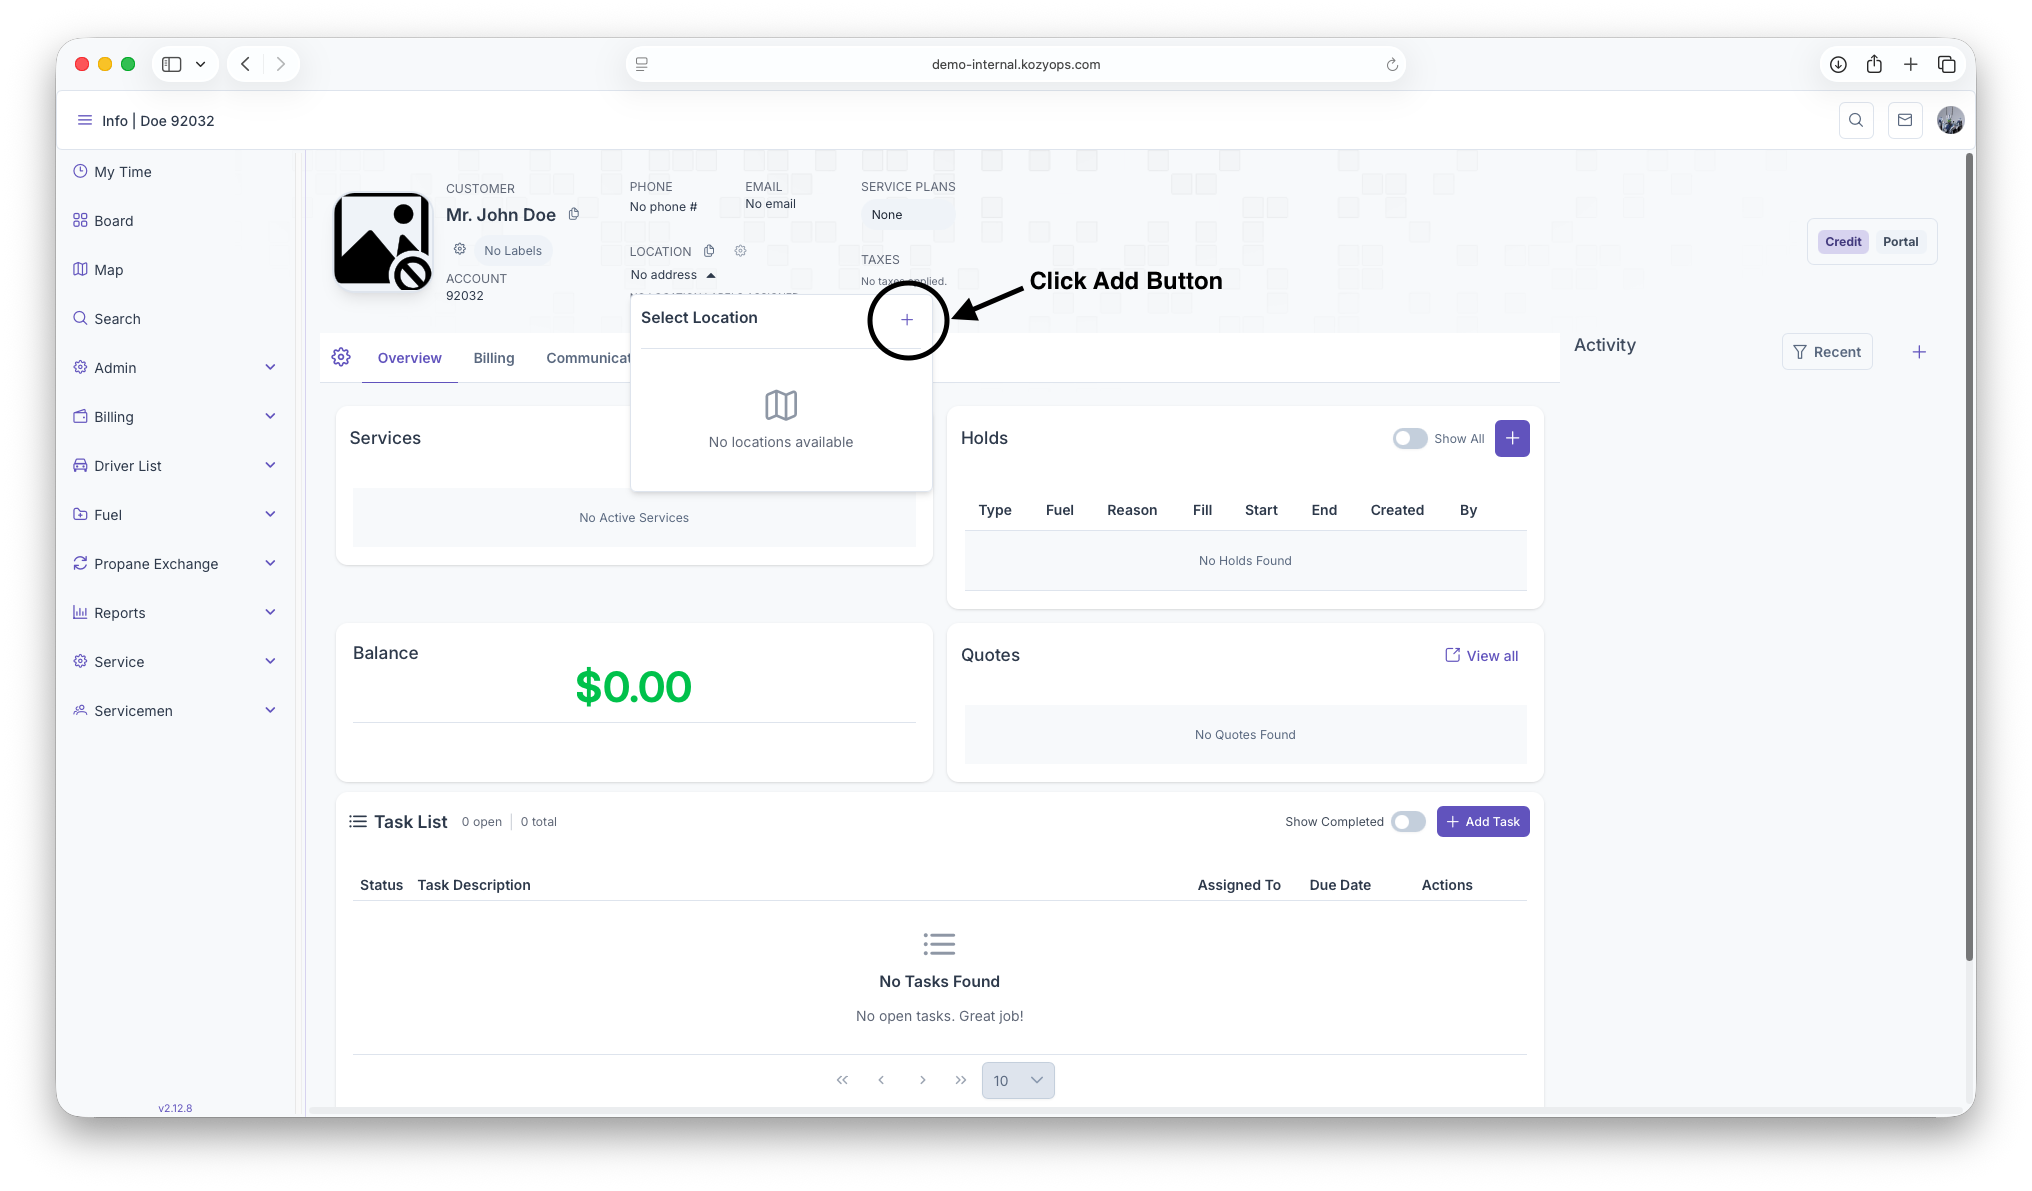
- In the header, click on locations, then click Add location.
- Follow the Location Management guide to complete the location setup.
Need the detailed location steps? See Location Management (recommended):
- Internal docs: Location Management
- Web docs: https://docs.kozyops.com/books/customers-and-locations/page/location-management
Prerequisites
- You have permission to create customers in the app.
- You know the basic customer details (name, primary contact, phone/email, billing address if available).
Step-by-step
1) Start on Search
- Open the Search page (Account Search).
- Enter the customer name, phone, or email to confirm they don’t already exist.
- If no matching customer is found, proceed to create a new one.
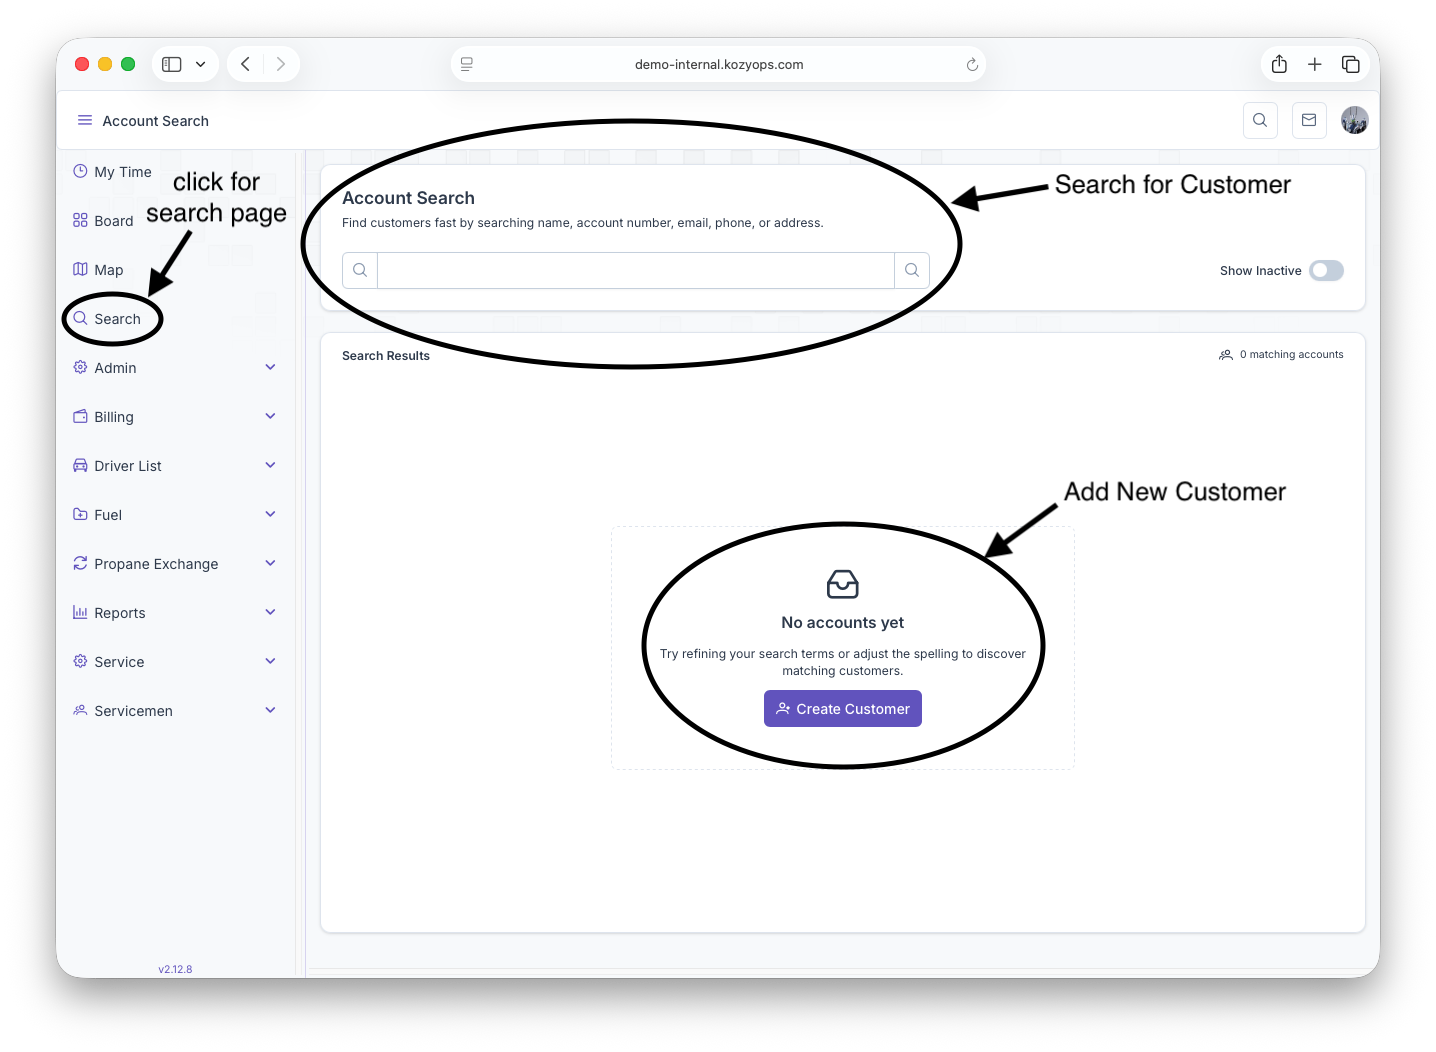
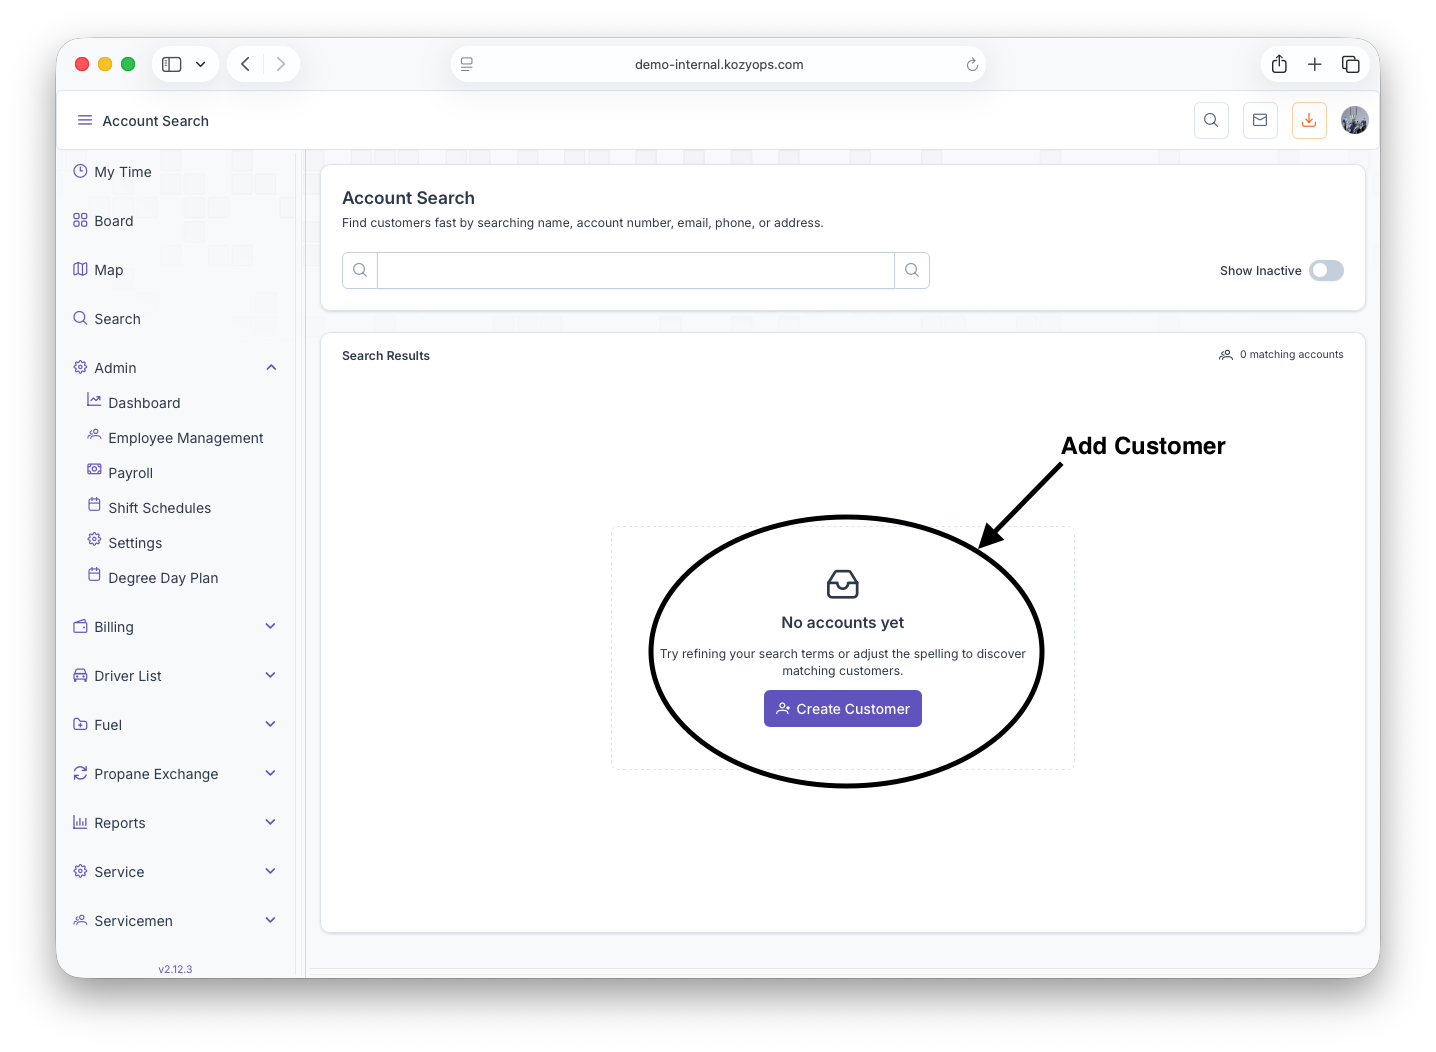
2) Click Add Customer
- Use the Add Customer action from the search results page.
- A Create Customer form will open.
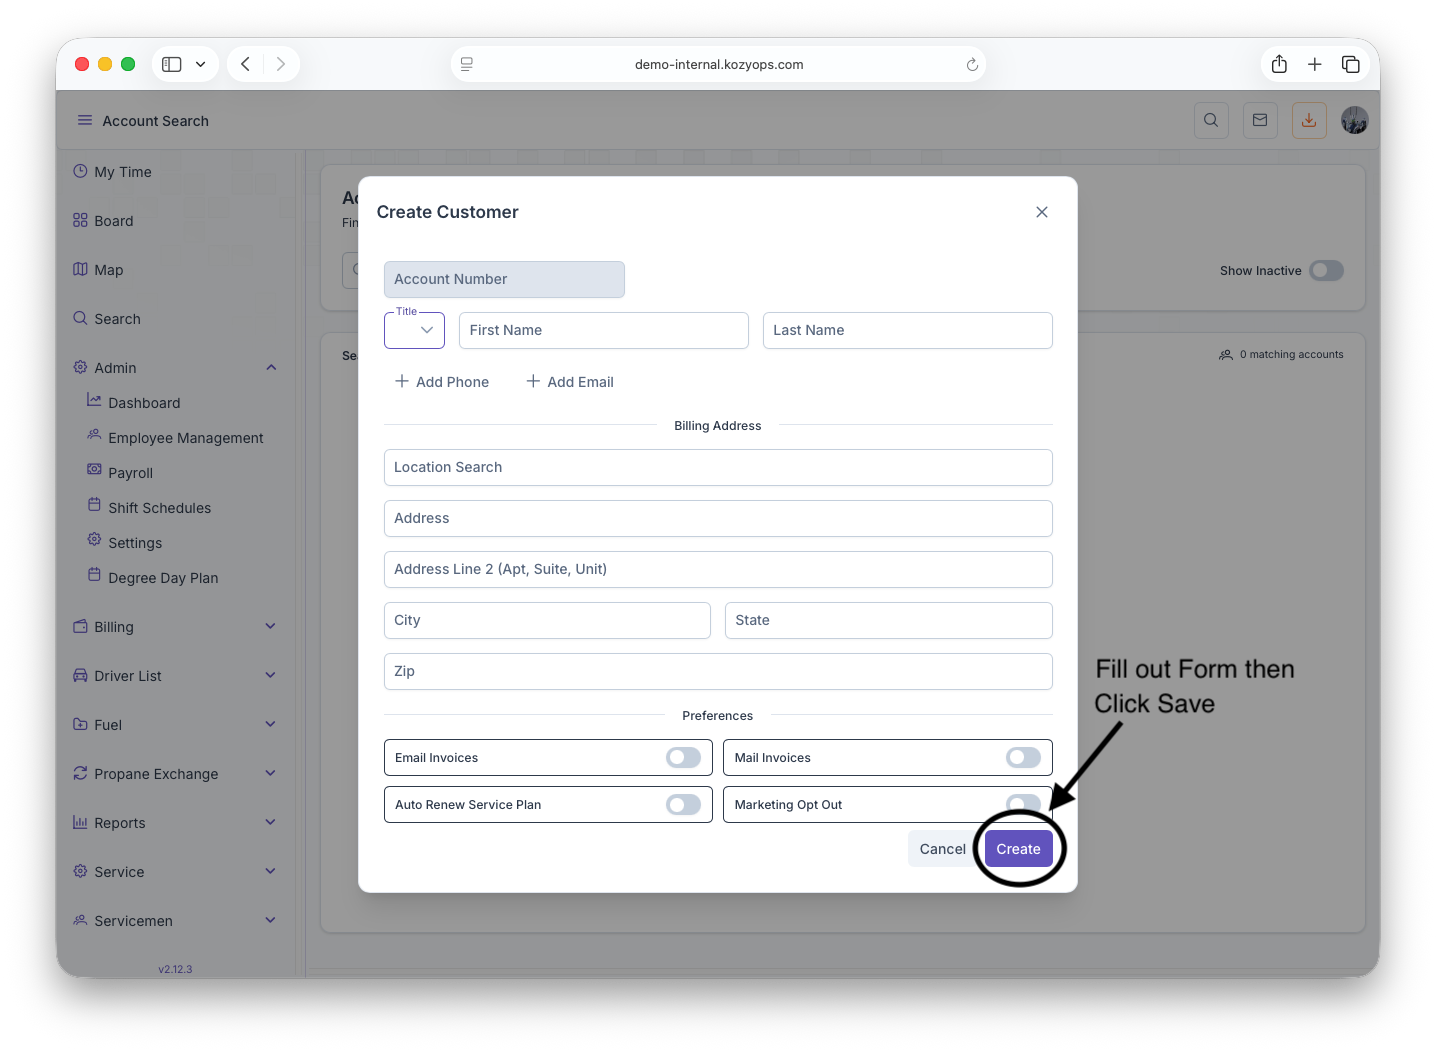
3) Enter customer details
Fill out the form (required fields are marked in the app):
- Basic info: Customer name or company name
- Primary contact: First/Last name (for residential) or main contact (for commercial)
- Contact methods: Phone and email
- Addresses: Billing address (and mailing if different)
- Notes (optional): Any onboarding notes that help dispatch or billing
Then click Save. If the app flags potential duplicates, review suggestions and confirm creating a new customer only if you’re sure it’s unique.
4) Land on the Customer Dashboard
After saving, you’ll be taken directly to the new customer’s dashboard. The customer header will show the current number of locations.
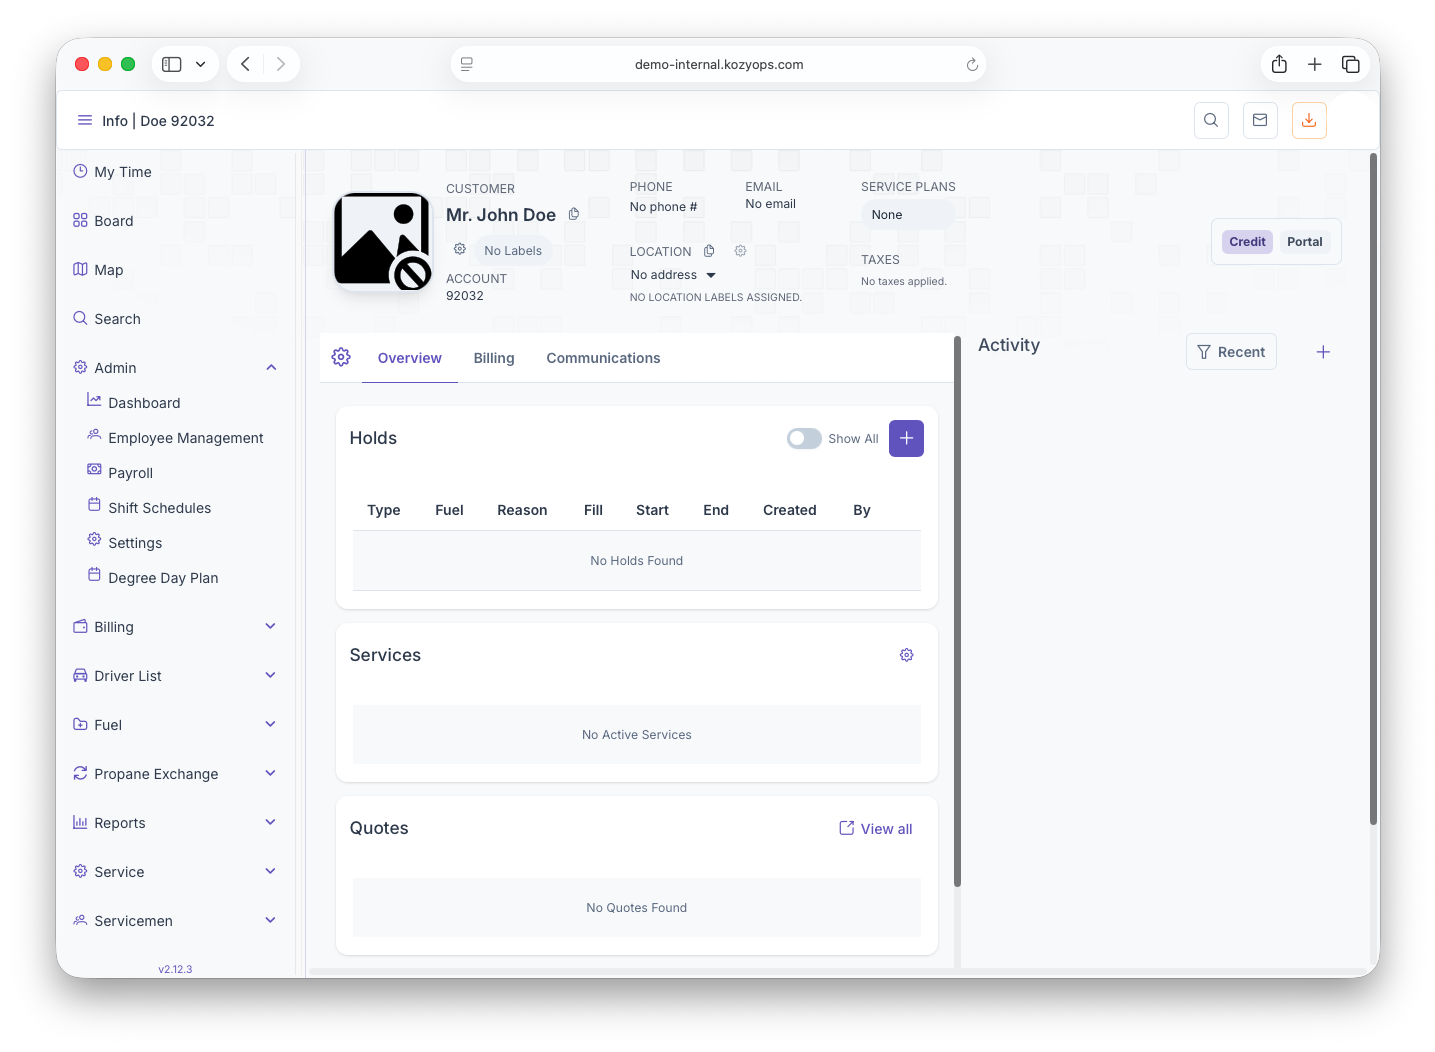
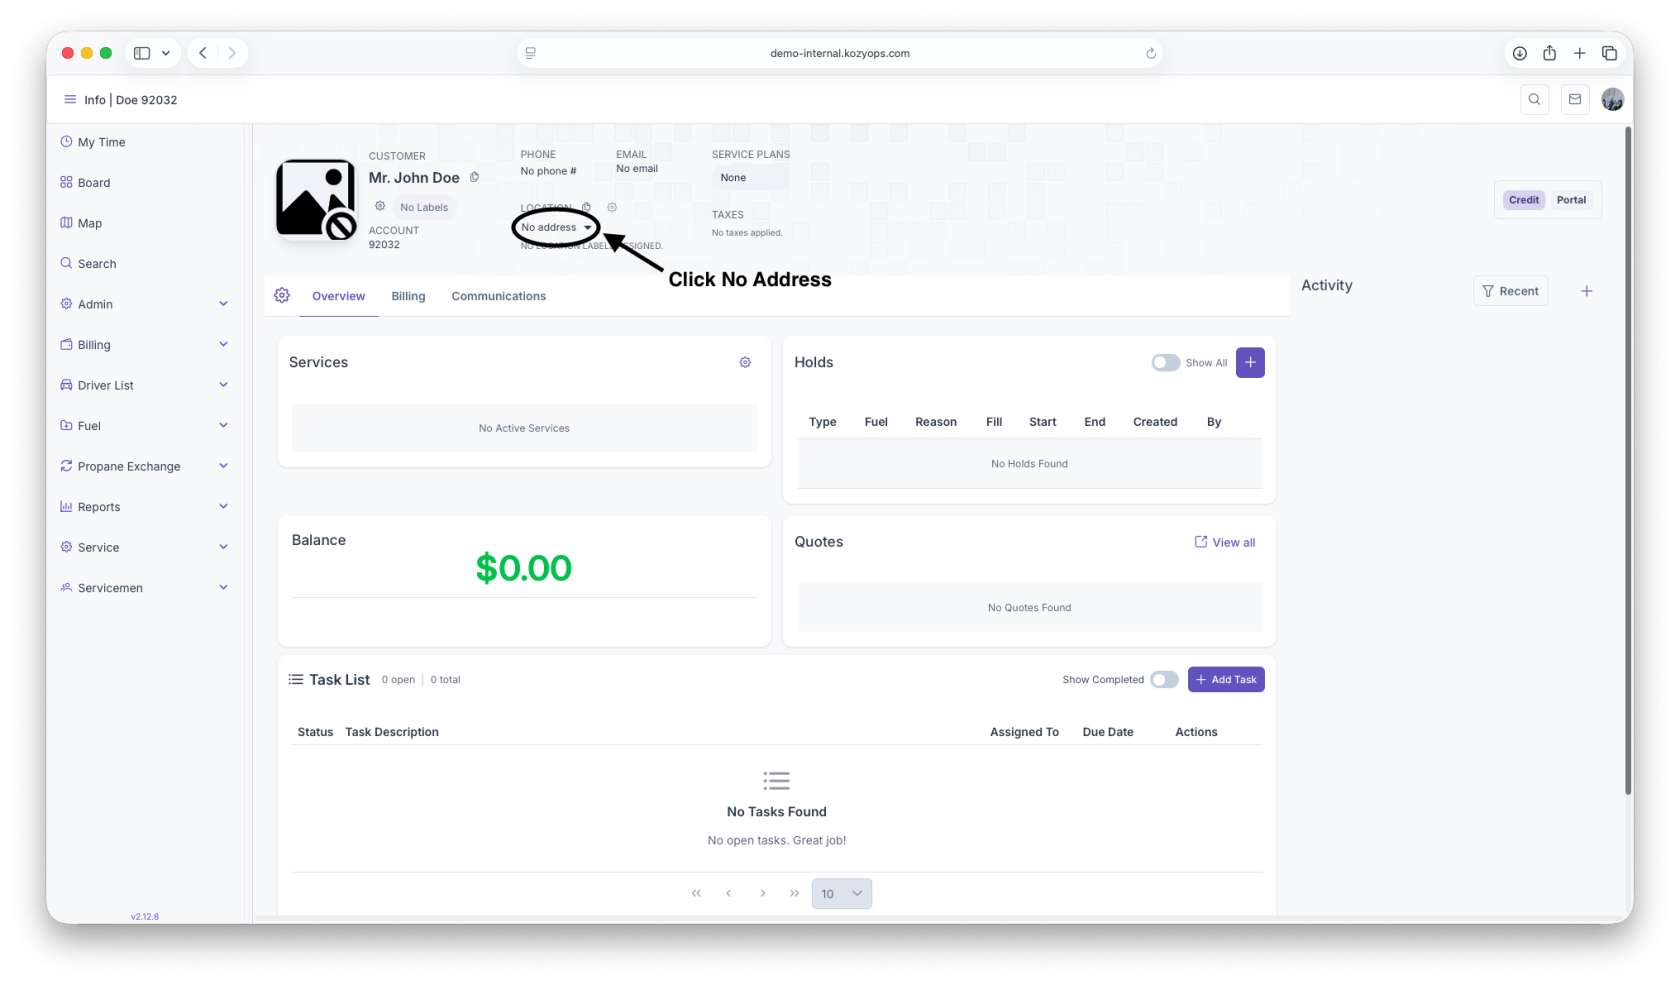
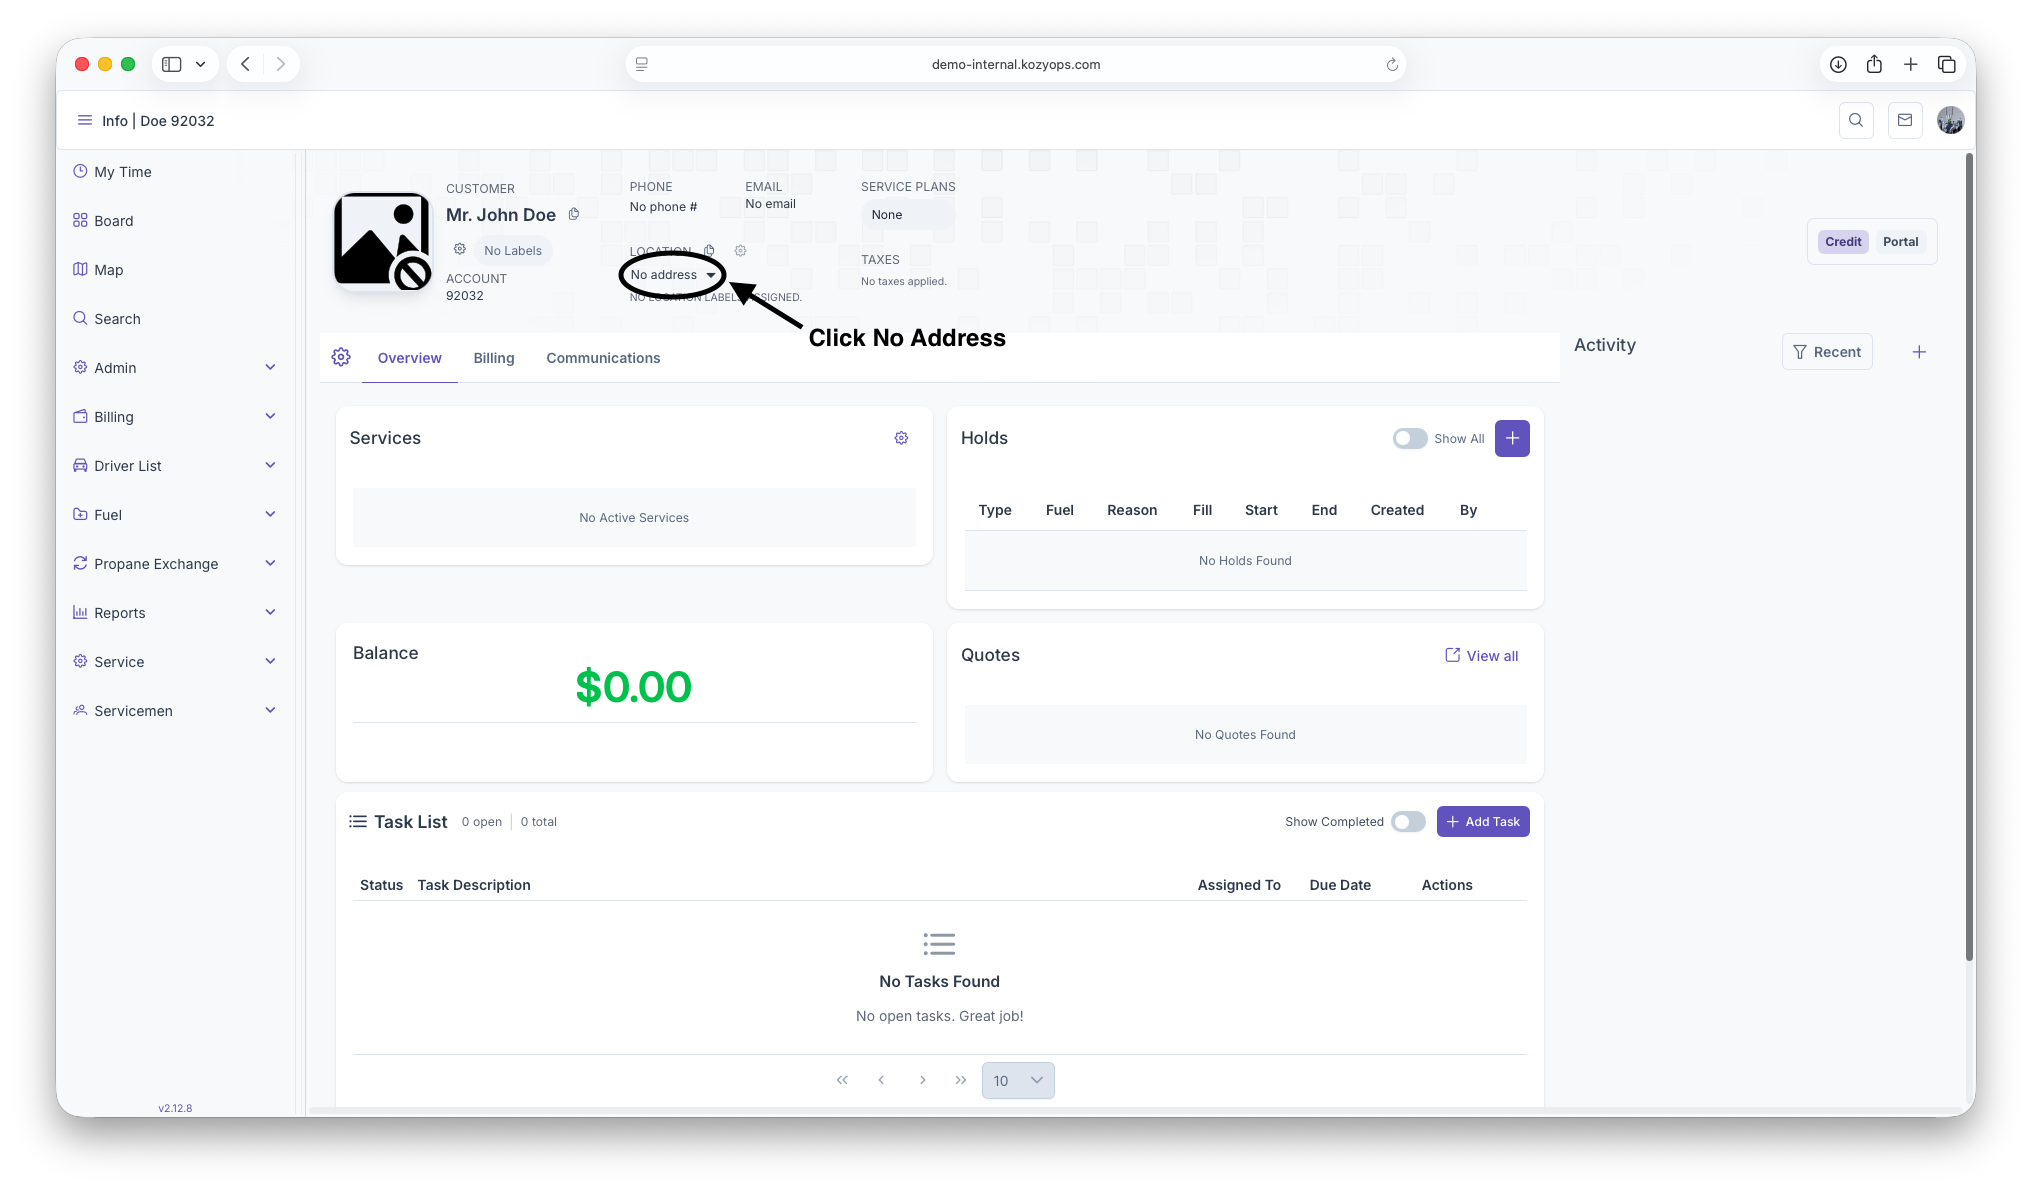
5) Add the first location
-
In the customer header, click No locations (or the locations count).
-
Click Add
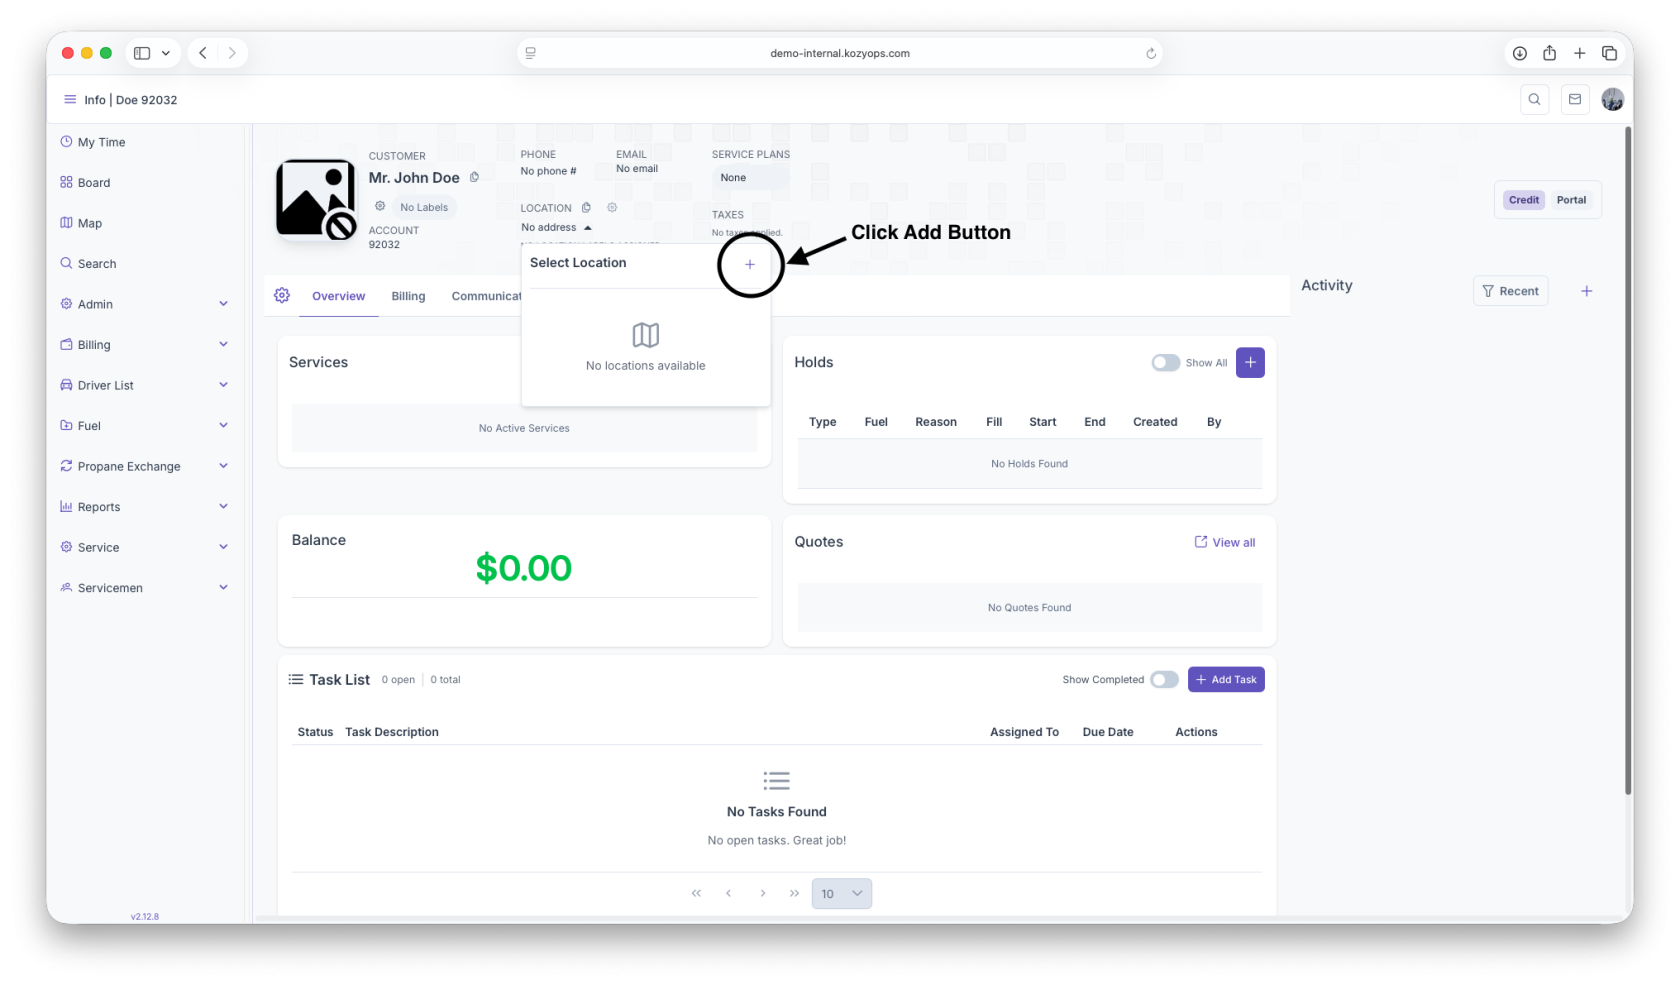 location.
 -
The Add Location form opens.
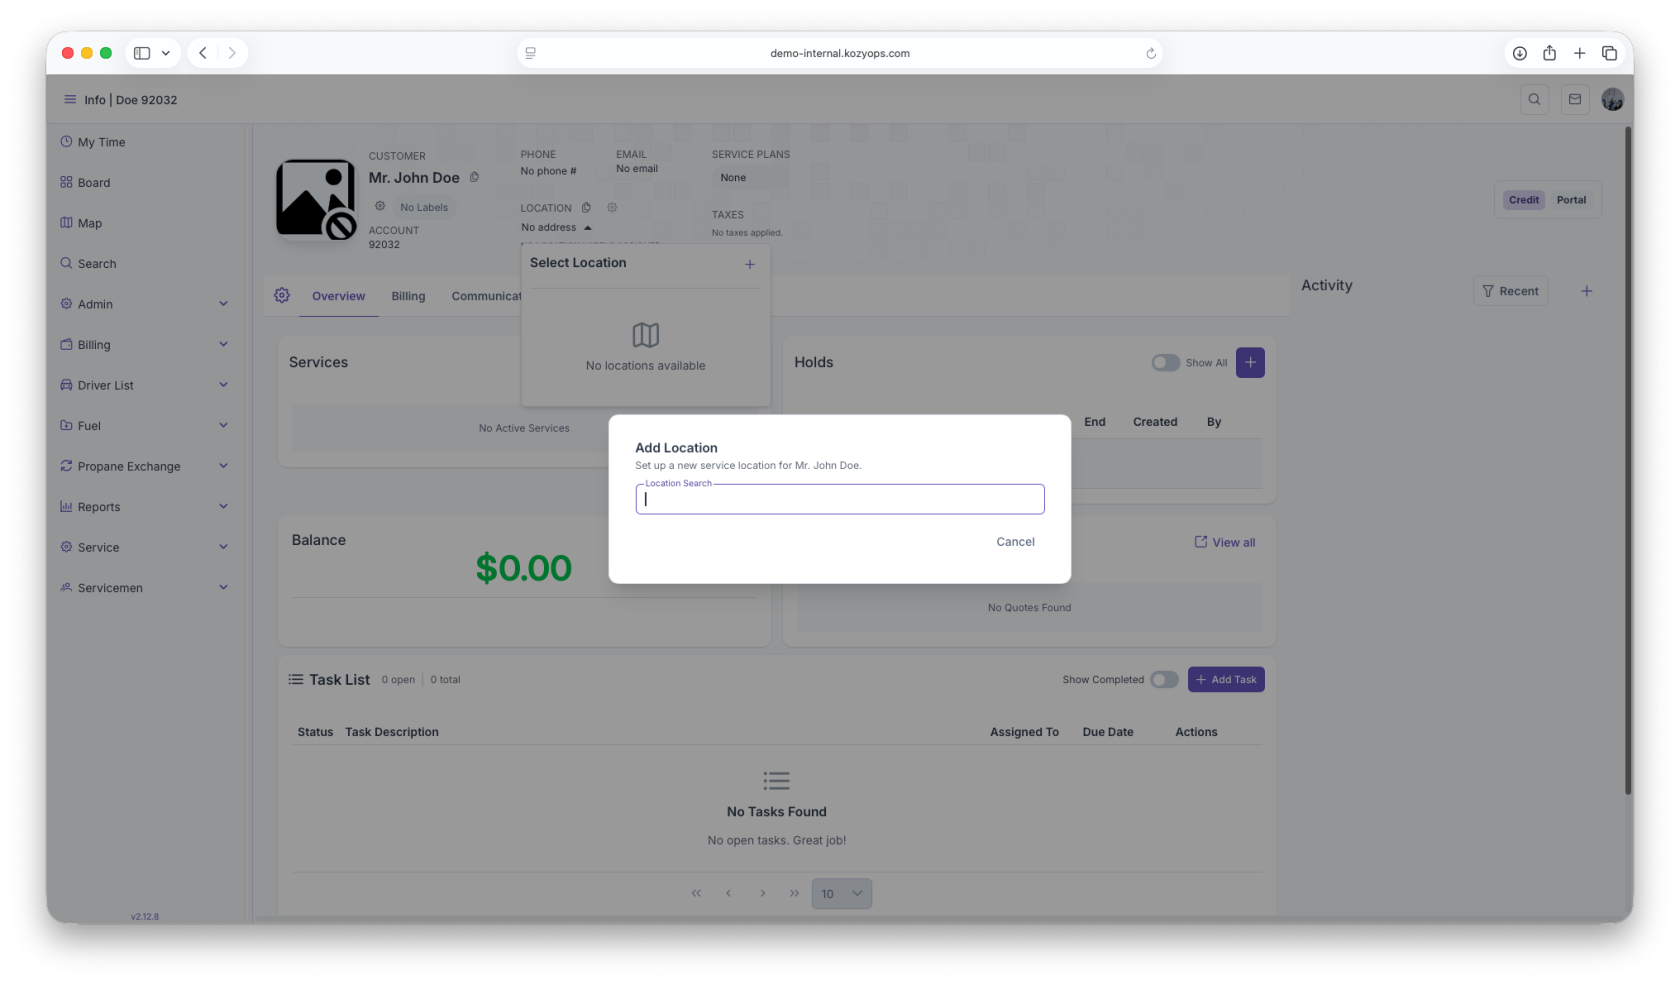
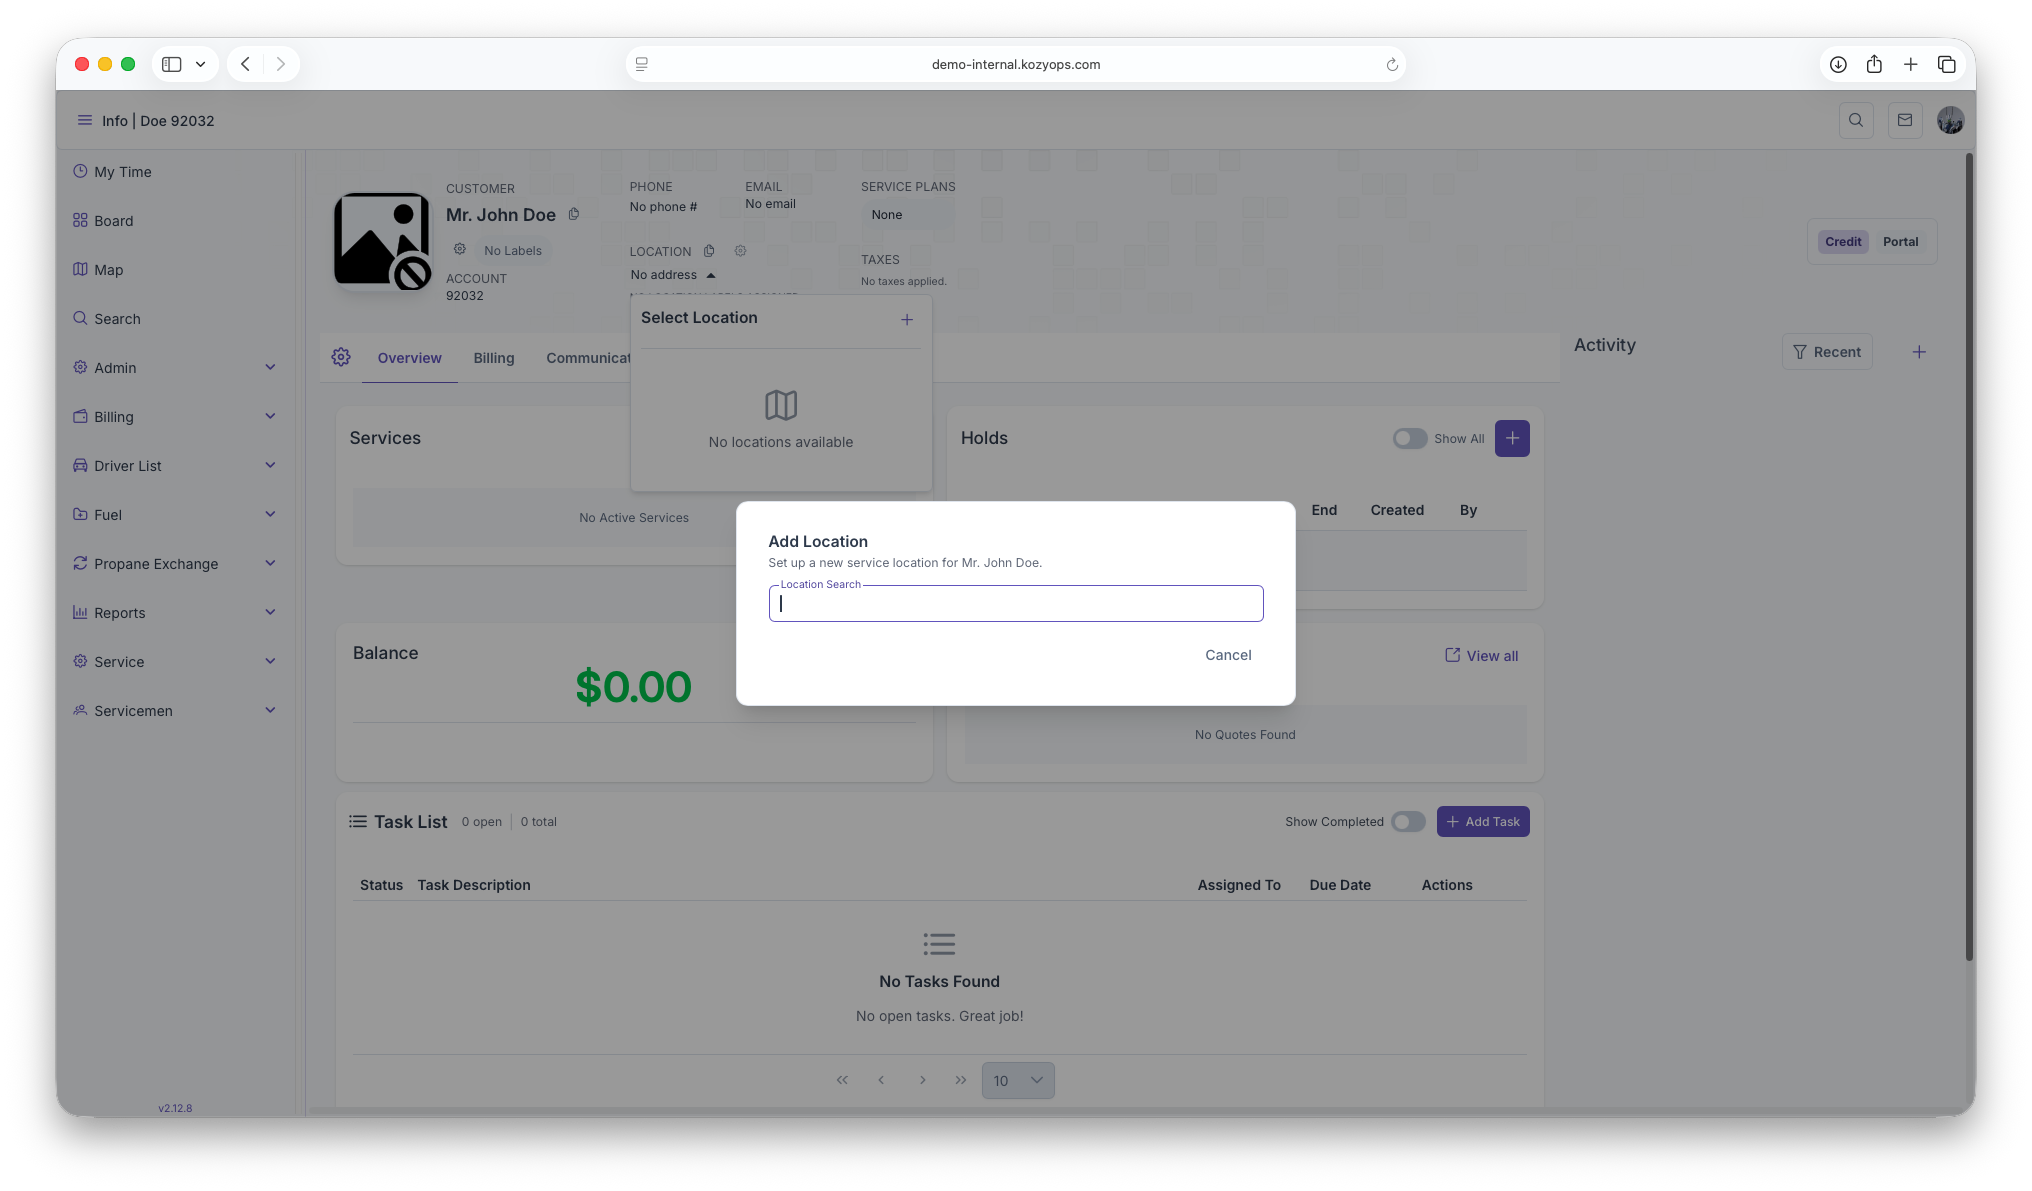
For the full, step-by-step location process (address validation, delivery settings, tanks/equipment, and notes), follow the Location Management guide.
Once the location is saved, it will appear in the customer’s locations list and on the dashboard.
6) Add services for this location
After the customer and location are selected (you should see both in the dashboard header):
- Open the Customer Dashboard Overview.
- Click the Services gear icon in the header (or the Services panel action) and choose Add Service.
- Fill out the service details, then Save.
Common fields (exact fields may vary by service type; consult the Add Services guide for specifics):
- Service Type (required): e.g., Oil Delivery, Propane Delivery, Exchange, Maintenance/Service Plan
- Location (required): Auto-selected to the current location; confirm it’s correct
- Delivery Mode (required): Automatic/Keep-Full or Will-Call
- Product/Fuel (required): Select the product to be delivered/serviced
- Primary Tank/System (if applicable): Select the tank or system this service is tied to
- Start Date (required): When the service becomes active
- Status (required): Active, On Hold, or Scheduled
- Pricing/Rate Plan (if applicable): Price tier, contract, or plan
- Minimum Delivery/Threshold (optional): Delivery minimums or triggers
- Schedule/Rules (optional): Degree-day, K-factor, route day, or cadence if used
- Notes (optional): Any special instructions for dispatch or billing
Reference: See the Add Services guide for detailed field explanations and service-type variations.
7) Create systems and equipment (if needed)
If the location’s systems haven’t been set up yet, create them now so services can be associated properly:
- In the Customer Dashboard, go to the Systems section (or use the Systems action in the header).
- Click Add System.
- Enter system details, then Save.
- After the system is created, add equipment under that system as needed.
Typical system fields:
- System Type (required): Heating, Cooling, Water Heater, Appliance, etc.
- Fuel/Source (required): Oil, Propane, Electric, etc.
- Manufacturer/Model (optional but recommended)
- Serial Number (optional)
- Install/Service Dates (optional)
- Notes (optional)
Typical equipment fields (under a system):
- Equipment Type (required): Tank, Boiler, Furnace, Air Handler, Vaporizer, etc.
- Size/Capacity (if applicable): e.g., tank gallons
- Manufacturer/Model/Serial (optional but recommended)
- Install Date (optional)
- Placement/Location details (optional): indoor/outdoor, access notes
- Monitoring/Telemetry (optional): tank monitor or sensor info
Reference: See the System guides for Creating a New System and Adding Equipment for full details and best practices.
What’s next?
- Create a first delivery or service ticket as needed.
- Add additional locations if the customer has more than one service address.
- Update billing preferences or contacts from the customer dashboard if required.
Tips & troubleshooting
- Can’t find Add Customer? Make sure you searched first and that you have create permissions.
- Duplicate warning: If you see a possible duplicate, cross-check contact info and addresses before confirming a new record.
- Required fields: The Save button stays disabled until all required inputs are provided.
- After saving a location, you can return to the dashboard to start work (e.g., orders, service tickets) immediately.