Fuel
Oil & Propane Deliveries
Summary
Purpose The Fuel Driver Module is used by field technicians who deliver heating oil or propane to residential and commercial customers. This module streamlines the entire delivery process—from starting the route, connecting to the truck’s meter system, performing each stop, recording delivery gallons, printing tickets, and submitting end-of-day inventory.
Who Uses This Module:
- Fuel Delivery Drivers
- Dispatch-Assigned Contractors
What This Module Enables Drivers To Do:
- View daily assigned loads and route stops
- Connect to Bluetooth or wired LCR meters
- Automatically capture delivered gallons
- Record manual deliveries when a meter is unavailable
- Add notes, additives, leftover, or short-fill information
- Print legally compliant delivery tickets
- Sync data online or store it offline until connection is available
Supports Both Fuel Types:
- Oil Deliveries (includes pricing, revenue, and HOD compliance fields)
- Propane Deliveries (includes tank-specific requirements and optional QR code validation)
High-Level Delivery Flow:
- Driver selects assigned load
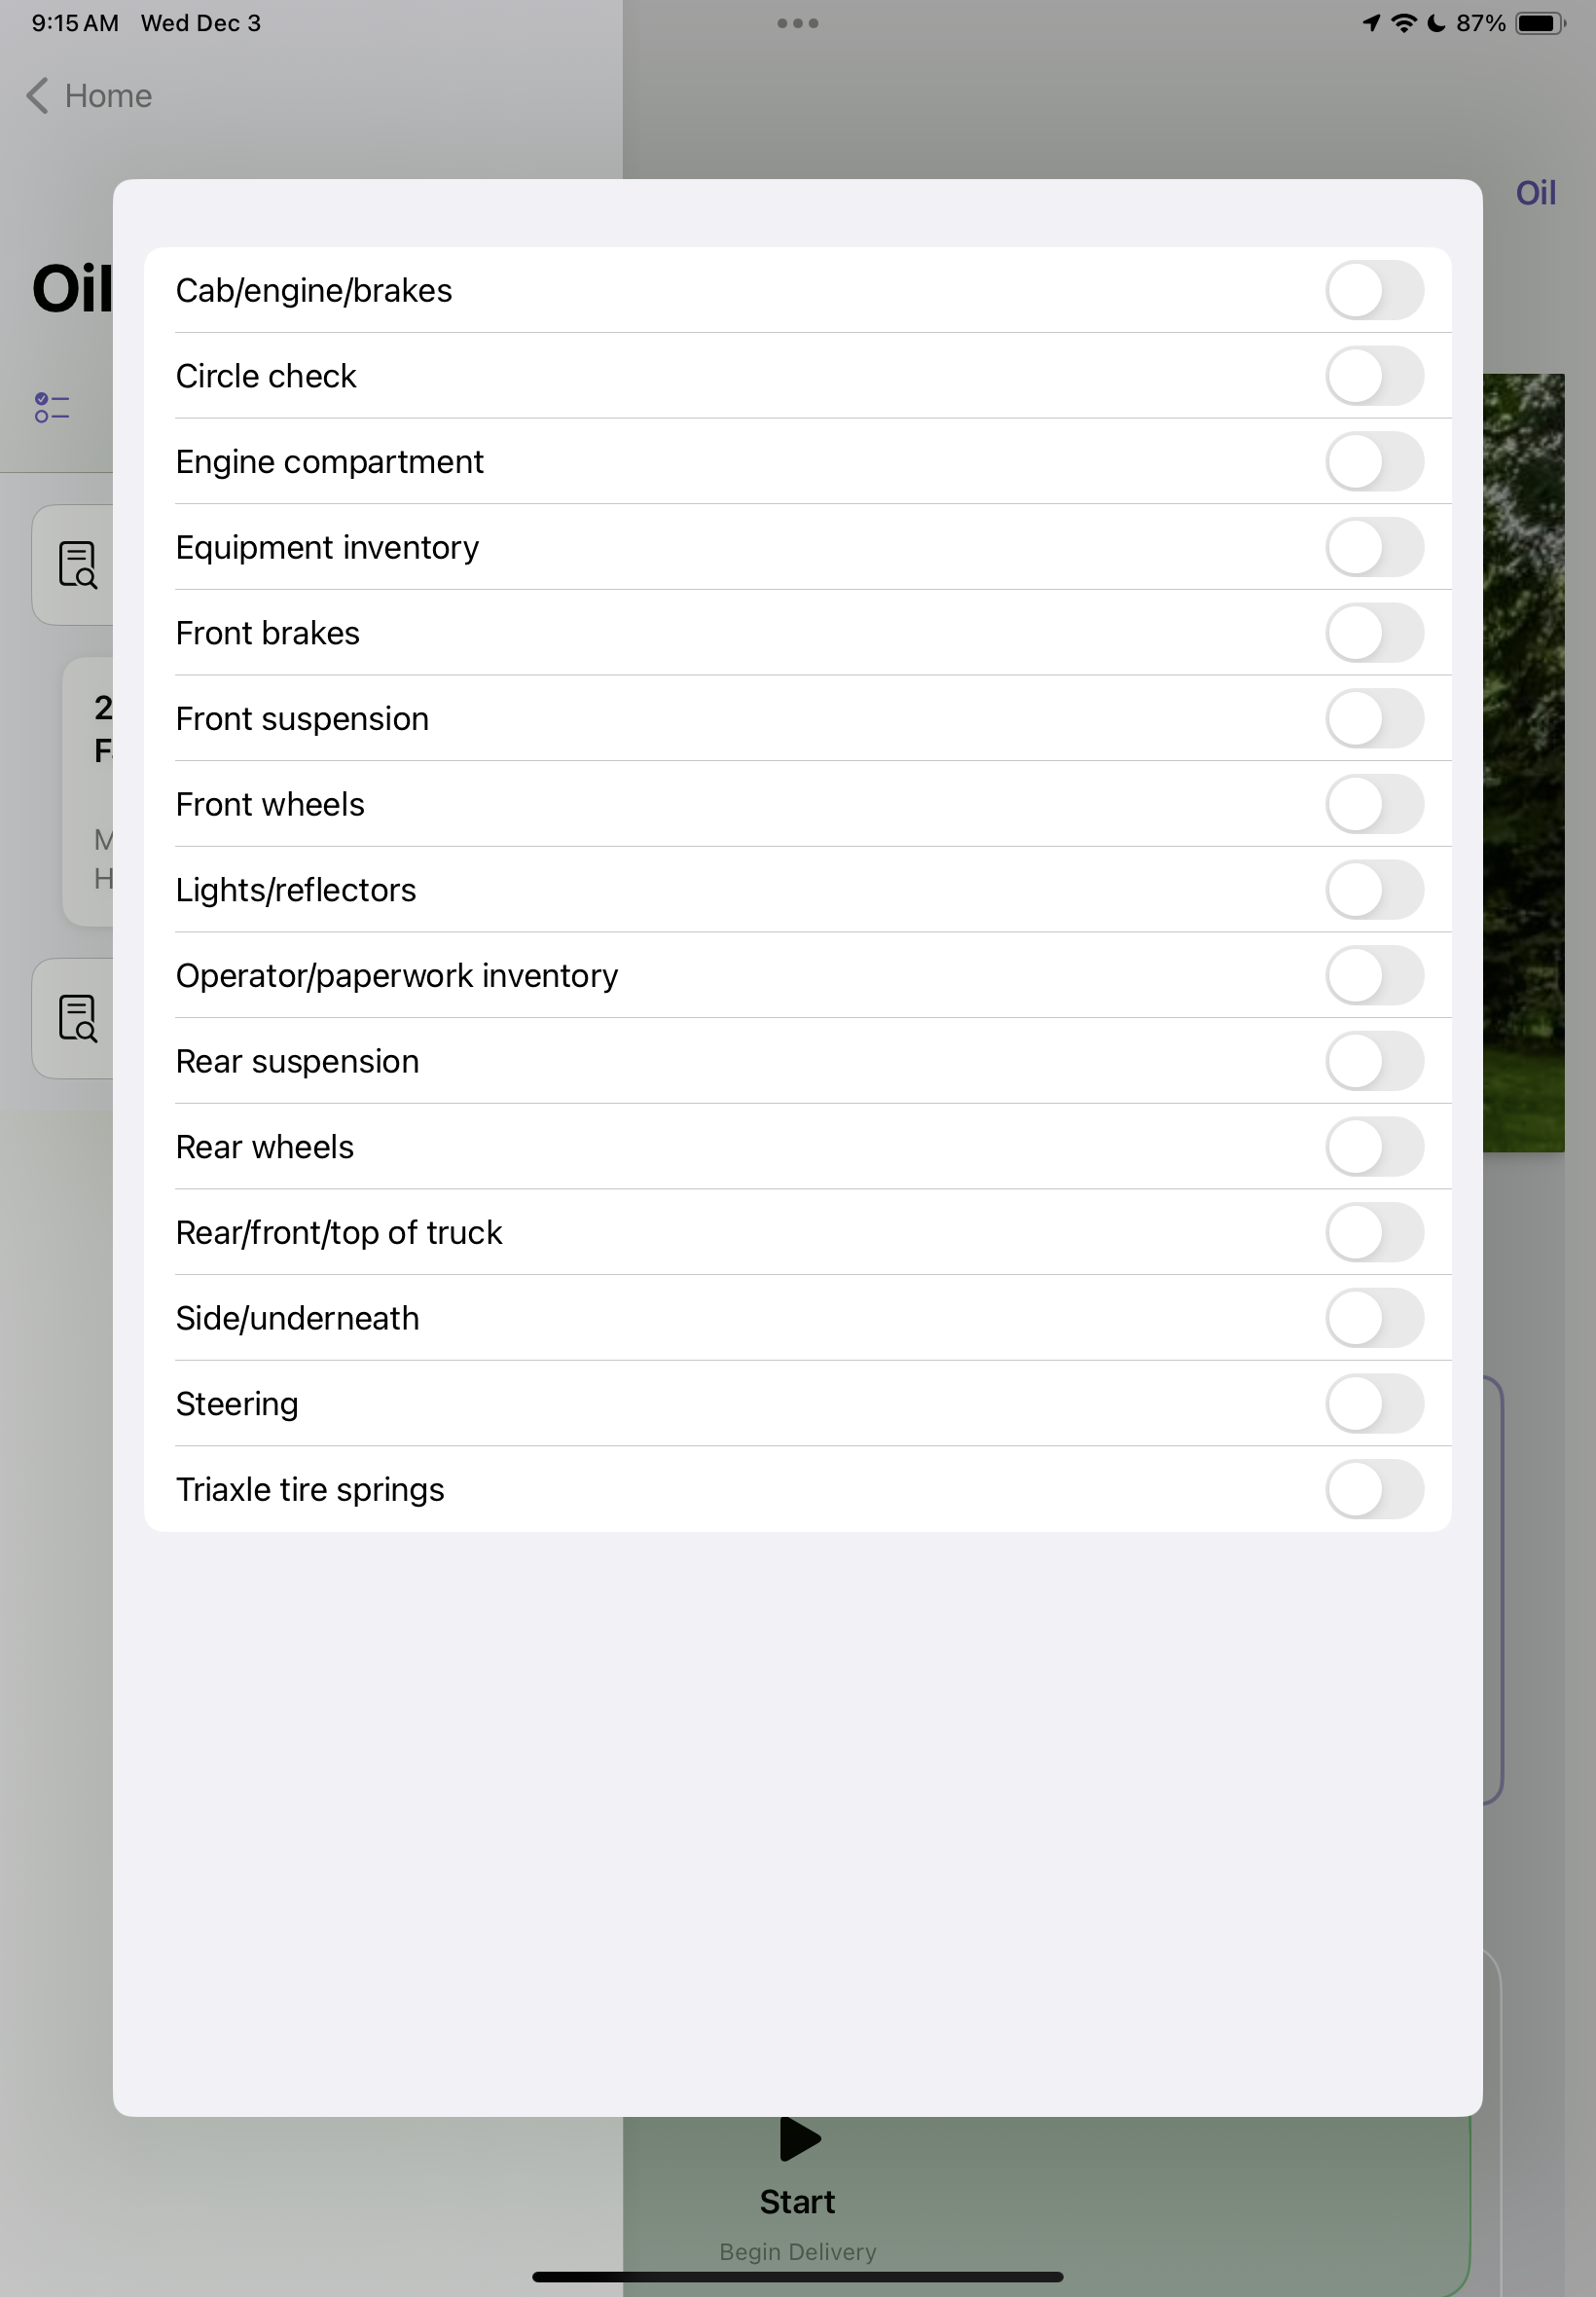
- Completes pre-trip checklist
- Begins delivery route
- For each customer stop:
- Connect to meter or manually enter gallons
- Print ticket
- Proceed to next stop
- After final stop, driver completes end-of-day summary
System Automation Benefits:
- Prevents data entry errors
- Ensures compliance with state regulations
- Speeds up delivery completion
- Automatically syncs with dispatch and accounting
Driver Load View
Driver Load List Screen
Purpose: Displays all assigned routes and loads for the driver on the selected date.
Key Features:
- View all loads assigned for the day
- Switch between multiple loads using tabs or horizontal picker
- Displays estimated gallons, number of stops, and progress
- Supports both Oil and Propane delivery types
Screen Breakdown:
| Element | Description |
| Load Header | Shows truck number, delivery date, and load number |
| Summary Metrics | Displays estimated gallons, delivered gallons, remaining stops, and revenue (oil only) |
| Checklist Banner | Required pre-trip items such as inventory, safety checks, and mileage must be completed before deliveries begin |
| Delivery List | Scrollable list of customers with address, estimated gallons, and delivery status |
Preparing Route
-
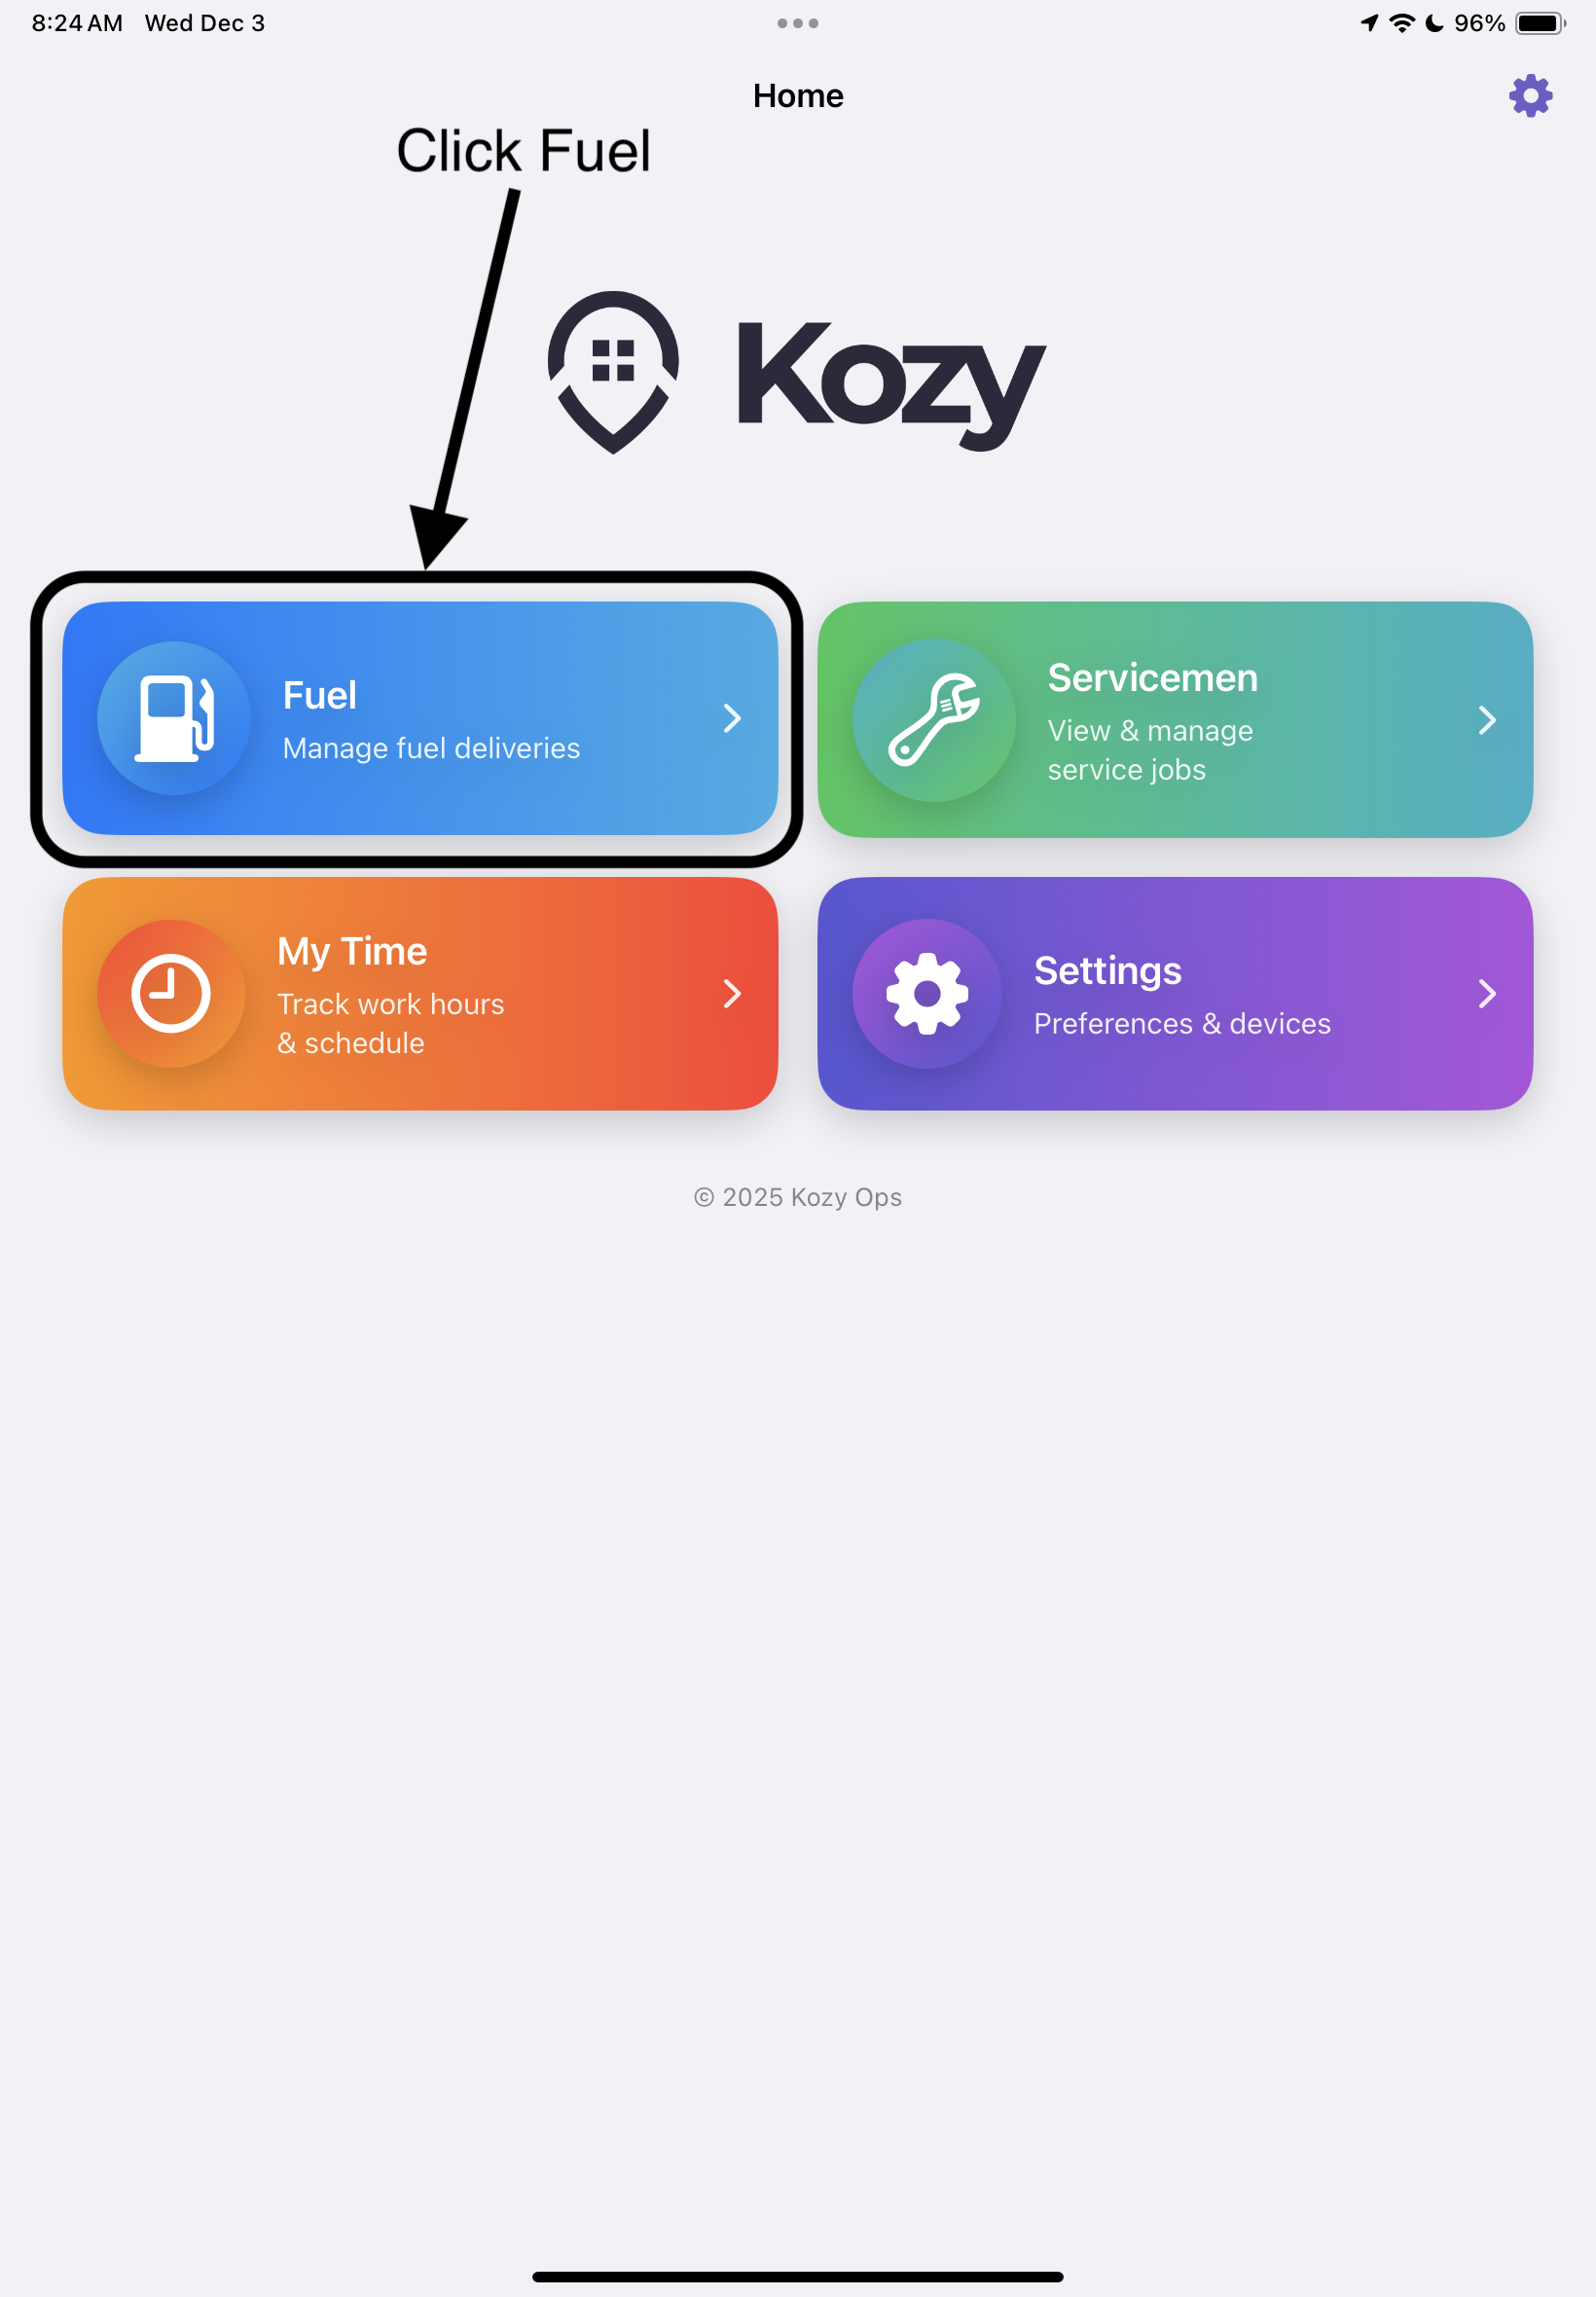
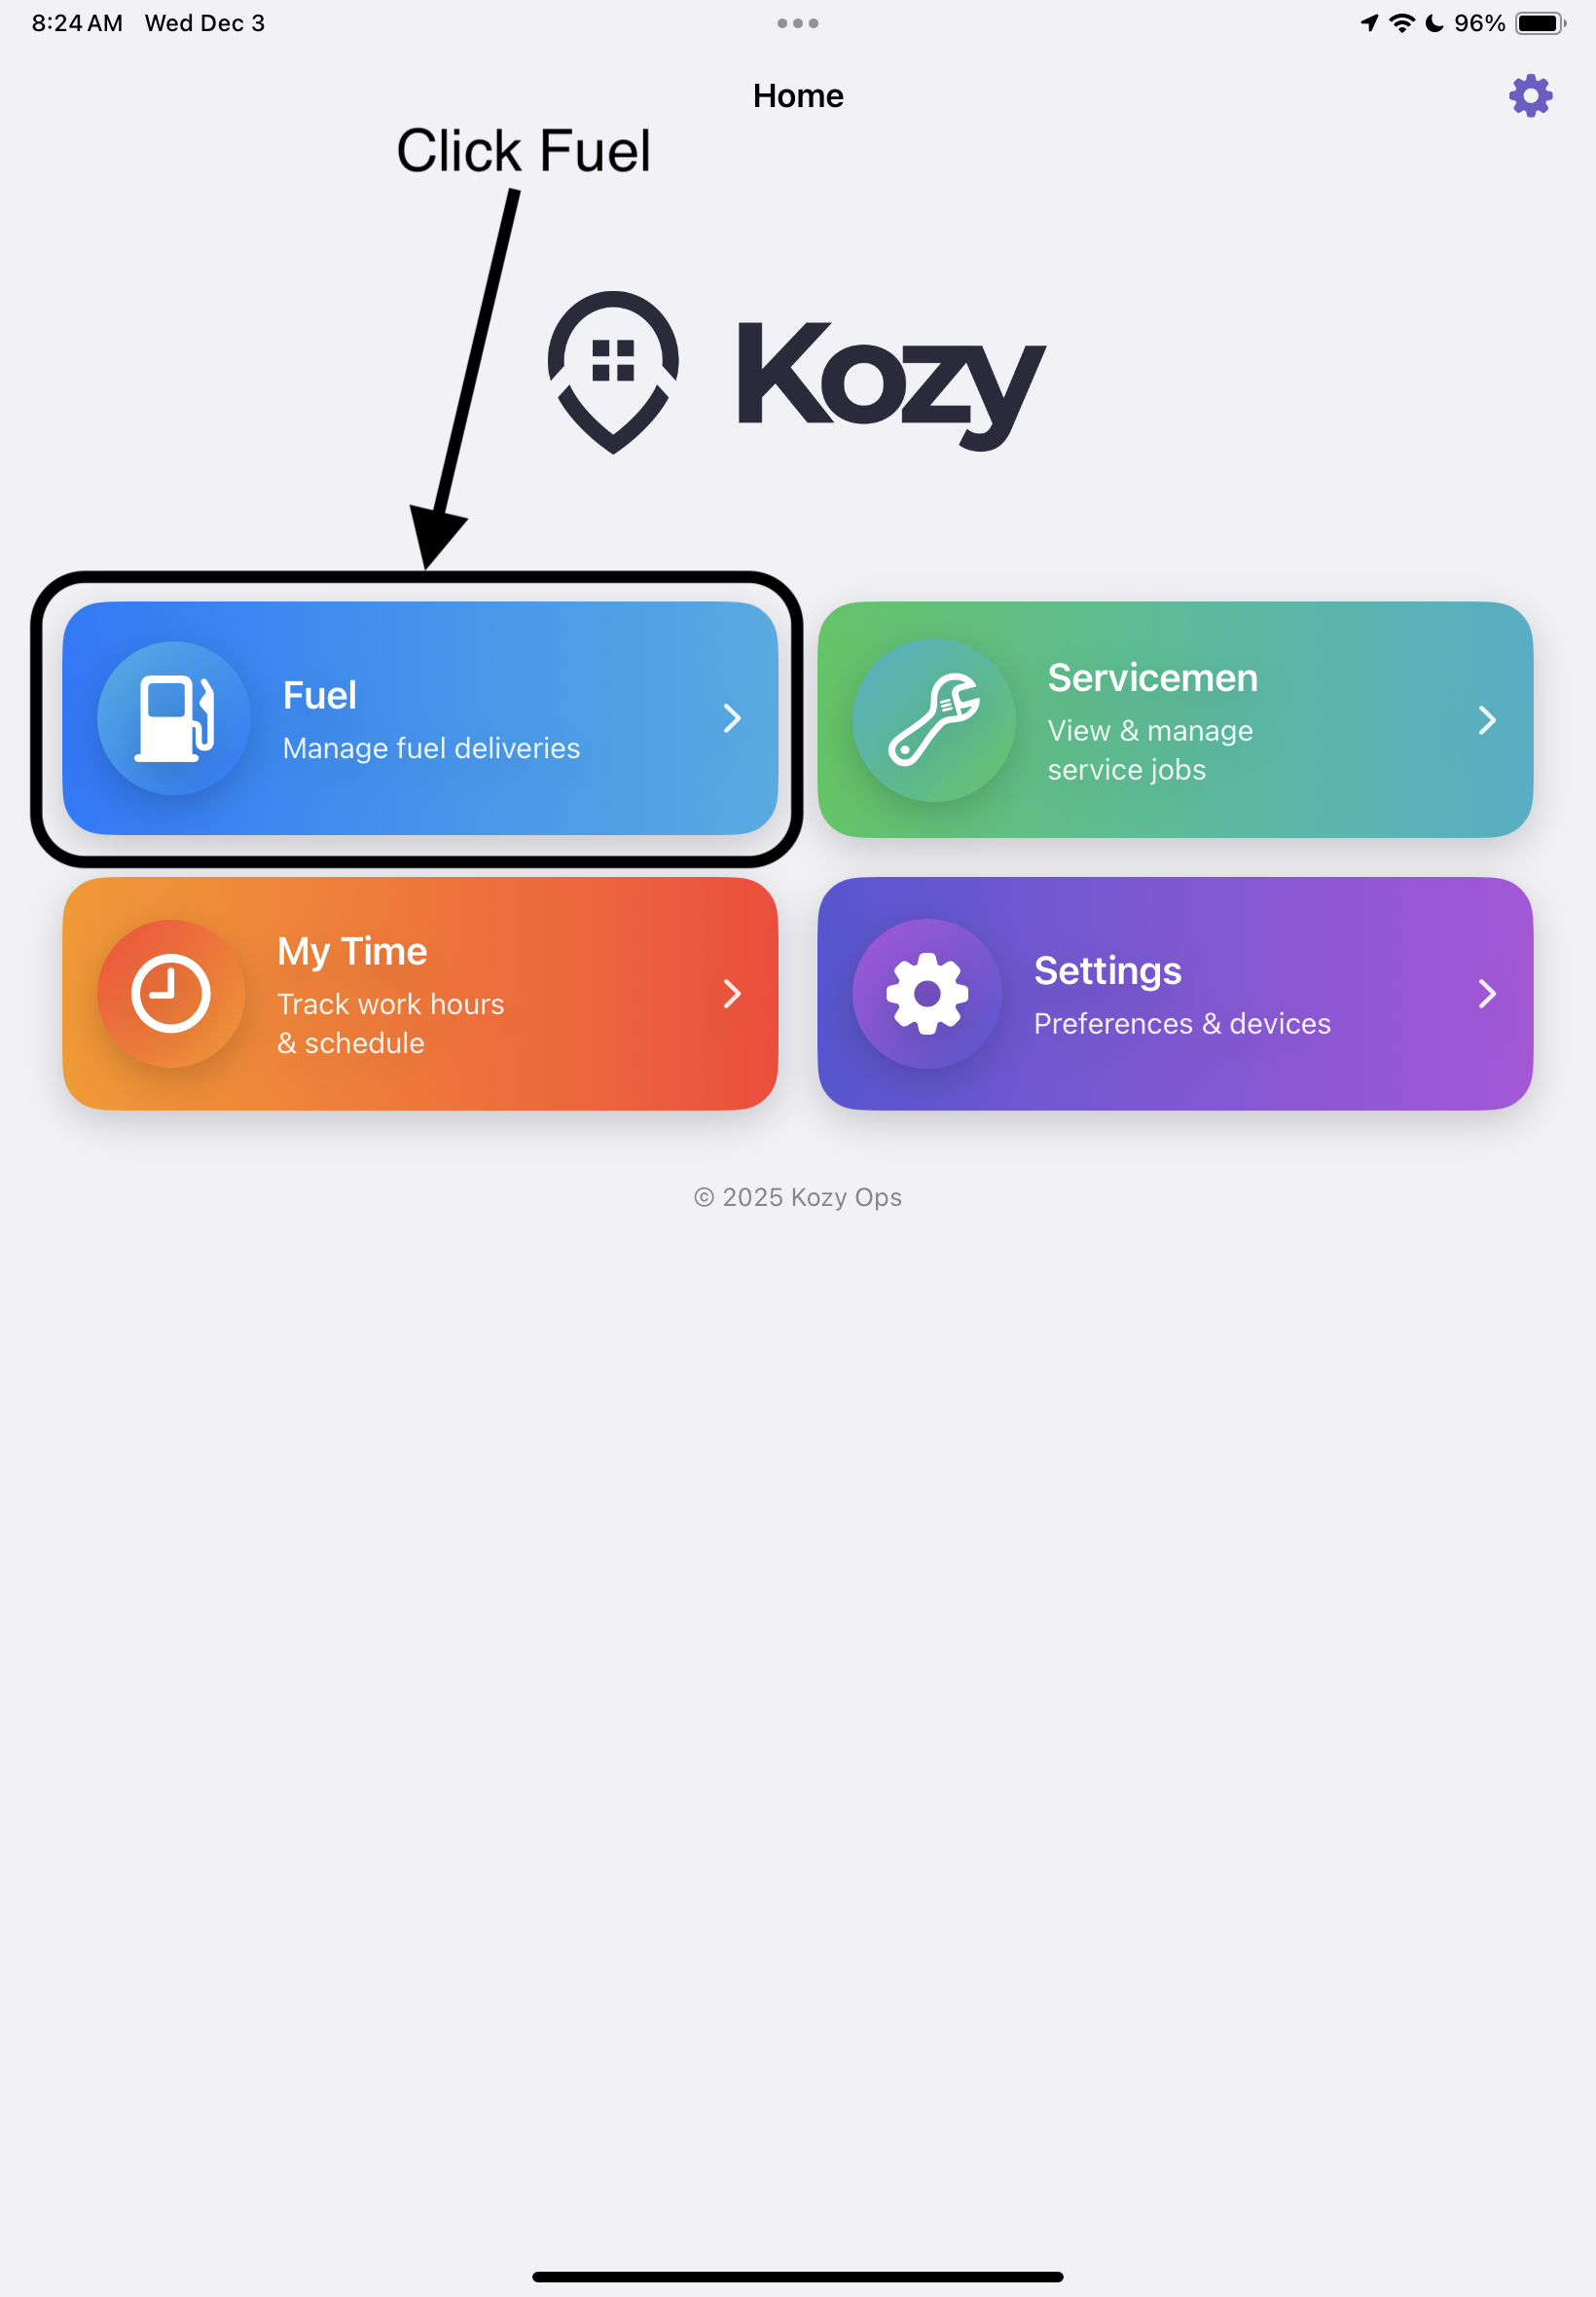
Tap the Fuel card on the Home Screen

-
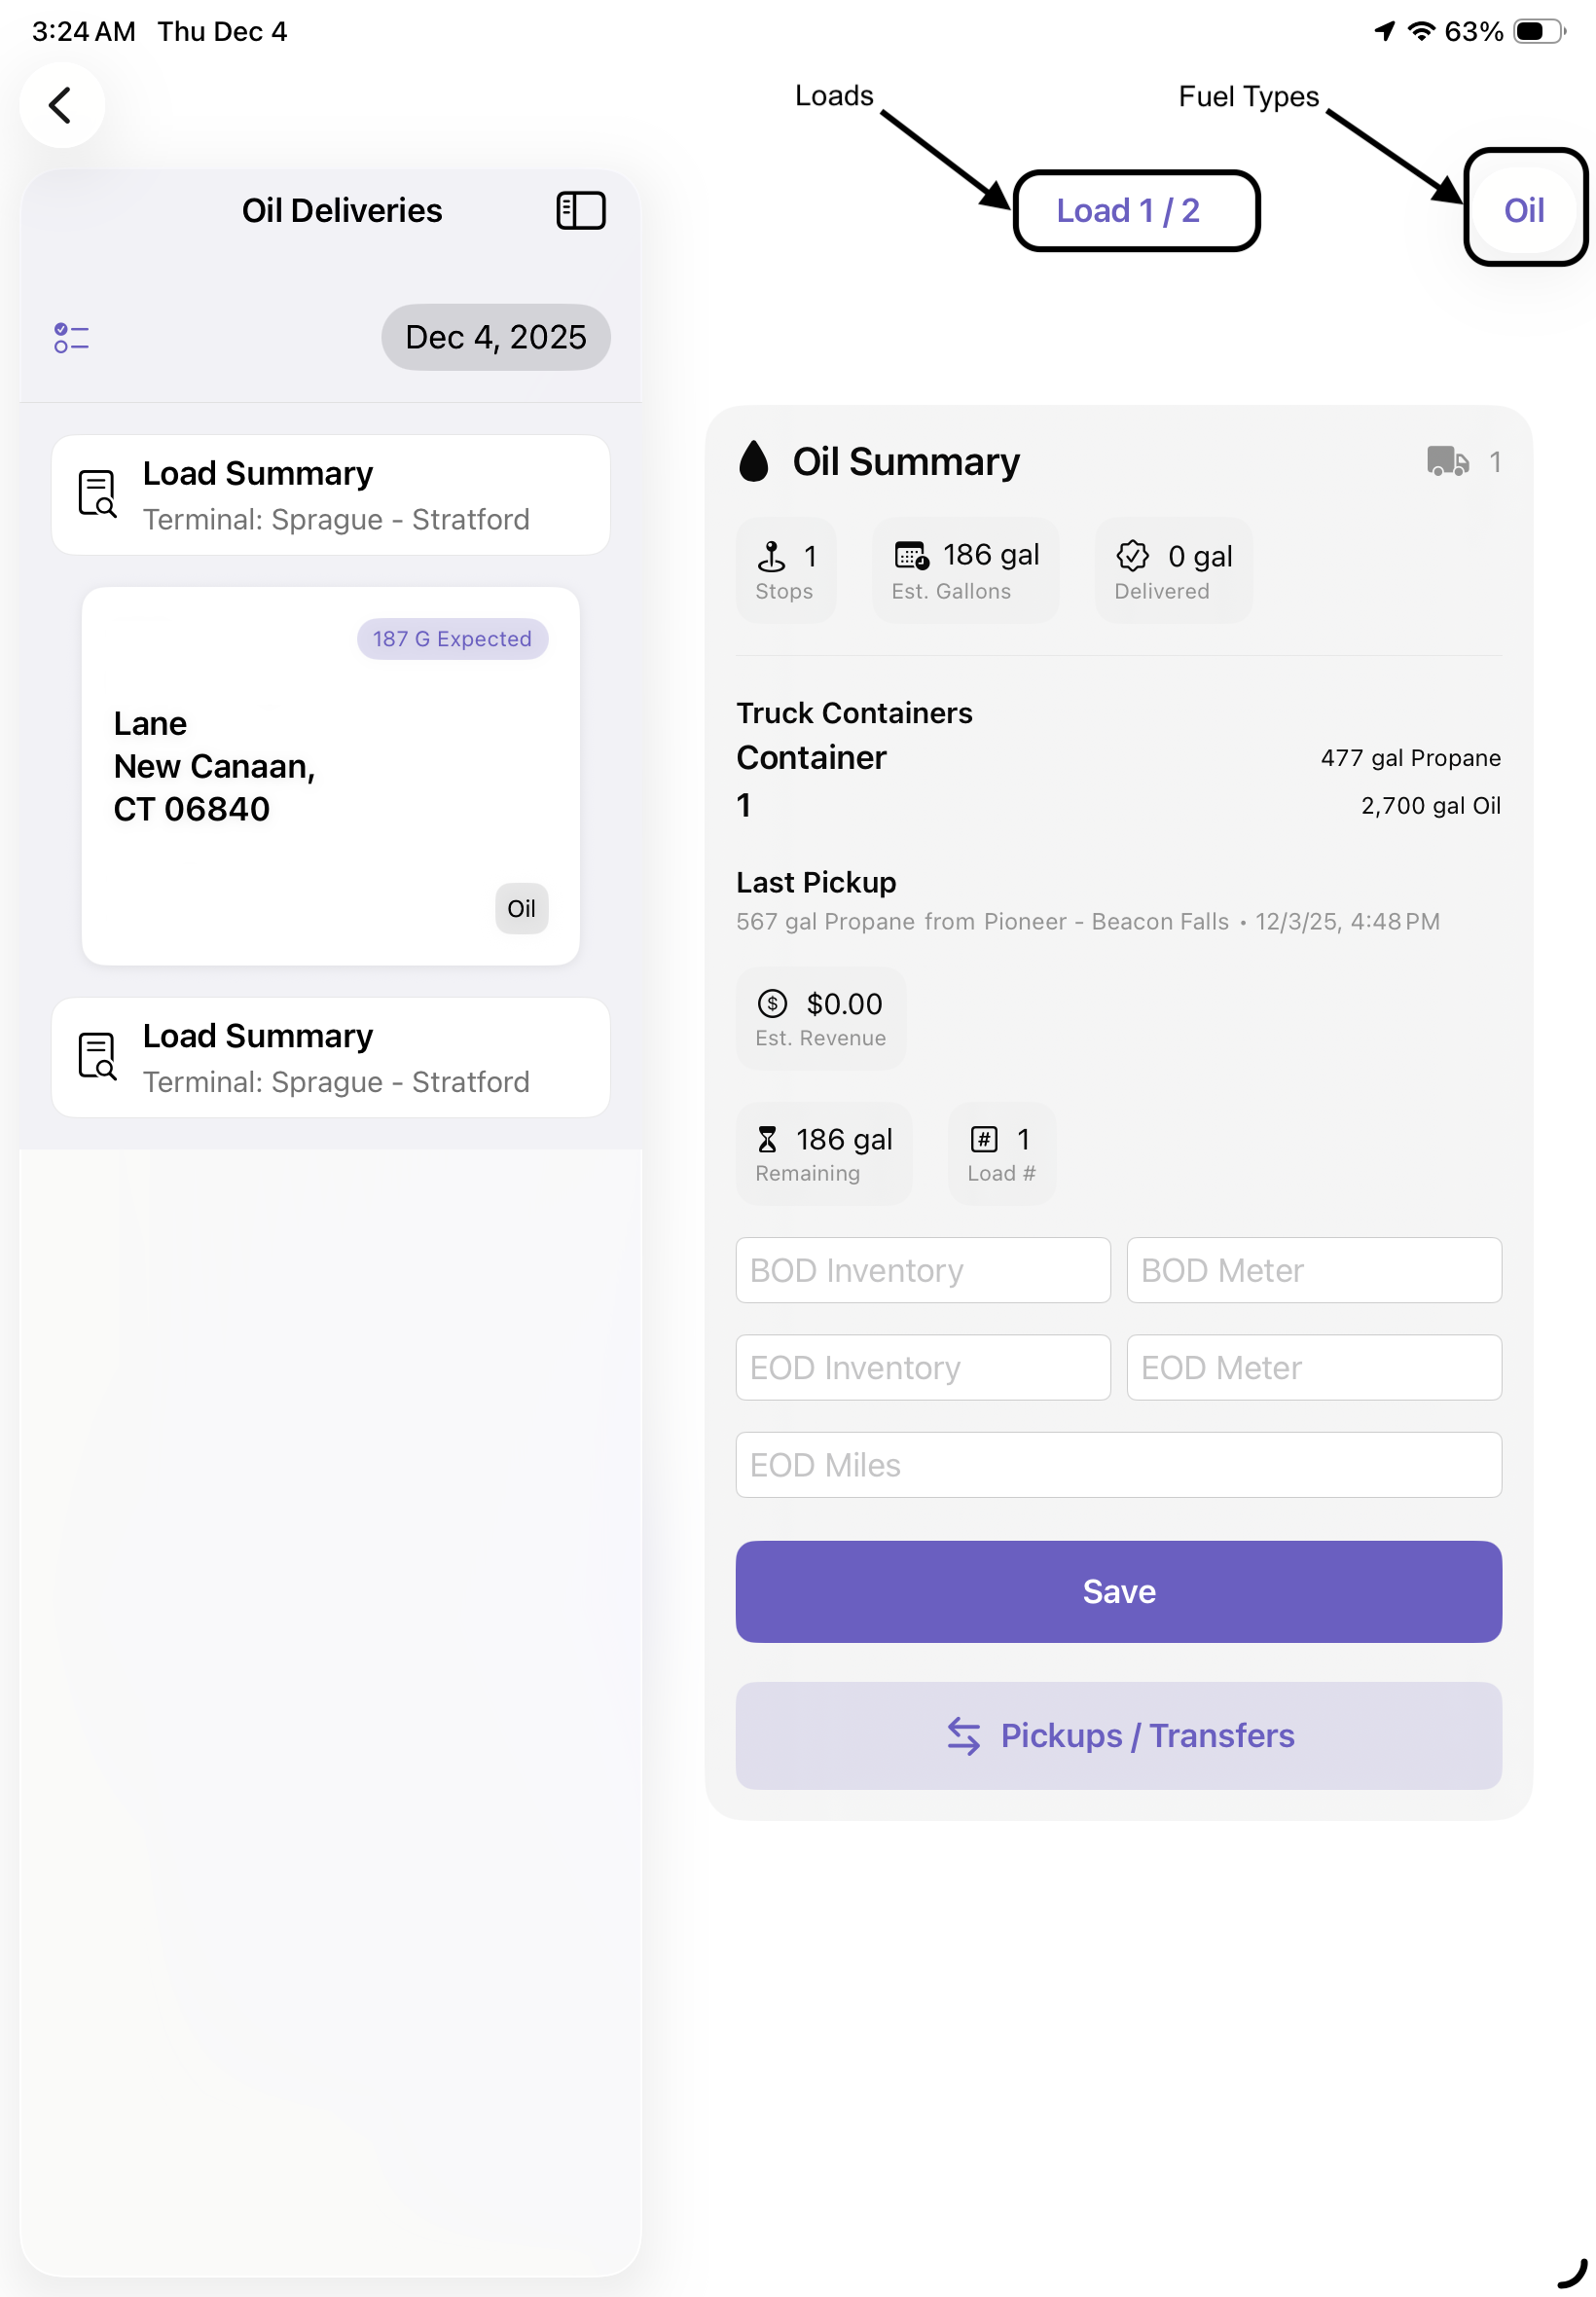
Next you'll be brought to the Driver Load screen, from here you'll tap your individual loads as well as Fuel types to see which terminals you should visit first and which truck you are assigned for the day. It is important you select both fuels so you can see how many terminals you must visit for Fuel pickup

-
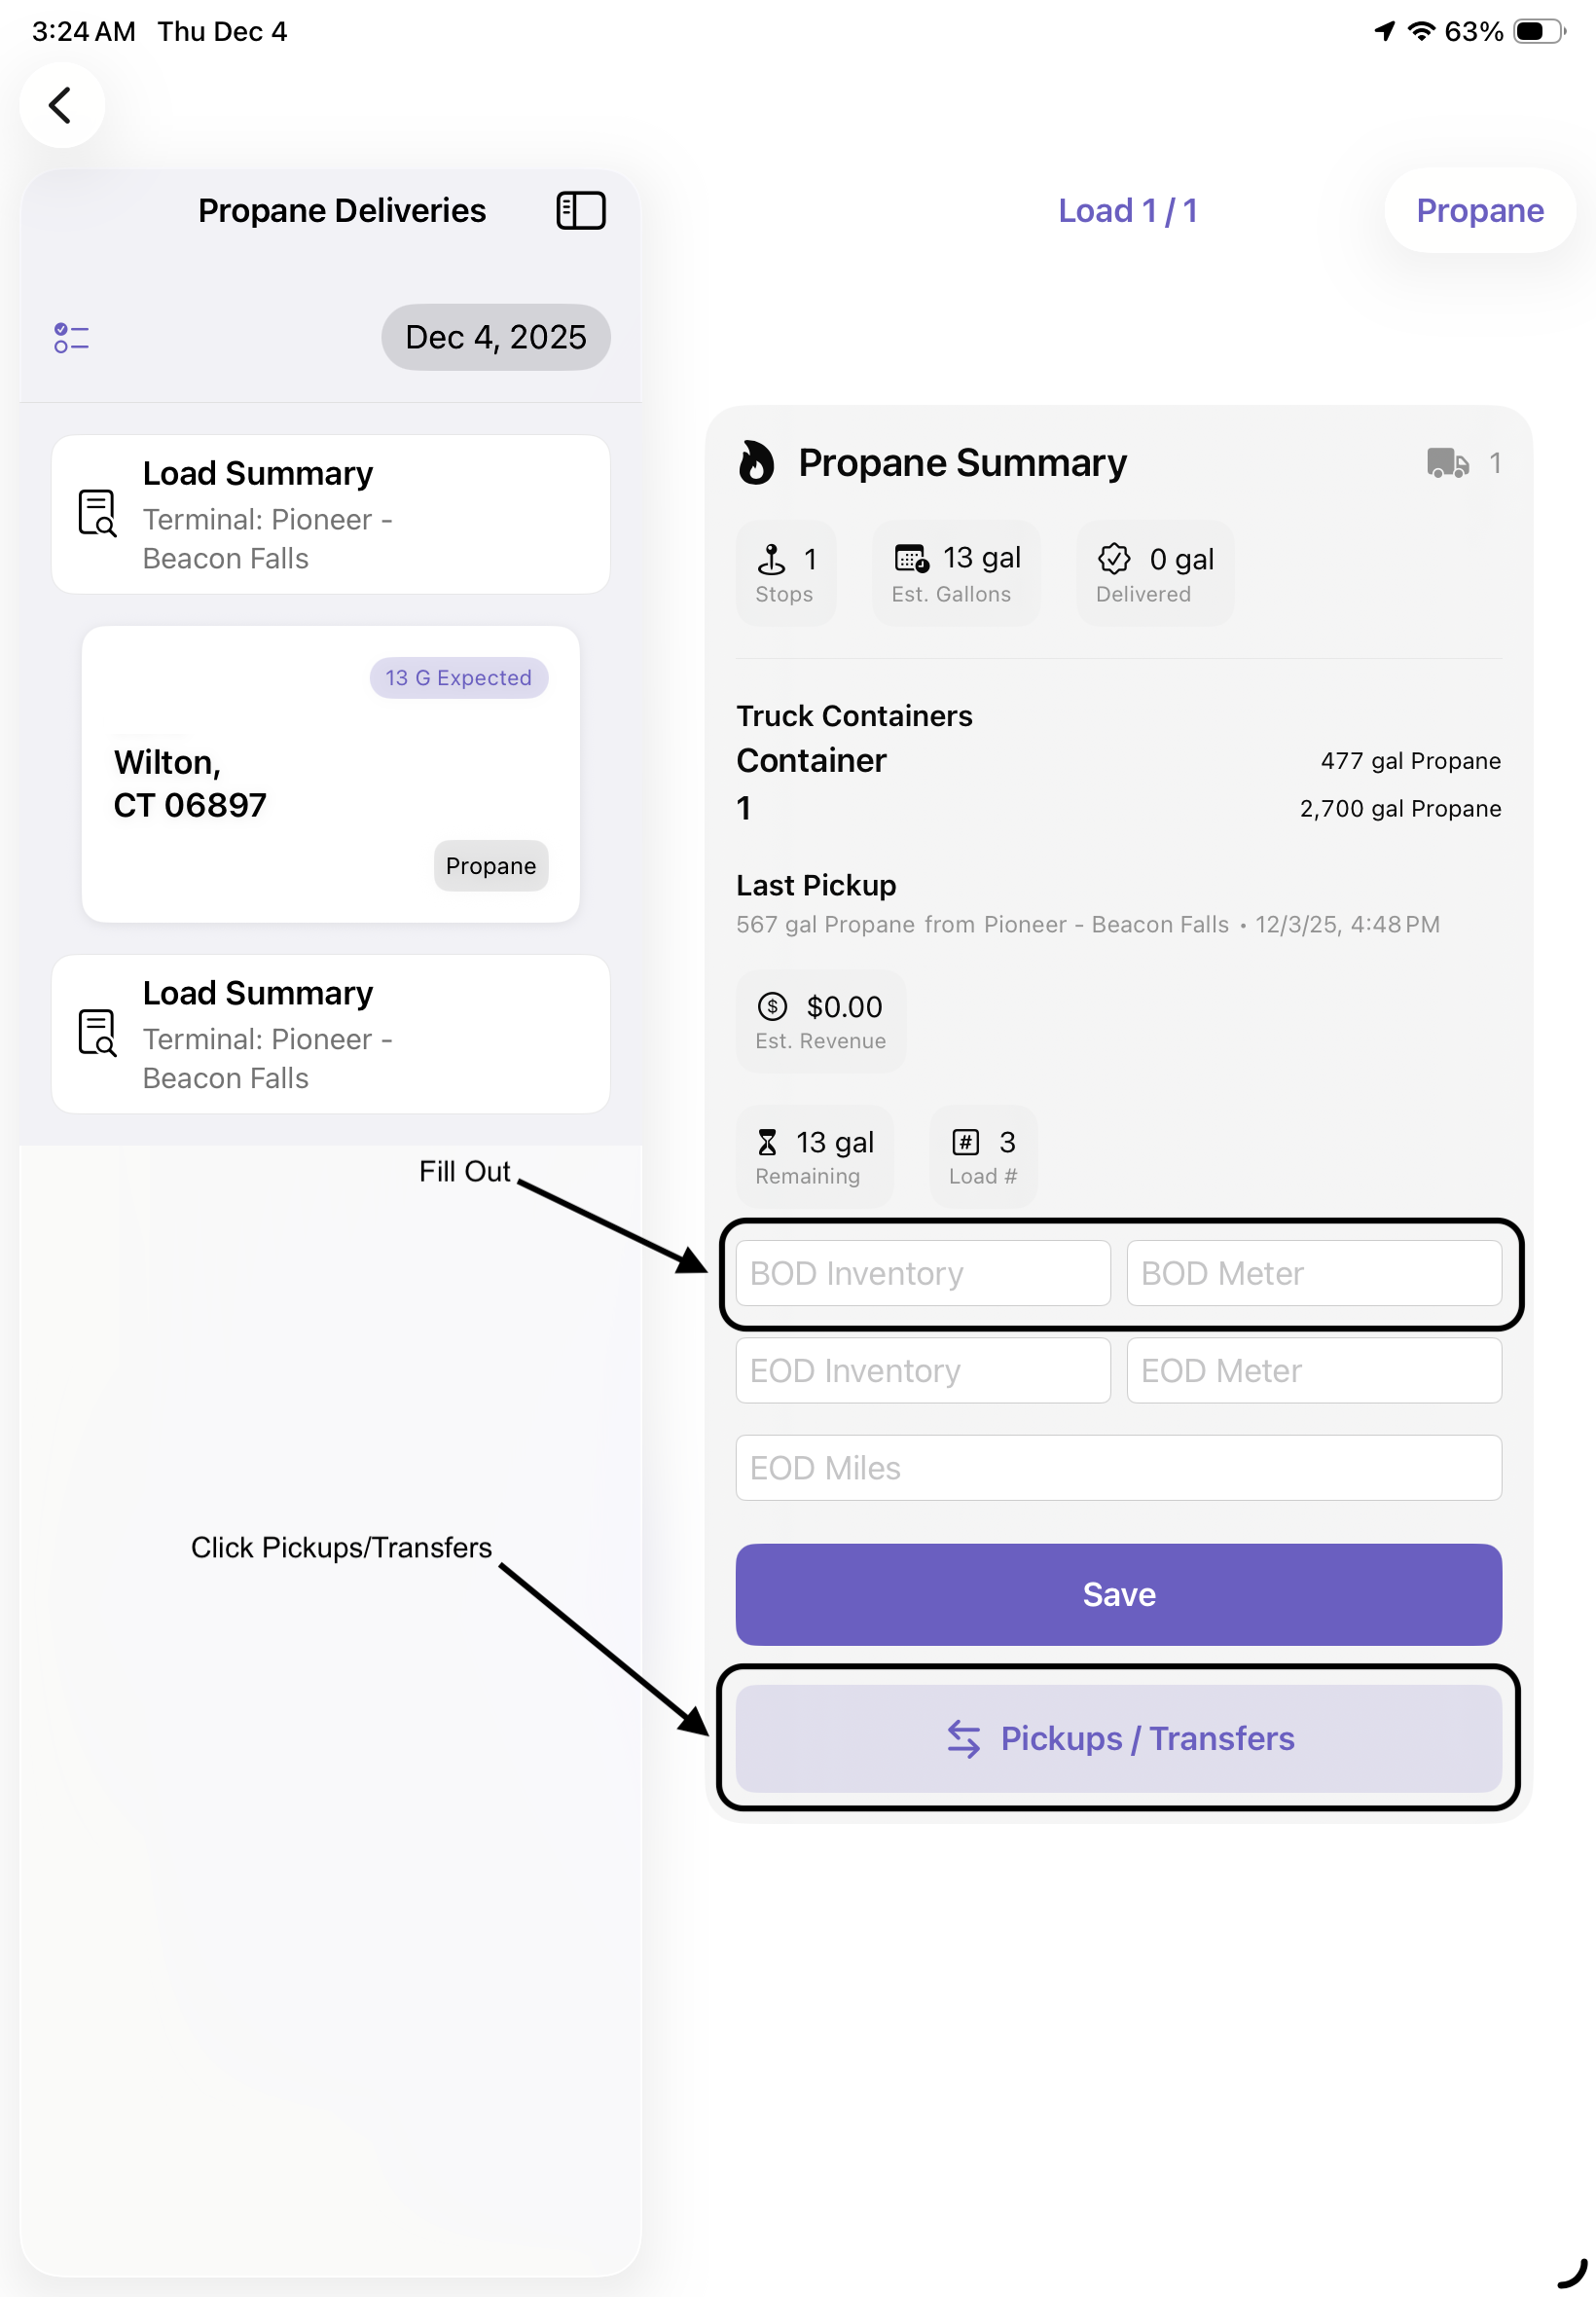
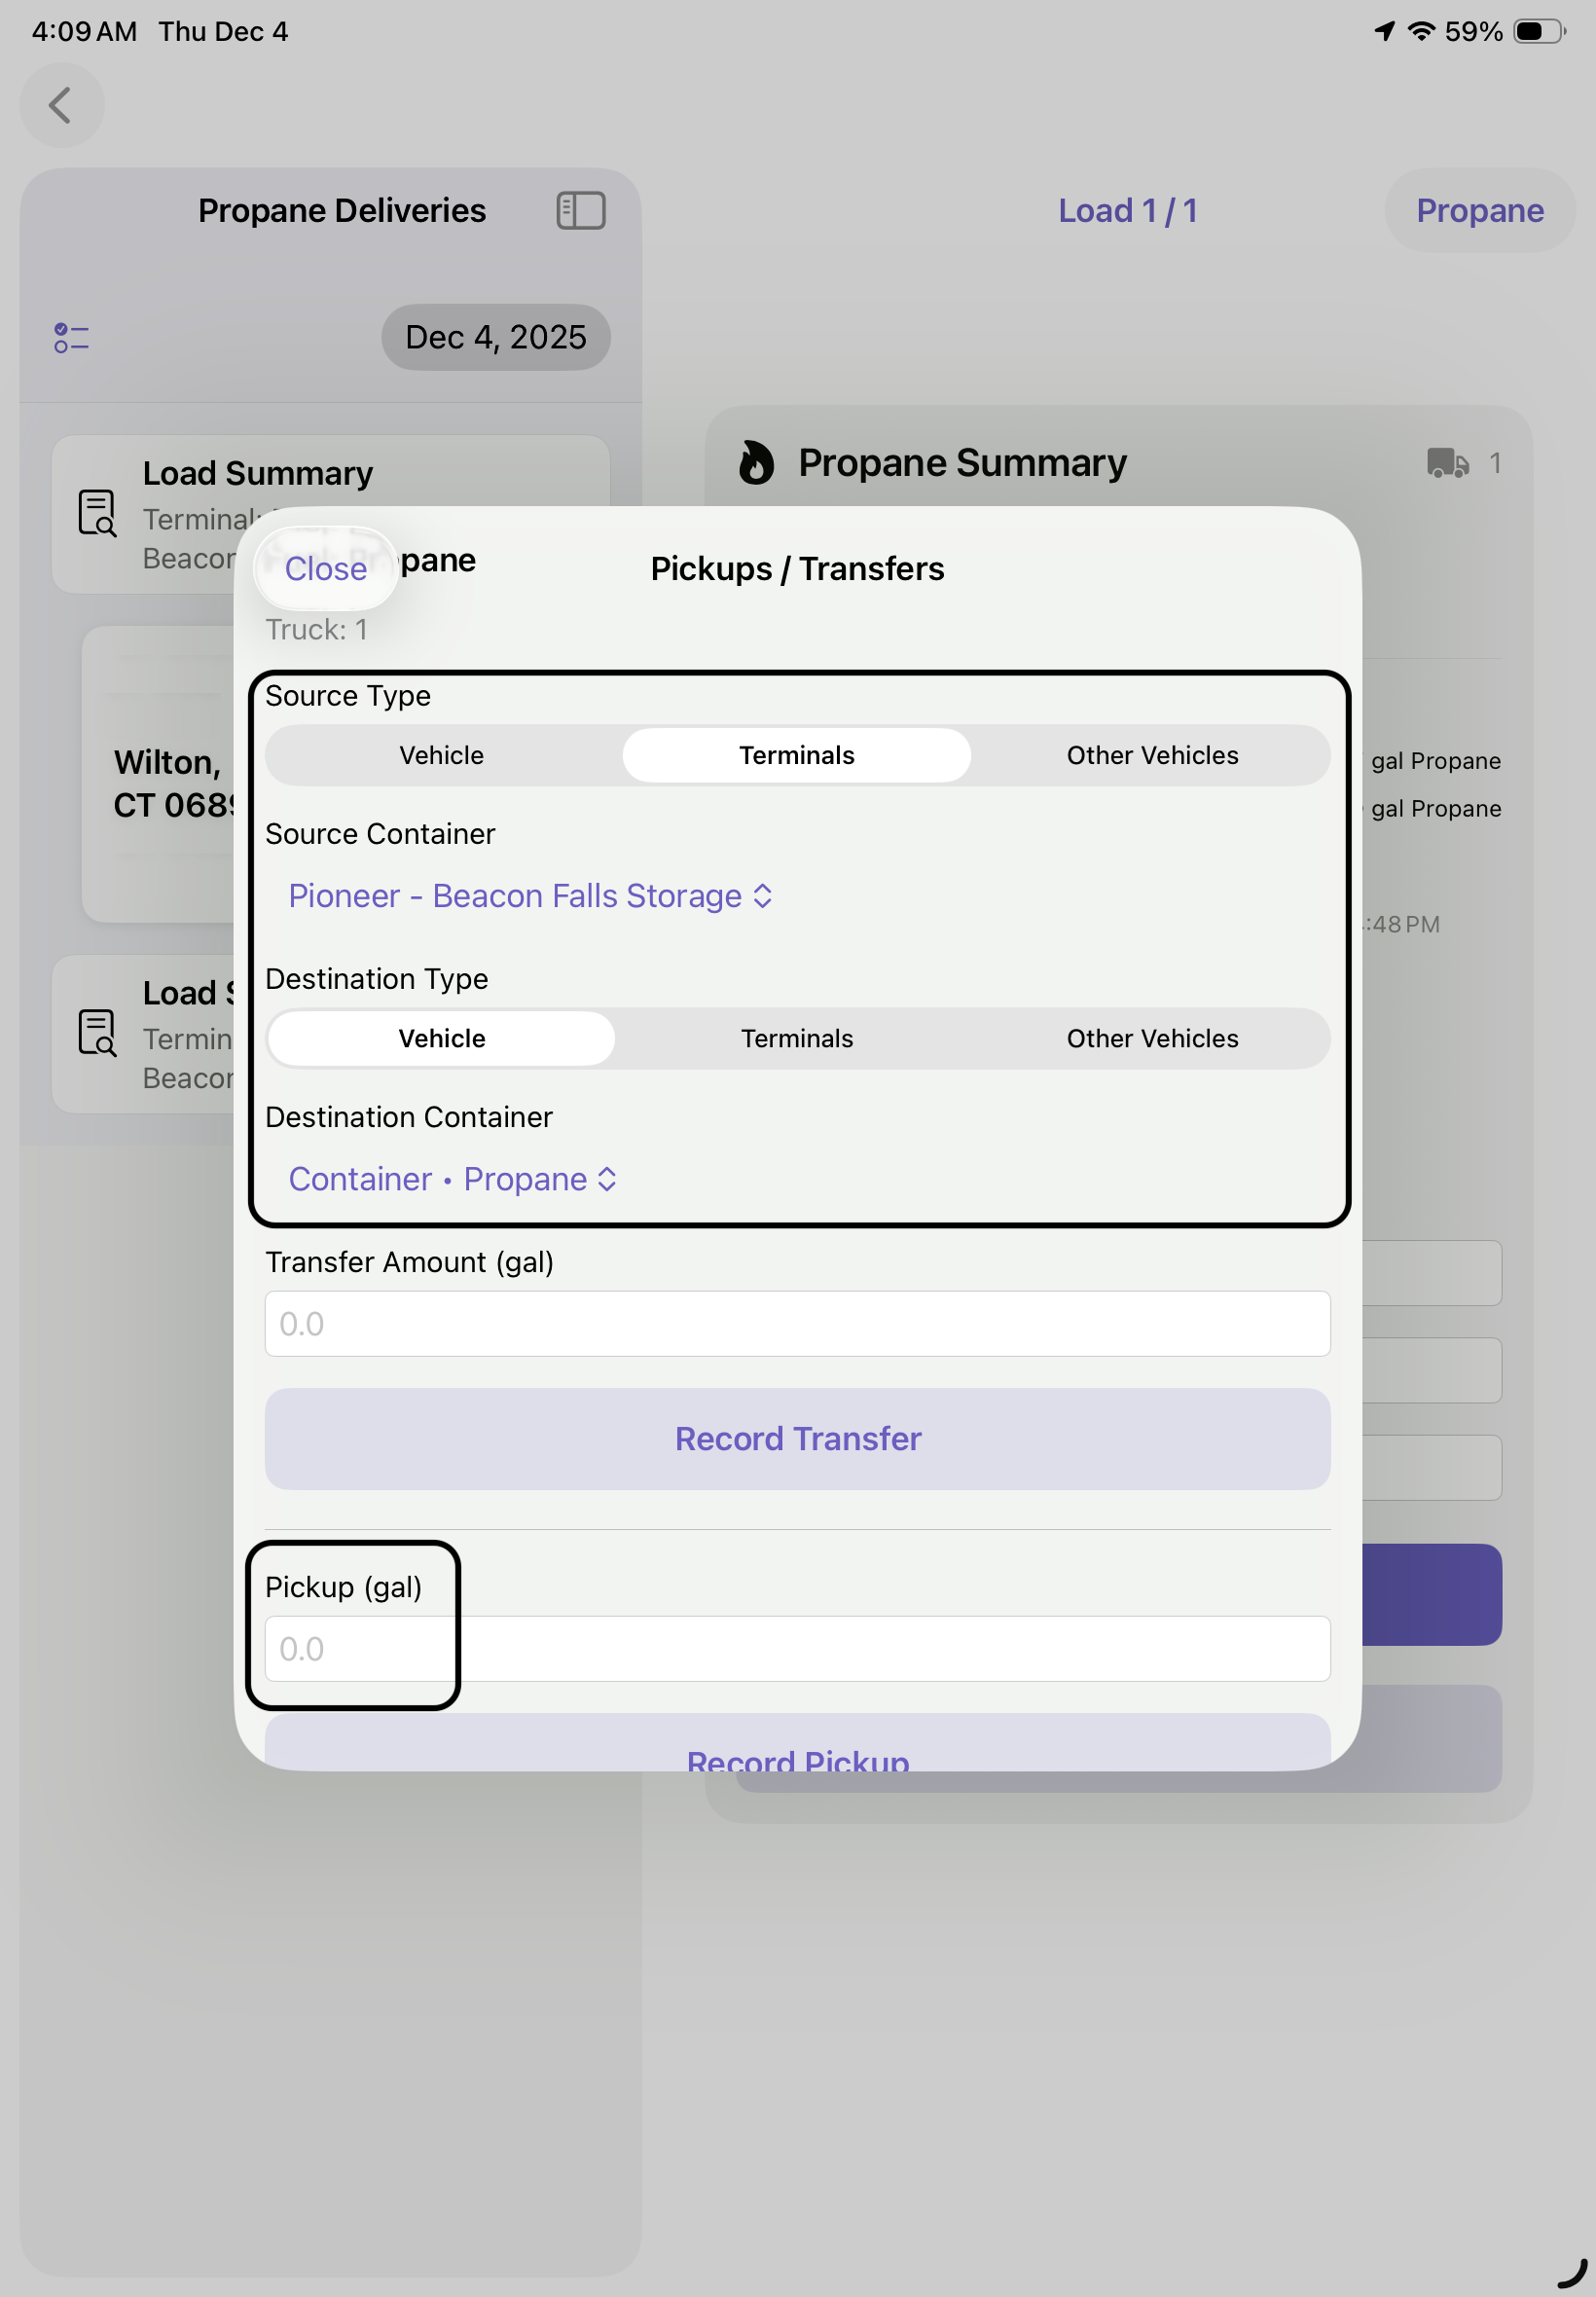
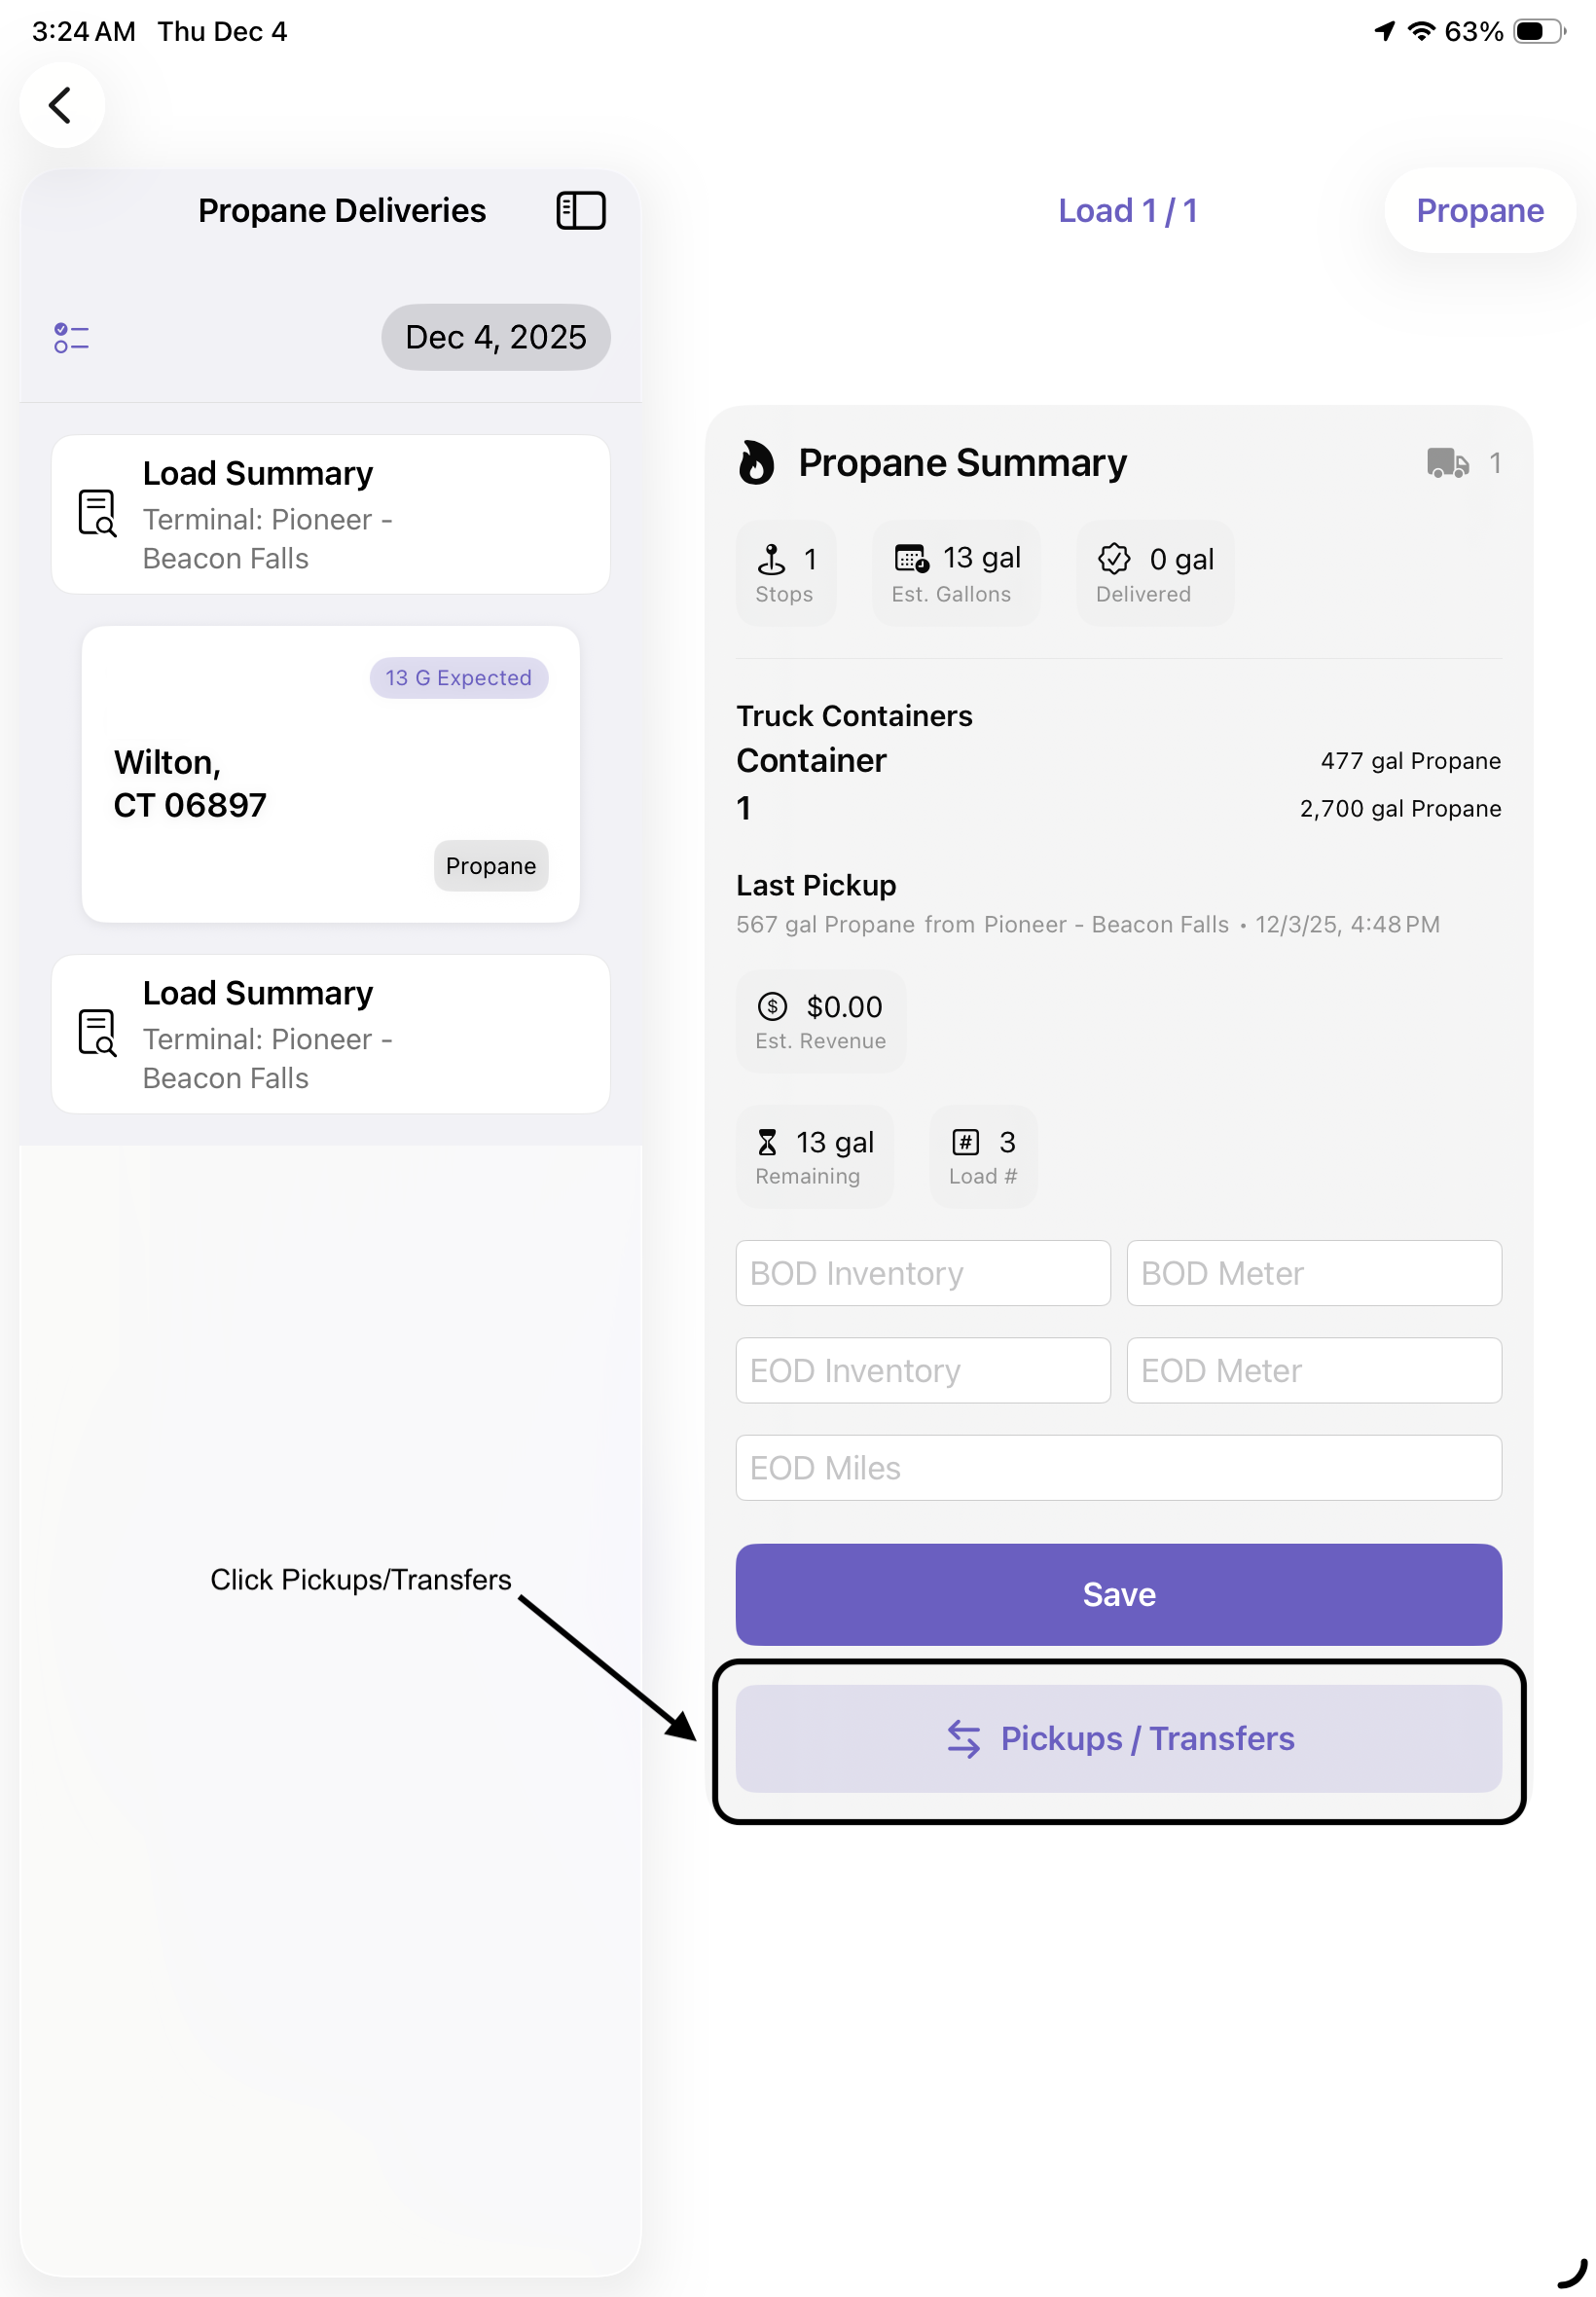
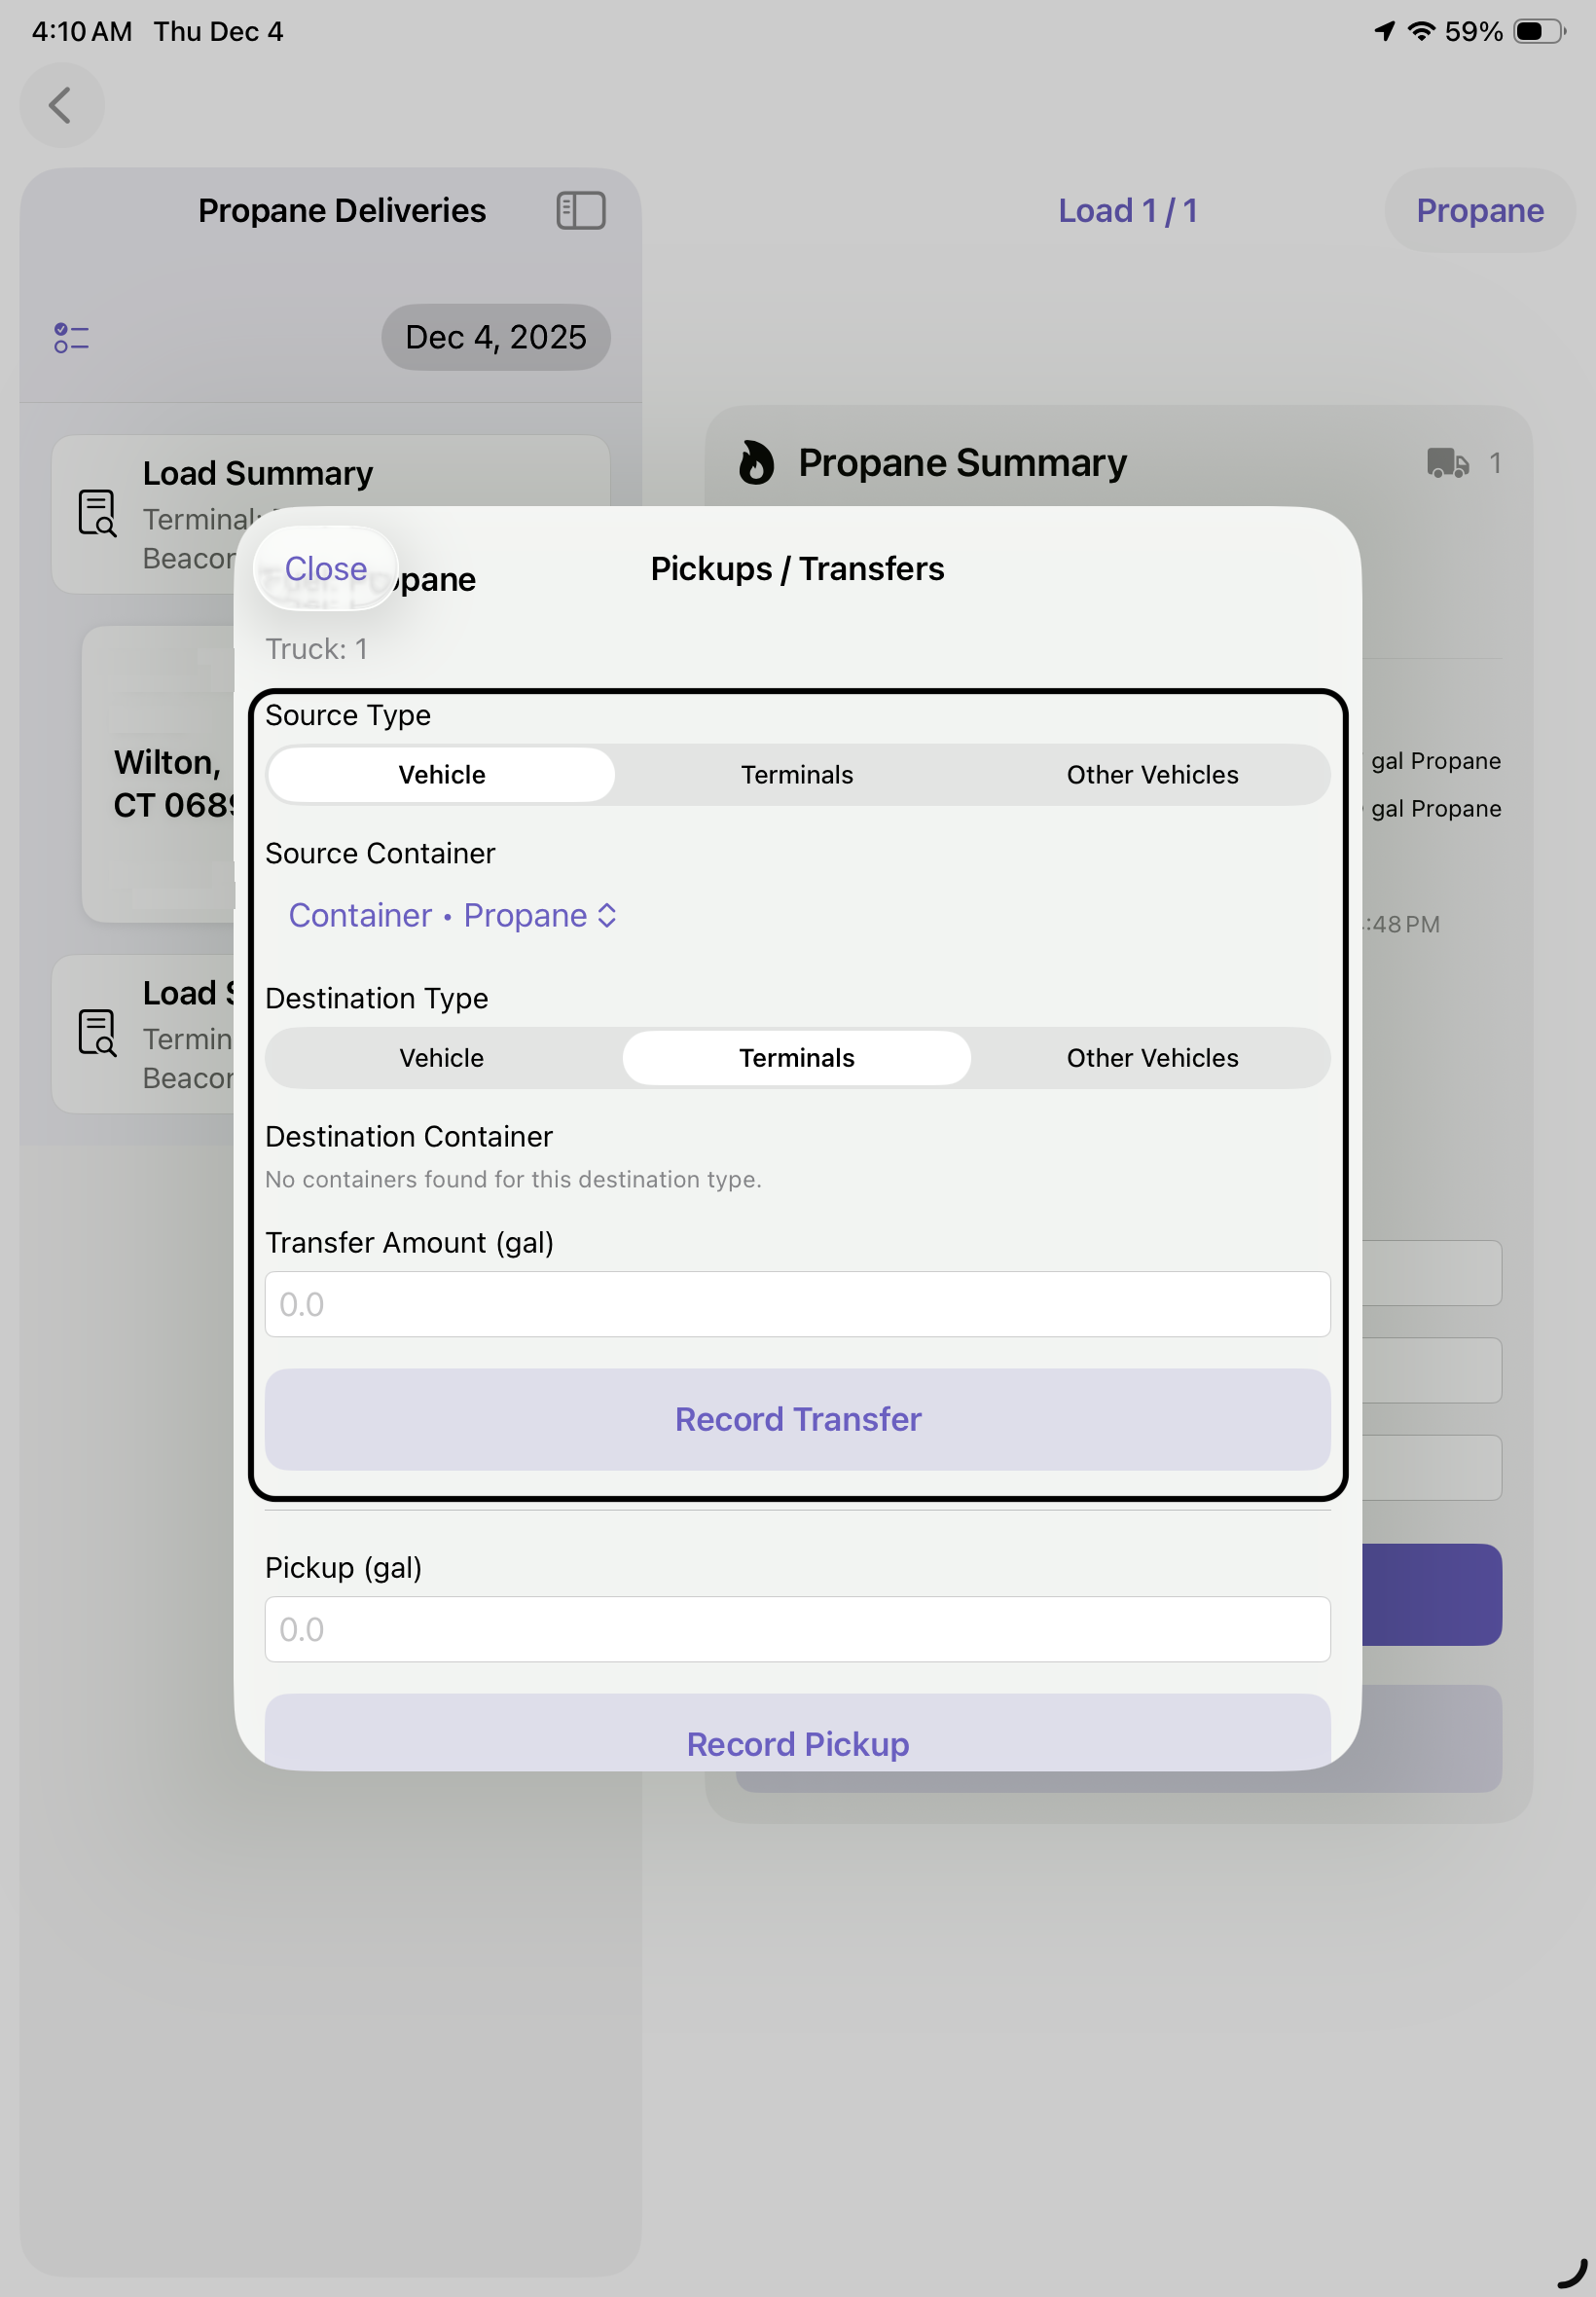
After arriving at each terminal tap on Pickups/Transfer then select Source Type (Terminal), Source Container, Destination Type (Vehicle) and Destination Container then record how many gallons you are picking up. Afterwards record your BOD Inventory and BOD Meter to keep track throughout the day. See below for how to Begin a Load

-
Next prepare route for each delivery and follow steps for Delivery View and complete each individual delivery
-
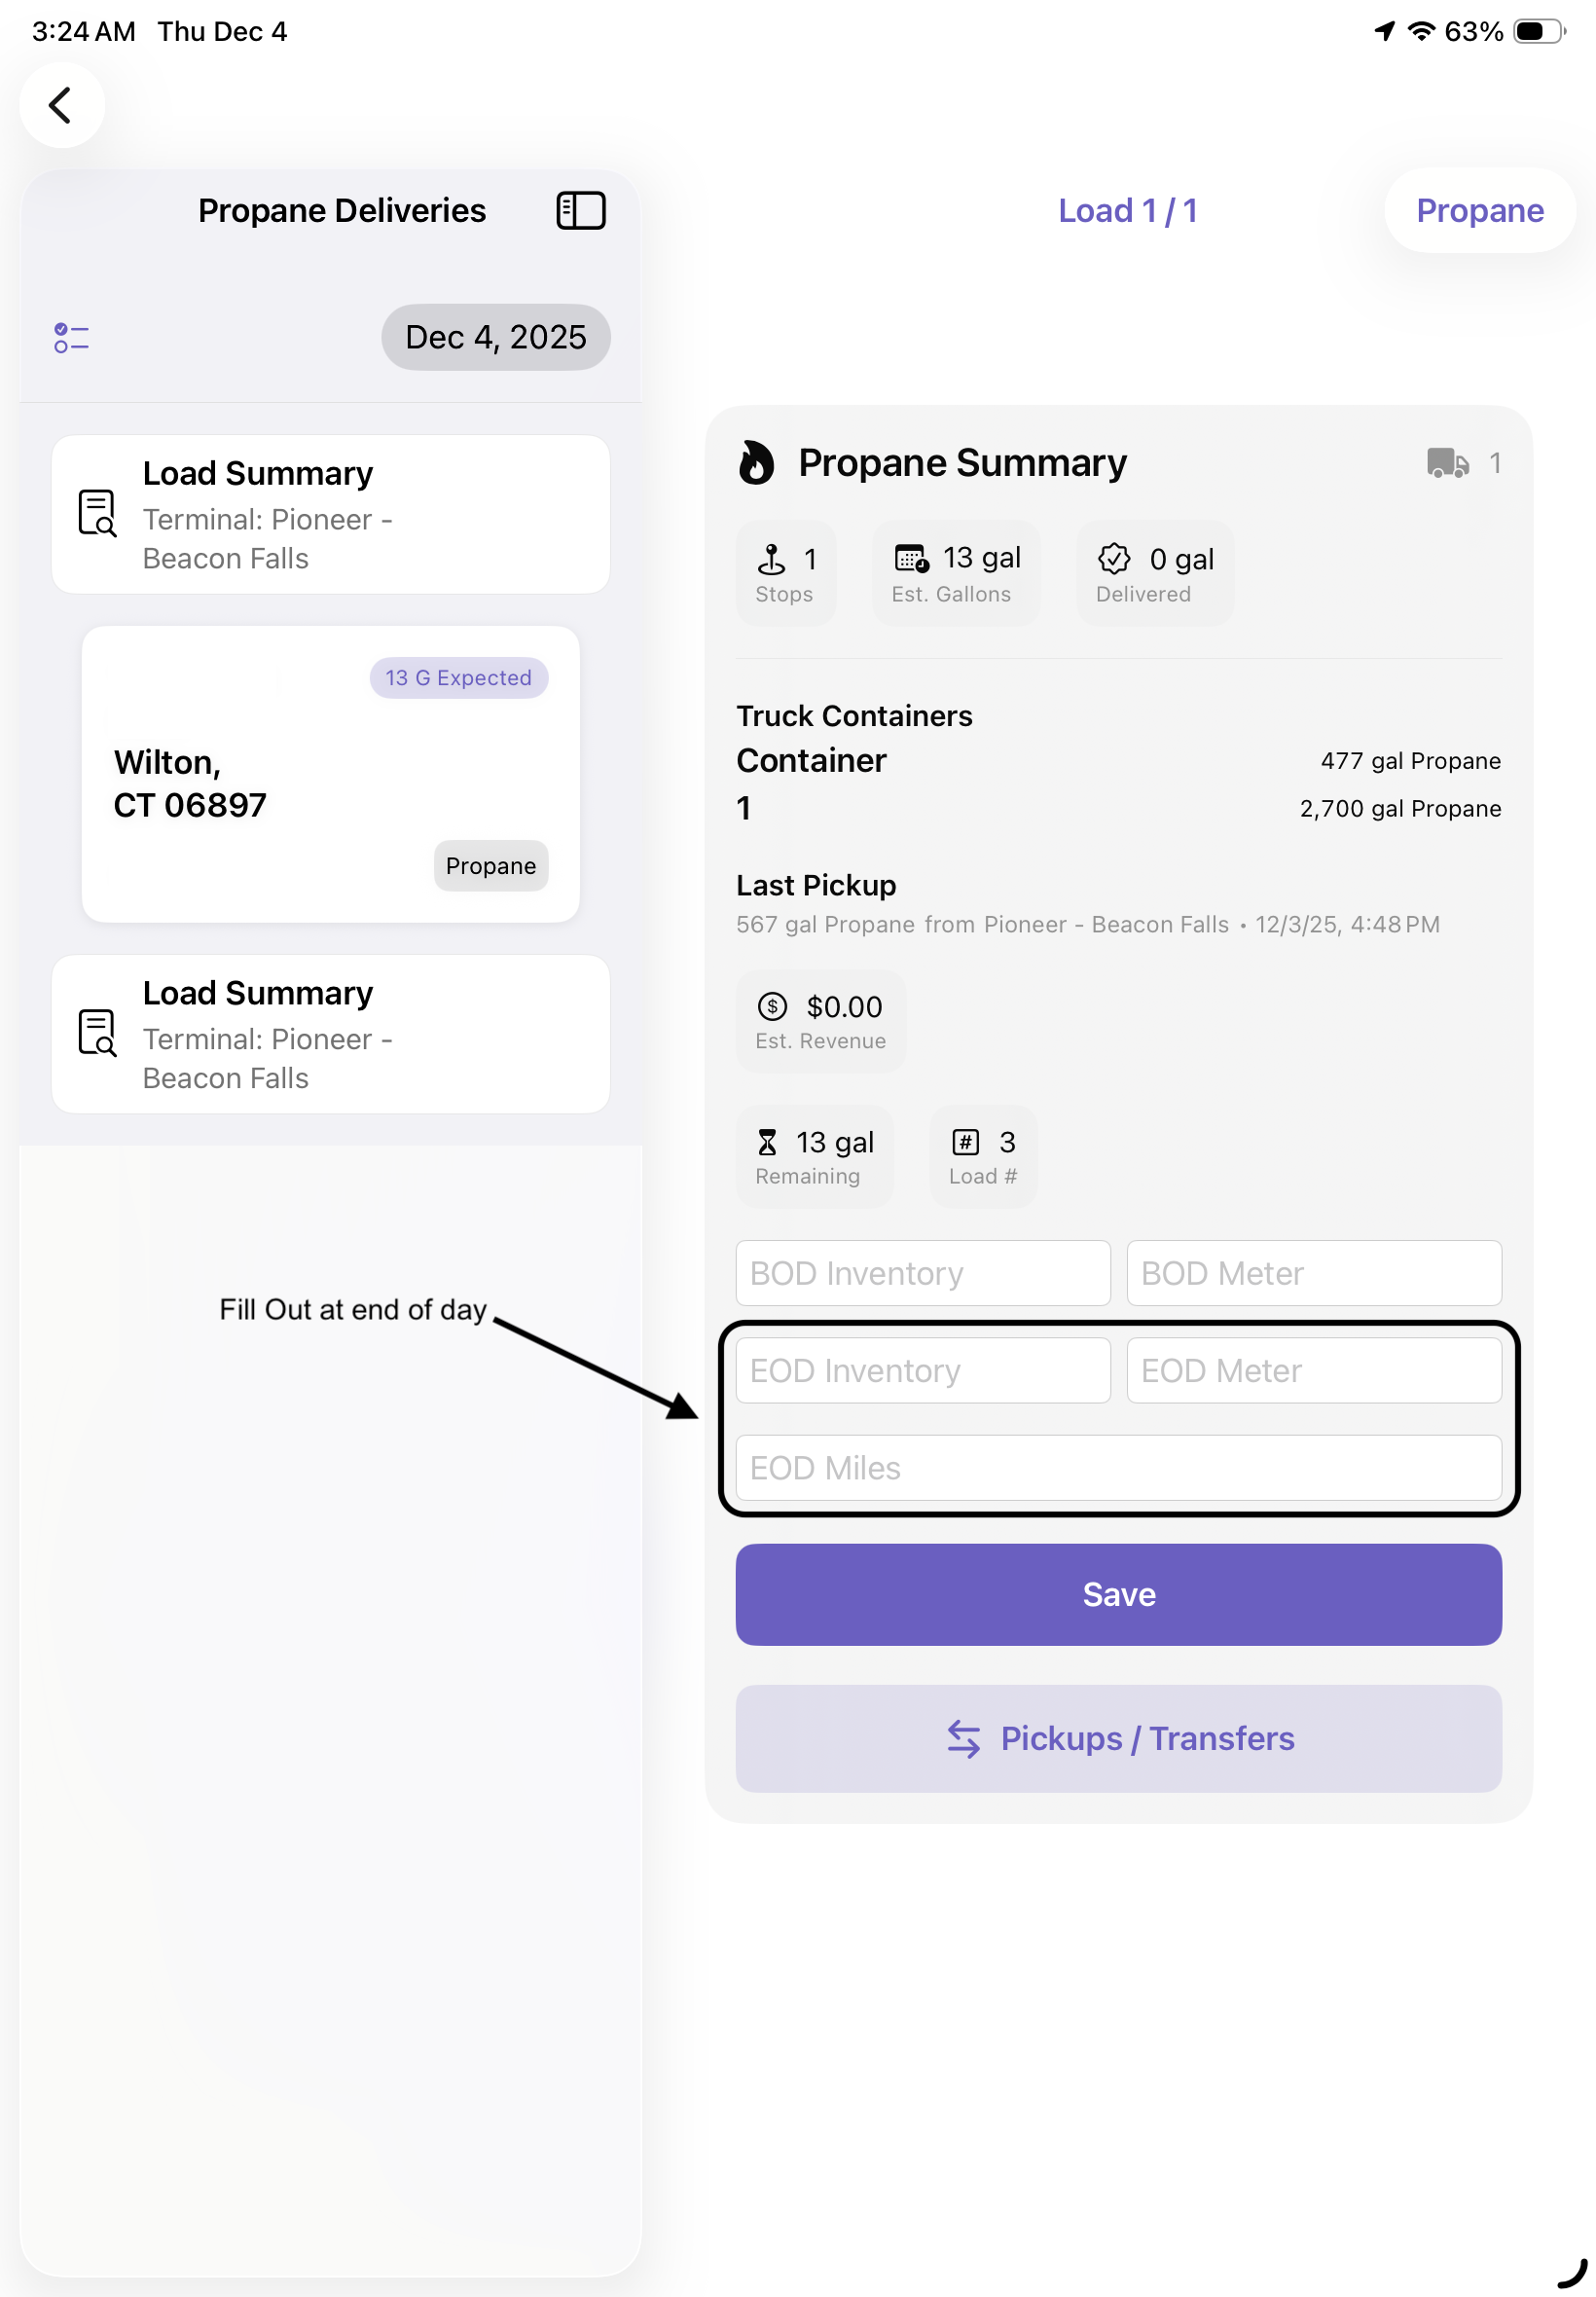
At the end of the day, update the EOD Inventory, EOD Meter and EOD Miles for both Fuel Types, if applicable

-
Following that, return to each terminal to return any left over fuel, then Tap Pickups/Transfer, select the source the fuel is coming from (Vehicle), The Source Container, The Destination Type (Terminal), The Destination Container and finally, record how many gallons are being transferred. These steps can also be followed if doing a transfer between other vehicles if approved

Steps to Begin a Load:
- Tap the Fuel card on the Home screen
- Select the active load from the top navigation bar
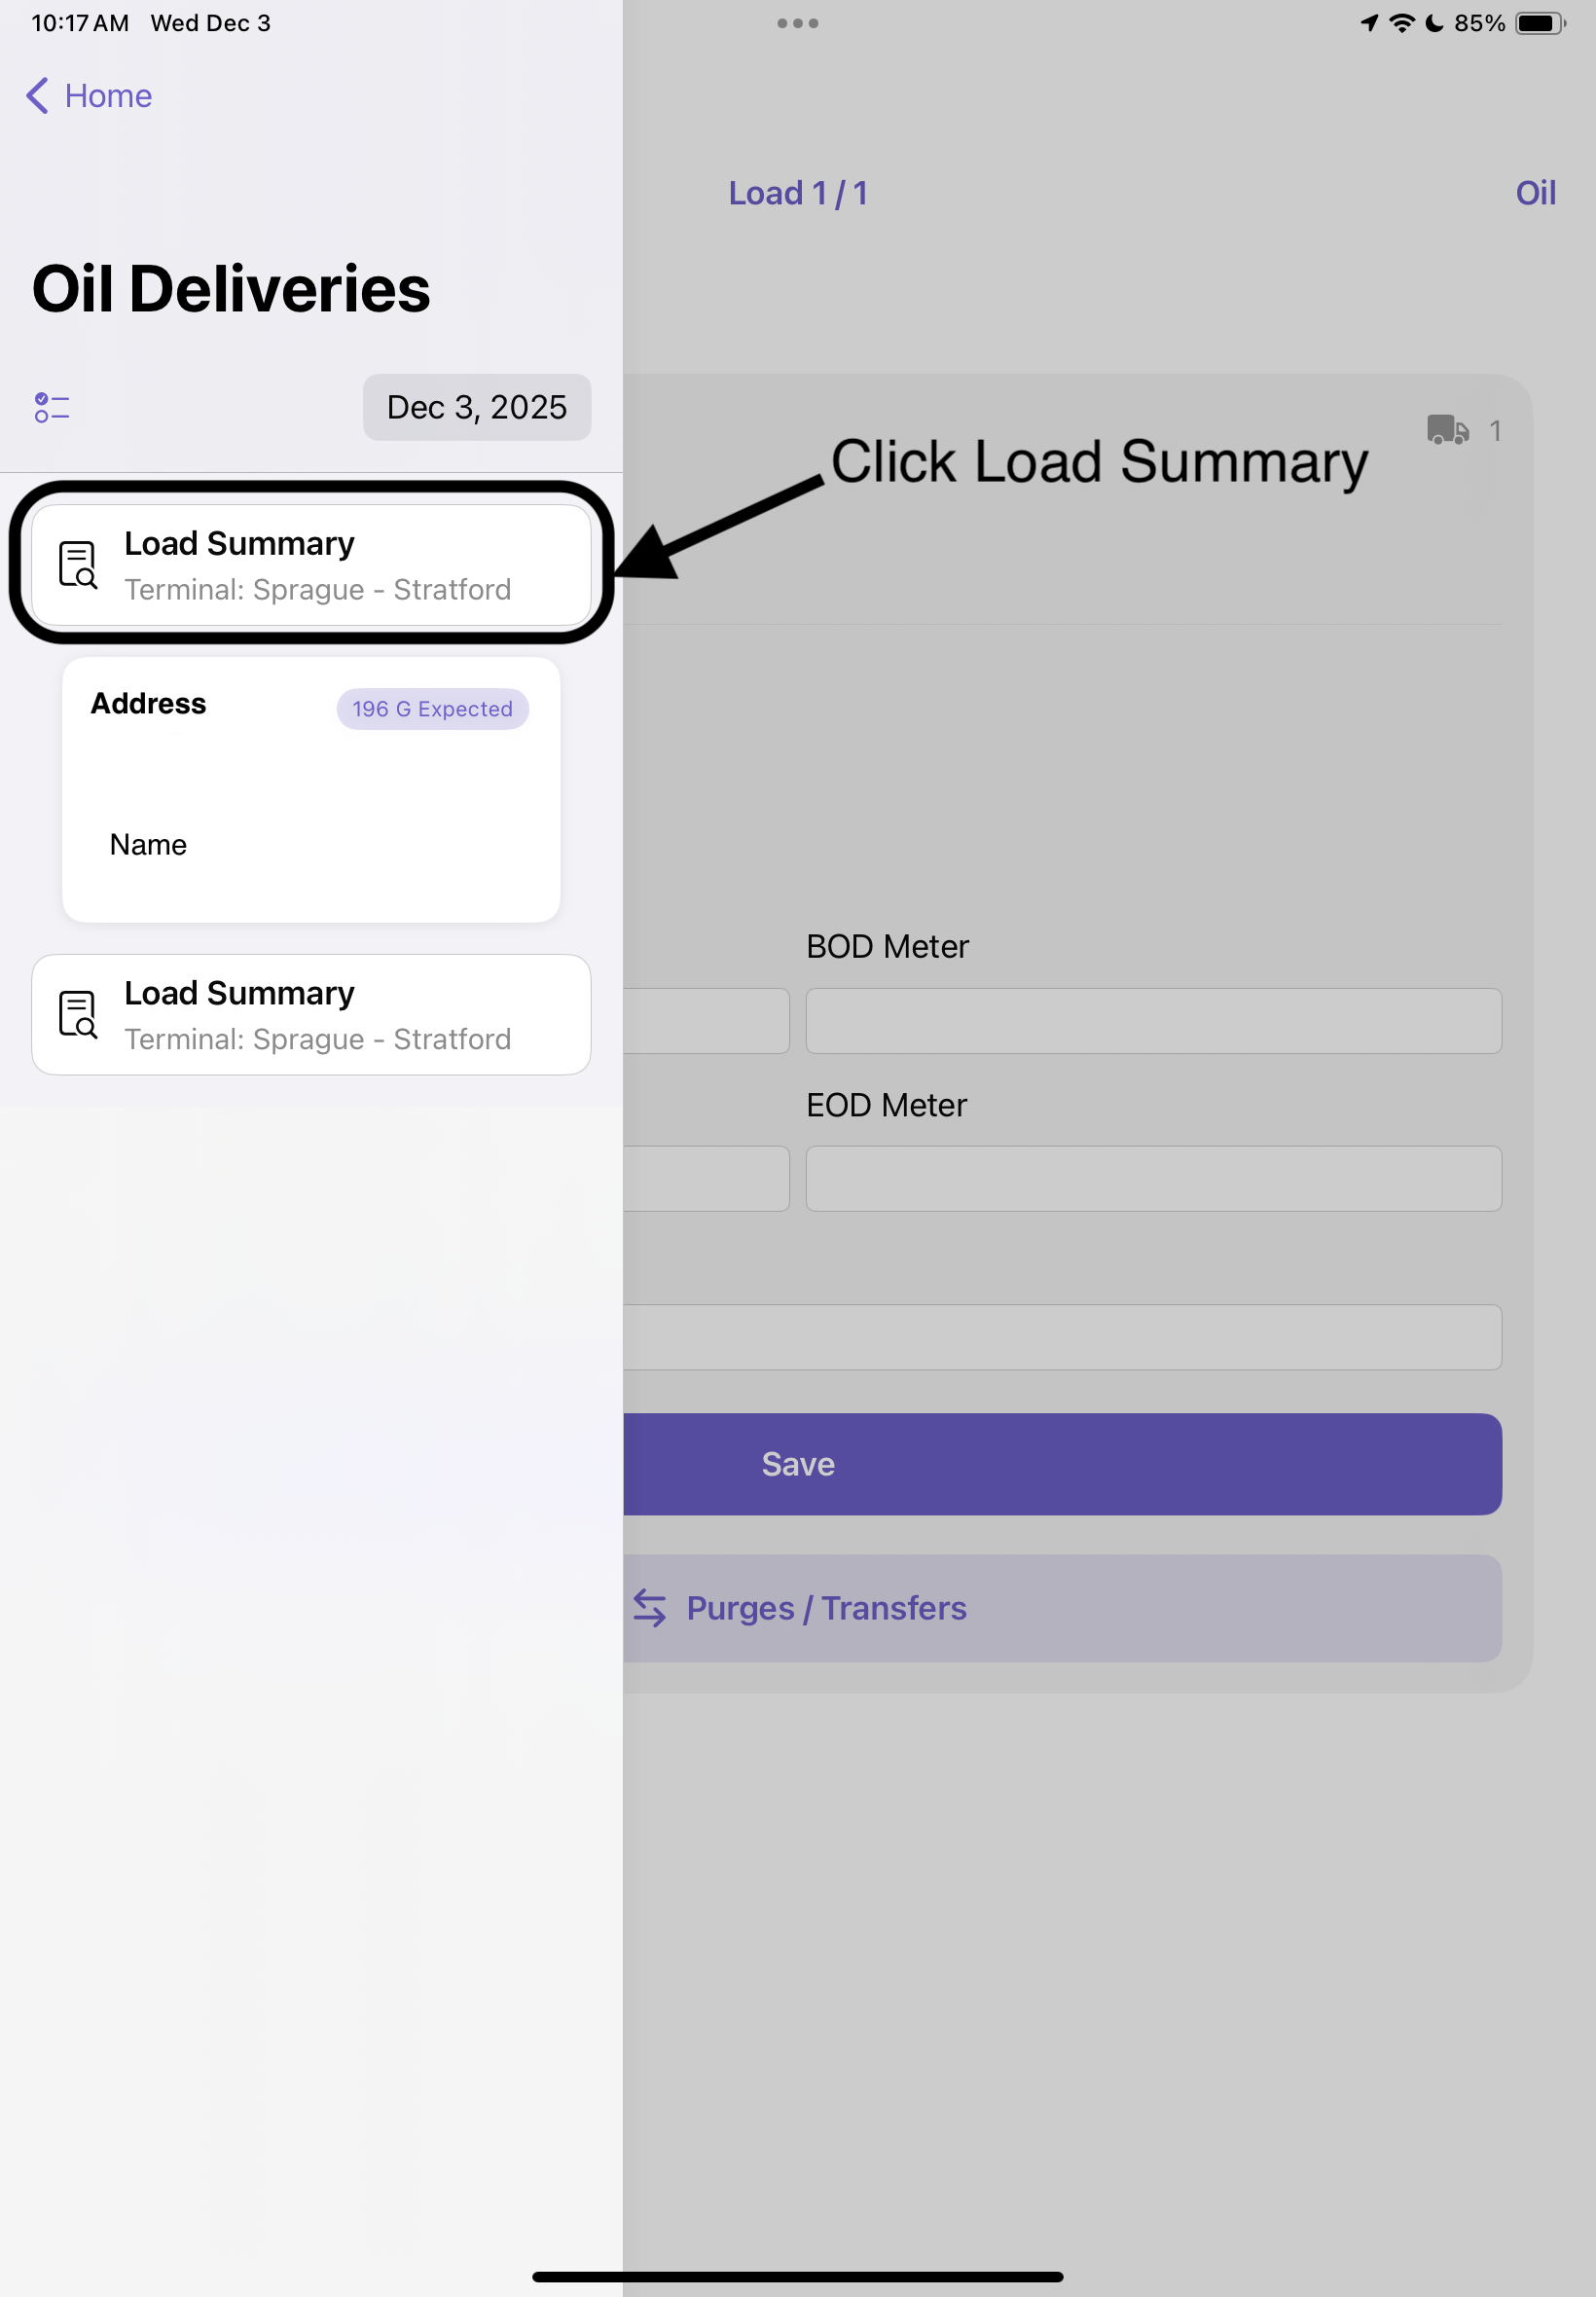
- Complete any items in the Pre-Trip Checklist if displayed
- Tap a delivery stop to open the Delivery Card screen
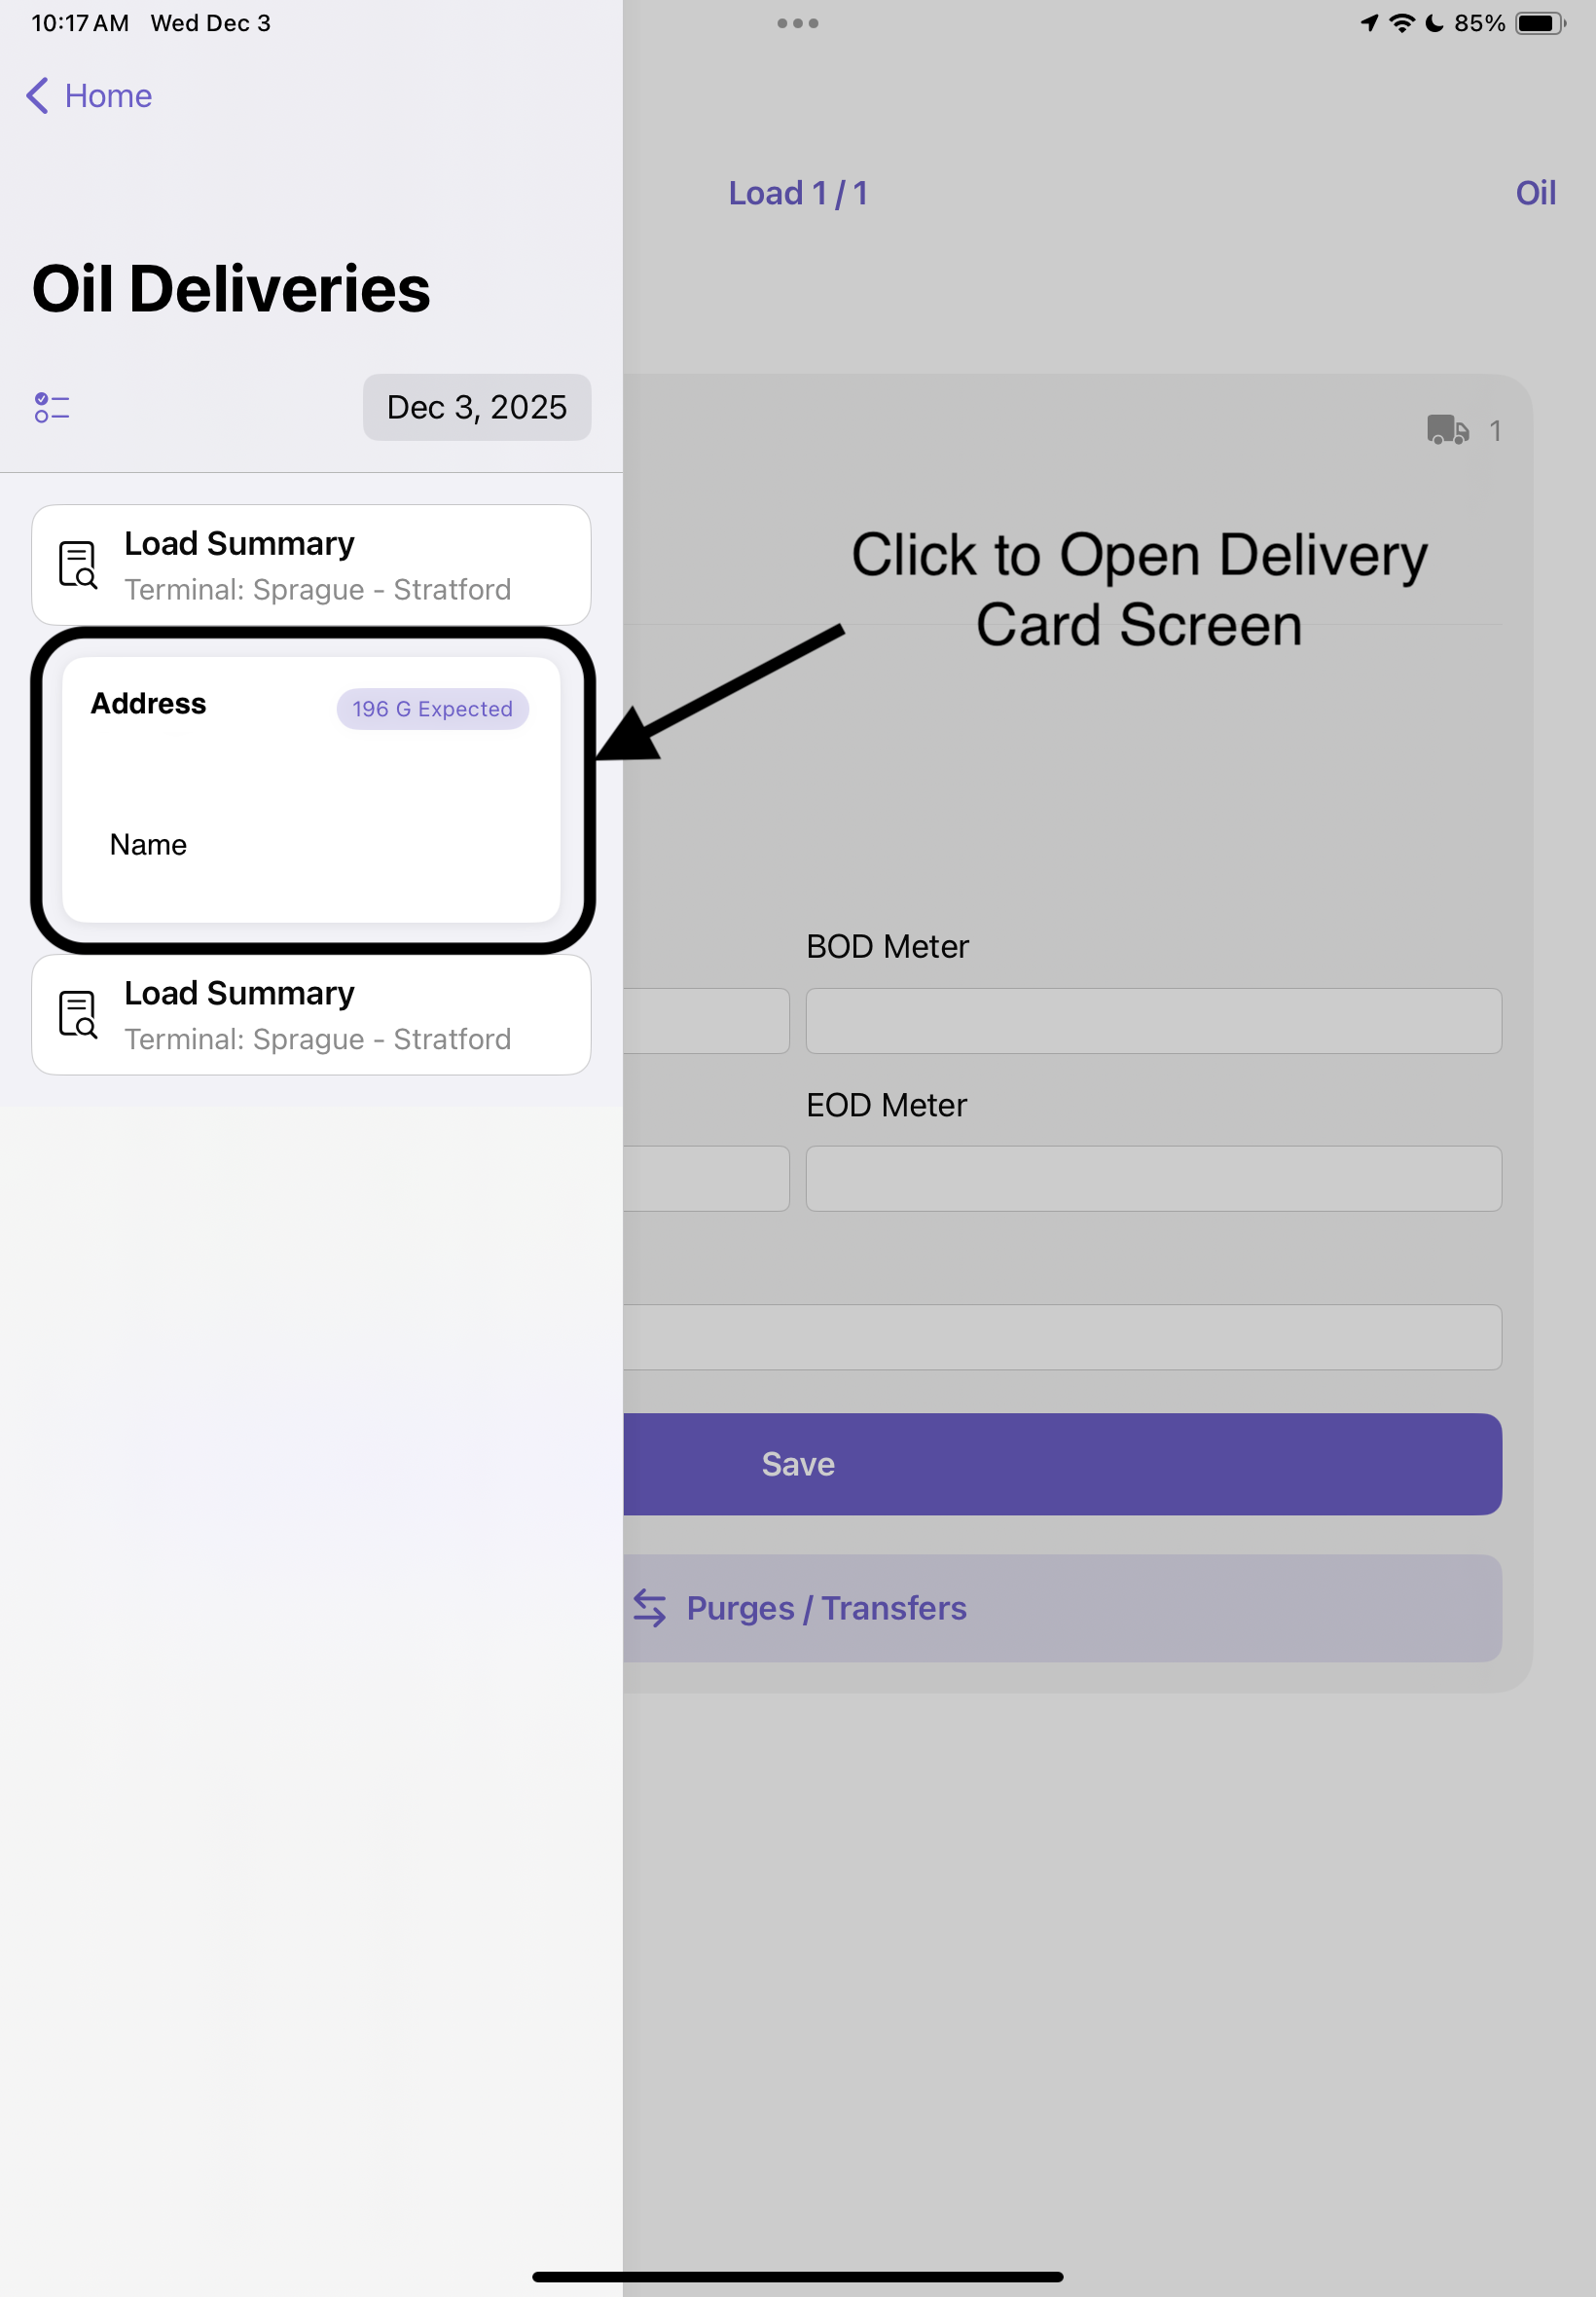
Accessing Load Summary on Webpage
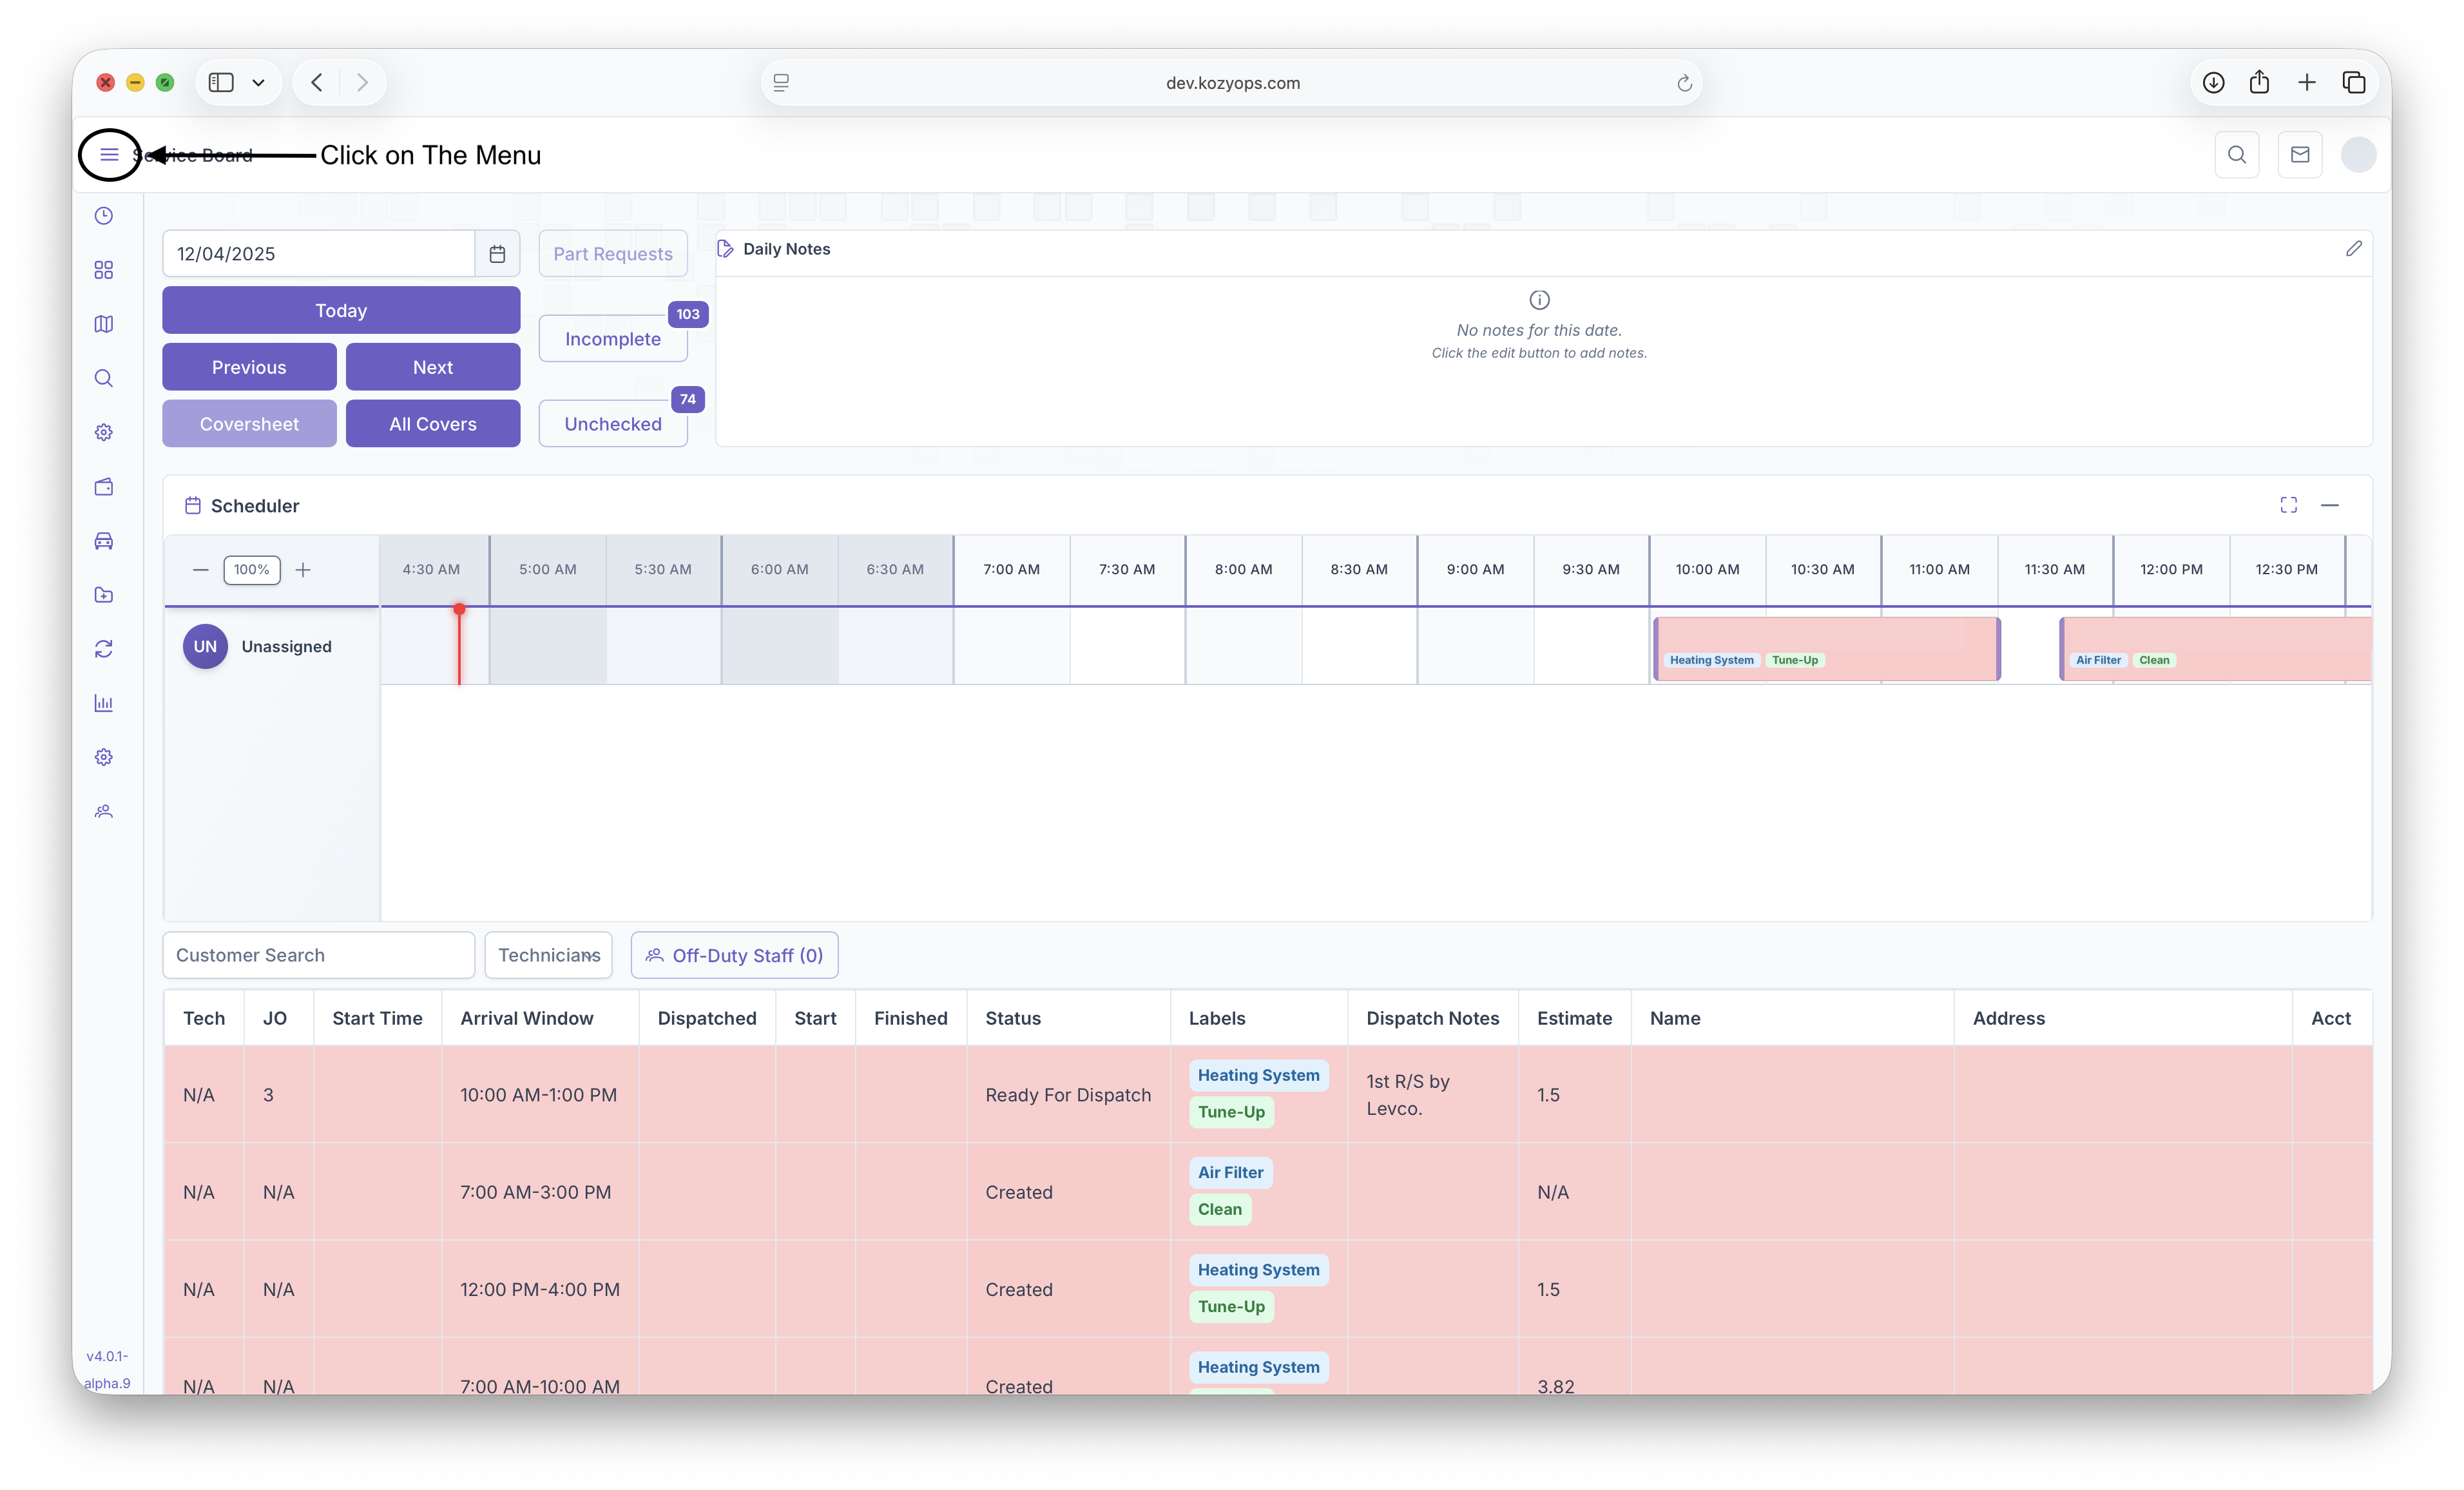
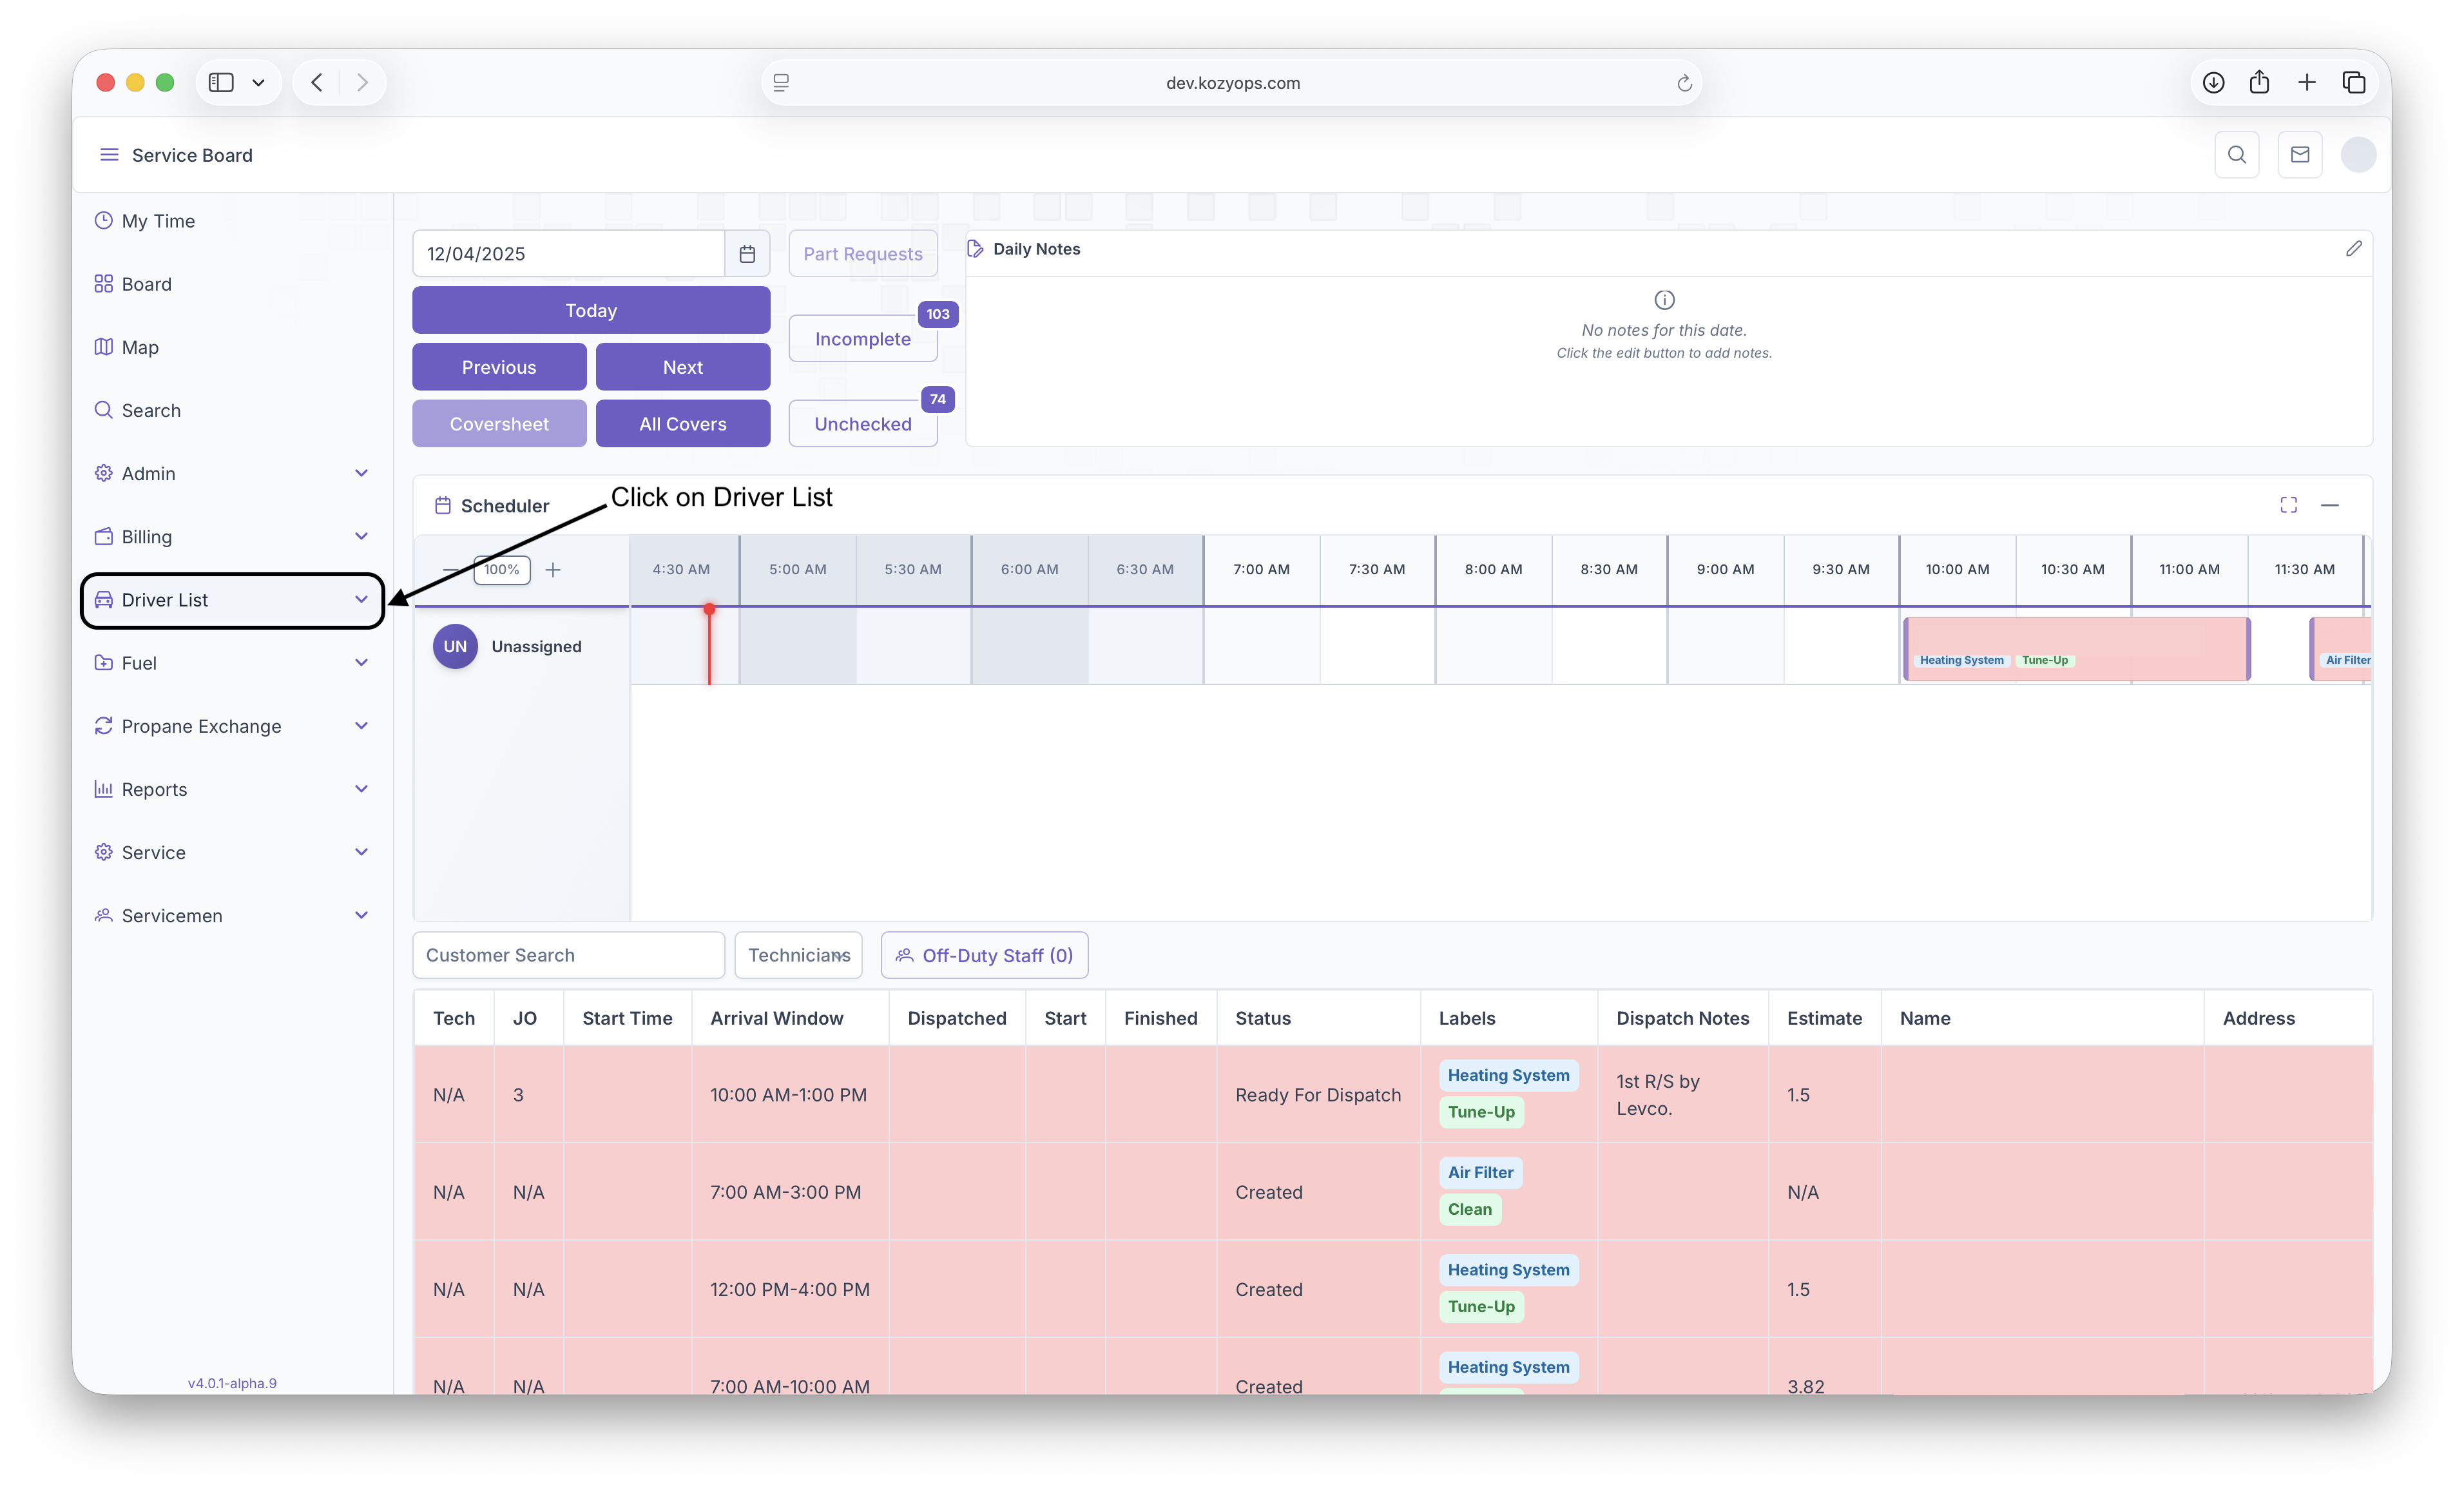
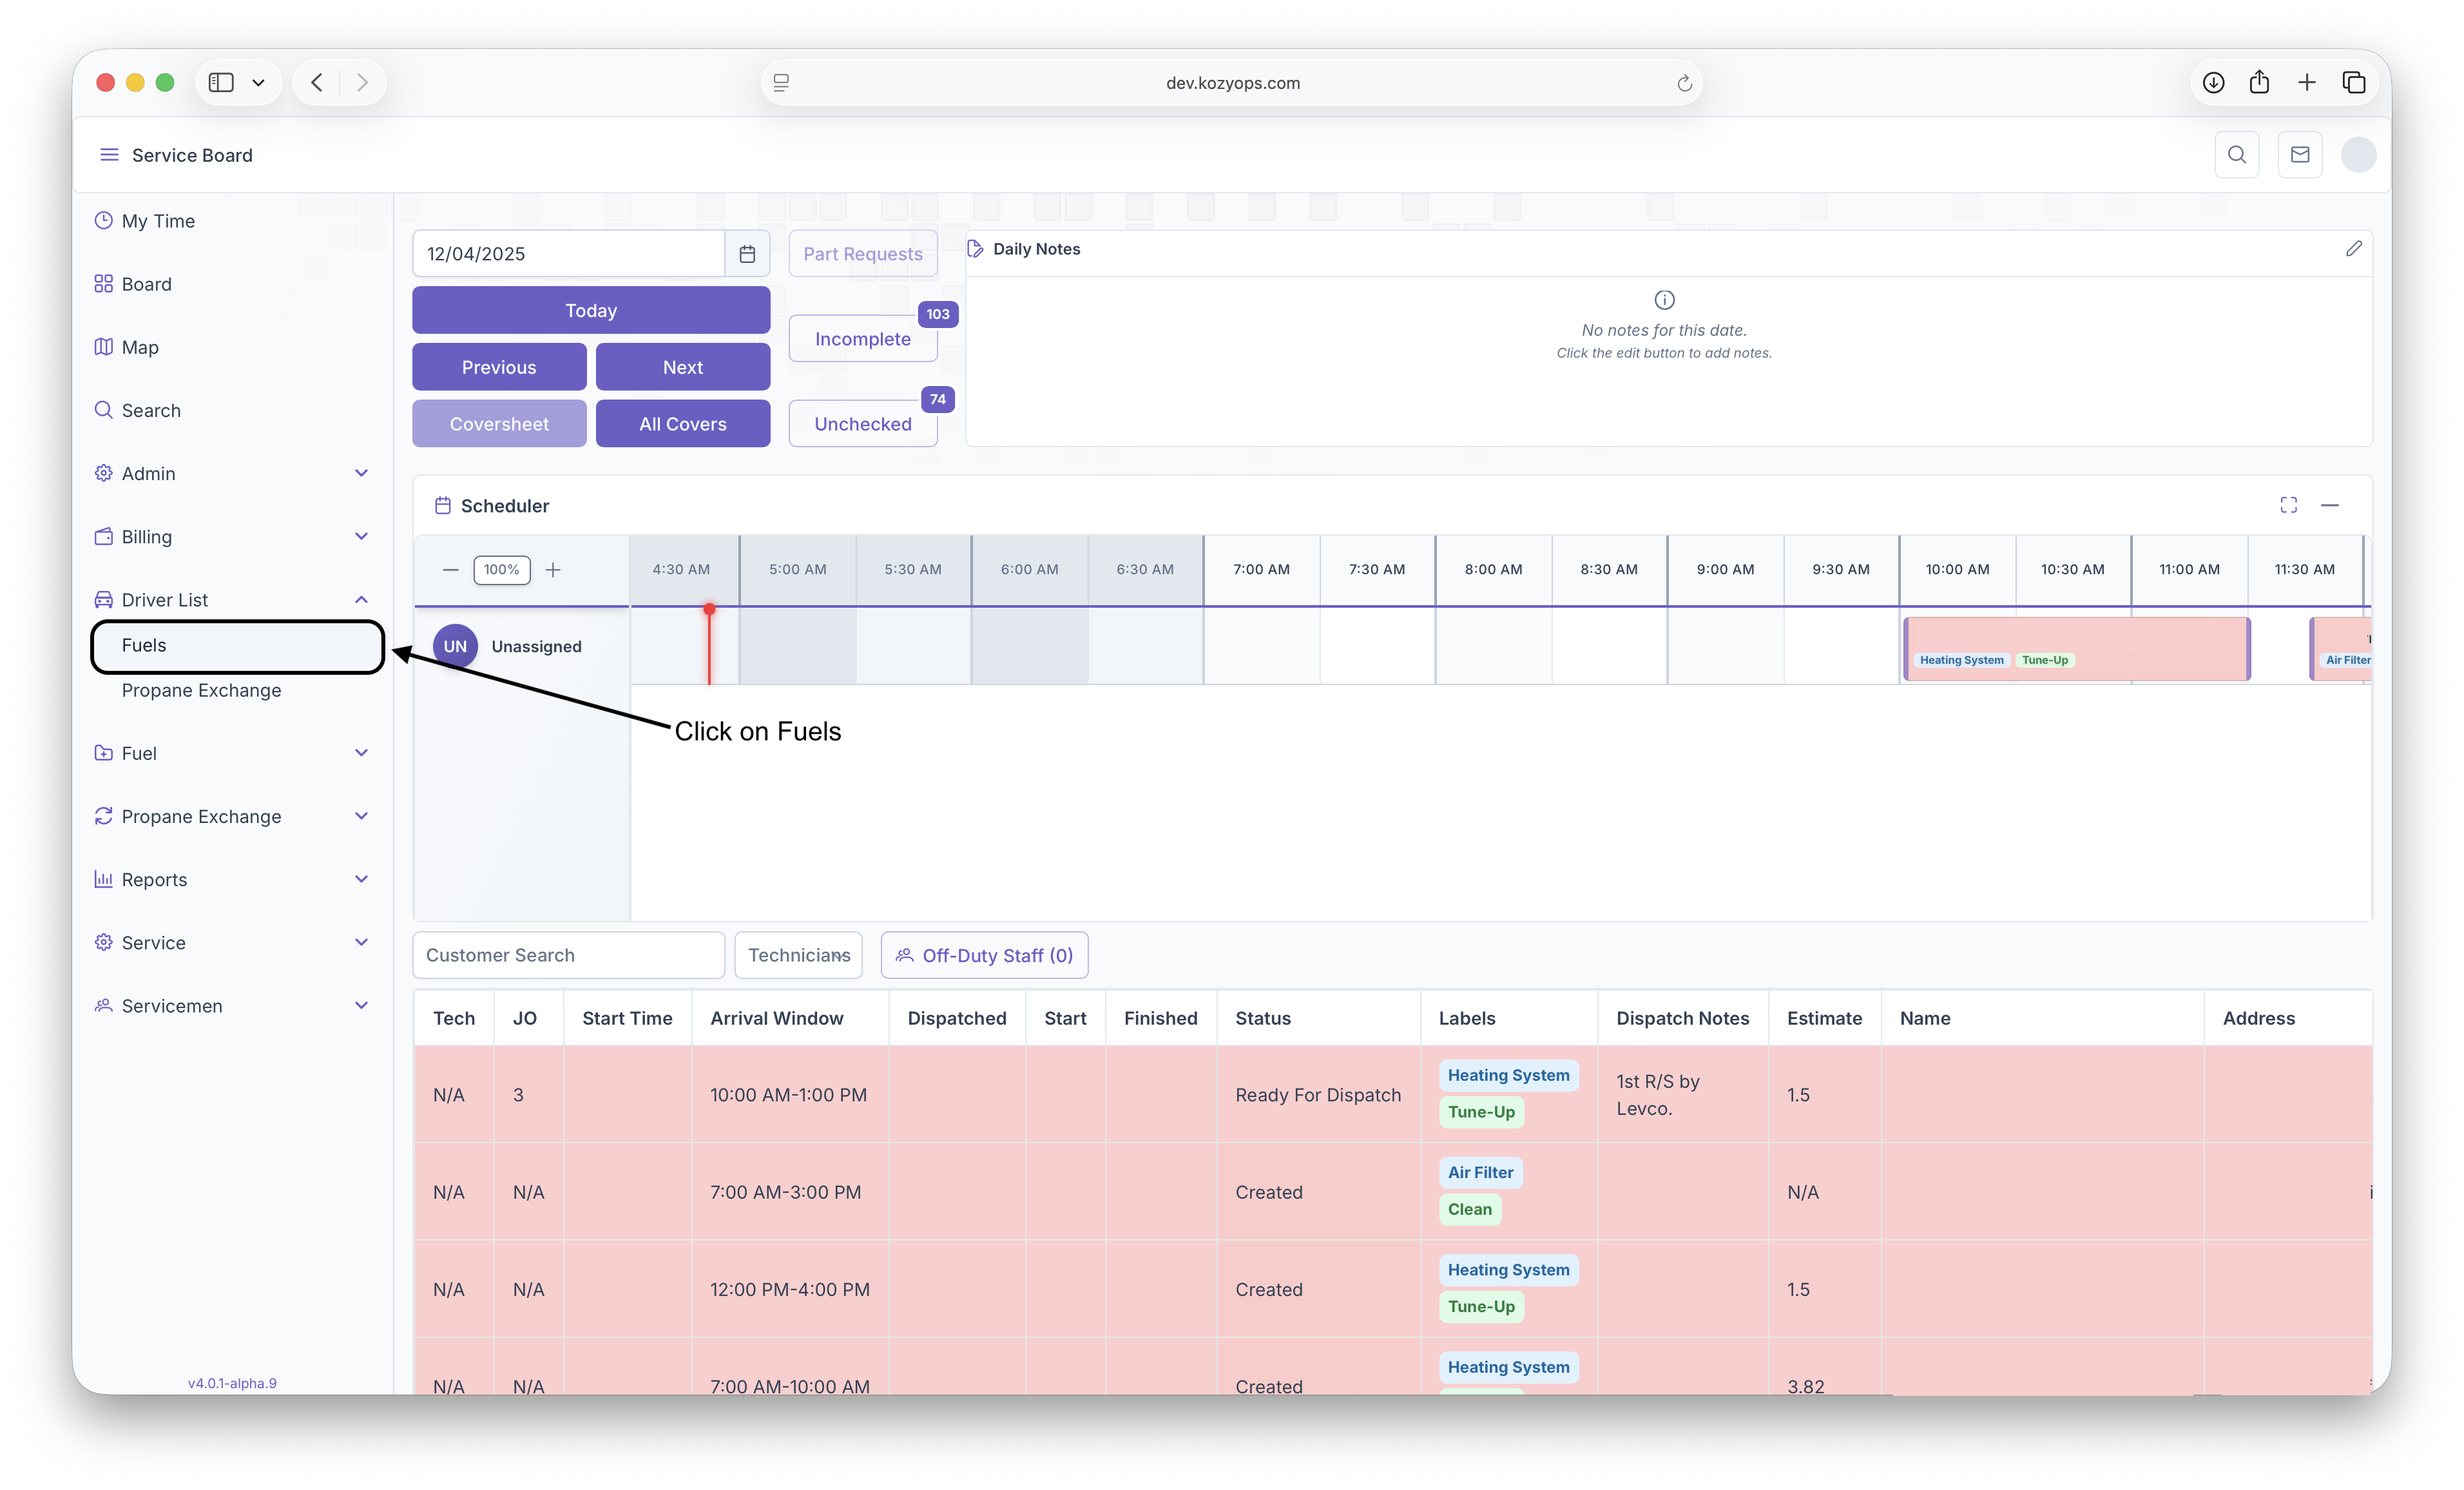
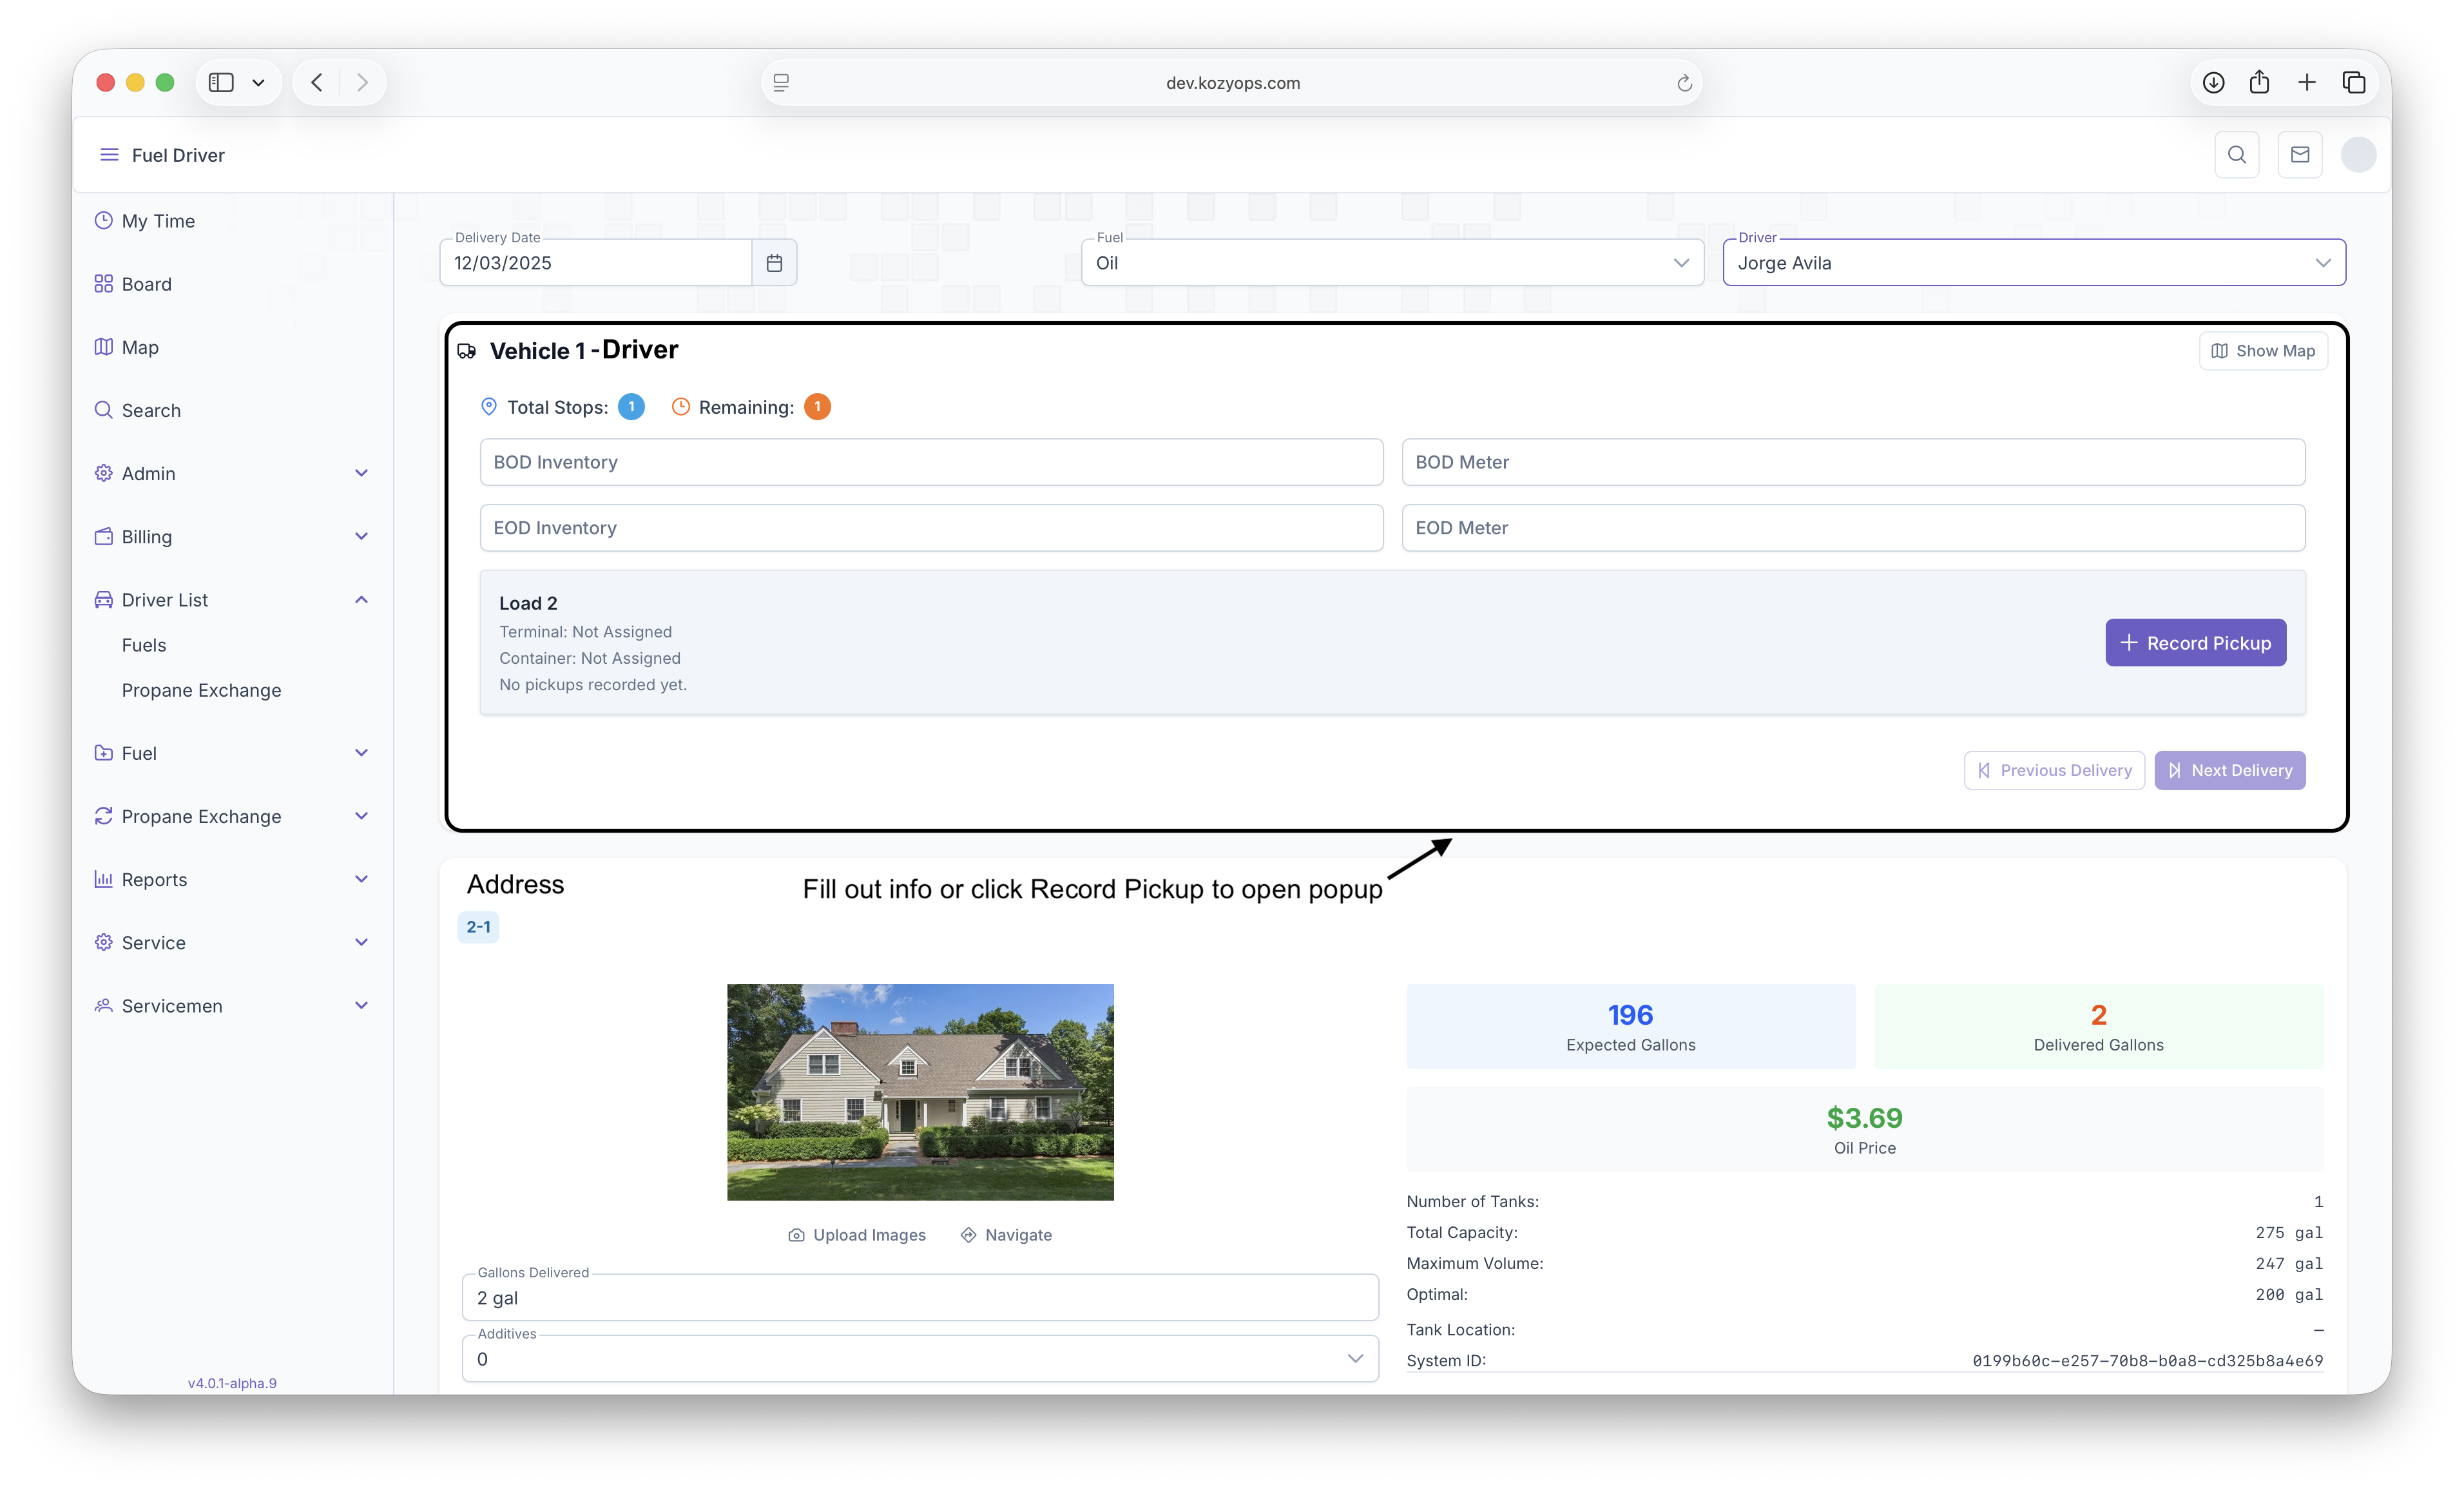
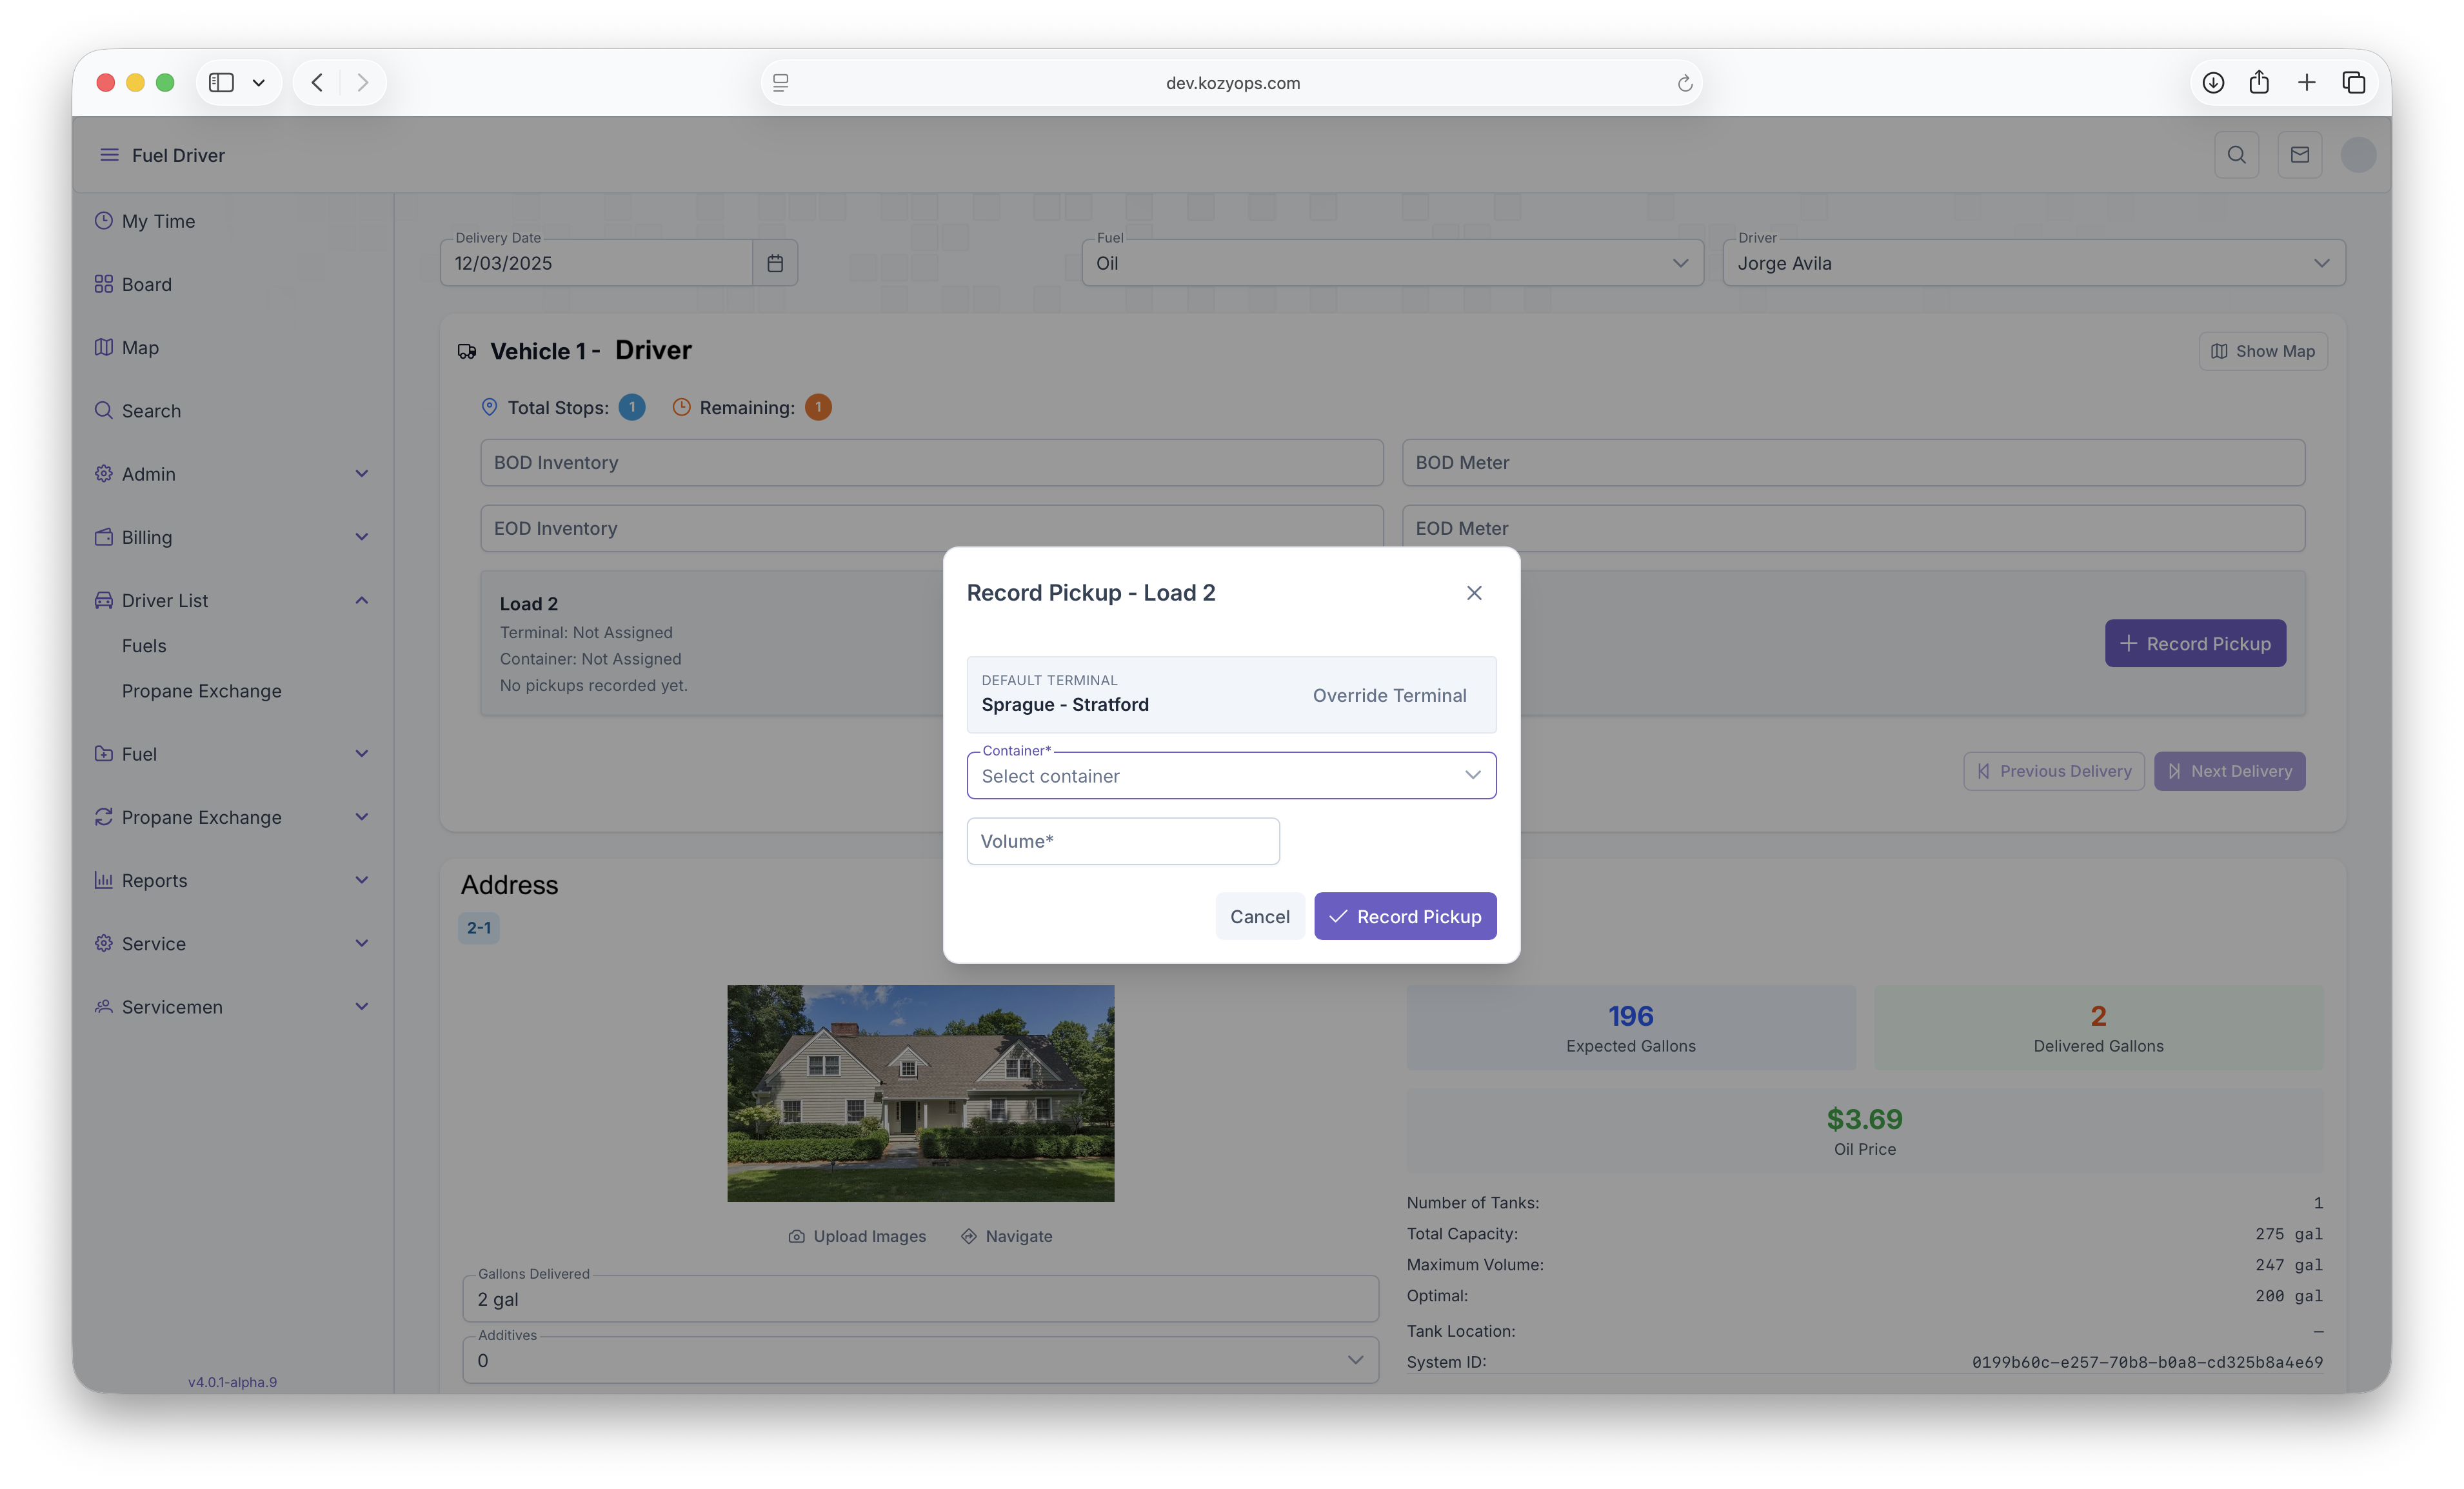
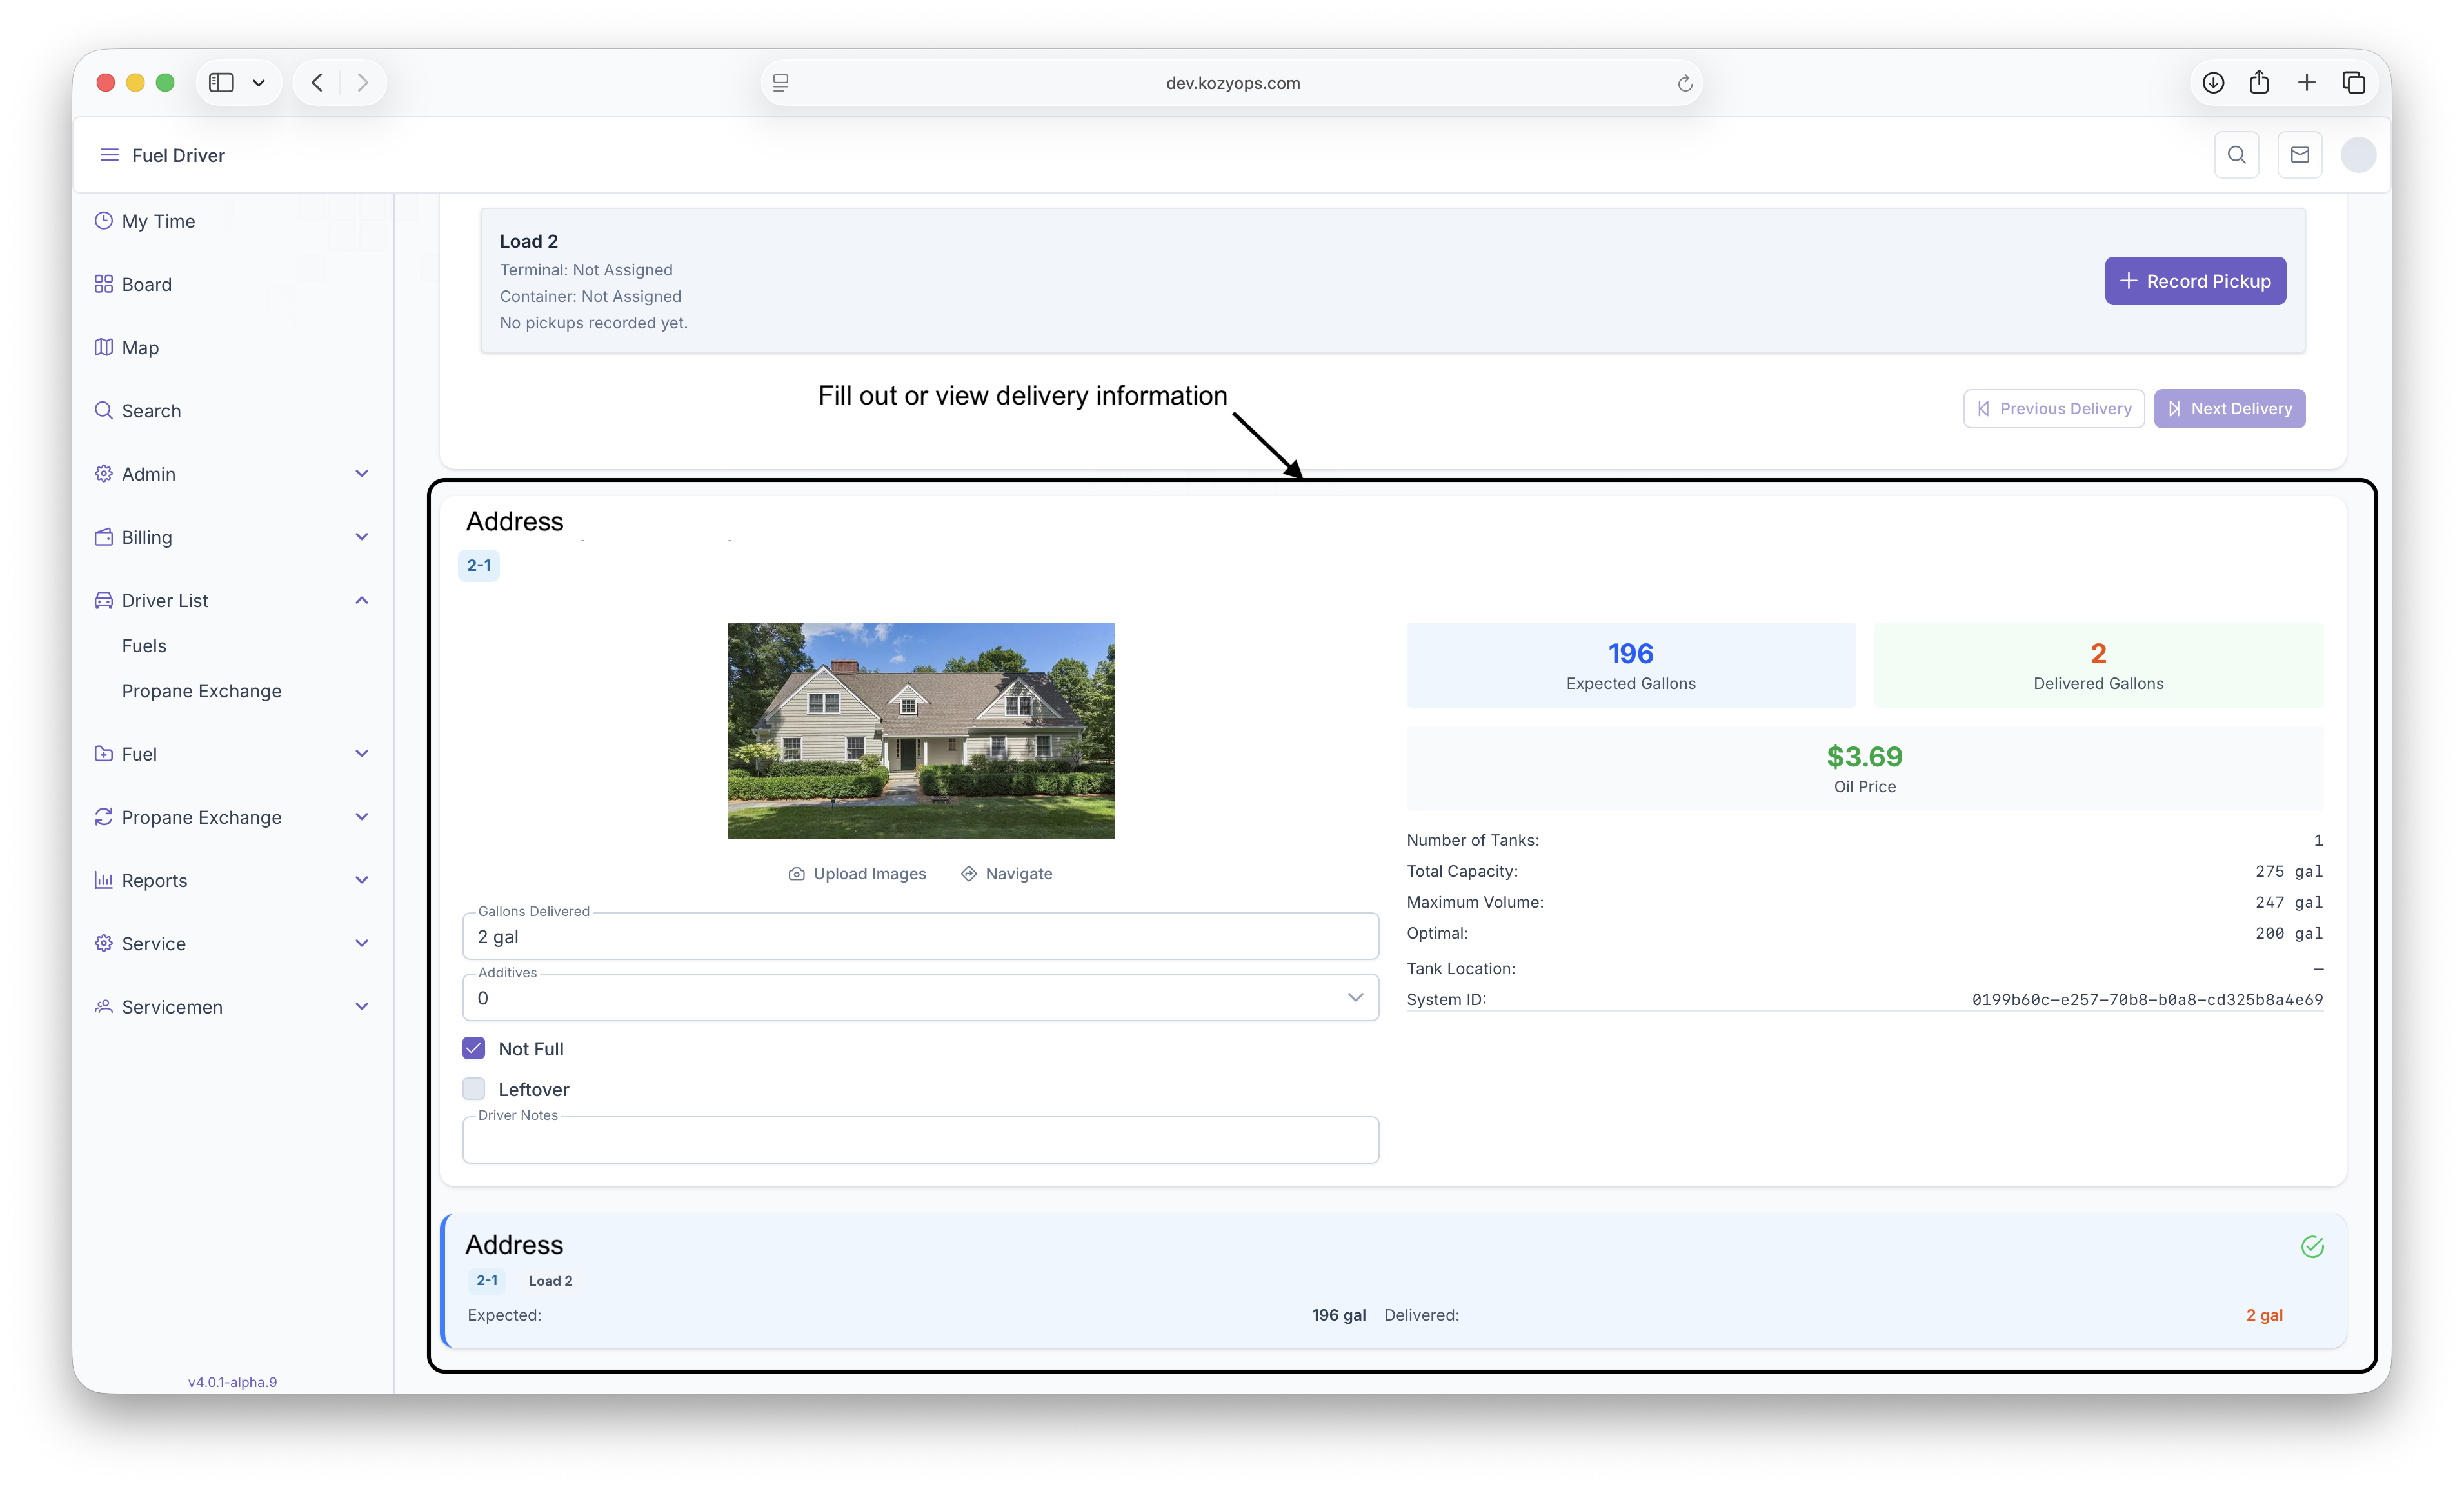
If for any reason the load summary isn't accessable on mobile, or if things need to be written out or just a preference for doing it on the website, here's how to acccess the load summary on the webpage. You can also record pickups and fill out how much was delivered, BOD and EOD Inventory, Meters and Milage
-
Click on the menu button

-
Click The Driver List Button

-
Click The Fuels Button

-
Fill out BOD or EOD info or click on Record Pickup

-
Fill out information and click on record pickup

-
fill out any delivery information

Delivery View
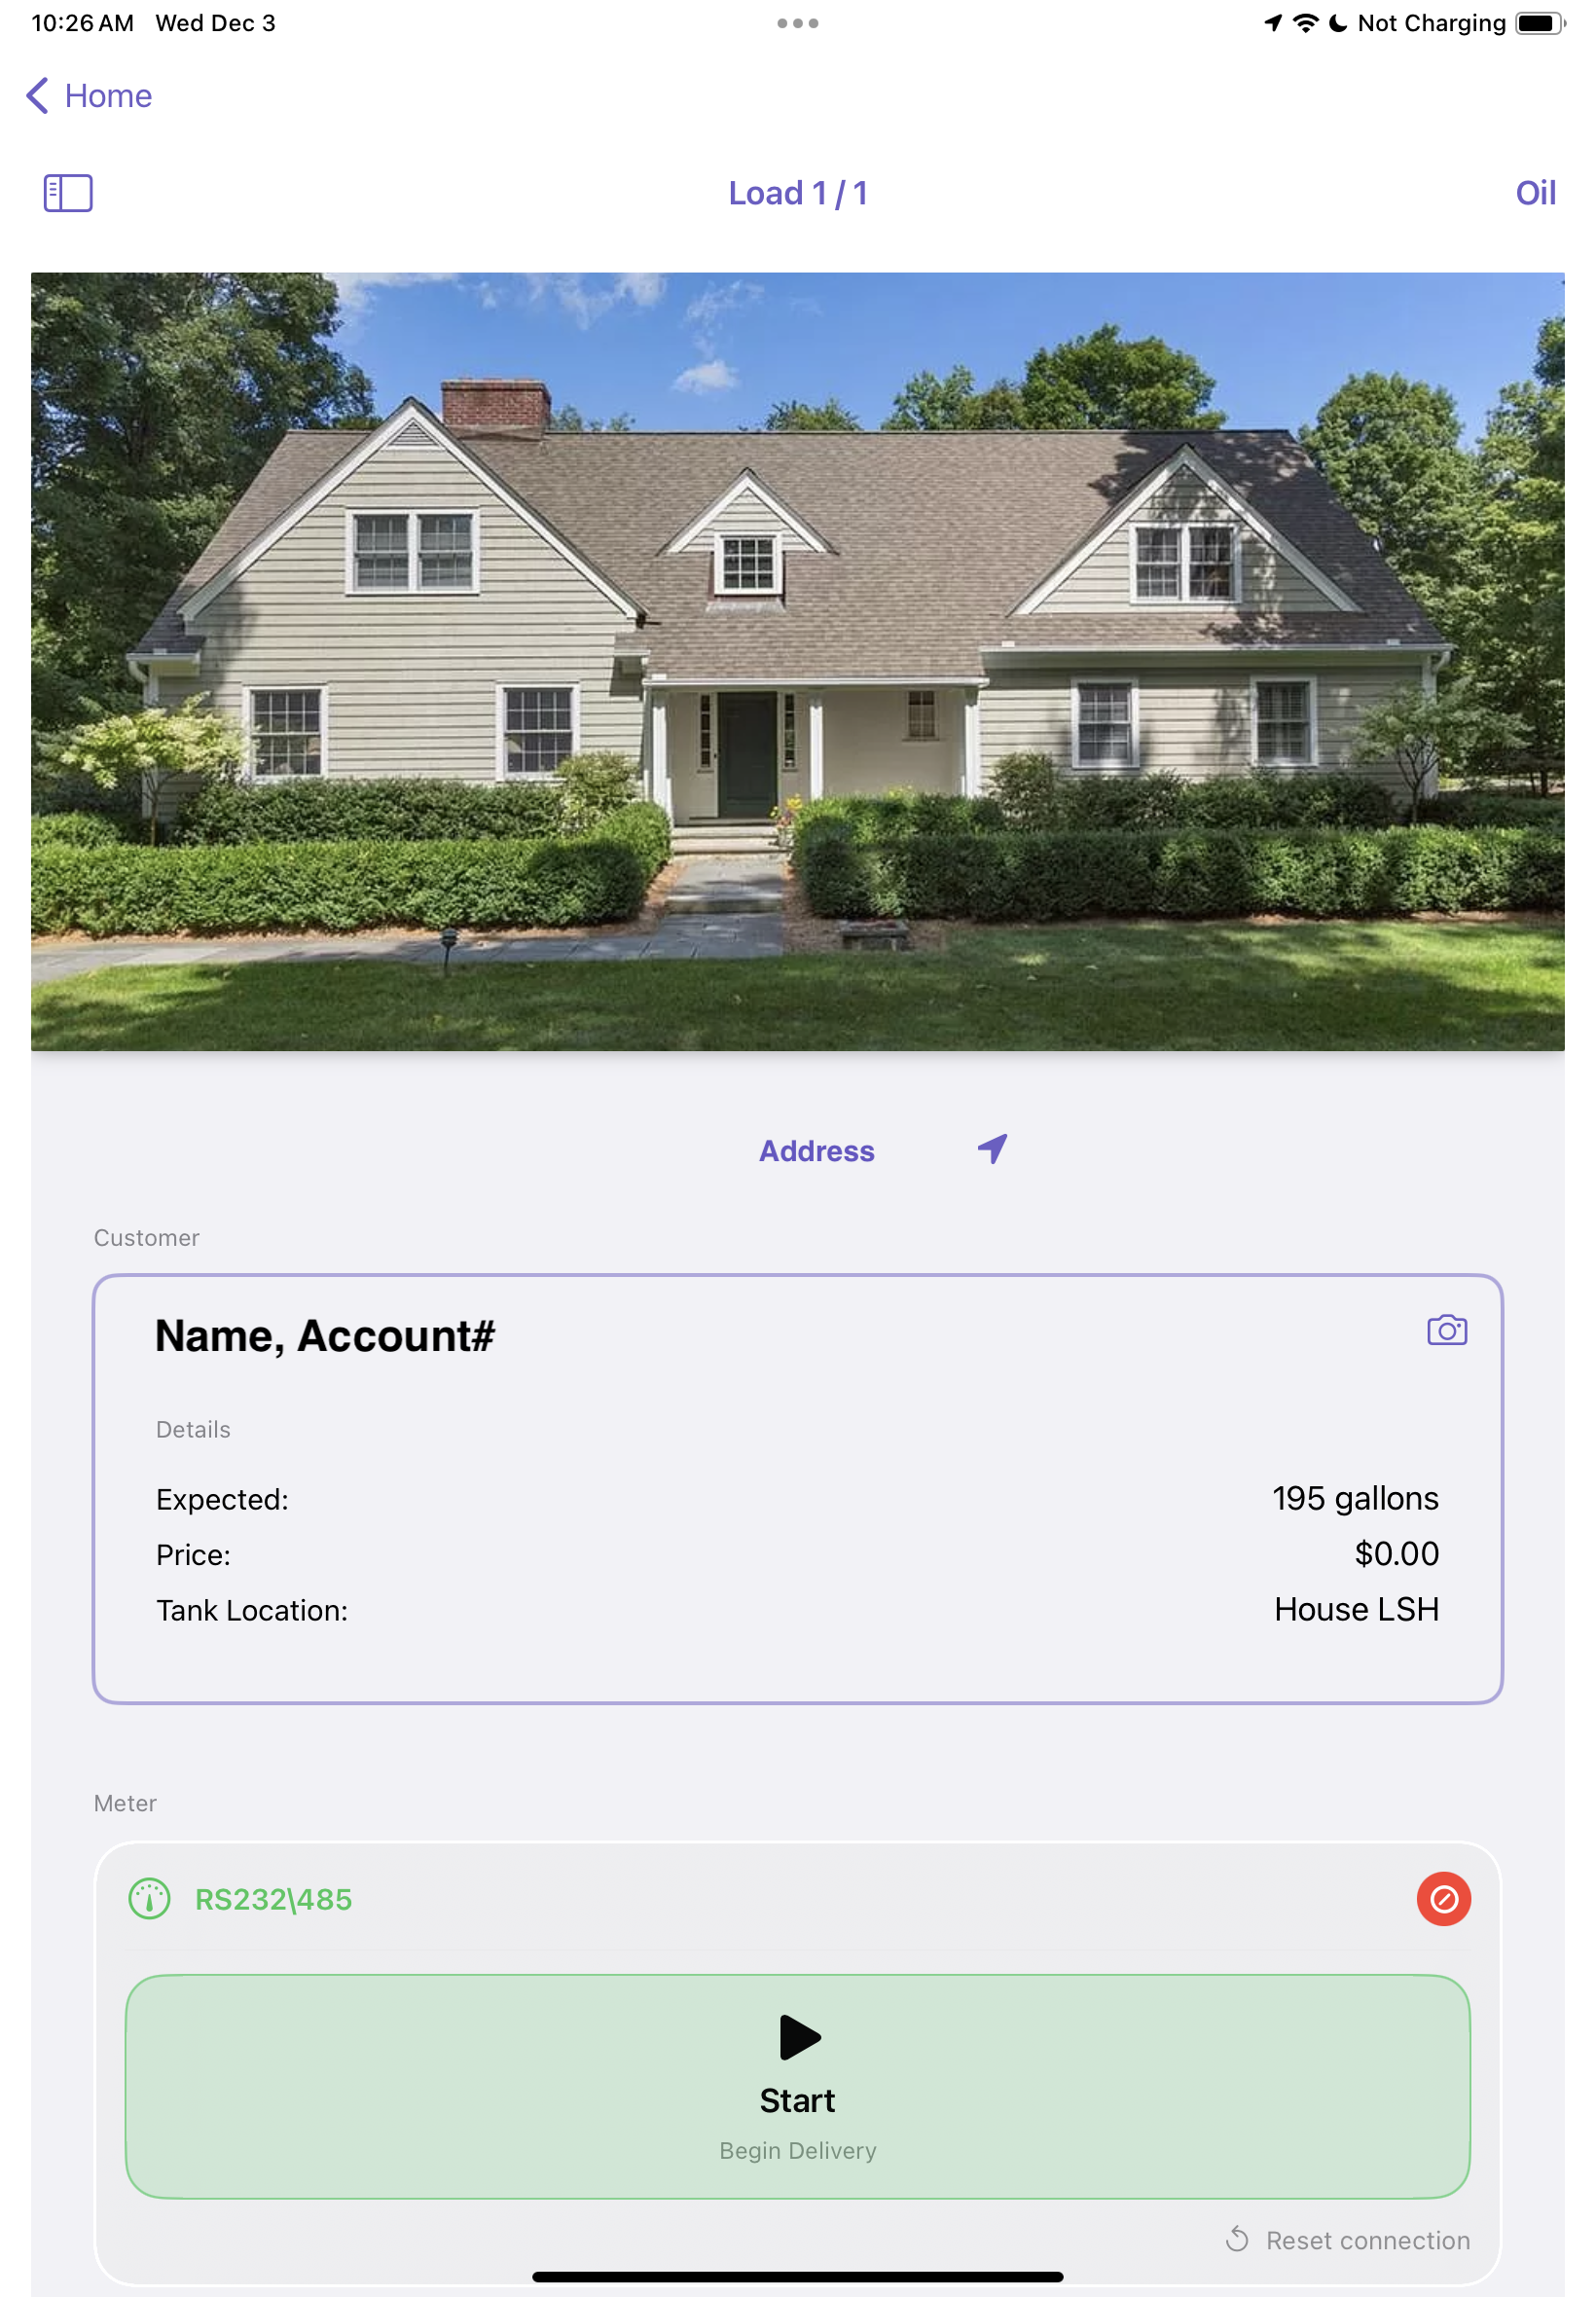
The Delivery Card is the central interface where drivers perform and record an individual delivery.
Sections Within the Delivery Card:
| Section | Purpose |
| Customer Information | Shows address, account number, and allows tapping to open maps |
| Ticket Notes | Displays any special instructions or warnings from dispatch |
| Meter Section | Used to connect to a Bluetooth fuel meter, start and end deliveries, and print tickets |
| Delivery Input Section | Allows manual entry of delivered gallons, additives, and flags (short or leftover) |
| Driver Notes | Optional section to record observations or issues encountered |
Performing a Delivery with a Meter
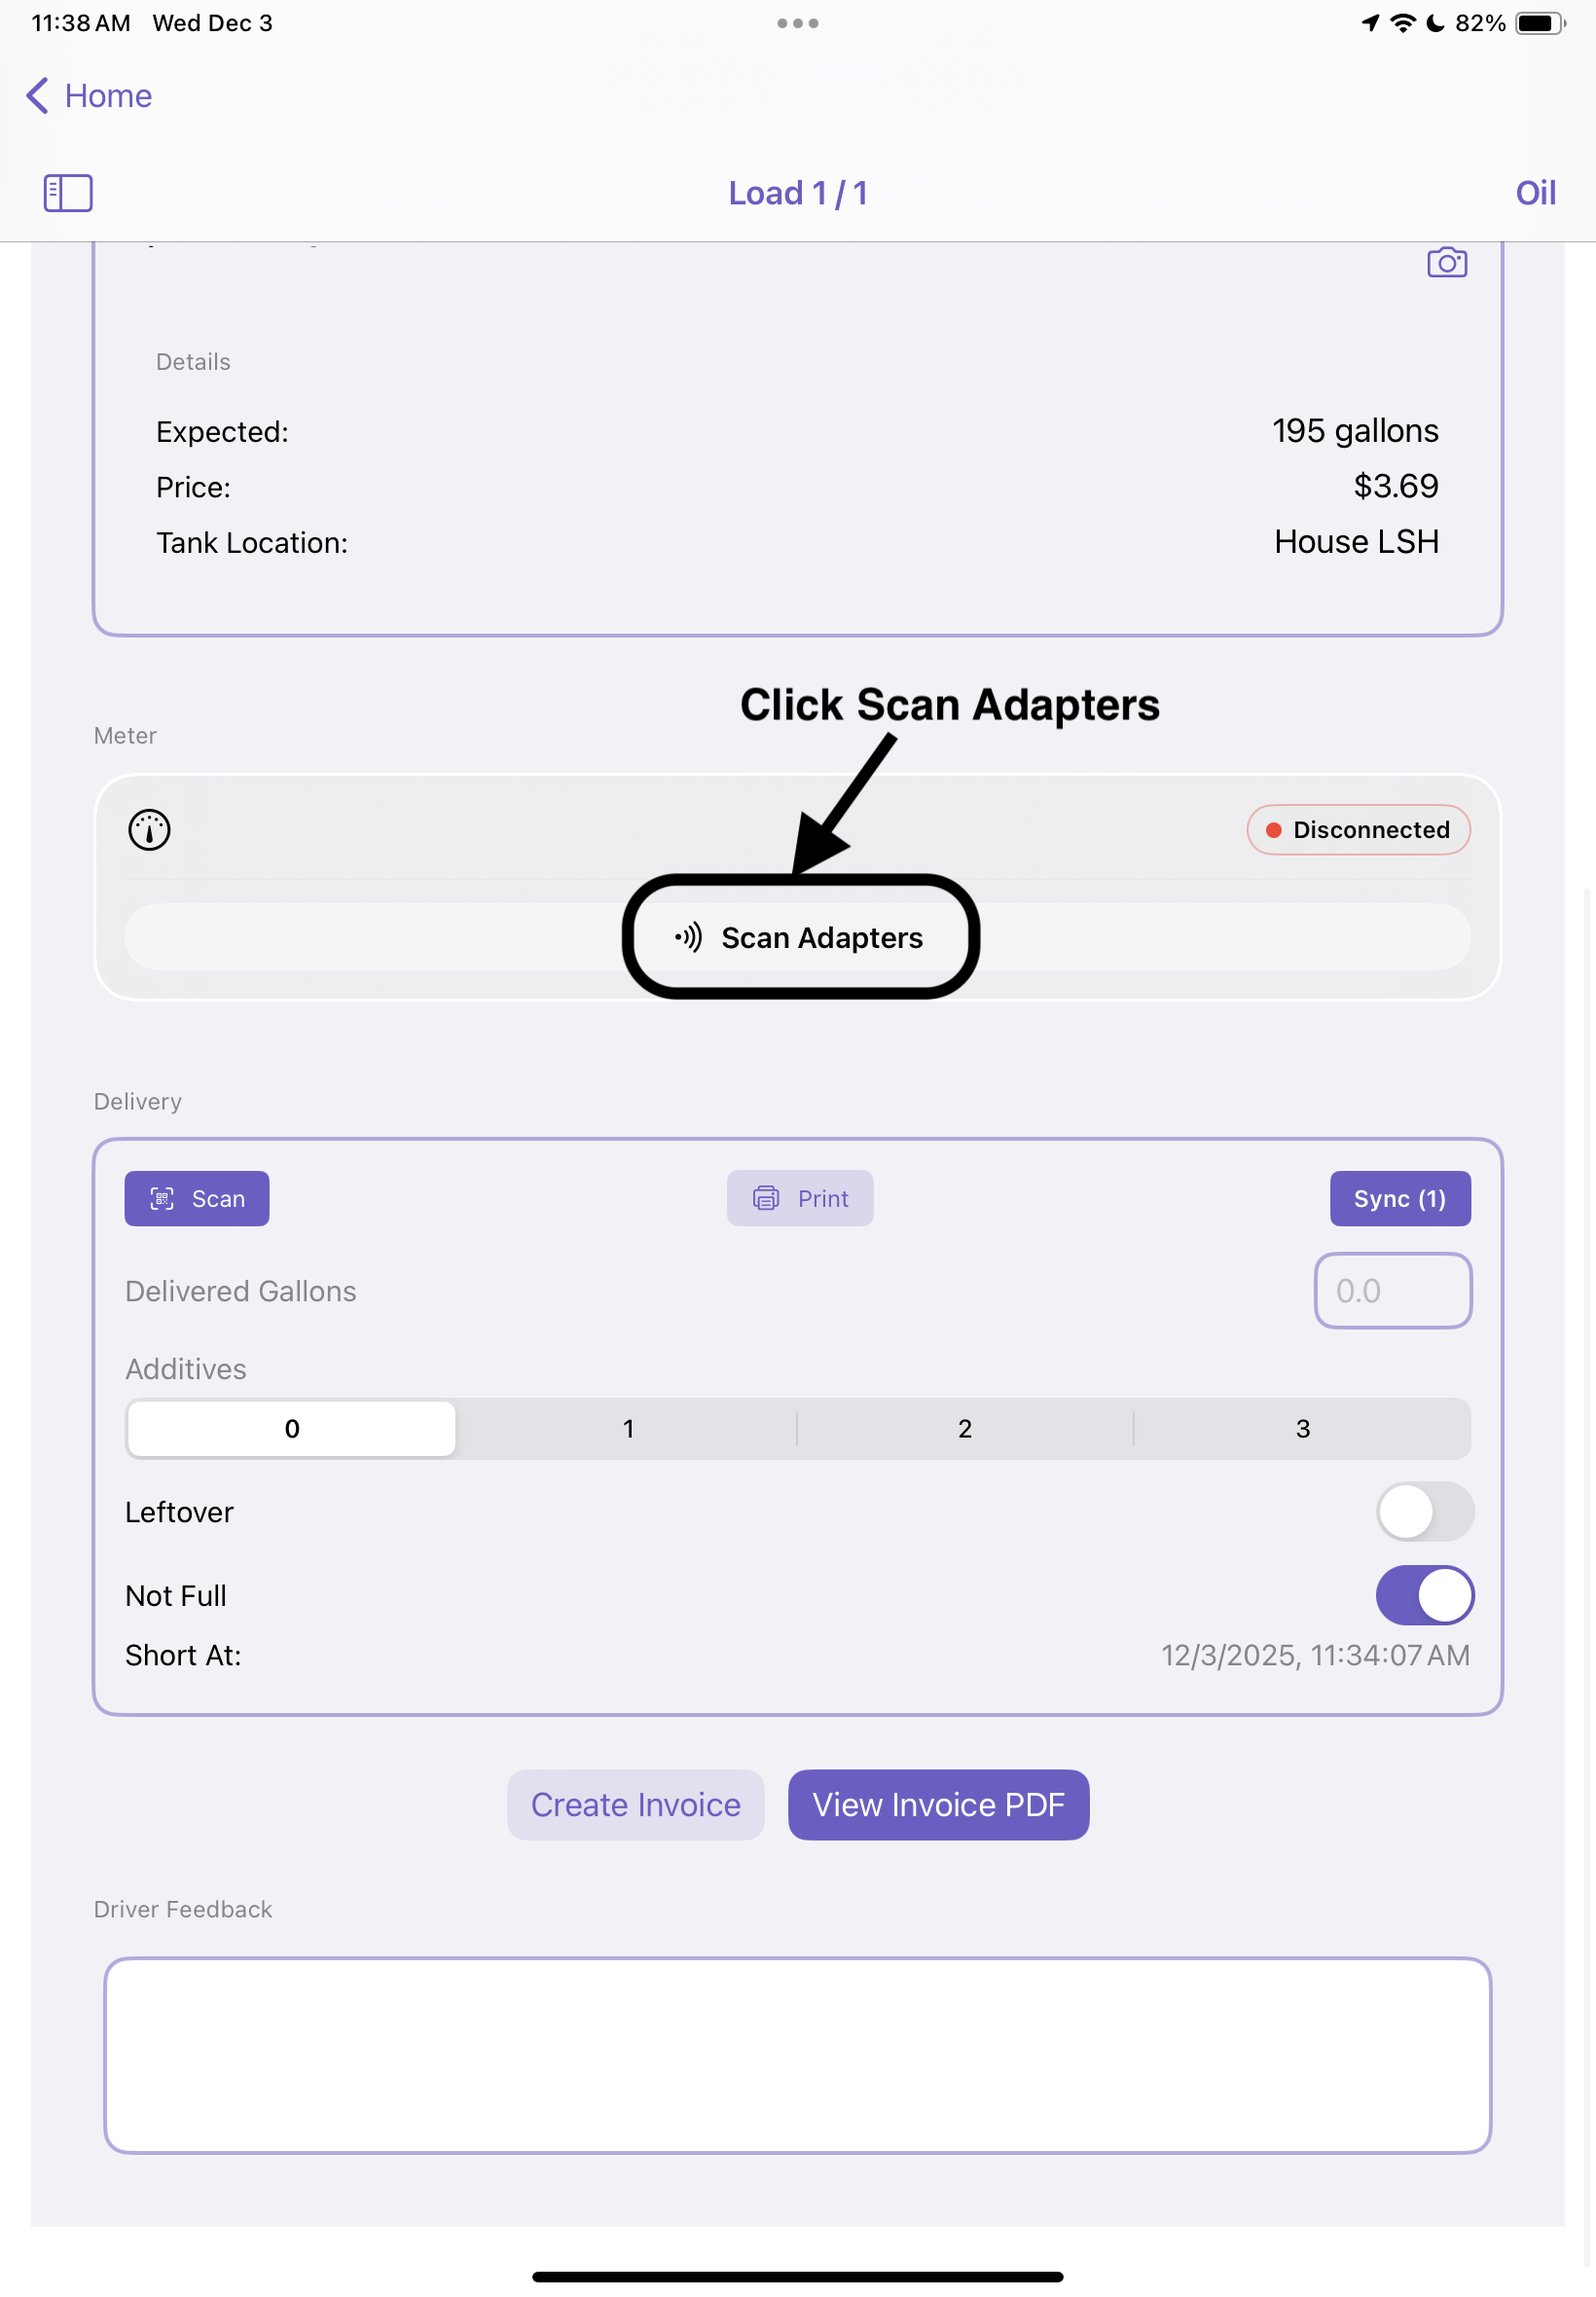
Step 1: Connect to Meter
- Ensure the meter is powered on
- Click on Scan Adaptors
- Select Adaptor from generated list
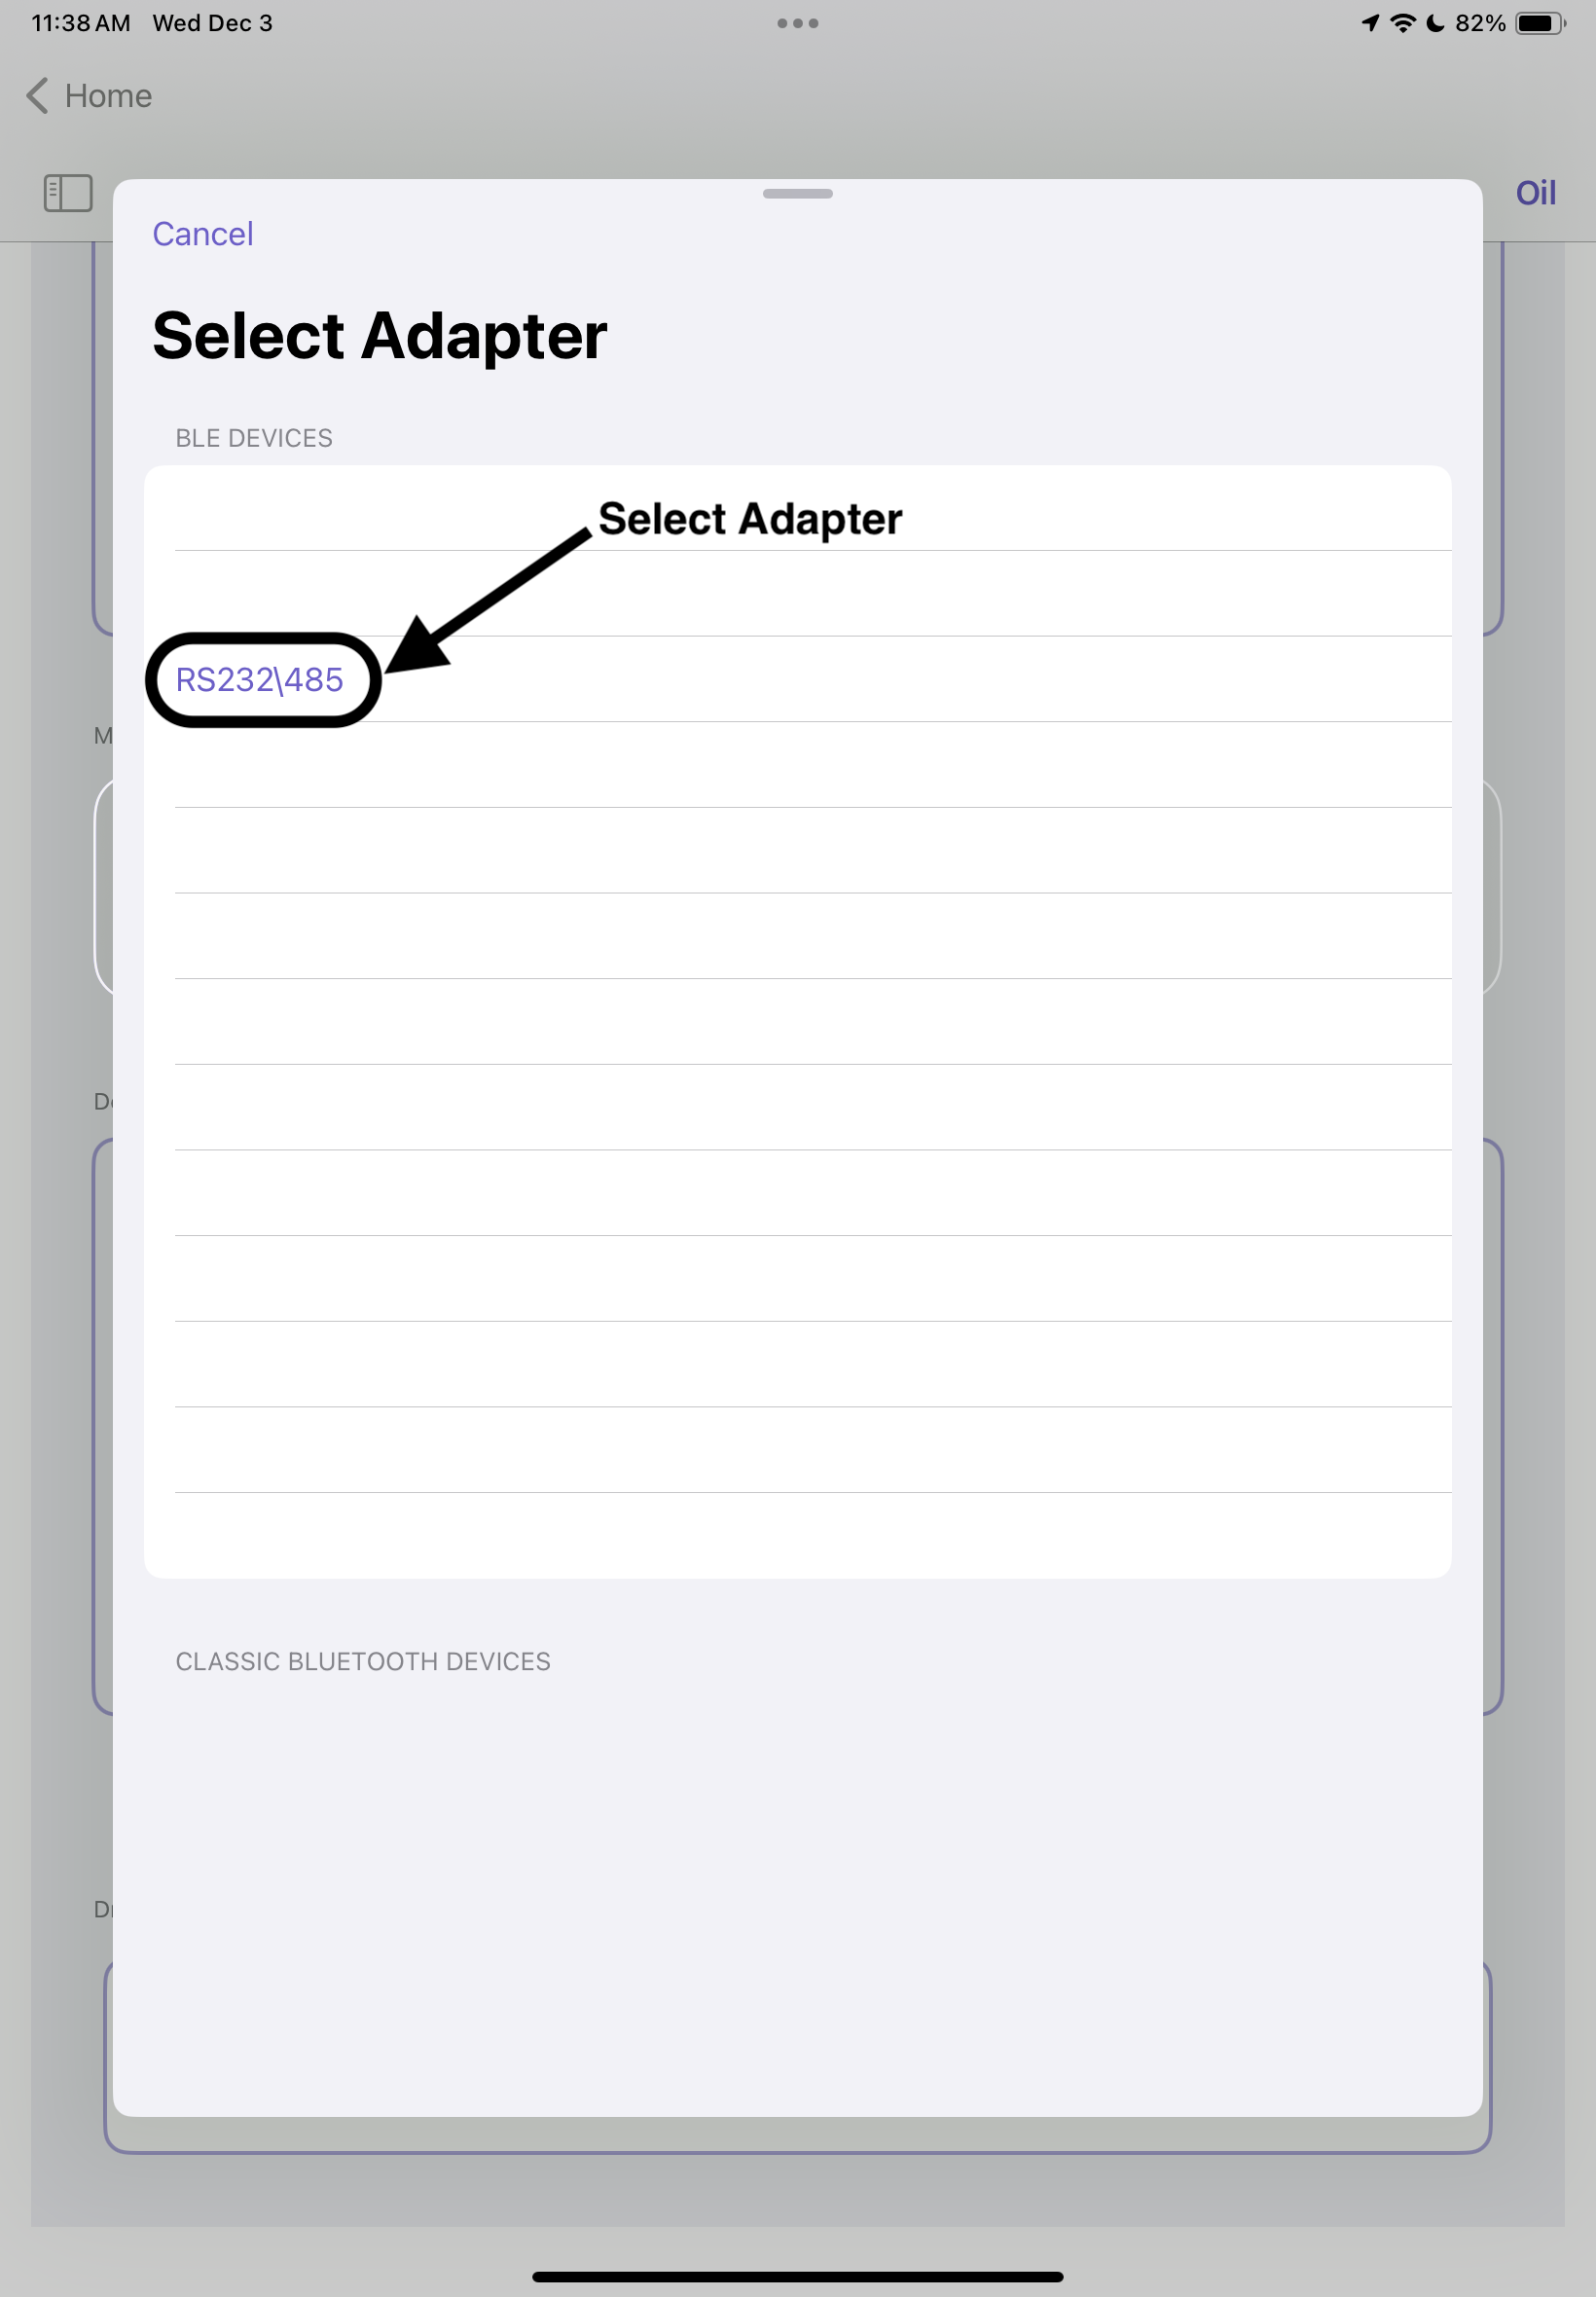
- After connecting to meter, two loading screens will pop up, wait for both to clear before beginning the next step
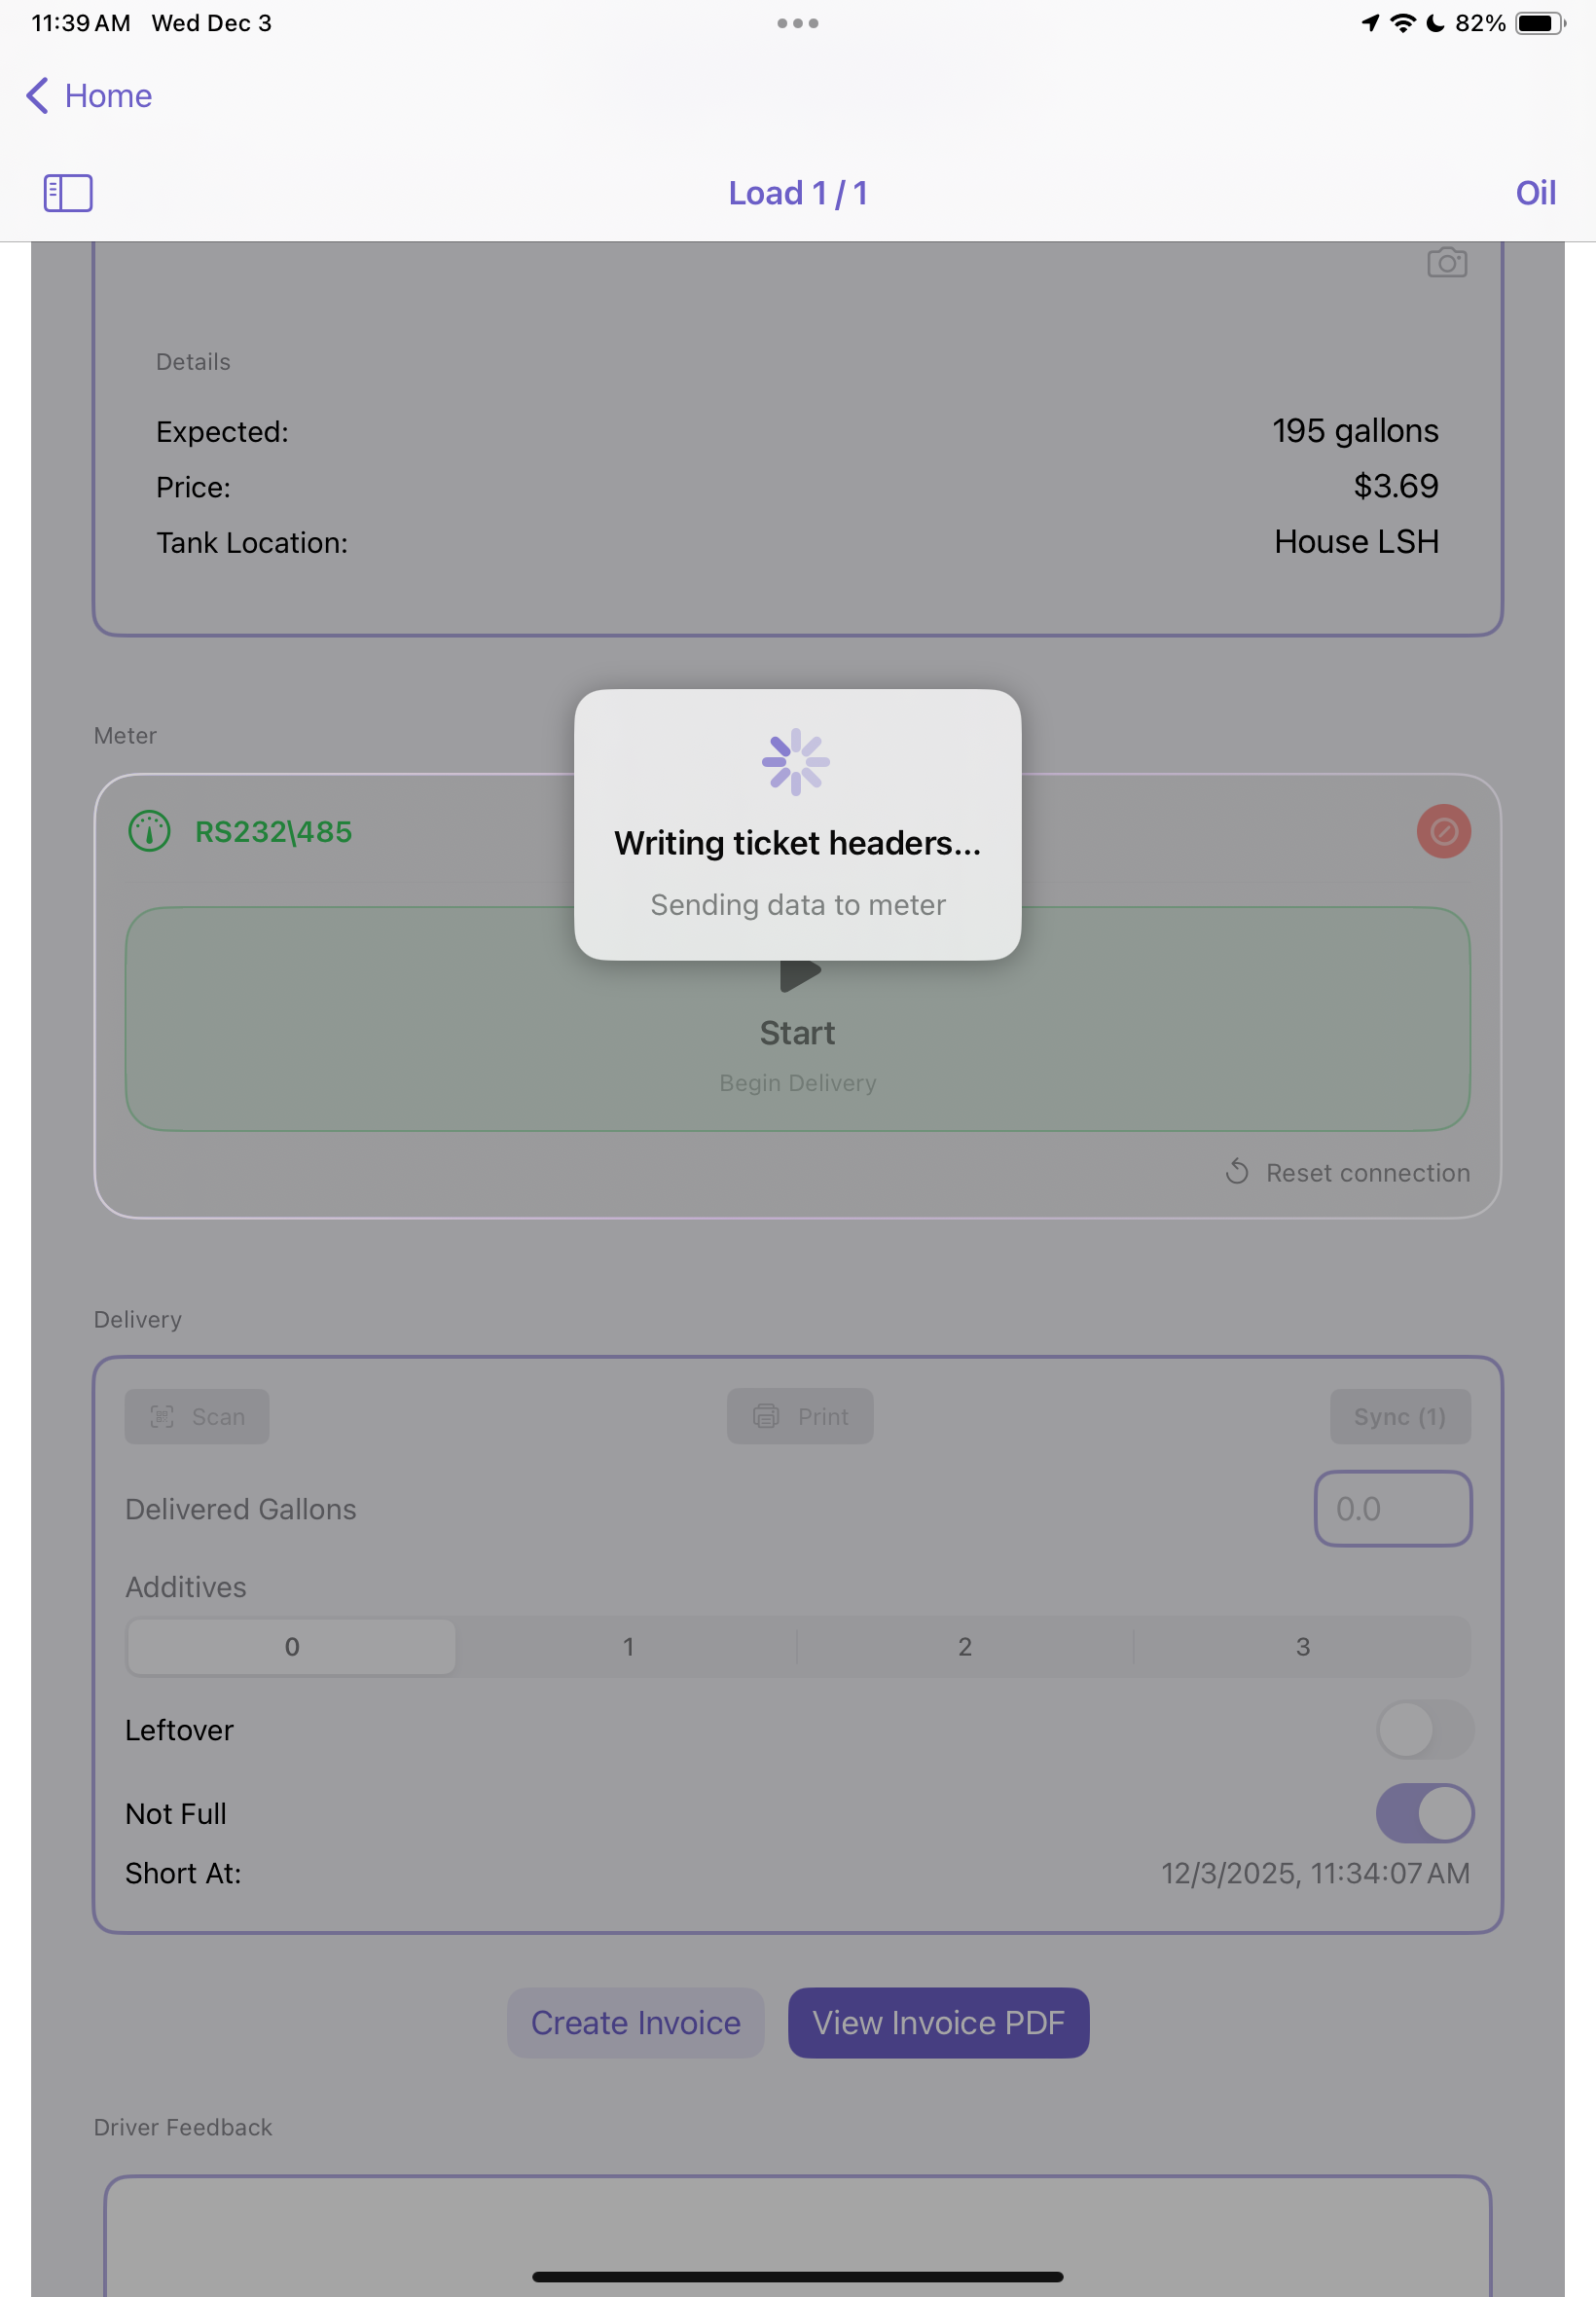
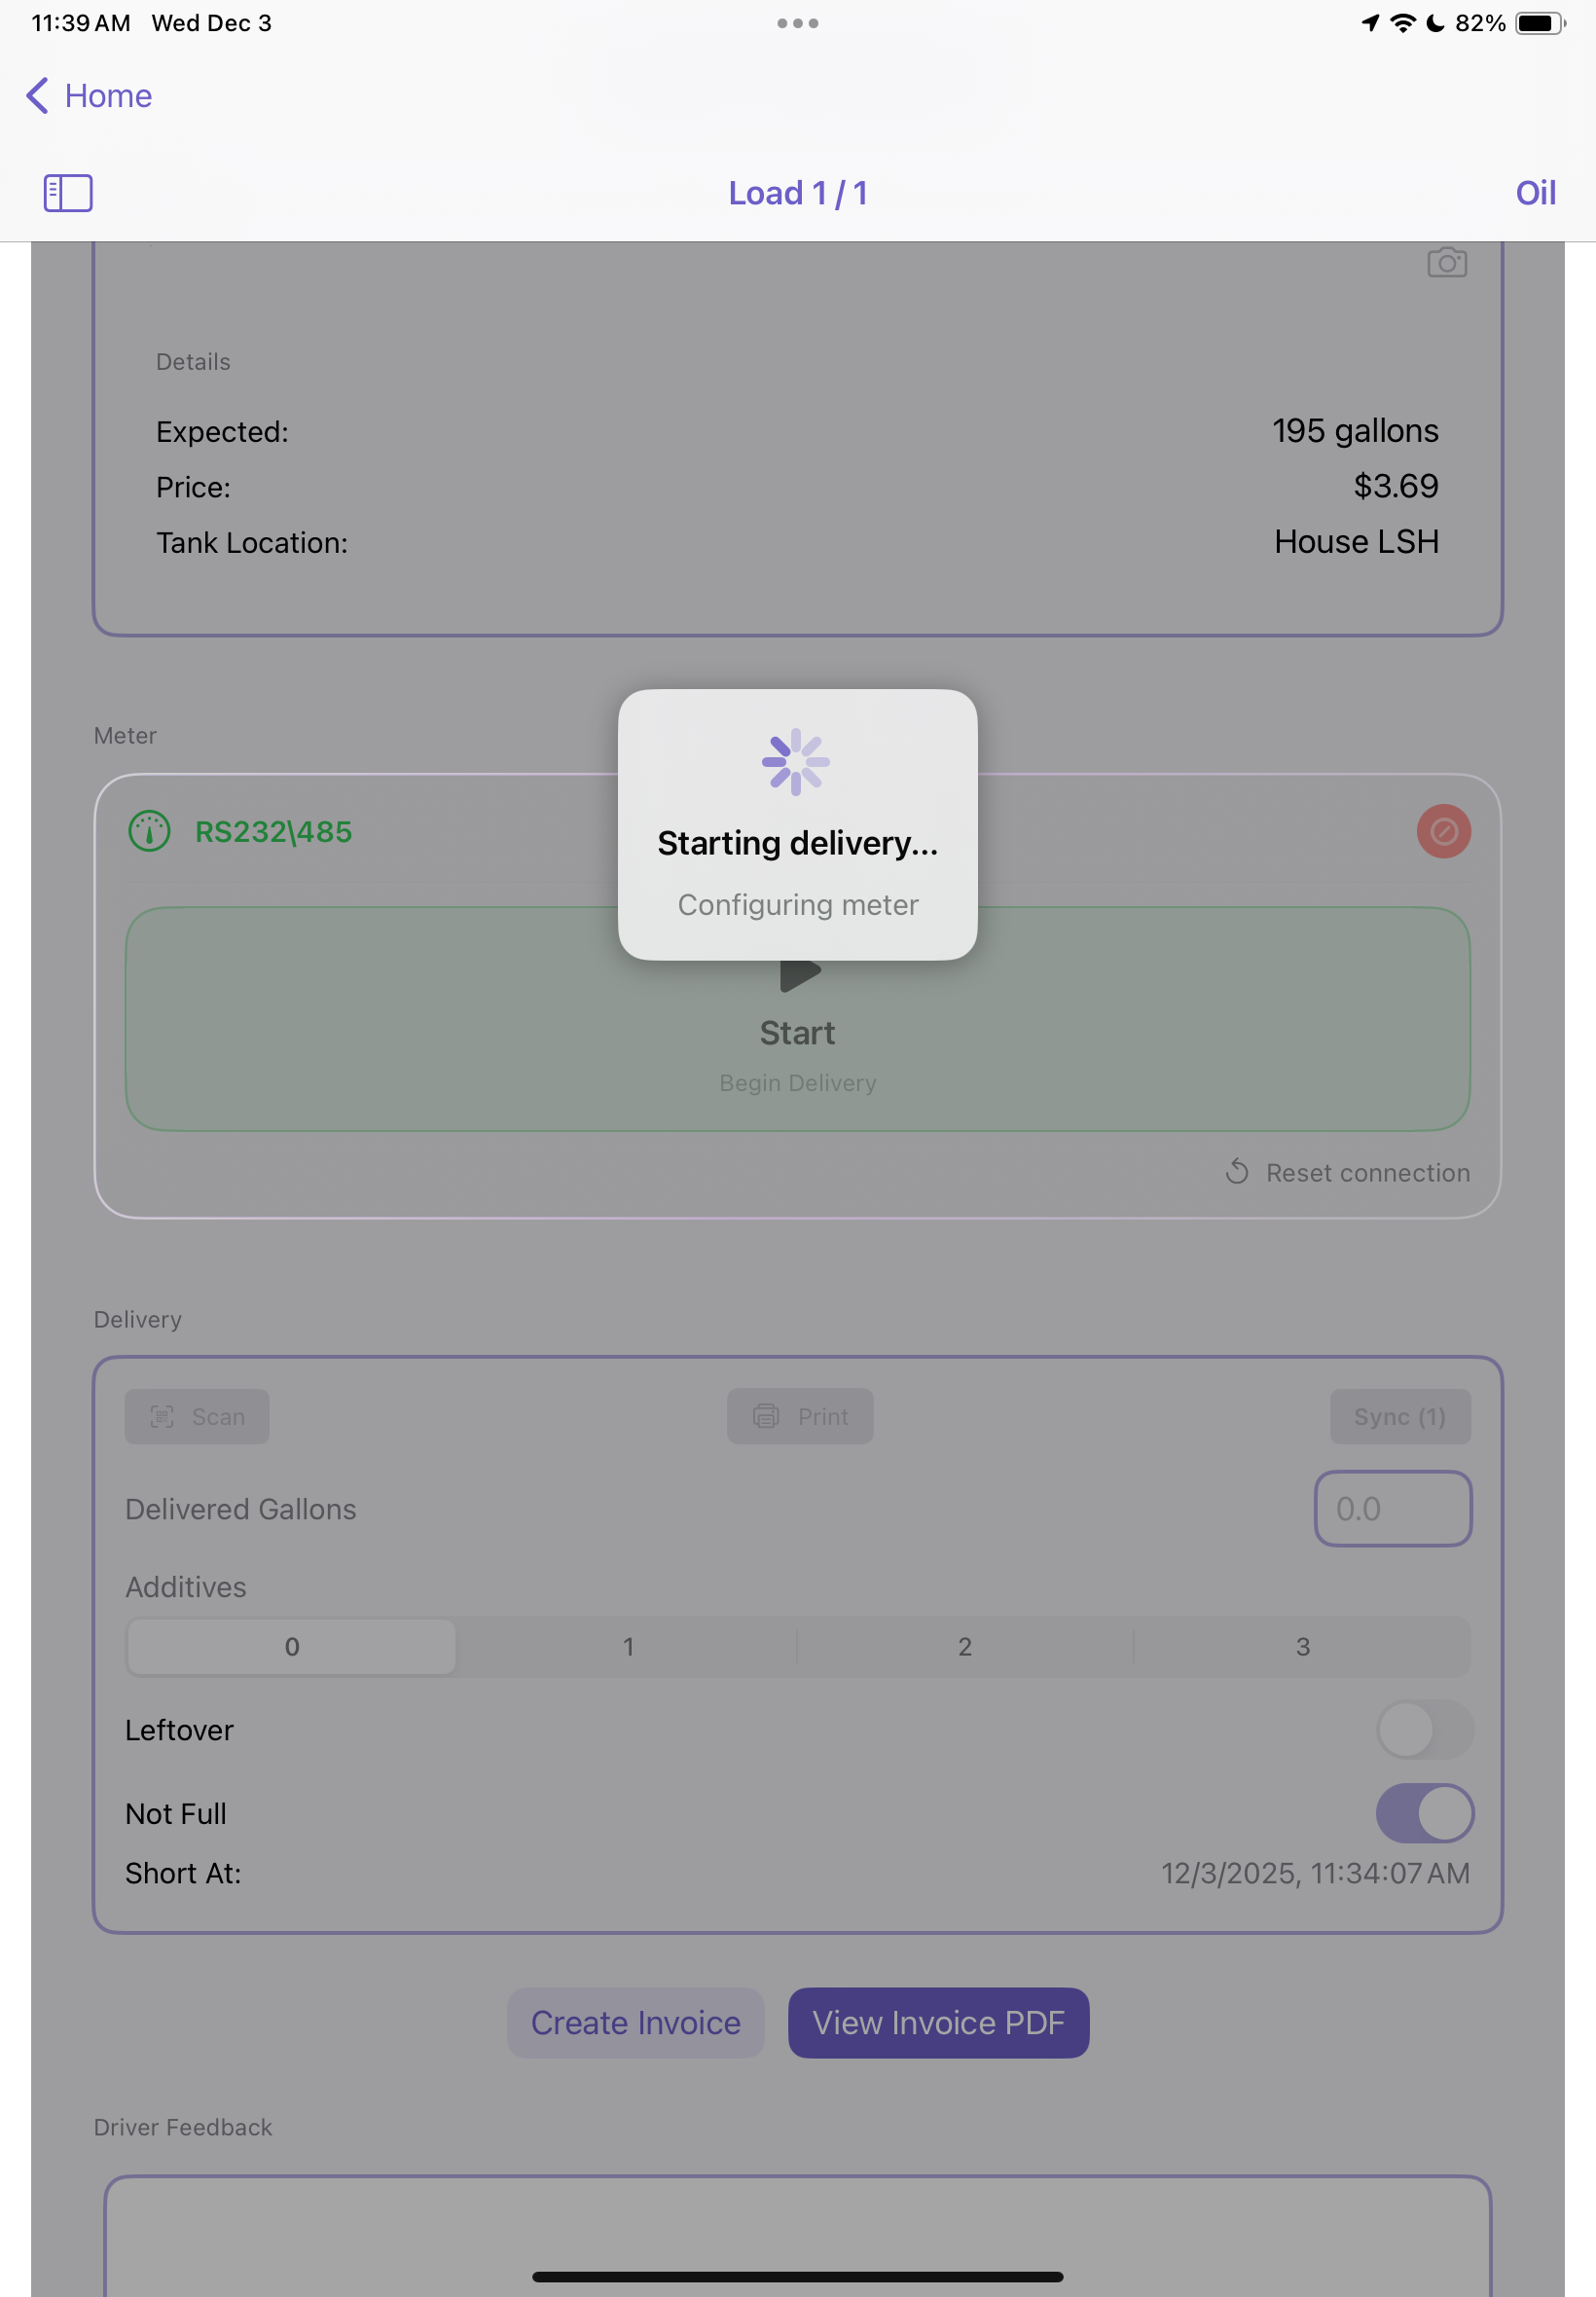
- Tap Start Delivery
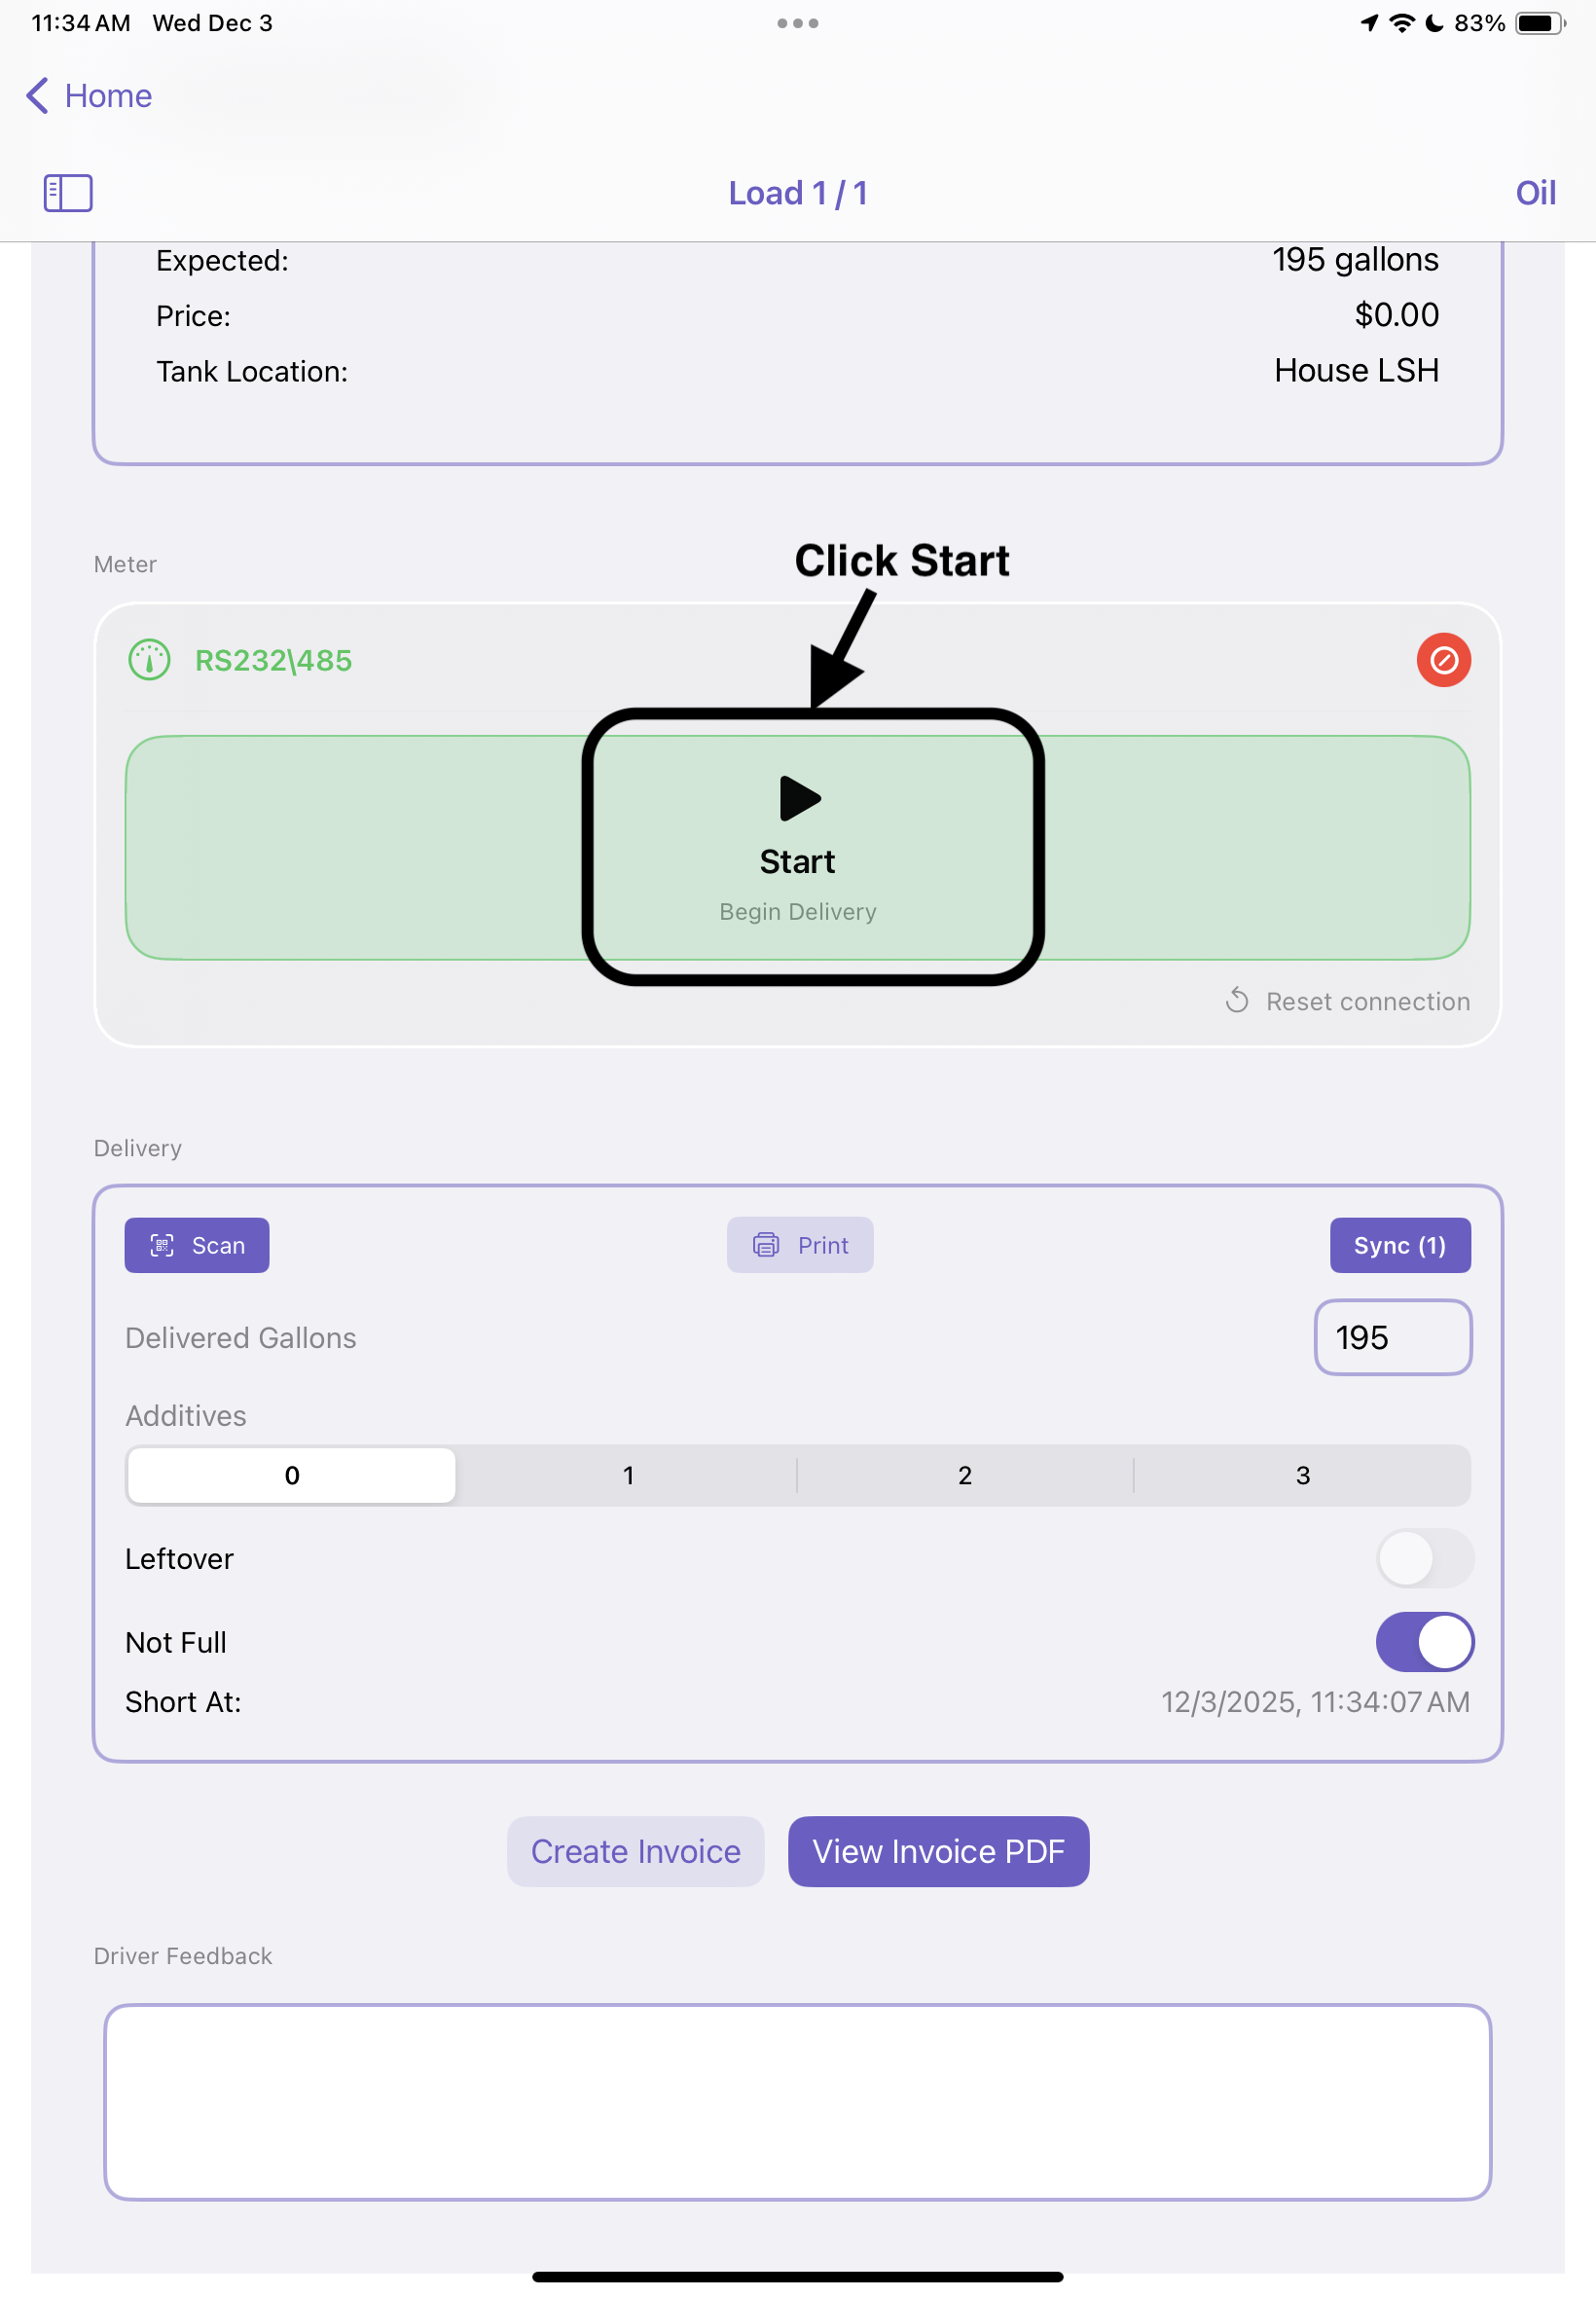
- The meter will automatically begin pumping and capturing gallons
Step 2: Monitor Gallons
- Gallons are automatically updated live on the screen
- If Bluetooth signal is lost, the system will inform you and pause the meter process
Step 3: End Delivery
- Tap End Delivery to finalize the ticket
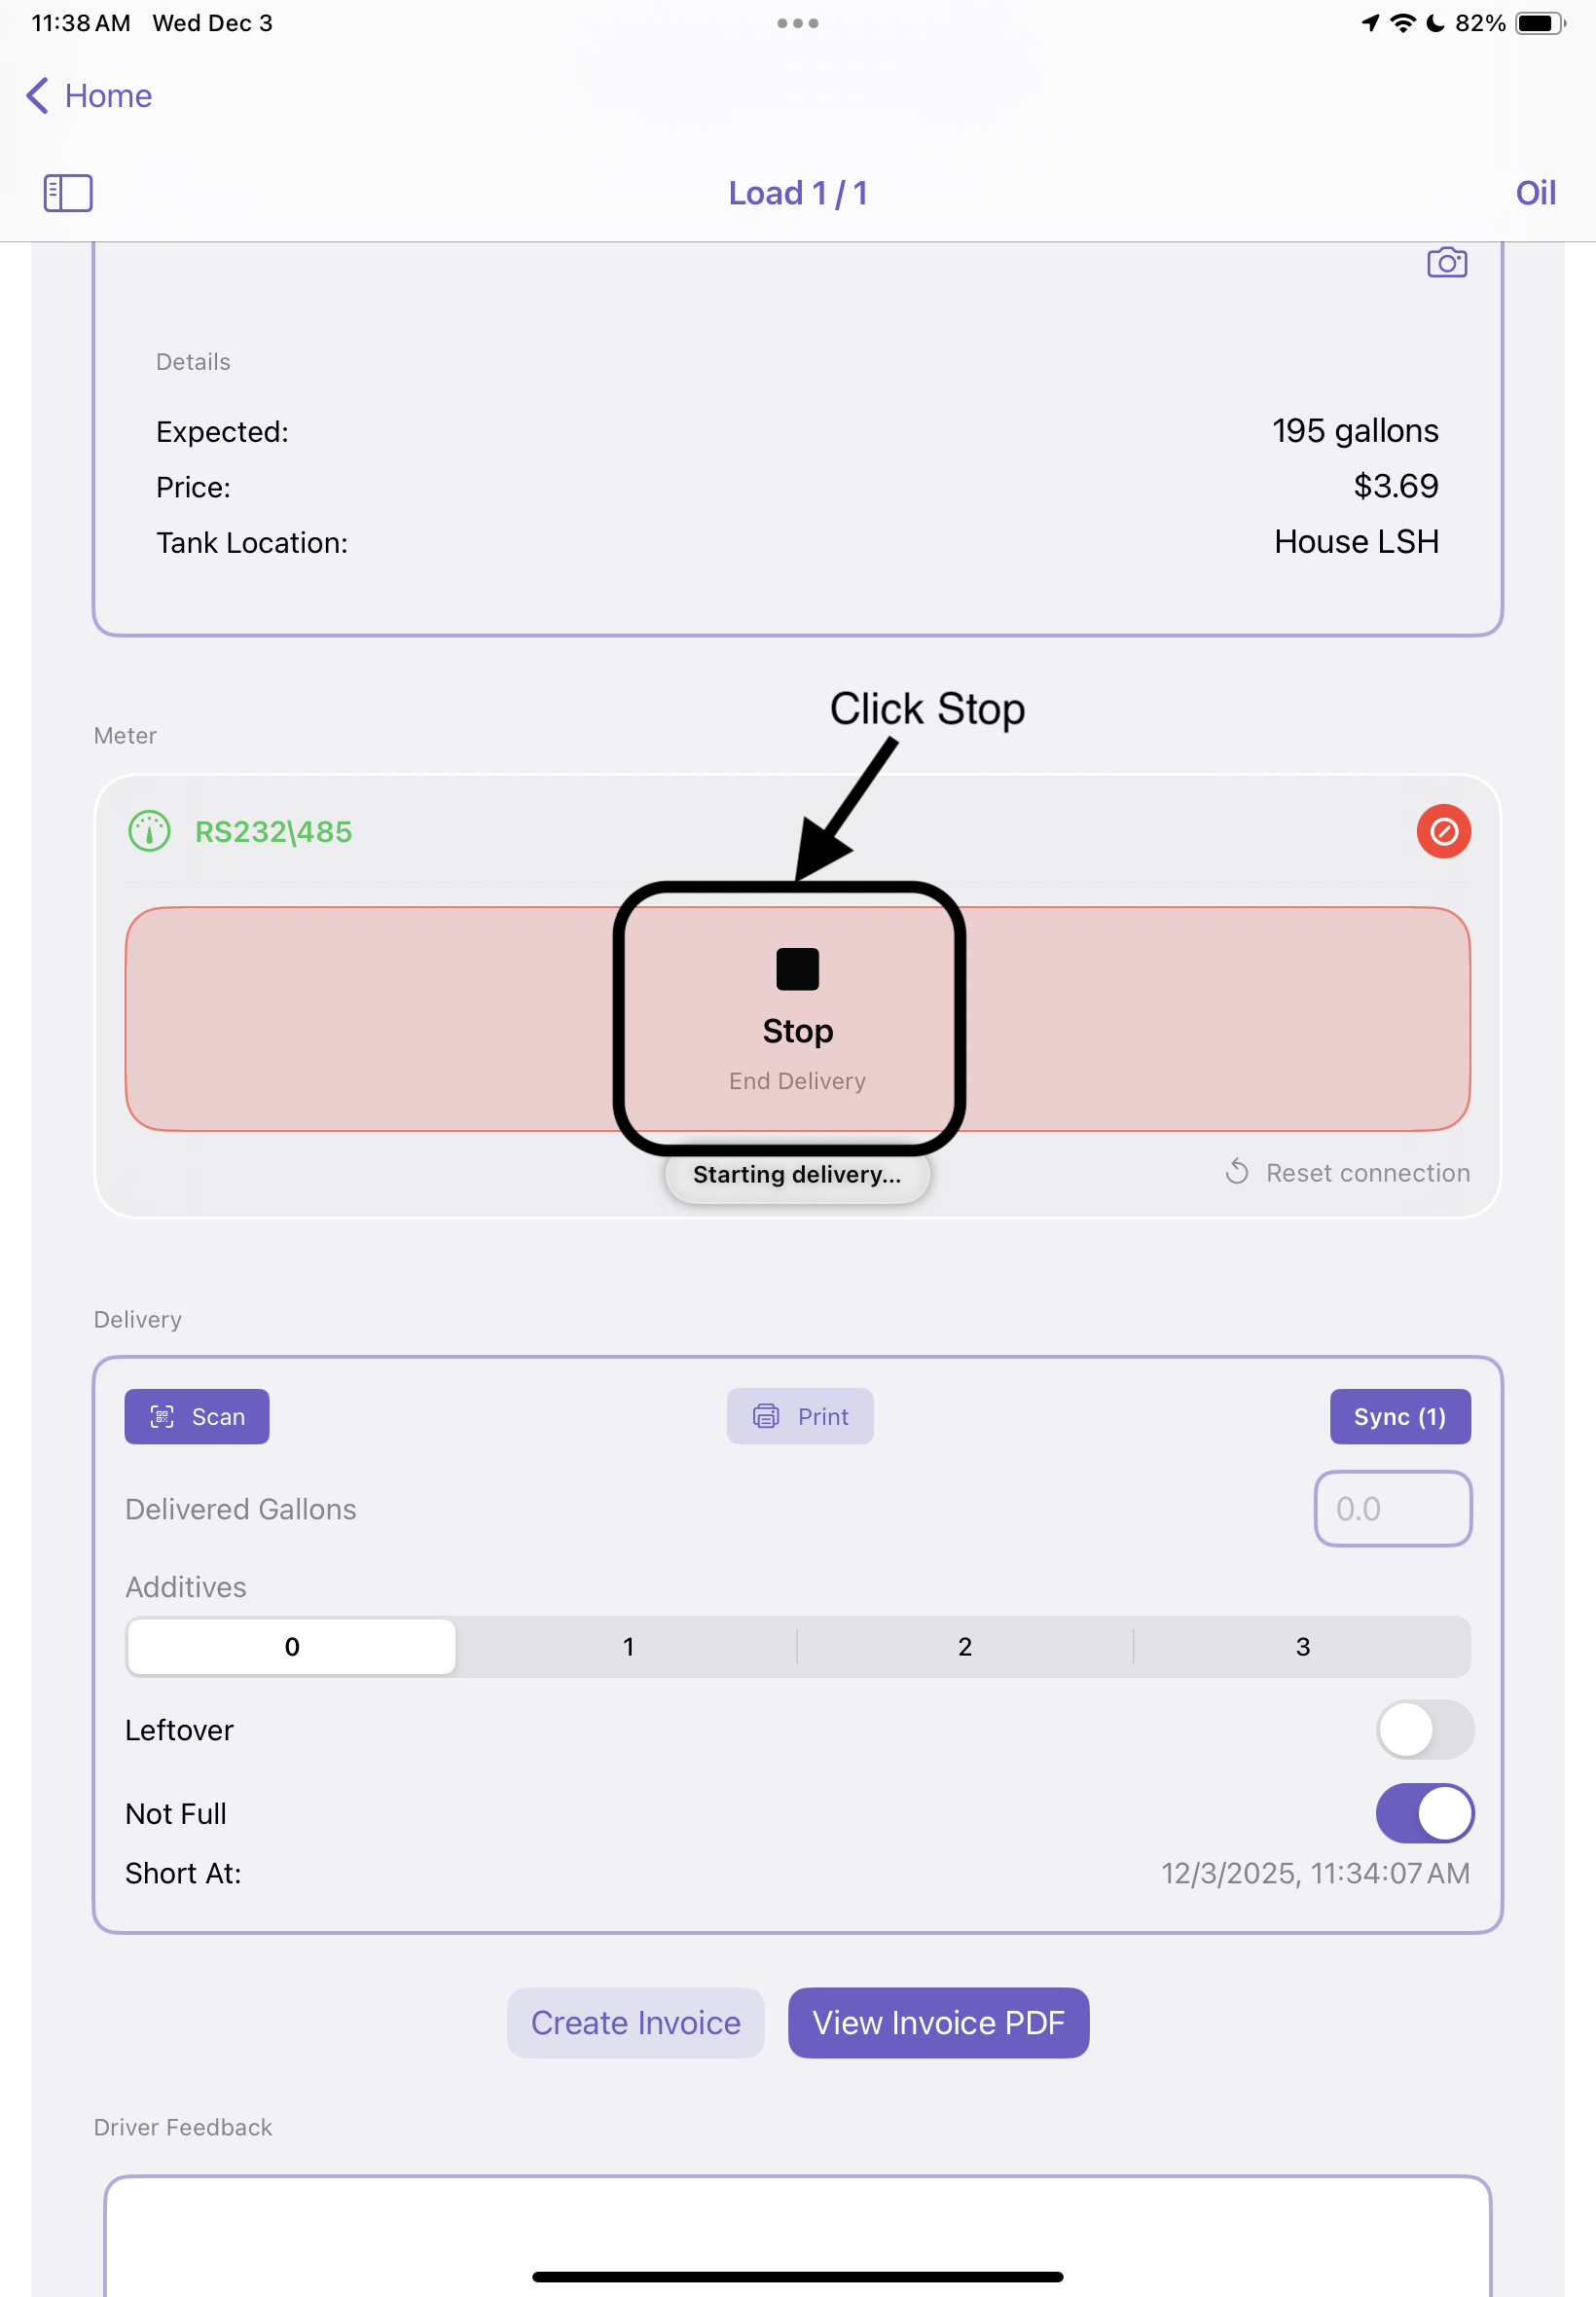
- Ticket headers are sent to the meter (customer name, pricing, etc.) and two loading screens will appear, wait for them to clear before continuing
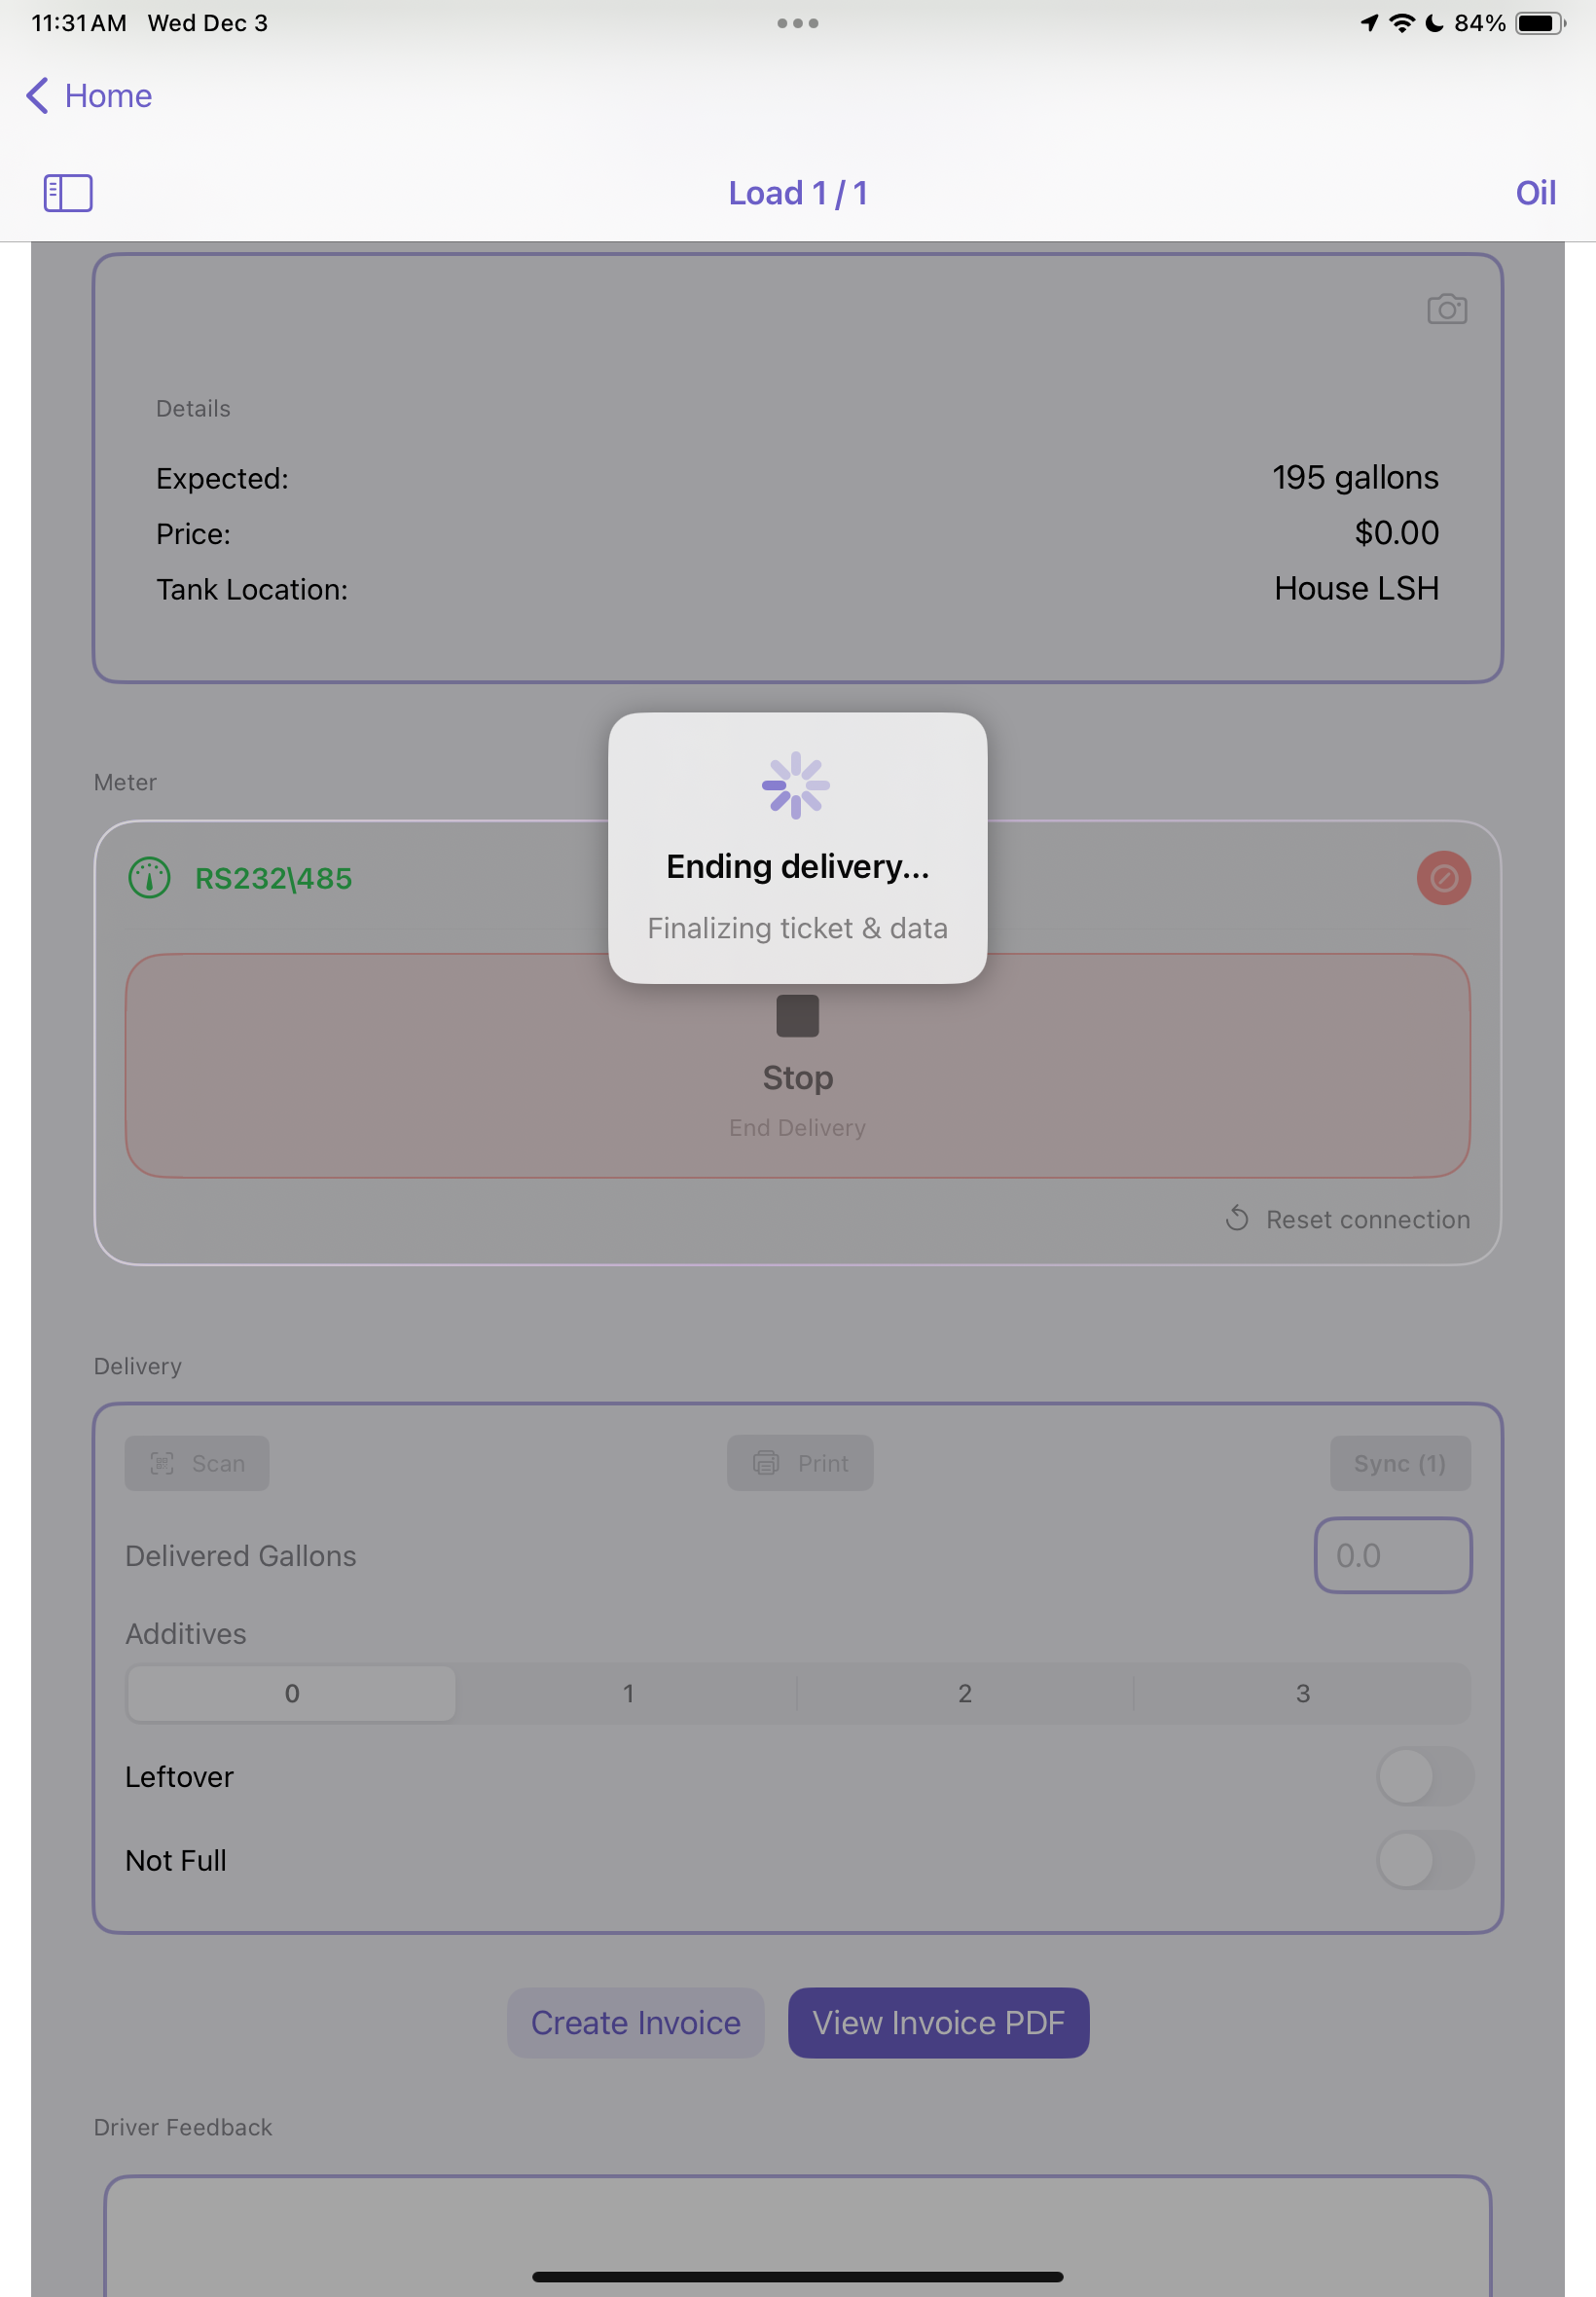
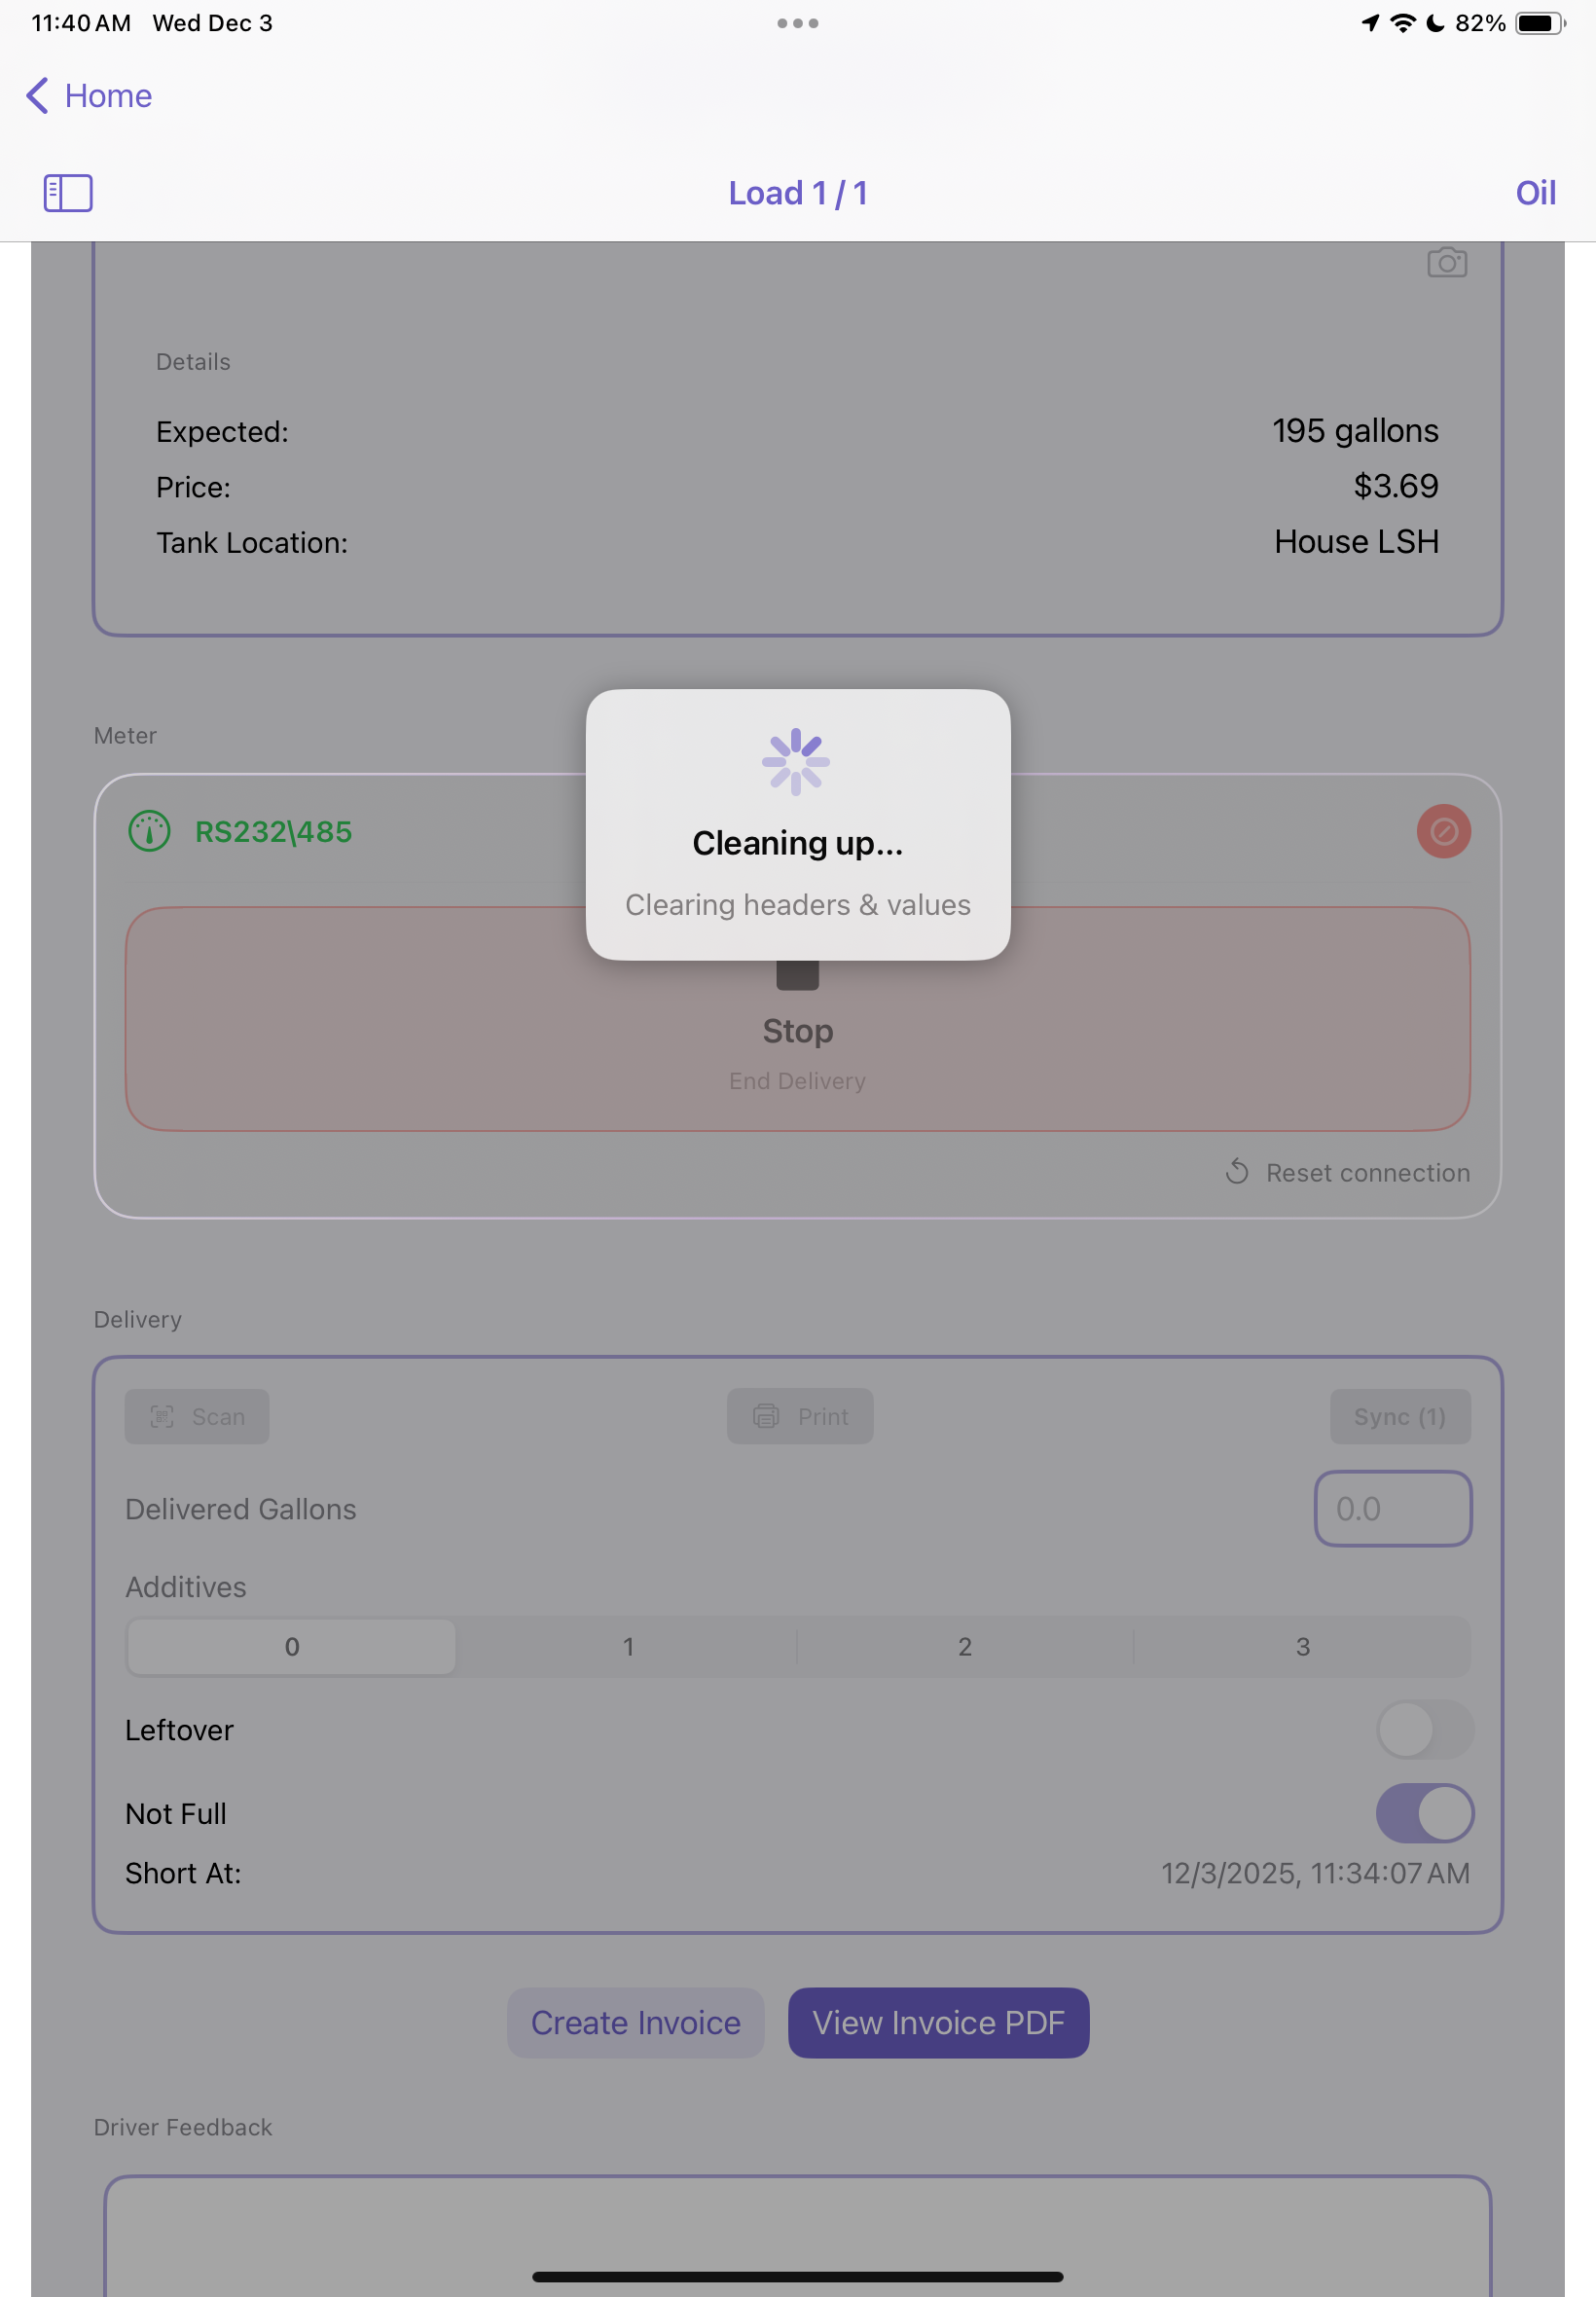
- A printed ticket is generated automatically
Step 4: Save Delivery
-
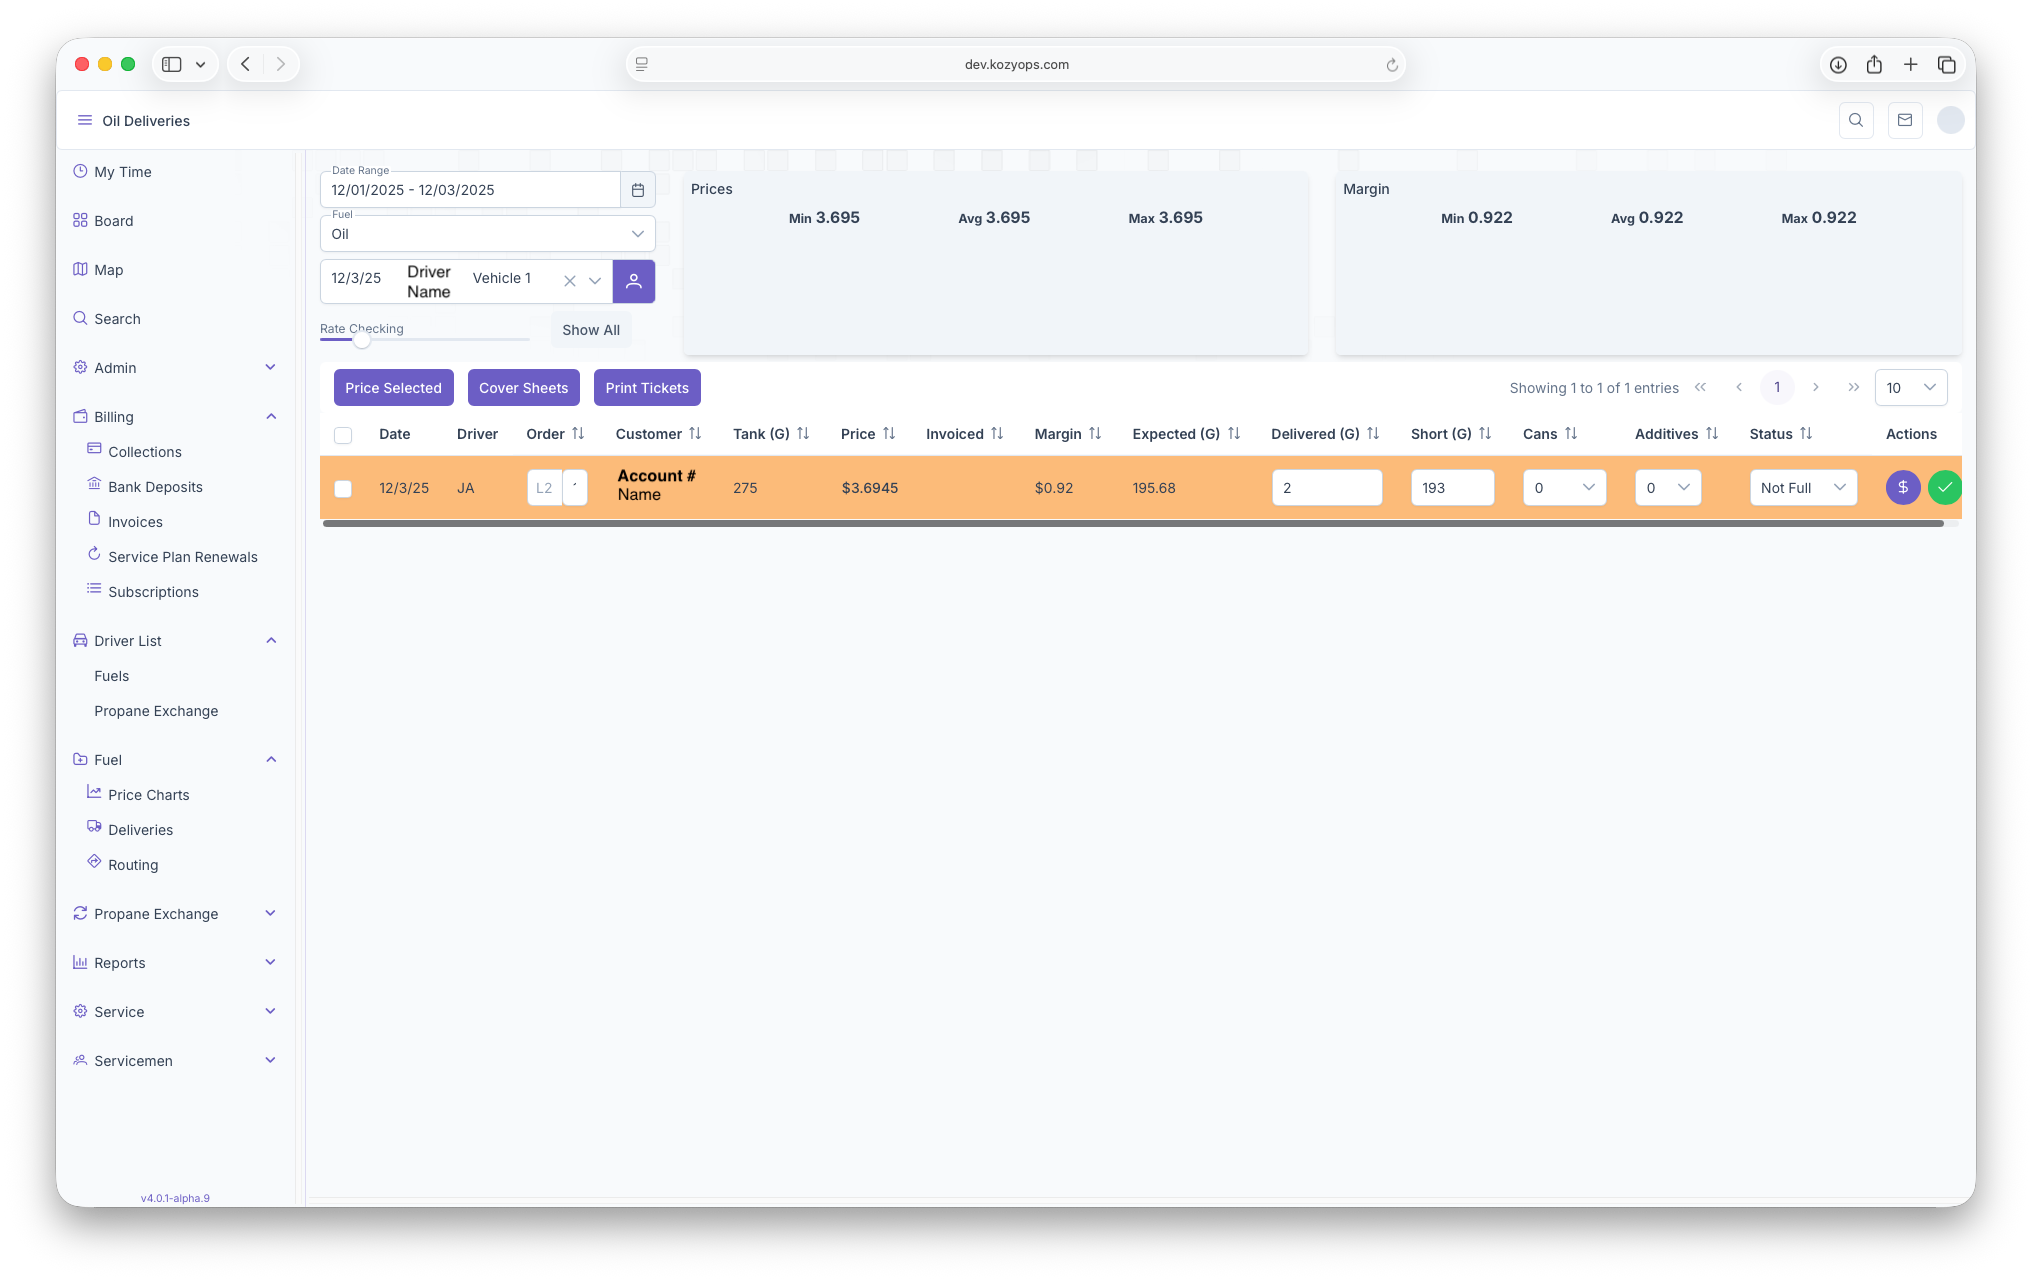
The delivery is automatically recorded and synced with the server if online

Performing a Delivery Manually (No Meter)
Step 1: Enter the number of gallons delivered in the Delivered Gallons field
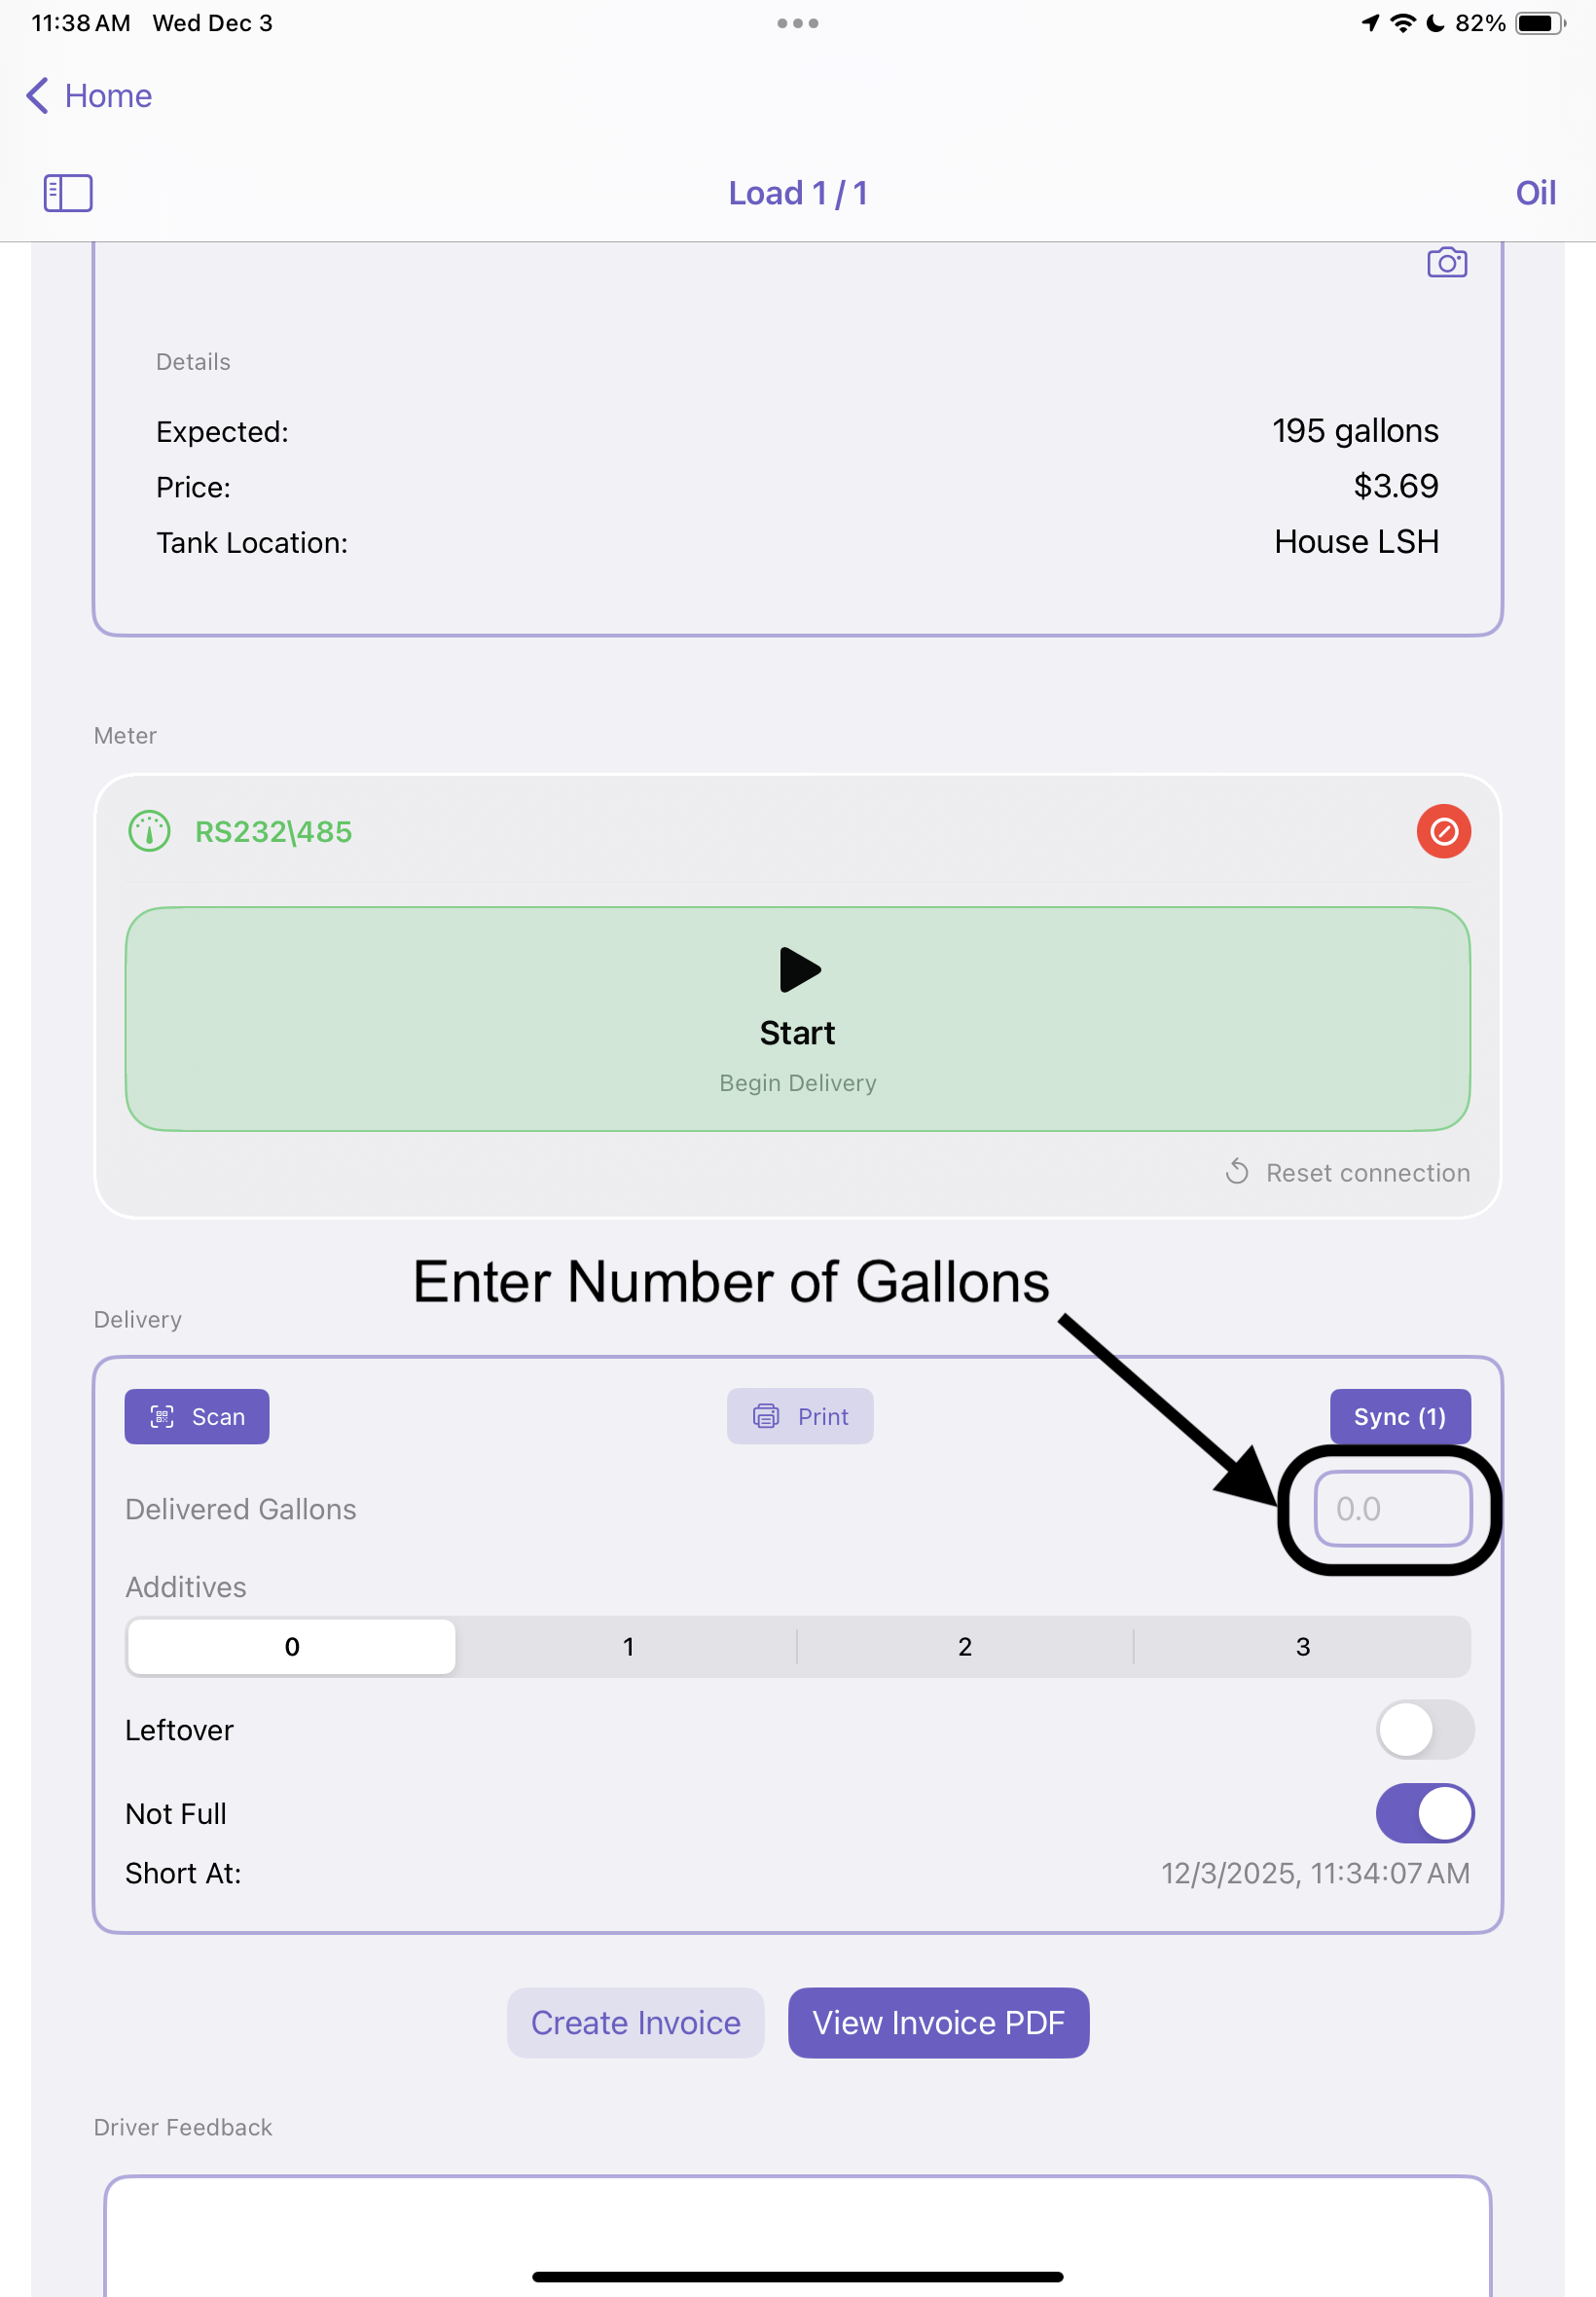
Step 2: Set Additives, Leftover, or Not Full as applicable
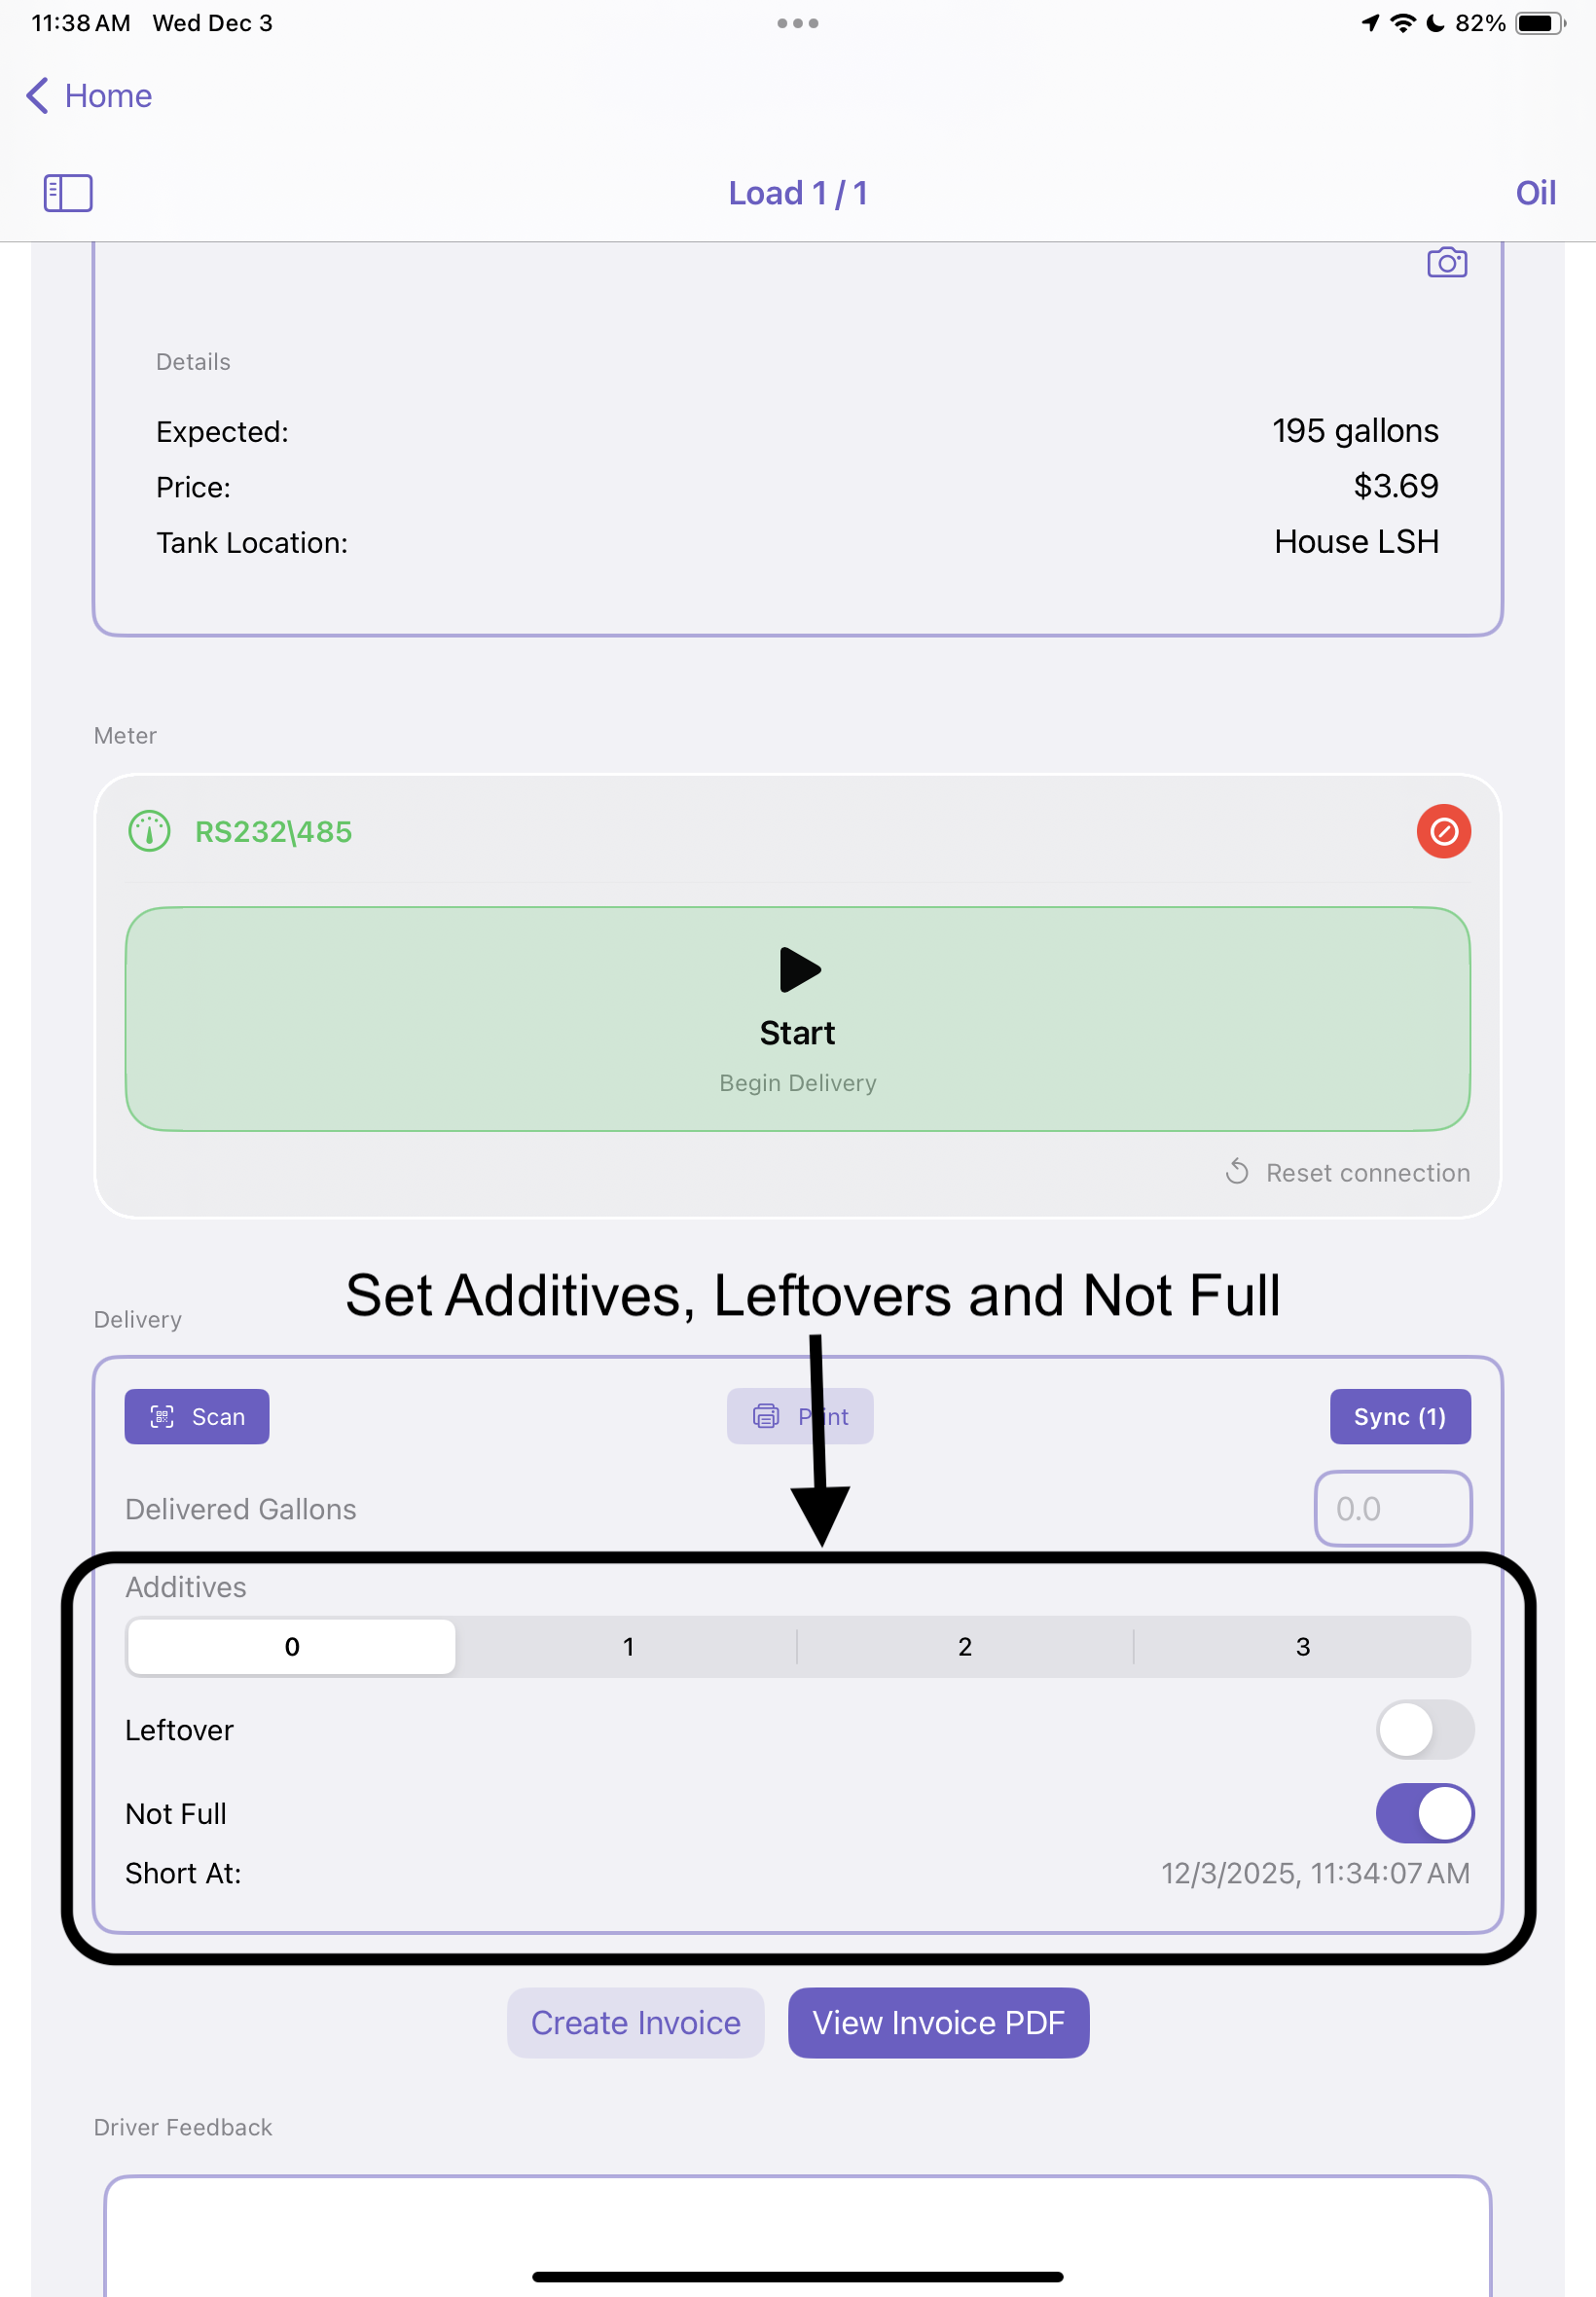
Step 3: Tap Print to bring up list of printers
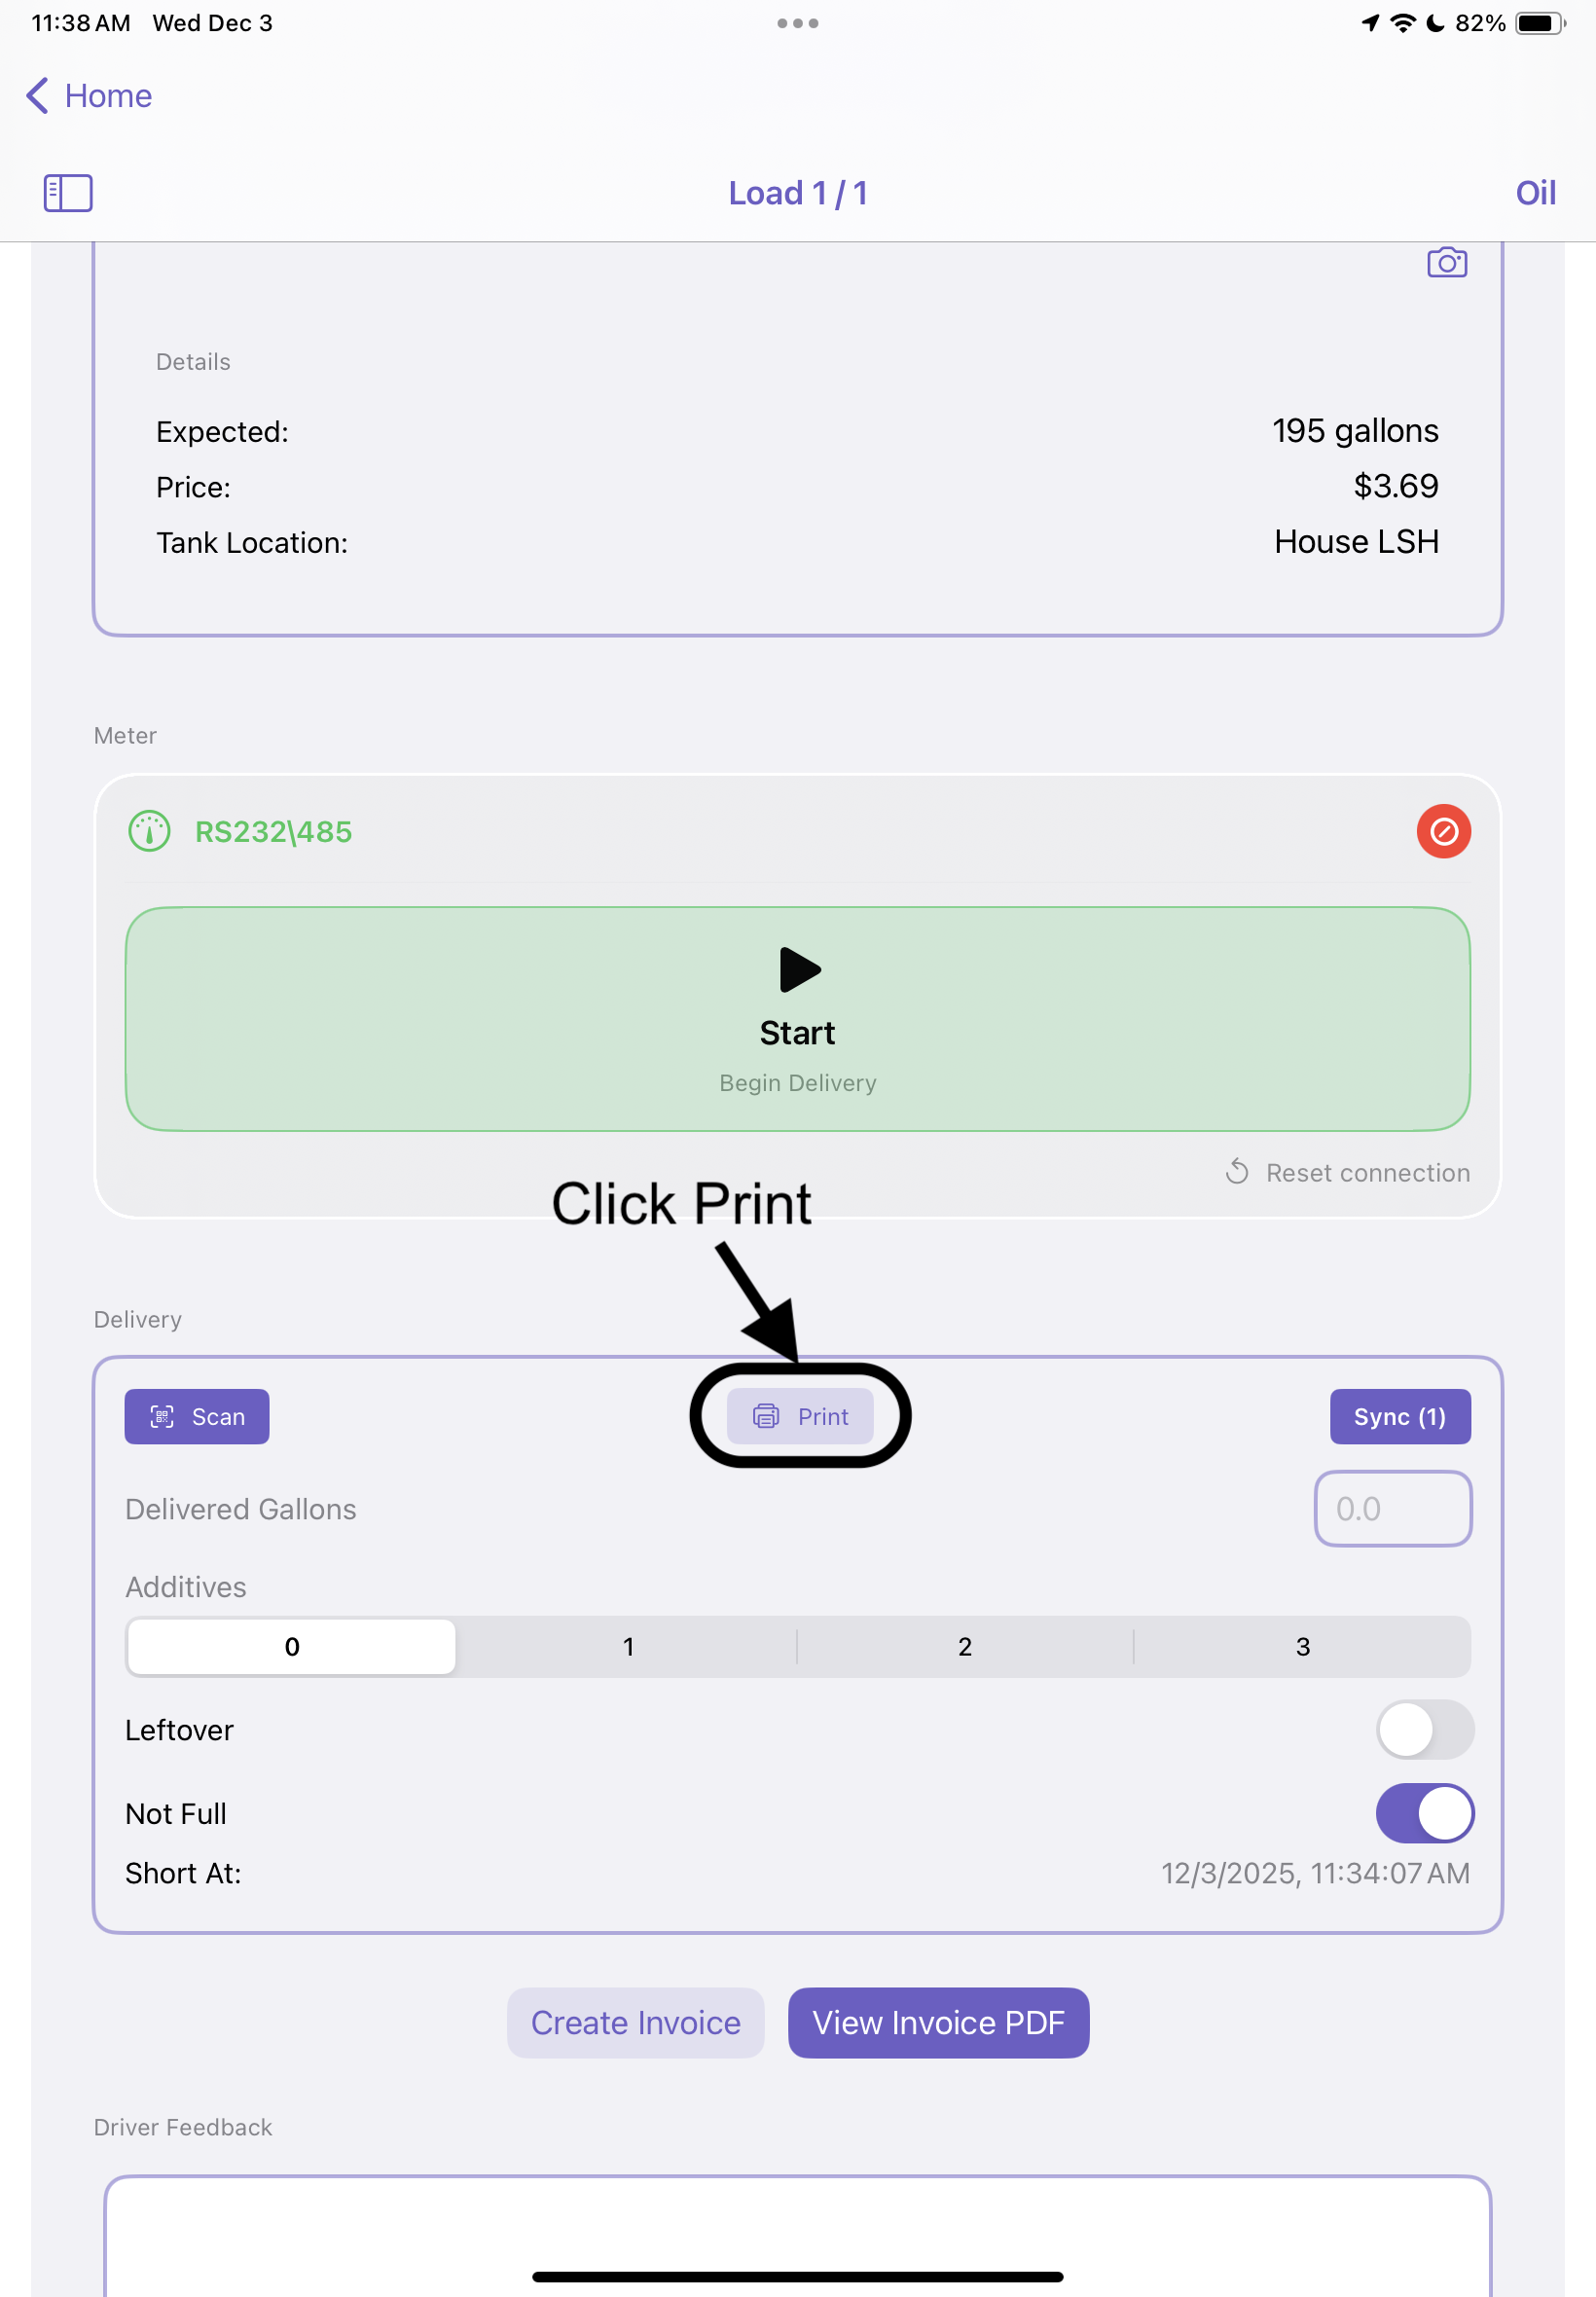
Step 4: After selecting printer, it will appear as current printer
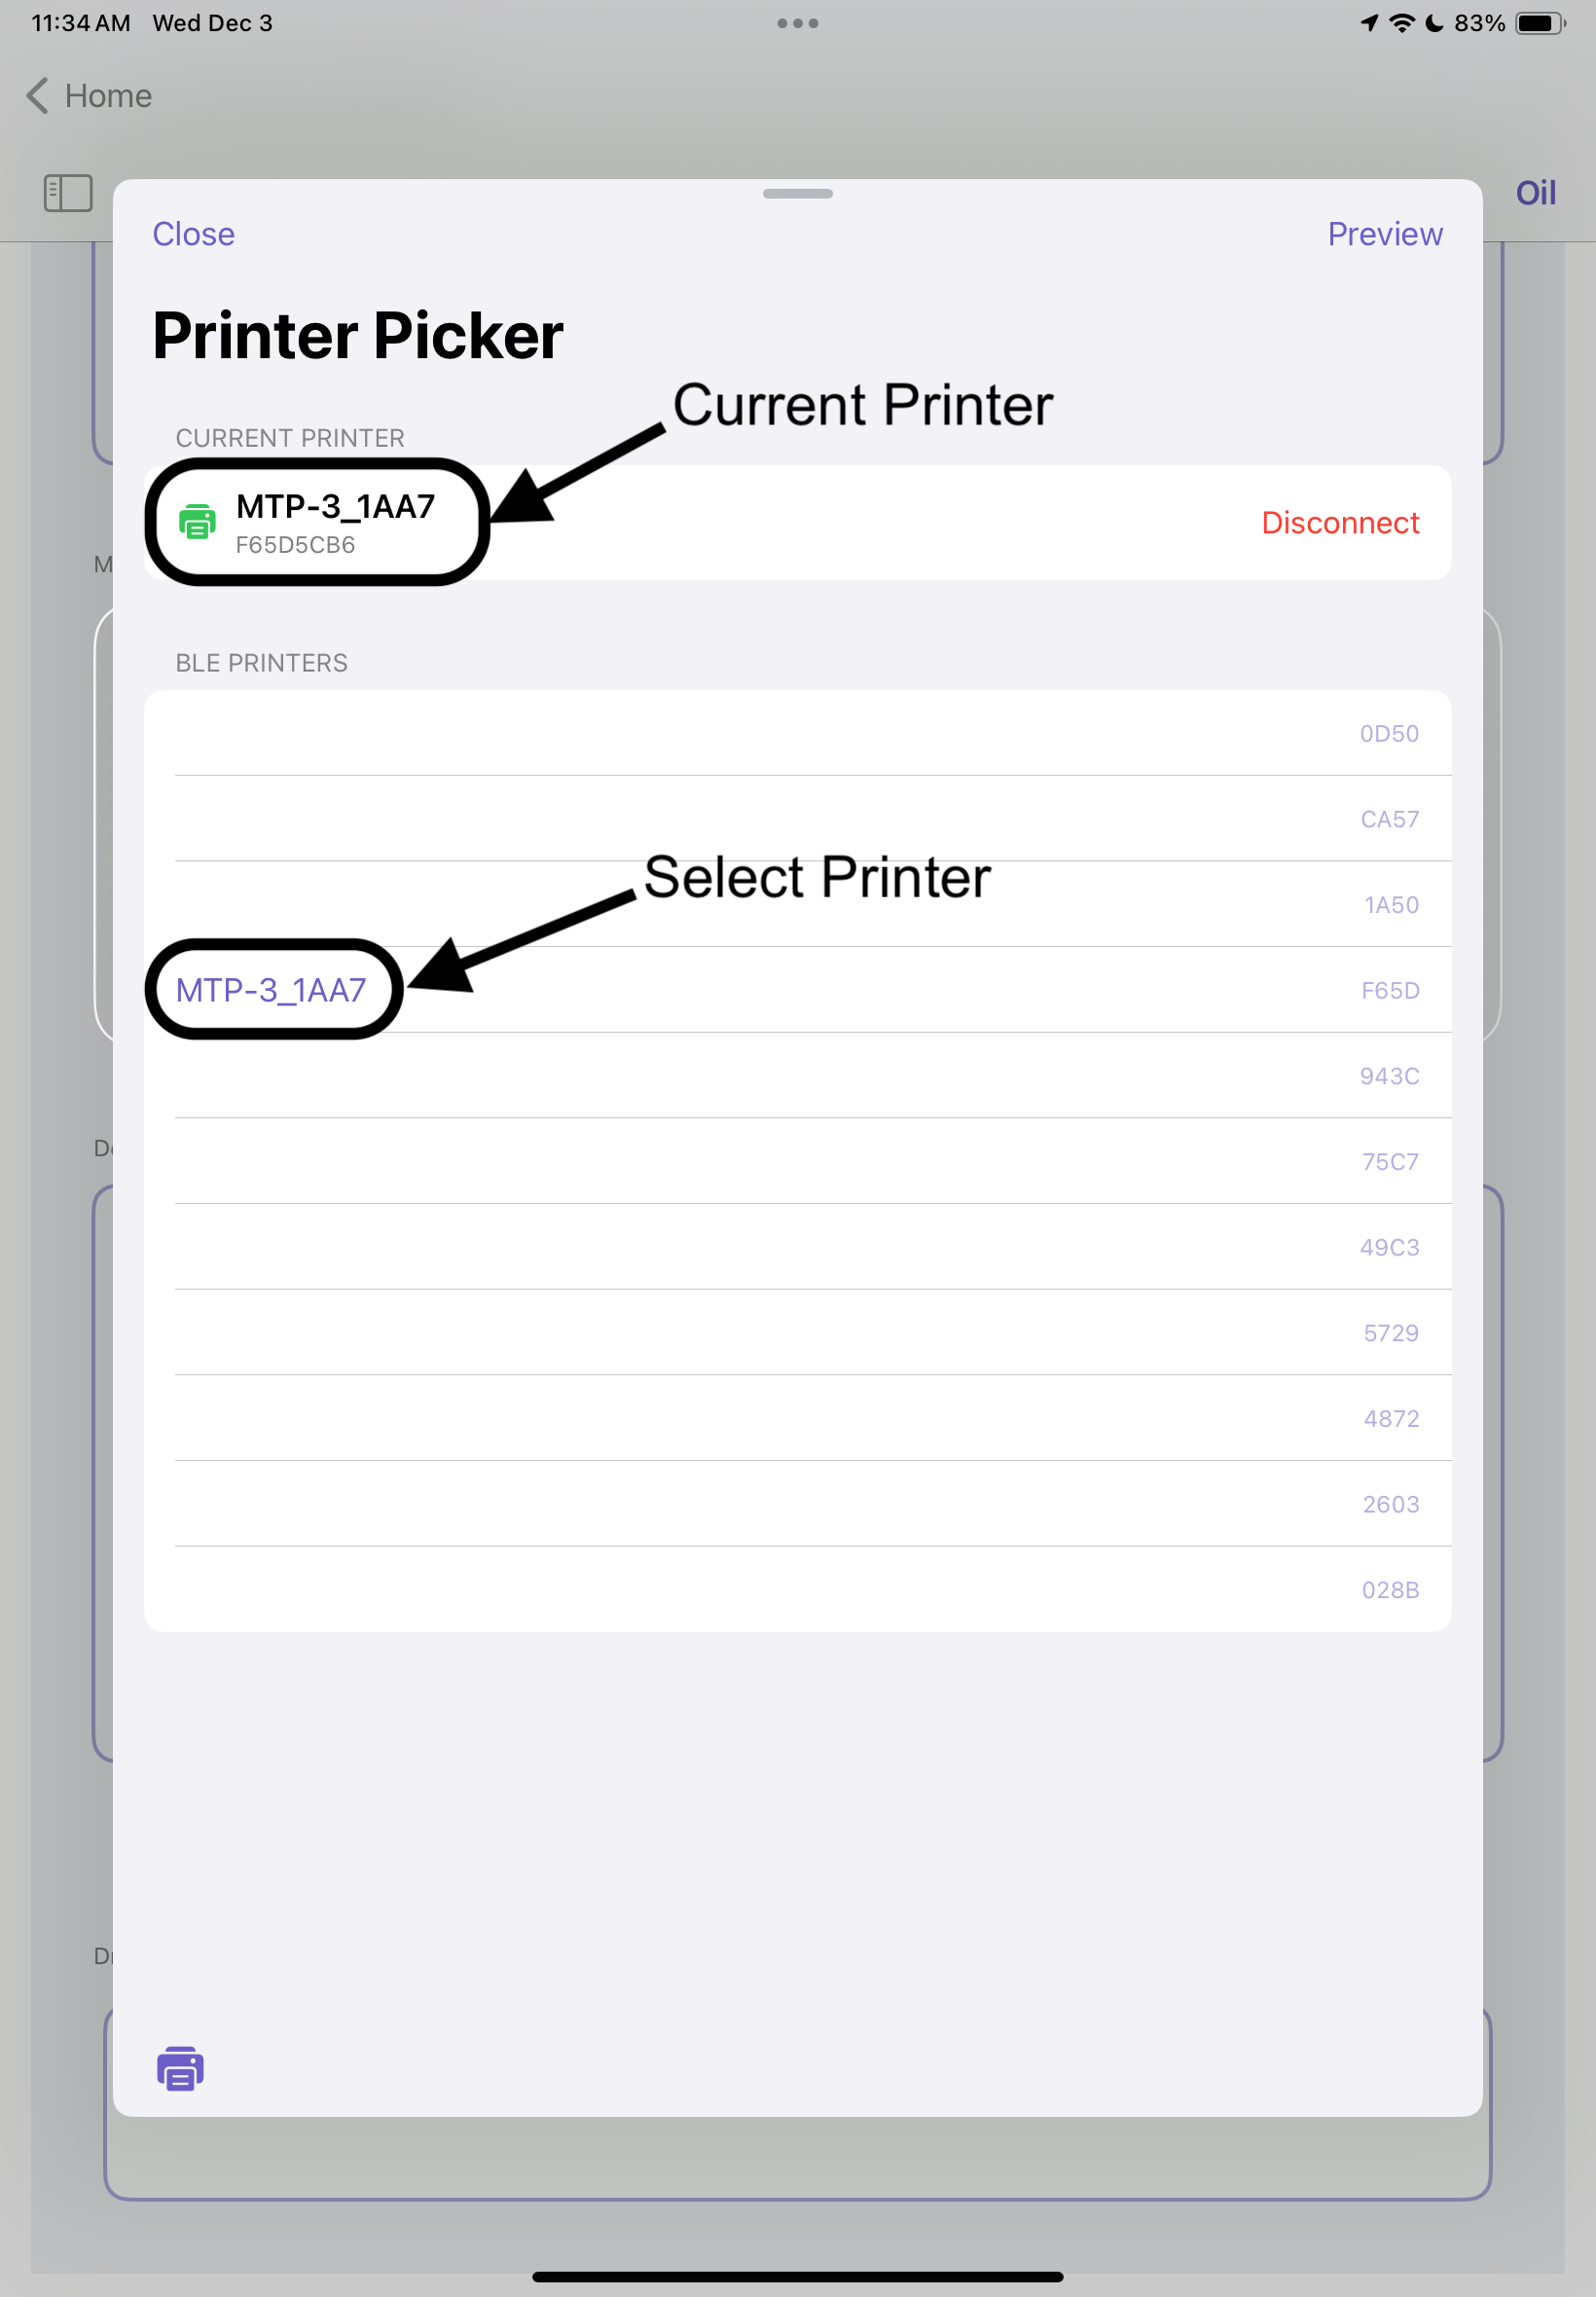
Step 5: Tap Preview at top right corner to generate ticket
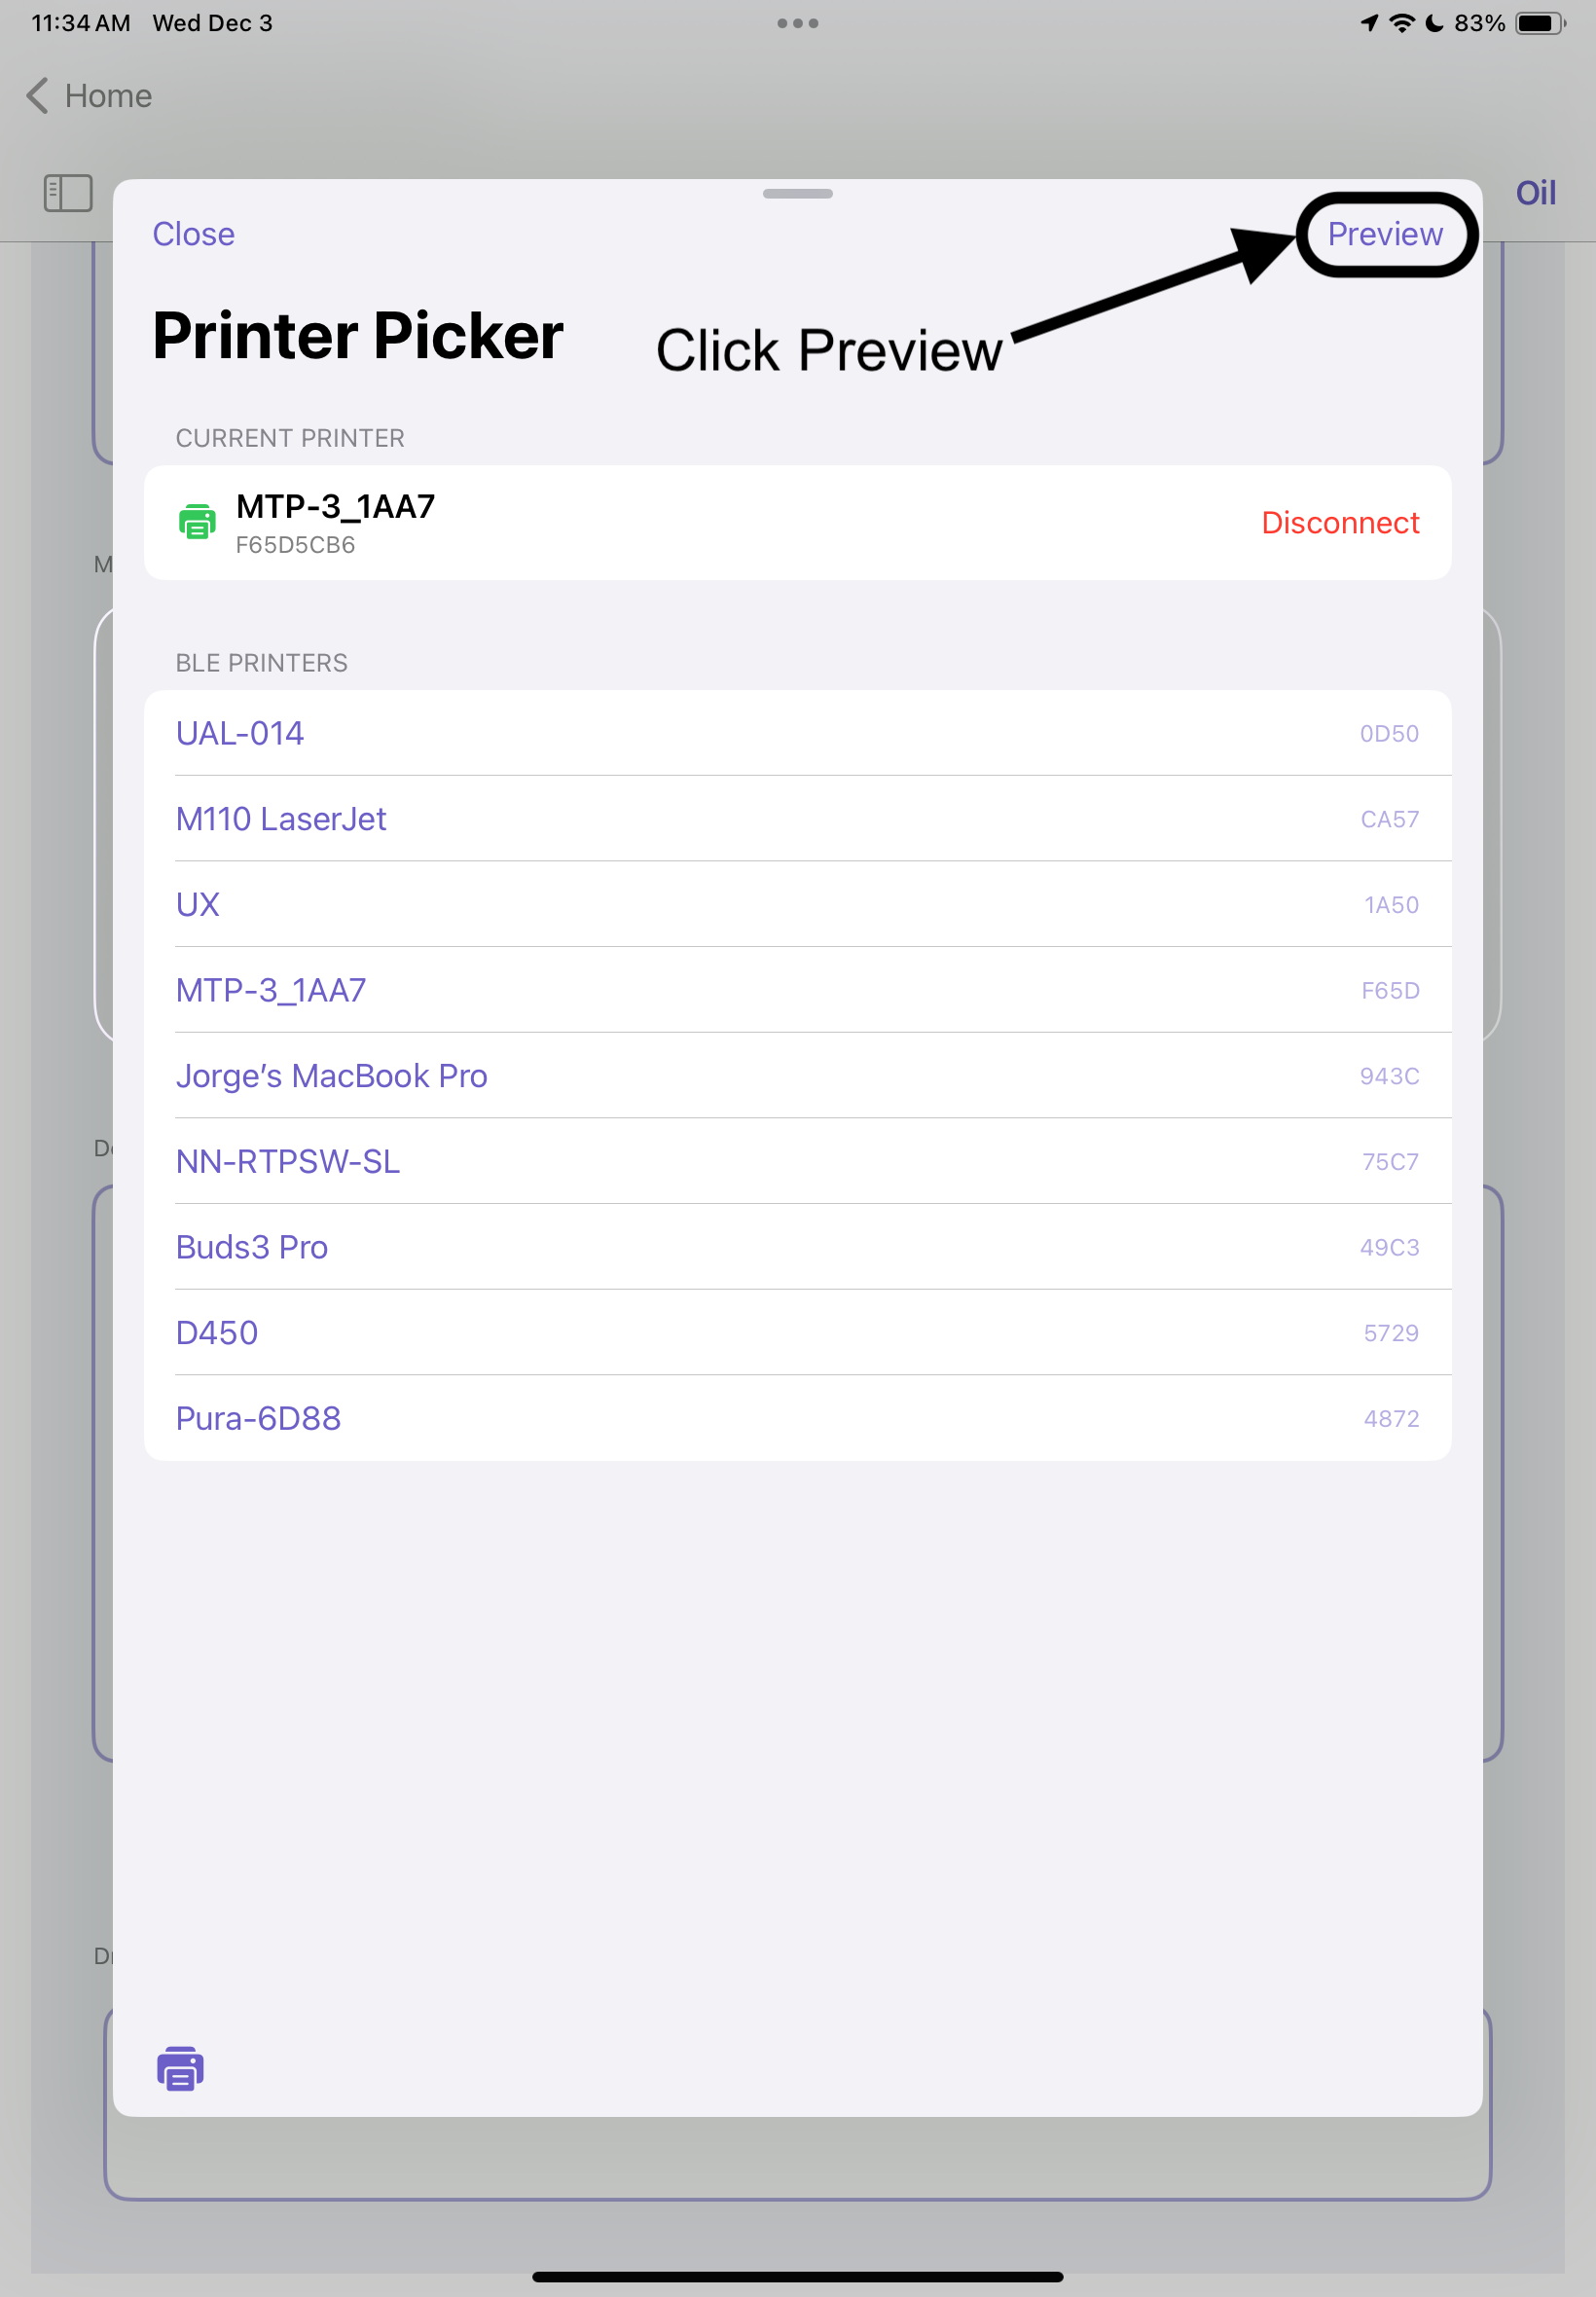
Step 6: Tap Print at top right corner to print ticket

Step 7: Tap Sync to ensure data is sent to dispatch
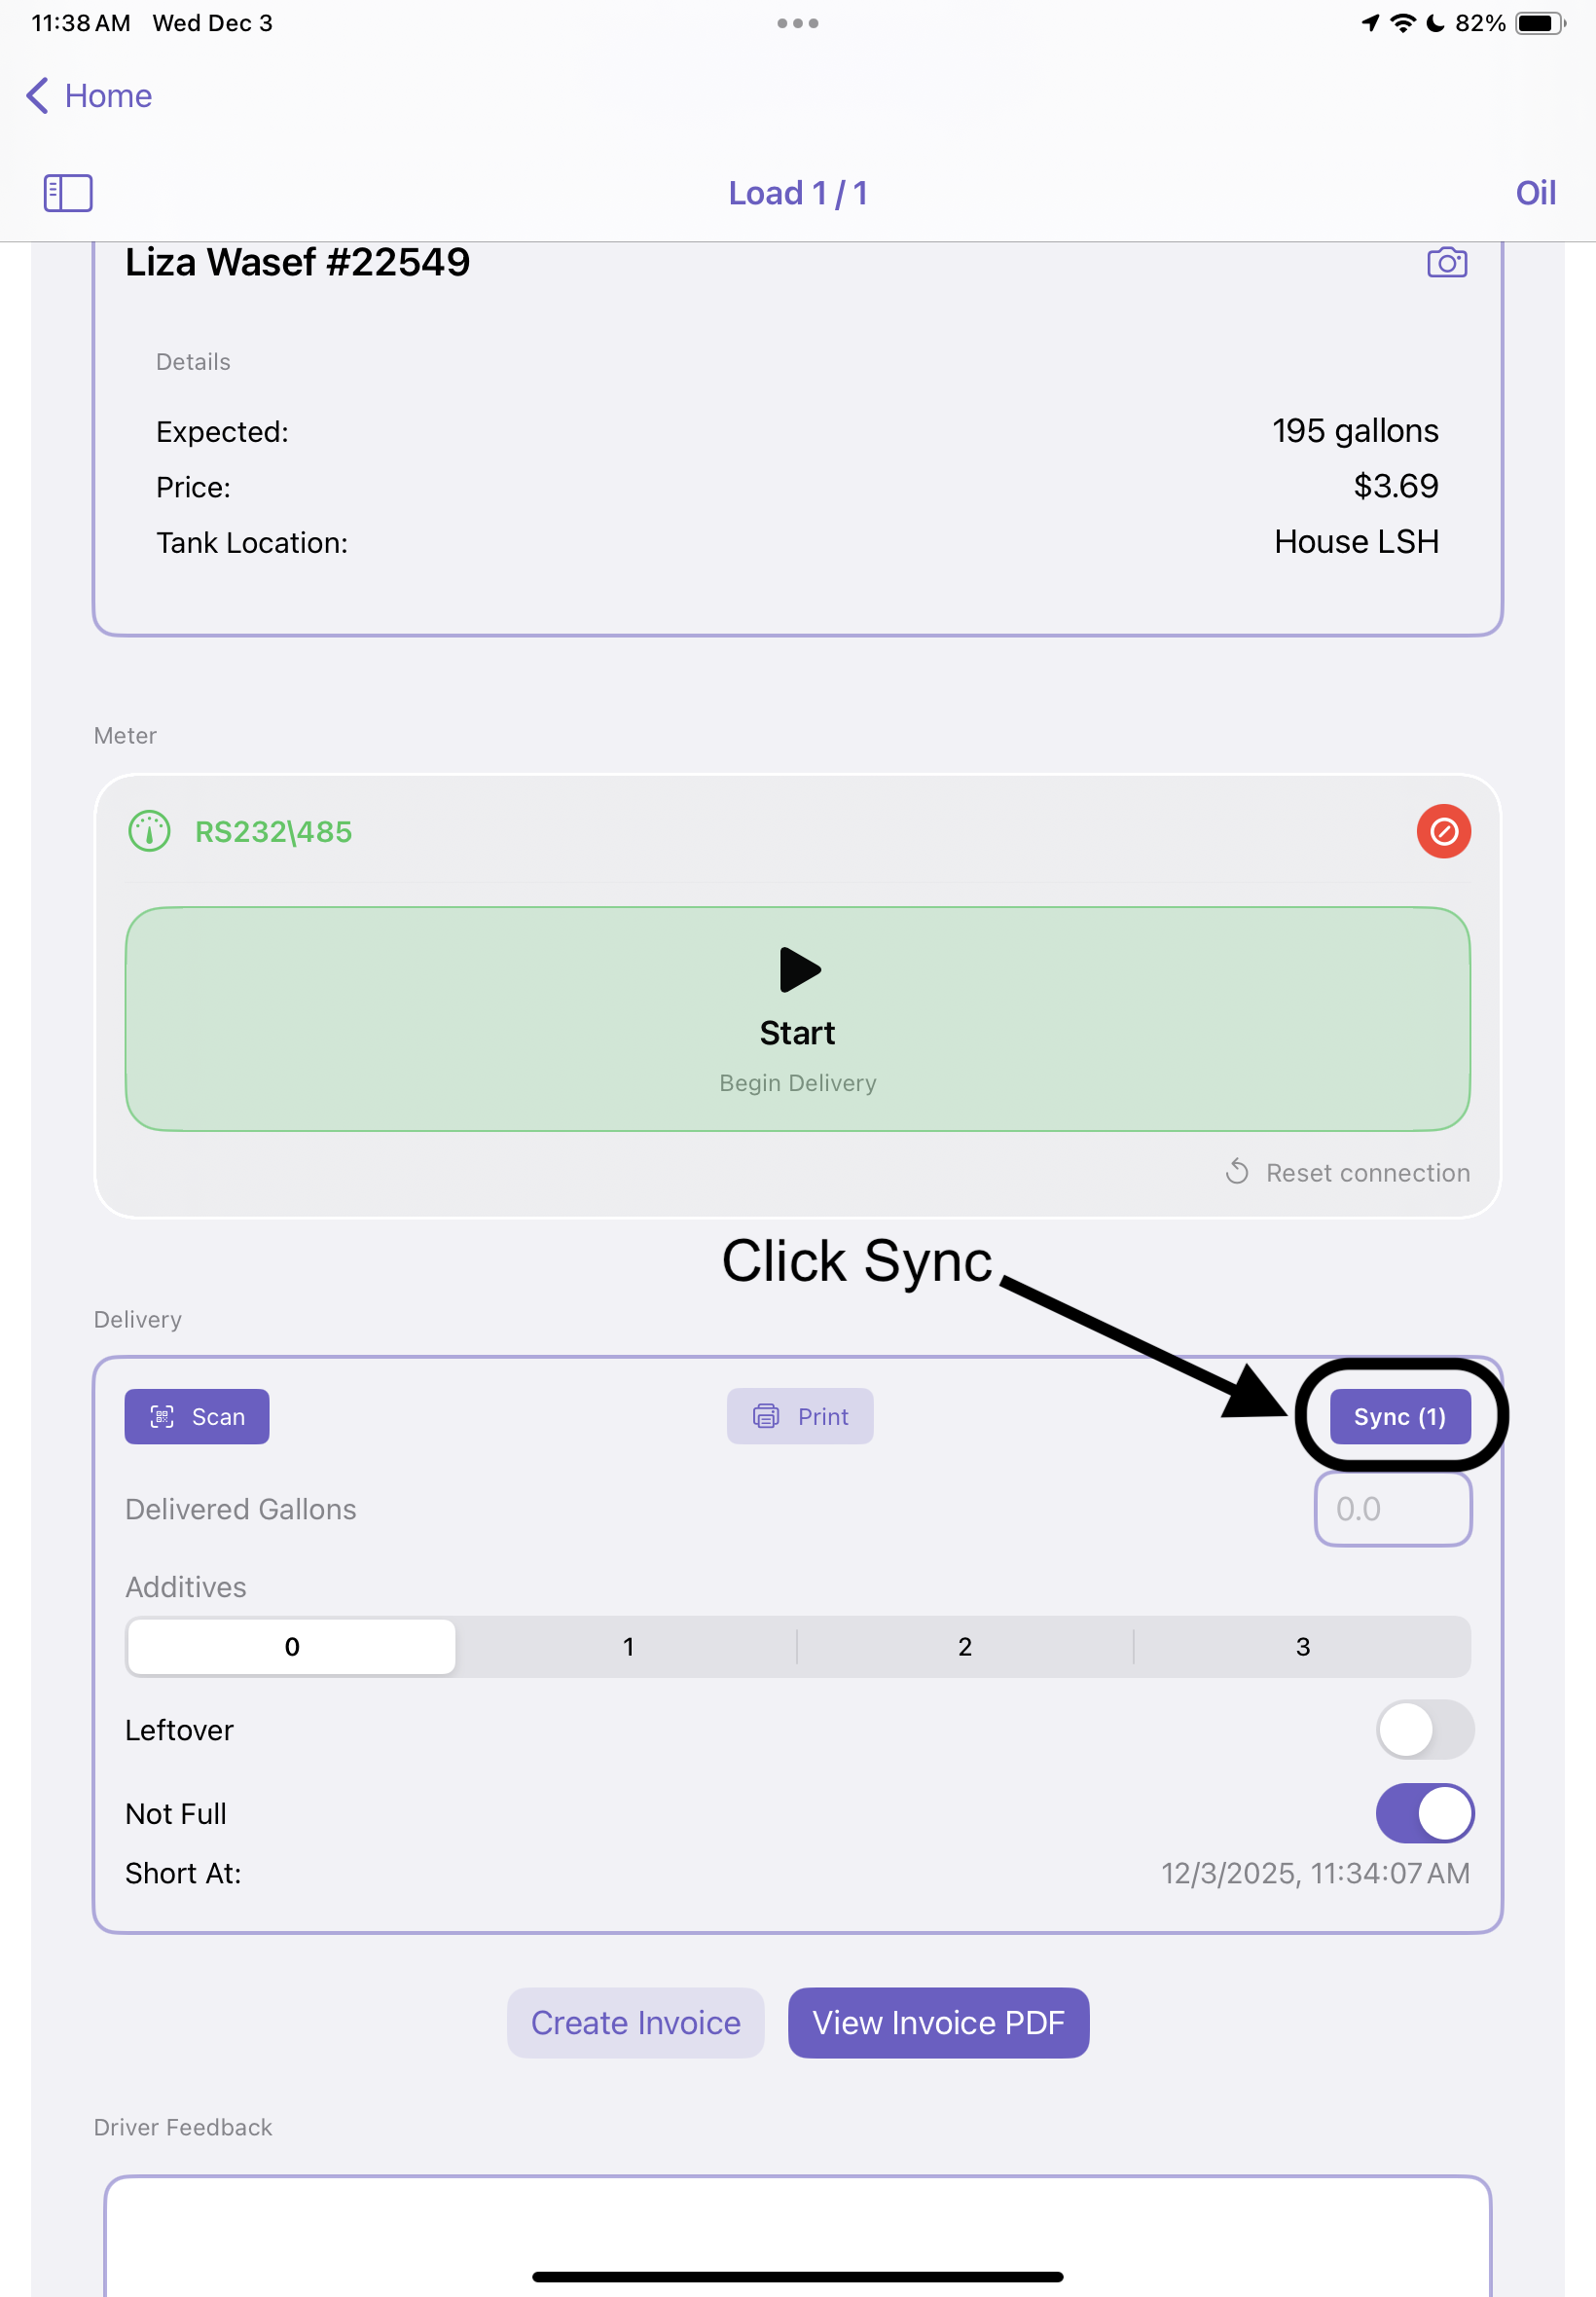
Key Buttons and Their Functions
| Button | Function | When to Use |
| Start Delivery | Begins meter pumping session | When starting customer delivery using Bluetooth meter |
| End Delivery | Ends meter session, prints ticket | After pumping is complete |
| Prints ticket manually | For manual entry or reprints | |
| Scan | Scans QR codes for delivery confirmation | Certain propane systems require QR validation |
| Sync Pending | Uploads any locally stored offline deliveries | Use after working offline |
Offline Mode and Sync
If an internet connection is unavailable, the system will automatically store delivery data locally.
Syncing Offline Deliveries:
- Complete your delivery as usual (data is stored on the device)
- A Sync Pending badge appears at the bottom of the Delivery Card
- When internet is restored, tap Sync to upload the data
- Confirmation will display once the sync is successful
End-of-Load Summary
Once all deliveries are complete:
Best Practices: ✅ Always verify customer address before starting delivery
✅ Ensure meter is connected before pumping
✅ Print ticket immediately to comply with regulations
✅ Use Sync Pending button before ending the shift