Setting Up a Route
Introduction
When Fuel deliveries are requested or set to auto deliver, The Routing page is used to place those orders on a load, then route in order for them to be delivered. The routing page can be reached by
- Clicking on the 3 bars on the top left corner to expand the side menu
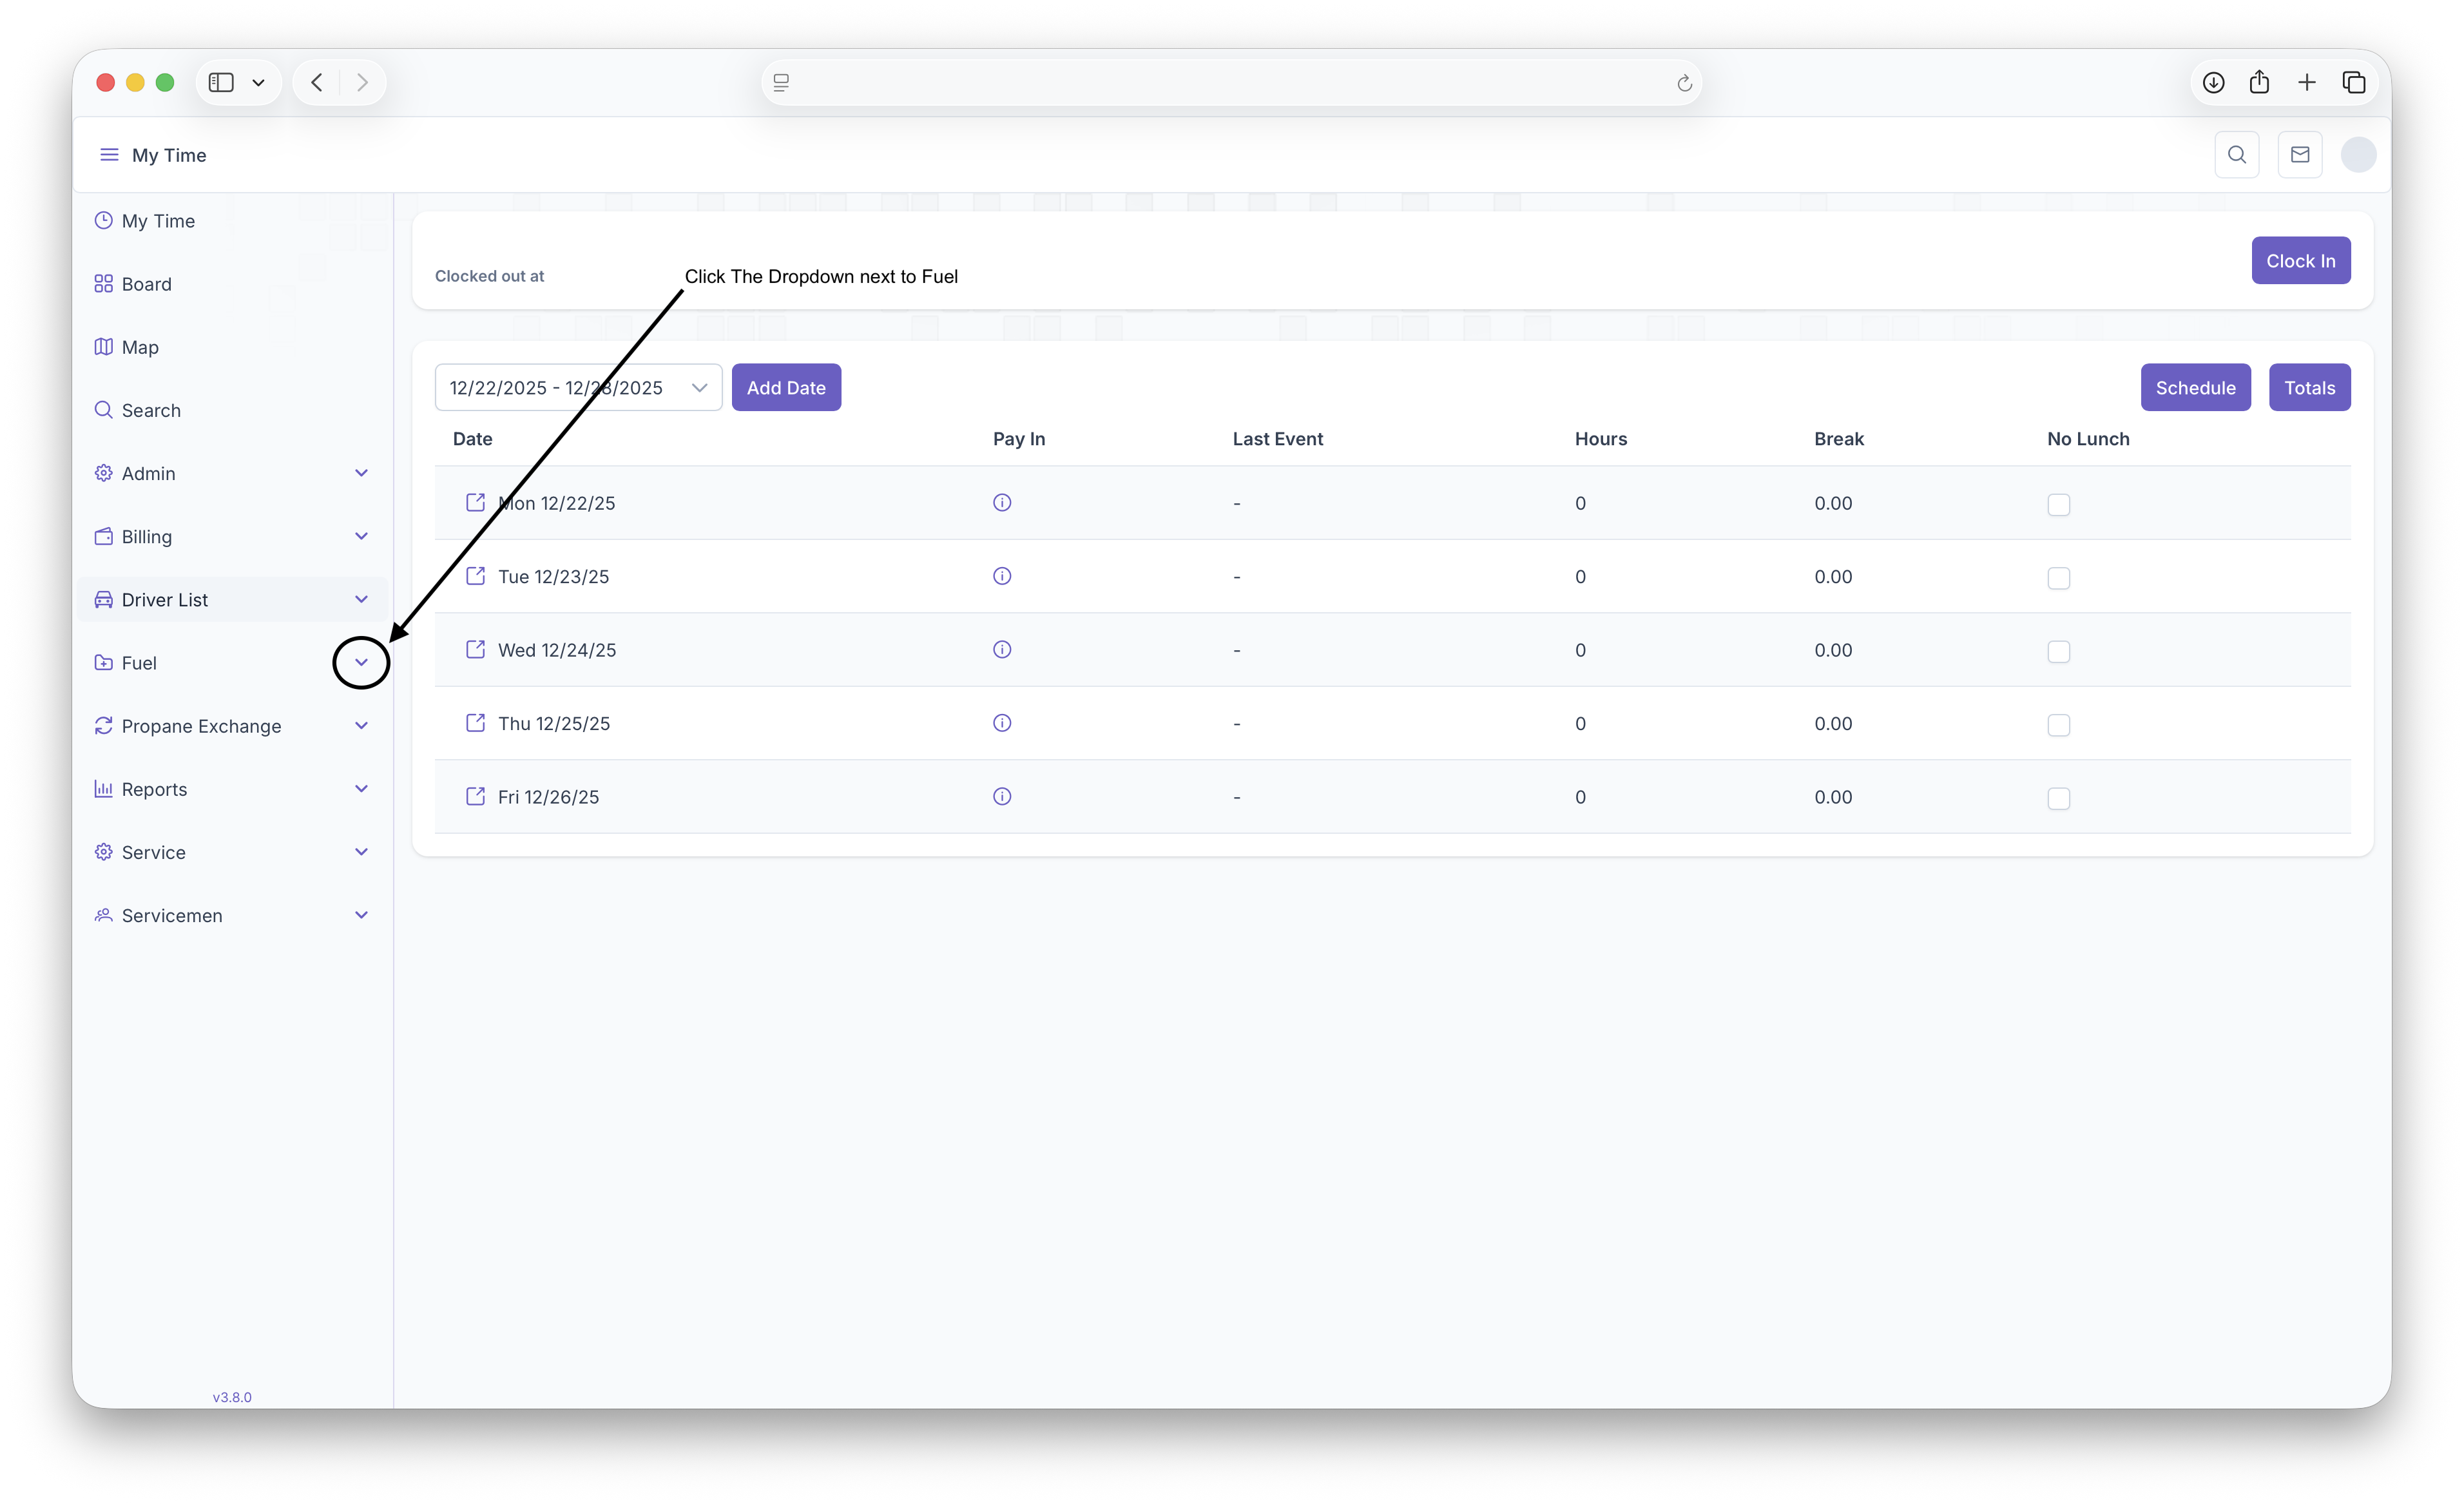
- The Click on the Fuel Dropdown
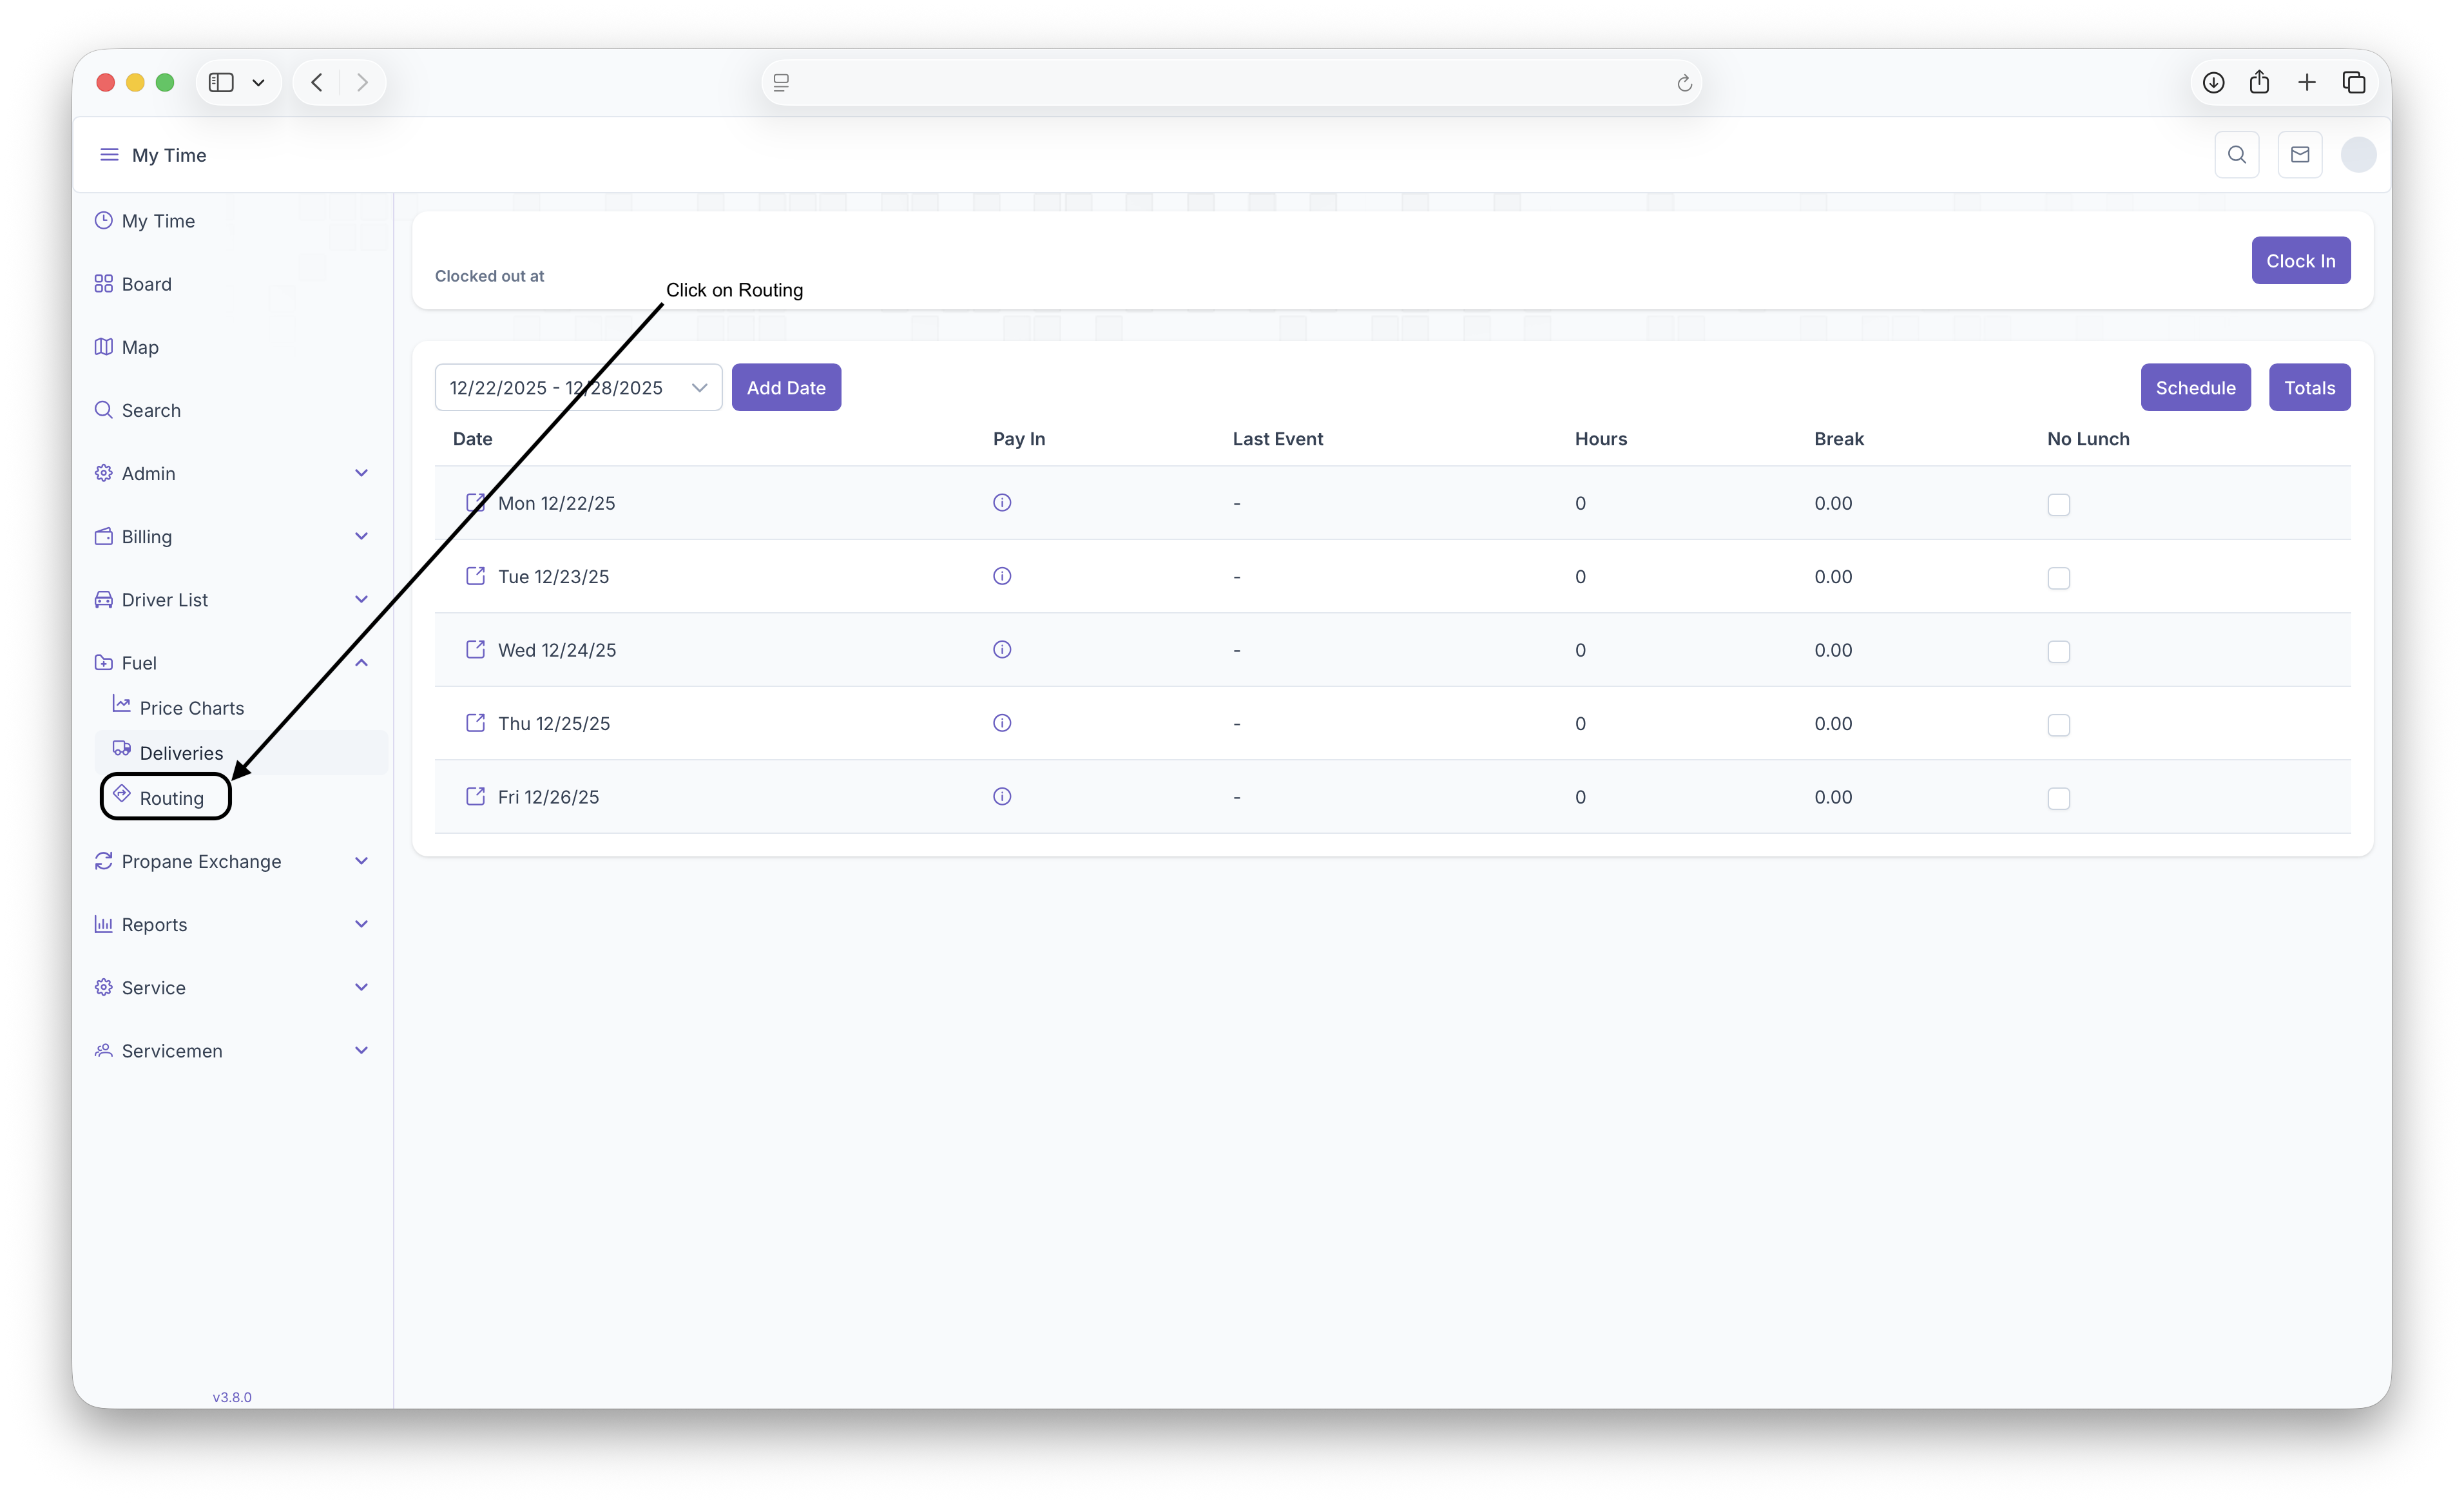
- Then click on Routing
This will then bring up the routing map
Routing Map
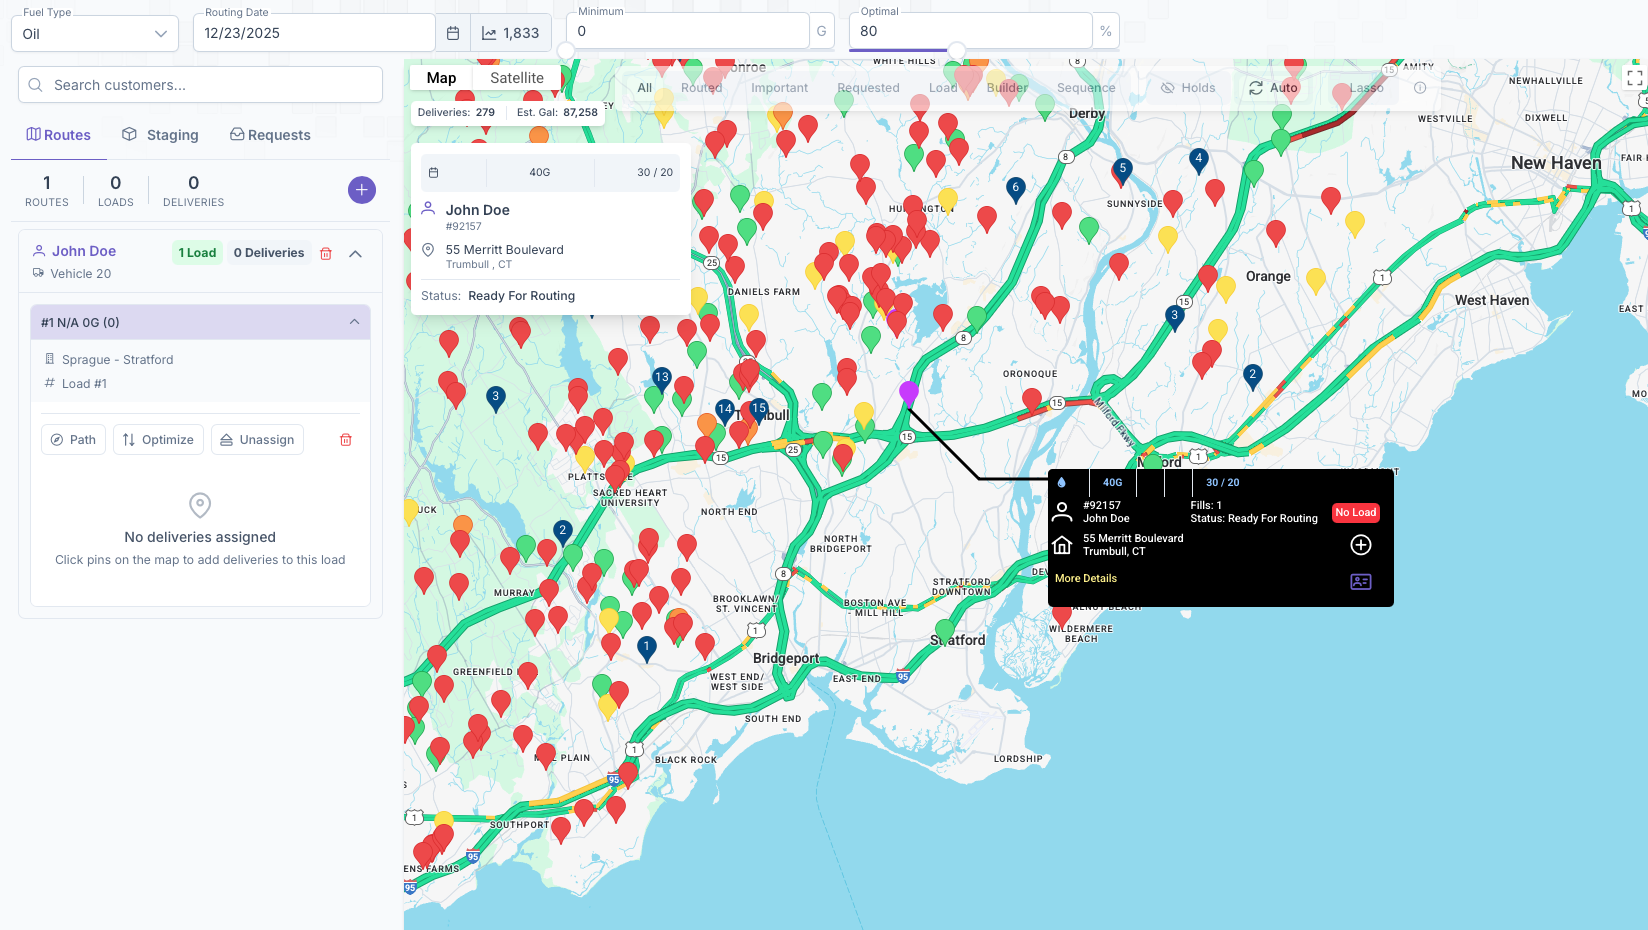
The Routing map is now where all delivery request will show up, including manual and auto deliveries. Before getting started with setting up a route, a few things must be set prior to beginning
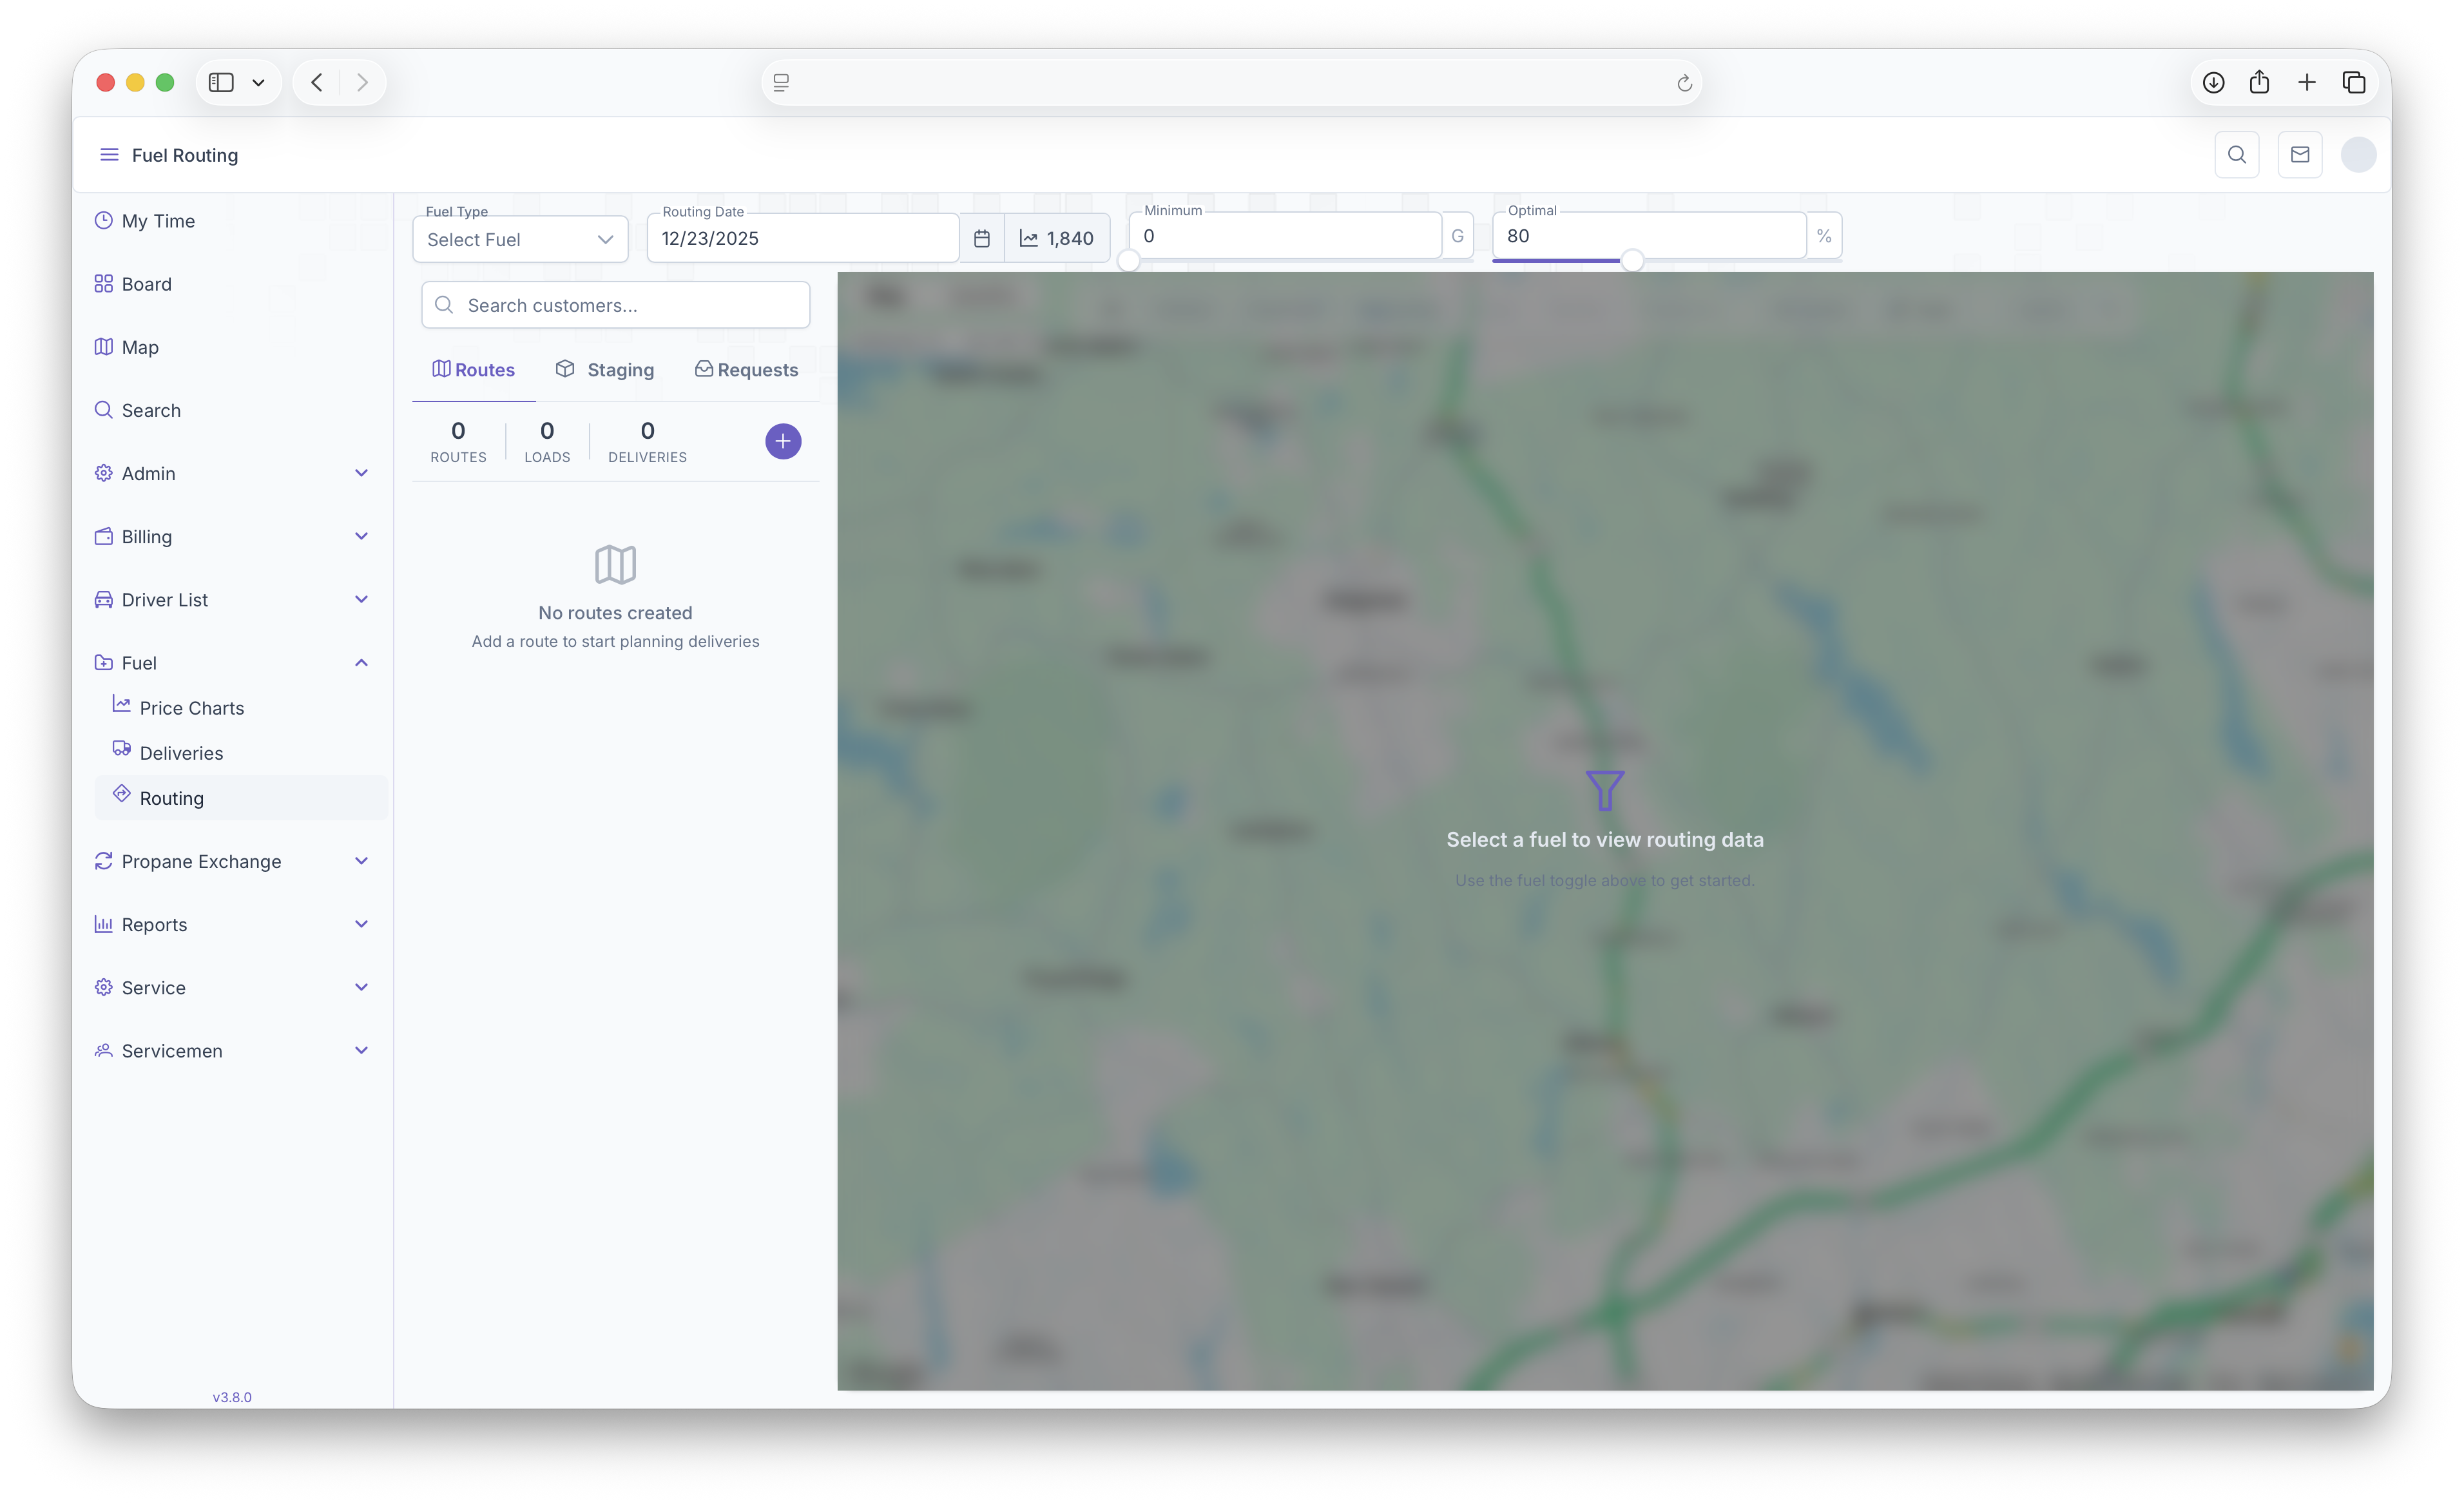
- Fuel Type - Select the fuel that's being routed for delivery
- Routing Date - The date the route is set to be delivered
- Minimum - Can be adjusted to filter out Customers who are below the set minimum gallons on the map
- Optimal - Can be adjusted to filter out Customers who are above the set optimum gallons on the map
These will be the first steps taken in order to start a route. The map will also show the current degree day next to the Routing Date. Once completed, The Routing Map will open up showing all Customers on the map.
Customers on Map
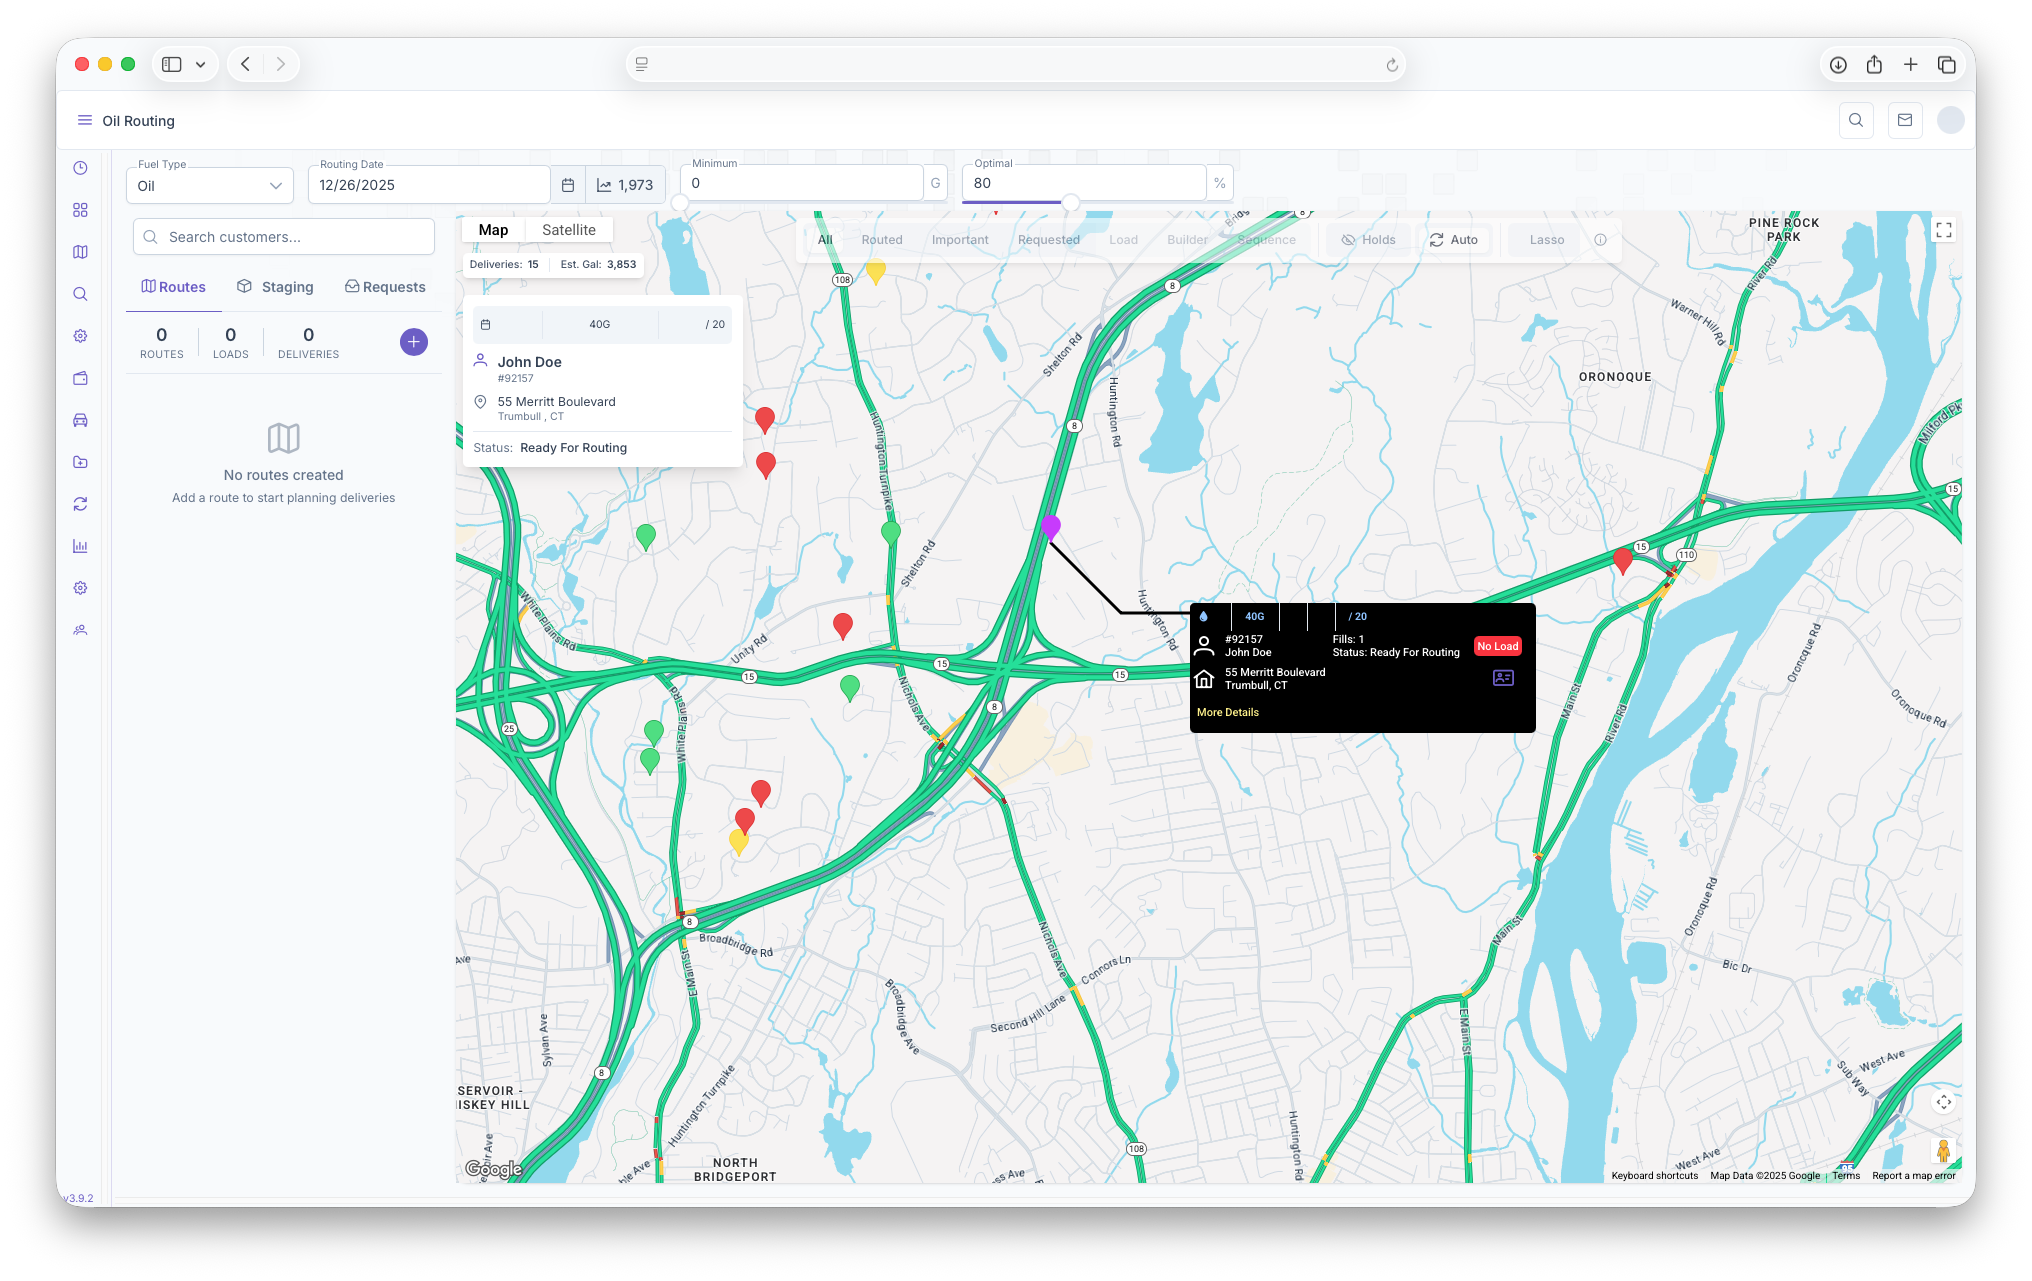
Hovering over a marker will show a brief description of the customer on the map, this includes
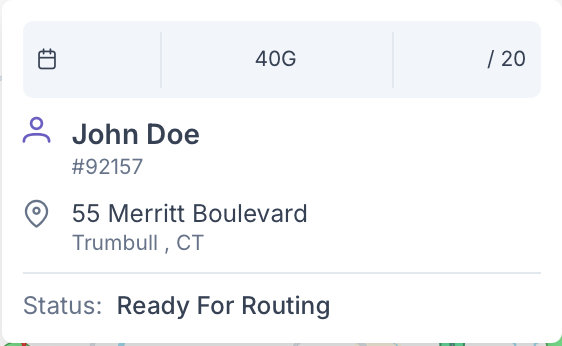
- Tank Size
- Expected Deliver/optimum Delivery
- The Customers Name
- Their Account Number
- Address
- Customer Status
Clicking on the marker will bring up a black box with more detail and options to take on the Customer. This box will be used later on for actual routing.
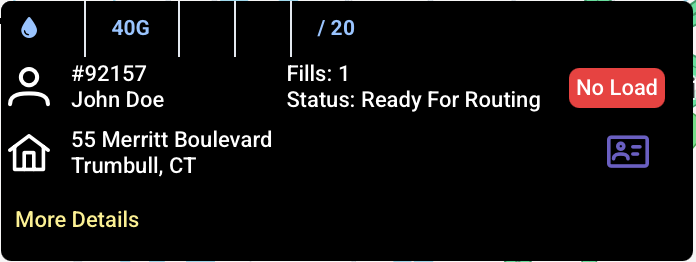
Additional options are that clicking on More Details will bring up a popup showing a more in depth look into the customers information which includes the extra following
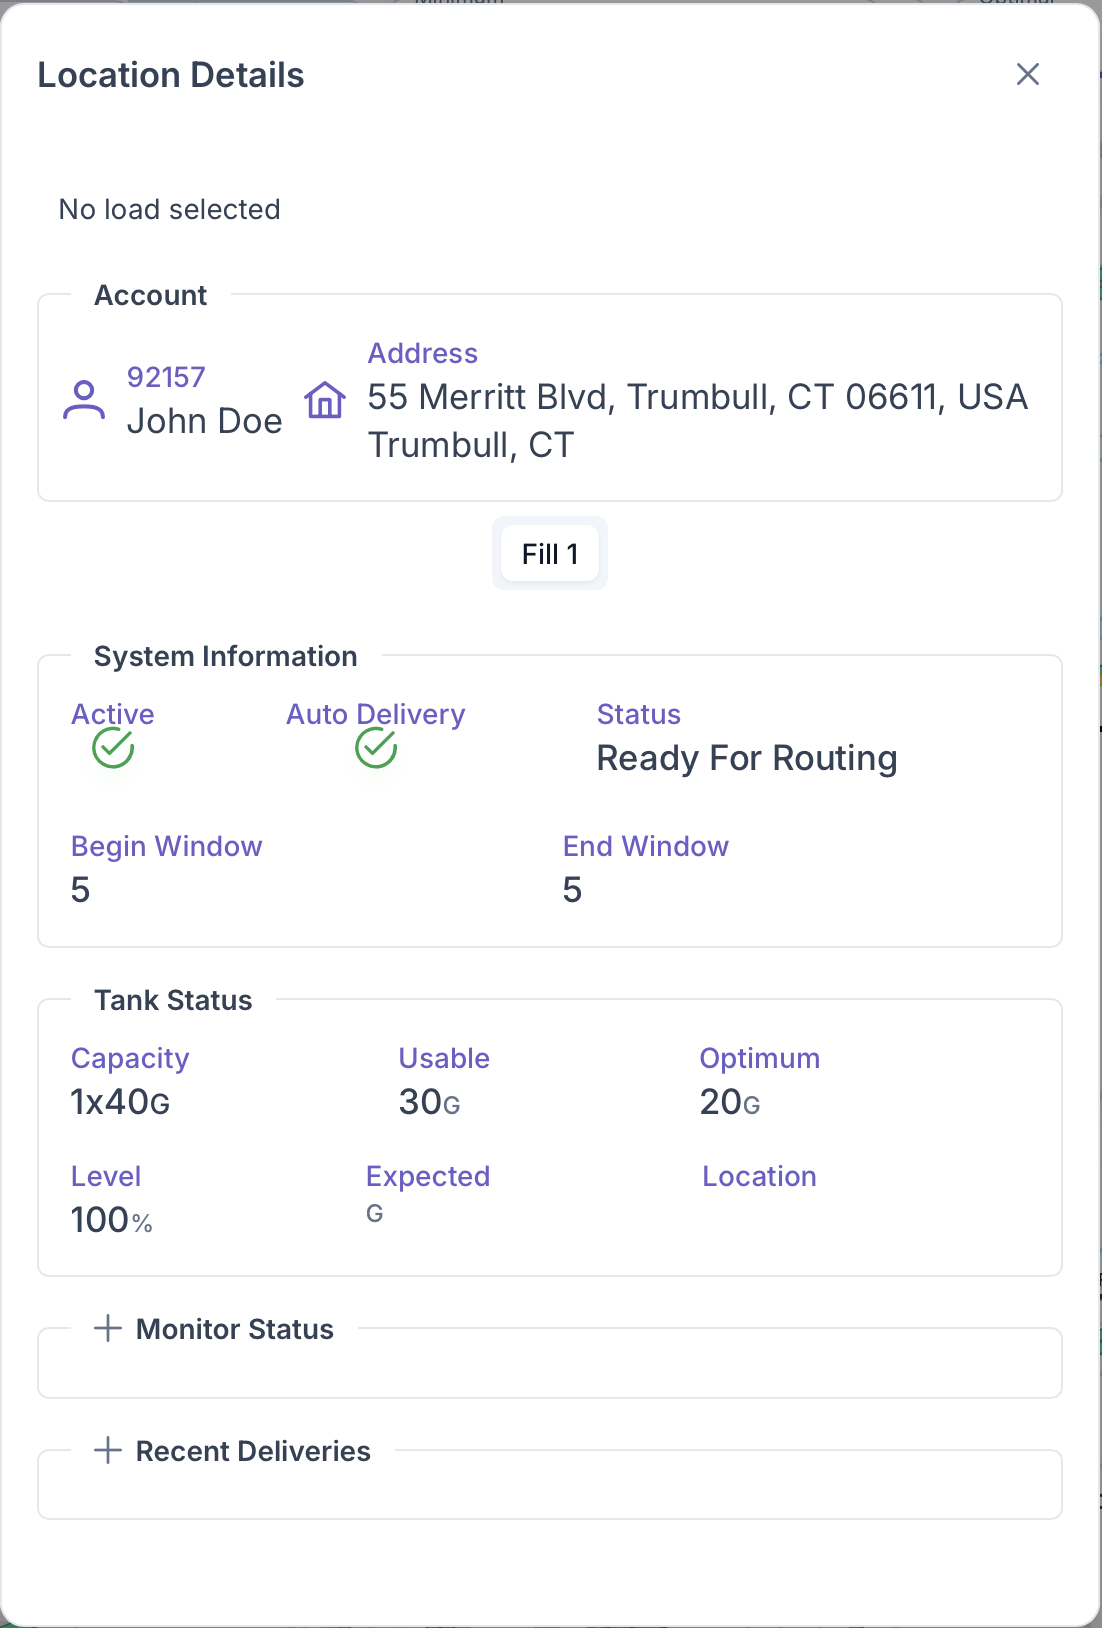
- System Information - This includes if the Customer's home is active, if it's set up for Auto Delivery, if it's ready for routing and the Degree Window for Delivery, including the Begin and End Window
- Tank Status - This includes Tank Capacity, the usable amount, the optimum fill, what level the tank is, expected delivery and the location of the tank on the property
- Monitor Status
- Recent Deliveries
Clicking on the Purple Card on the black customer box will pull up the Customer Account page.
Search
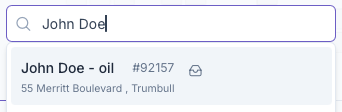
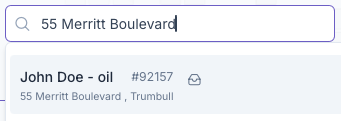
A customer can also be searched by using the search box right next to the map. They can be searched up by name, address or account number, this will handy for pulling up a customer without needing to search the map for a specific address.
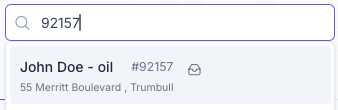
A delivery request can also be made on the search page by clicking on the envelope next to the customers name. This will help with quickly looking up a customer and adding them to the Requests portion of this page, as seen below, for easier routing by having the customers already listed.
Map
The map itself has a lot of features itself outside of showing customer locations and adding them to routes. Starting with the top bar, the map can be toggled to show as a normal map or by toggling to satellite view, will show the map in a satellite image, still showing all customer locations

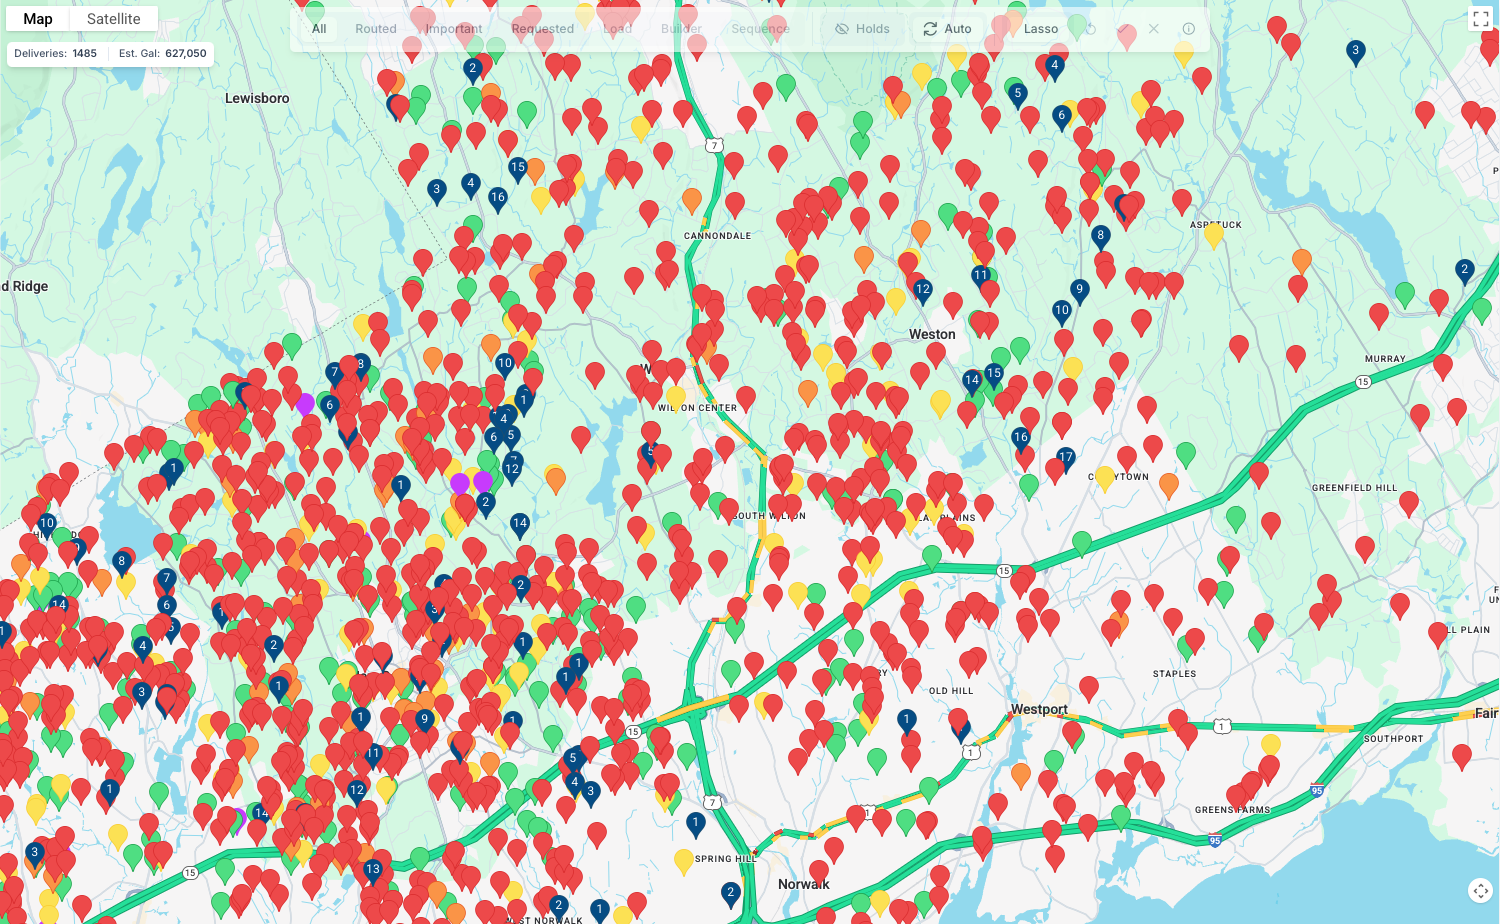
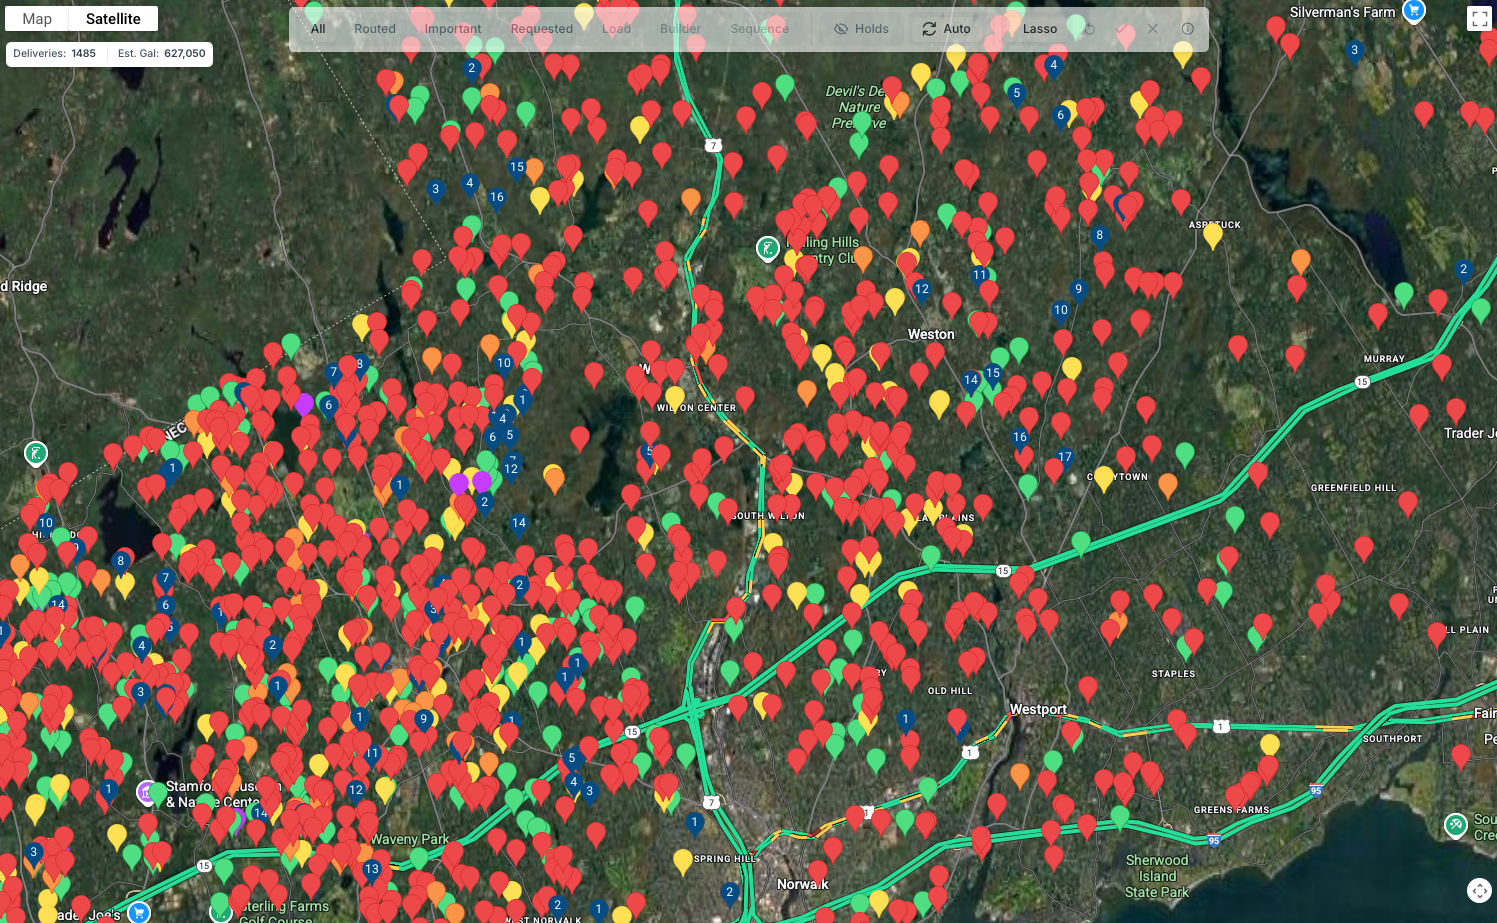
Below the Map and Satellite bar, is another bar that shows total number of potential deliveries on the map as well as total number of estimated gallons for the day.

Finally the filter bar, probably the more important bar before geting a route ready. The bar itself is divided into 3 sections each used for filtering purposes

The first sections is for filtering routes
- All - Shows all customers on the map for routing
- Routed - Shows only customers that have been added to routes
- Important - Shows the more pressing deliveries that need to be made
- Requested - Shows Deliveries that were requested by the customer
- Load - Shows loads that have been built but need to be added to a route
- Builder
- Sequence - Routes that have been loaded and sequenced showing a route
Next is the customer filter
- Holds - Shows customers on the map that have holds on their accounts
- Auto - Shows customers that have auto deliveries set up on their acount
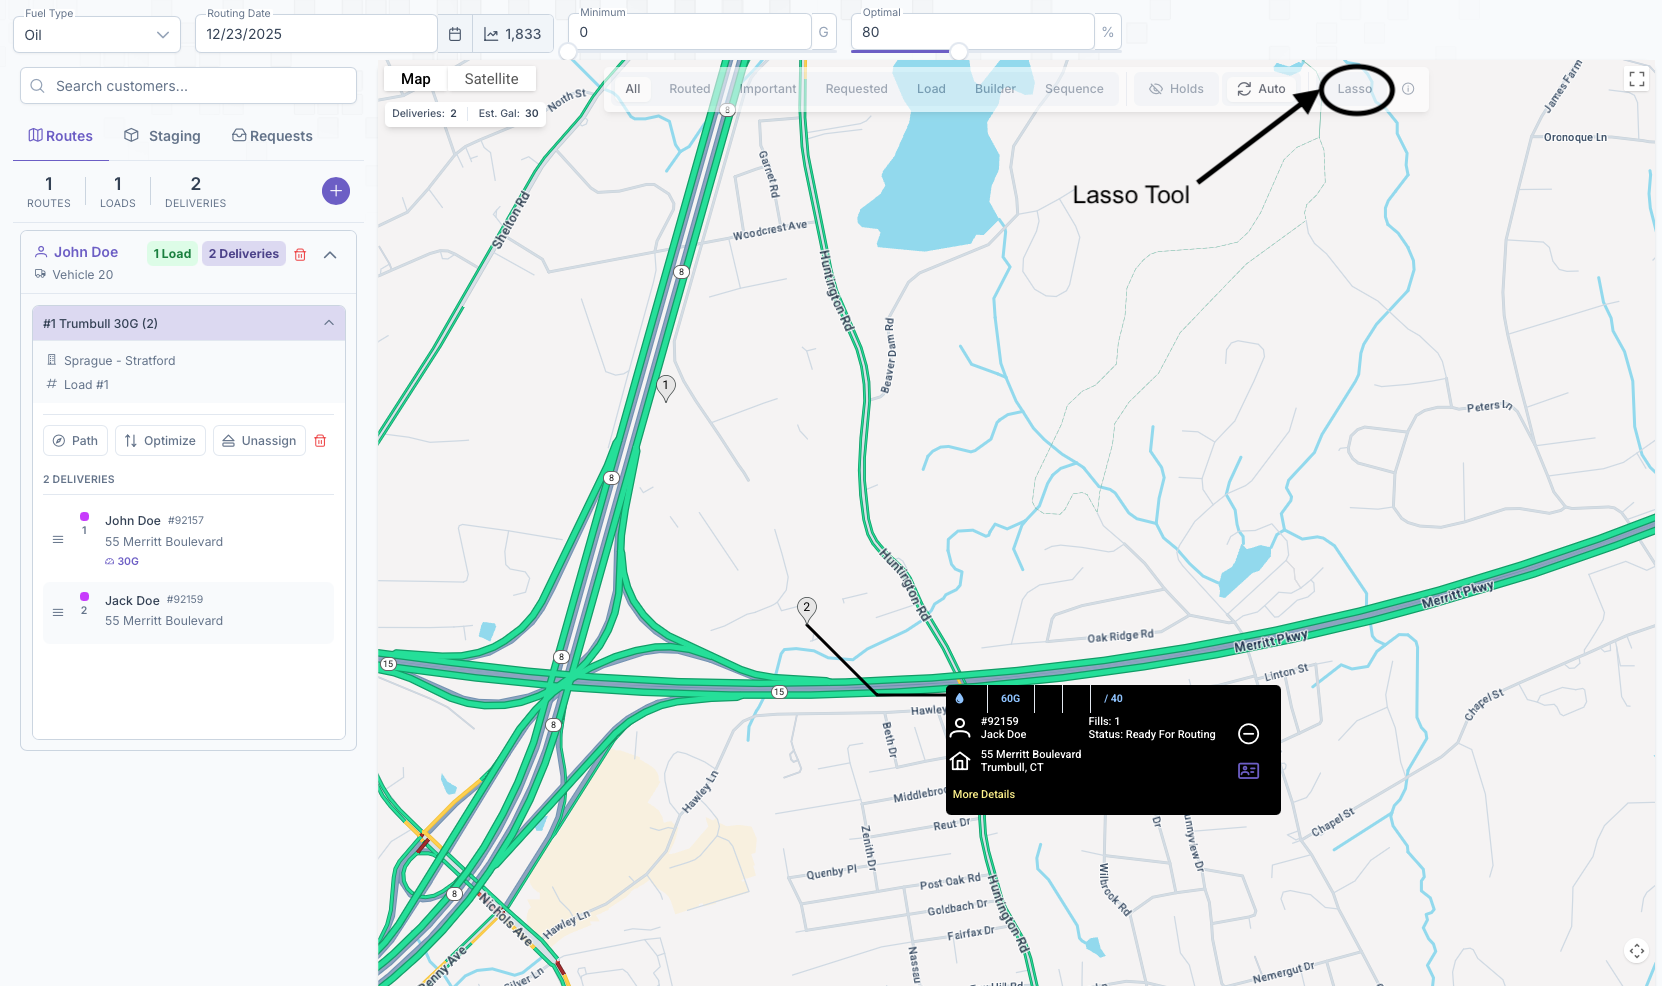
Finally The Lasso tool, this tool is primarily used when setting up a load for a route. The tool allows for a "Lasso" to be made using points around a selected area. The points then create a zone and everything inside of the zone can then be added onto a load which can then be added to a route. The tool shows the following
- Undo - Clicking on it deletes a previous point added on the lasso
- Check - Clicking on the check will close out the Lasso and create a zone
- X - Clears out the created zone and allows for the creation of a new one
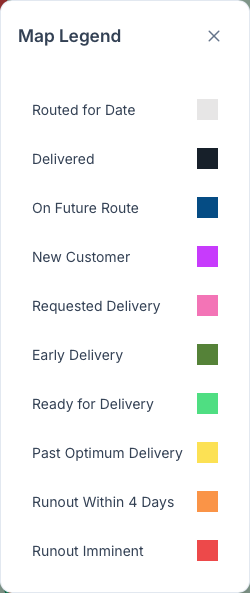
The map also features a legend to indicate what every color on the map signifies. Clicking on the explanation point on the bar will bring up the legend
The map can also be shown in full screen by clicking on the box on the top right corner. With all that, Routes can now be set up
Creating Routes
Once everything is all set, a route can now be created. Routes are created on the left side of the map on the routing toolbar. The toolbar is divided into 3 sections, Routes, Staging and Requests
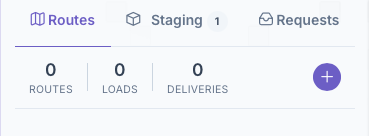
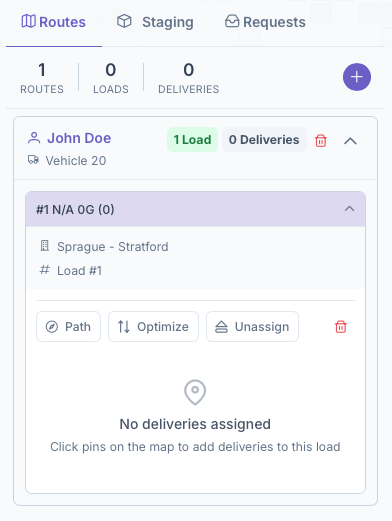
1. Routes
Setting up a route starts on the routes tab
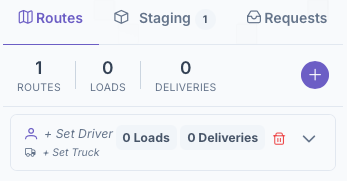
- Click on the add button to open up the Route Box
- Click on Set Driver and select a Driver then click on the check next to the name
- Click on Set Truck and set the truck for the driver and click on the check next to the truck. For a truck to be made available, it must first be created and added to the system. A guide on how to create a vehicle can be seen on the Vehicles guide
With that a route has been created and now a load must be generated to add to the route

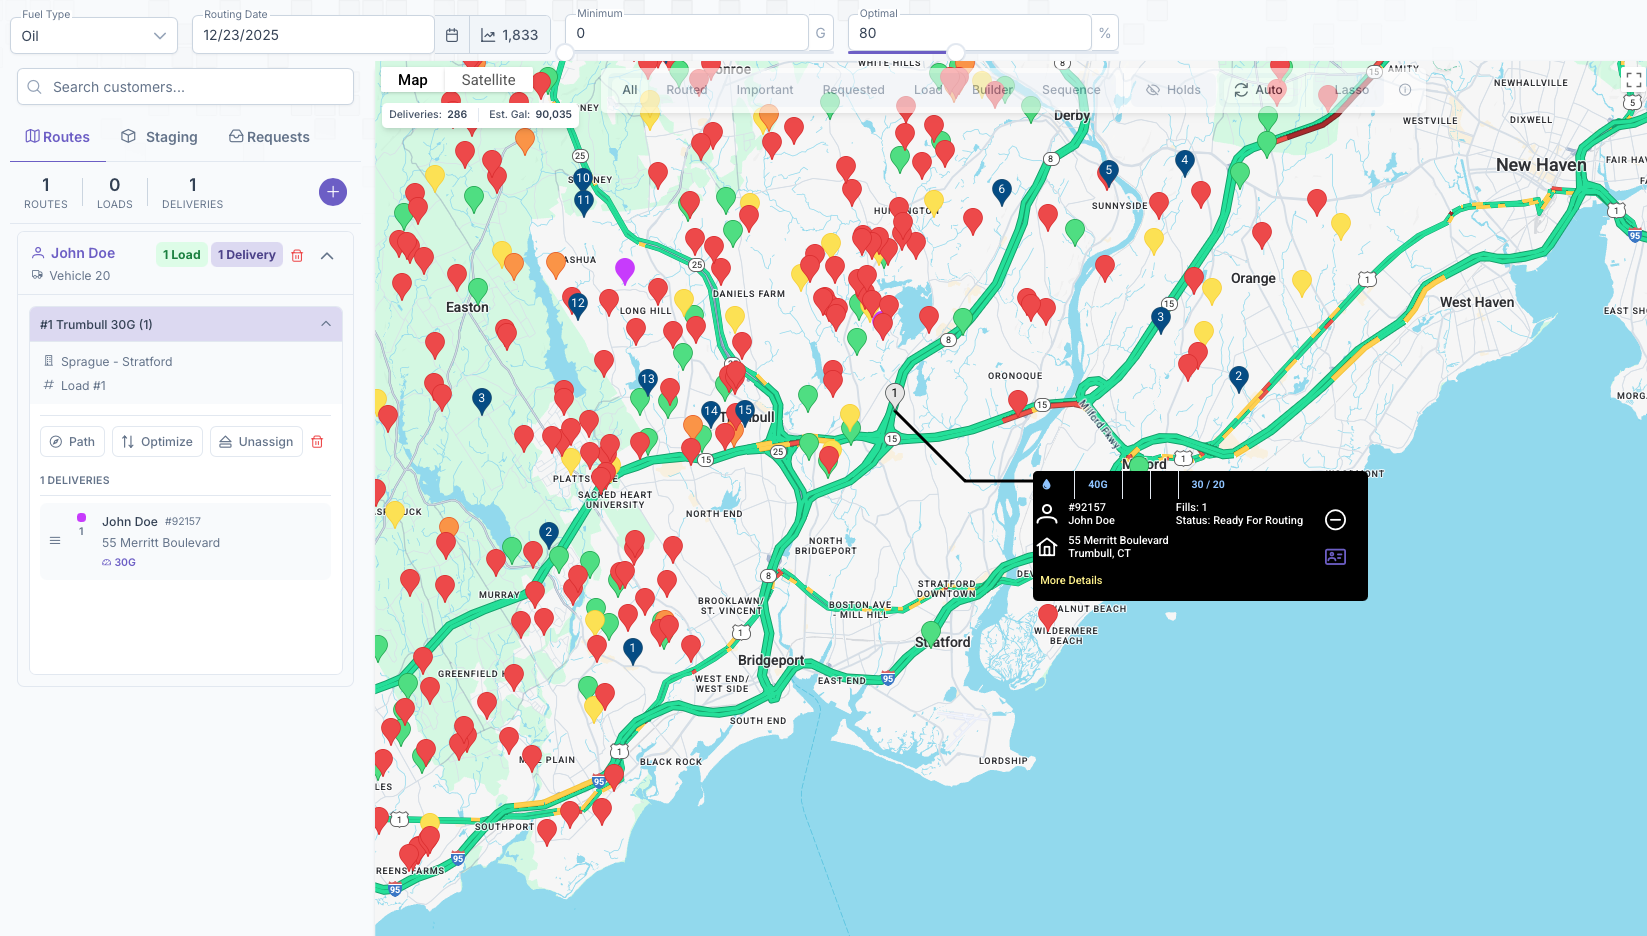
2. Load
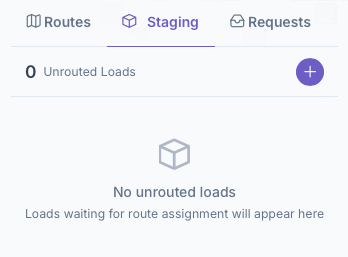
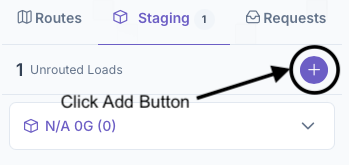
Next is setting up a load to add to a route. To start this process, click on the Staging tab next to the Routes tab to bring up the Staging toolbar
- Click on the add button to add a load to the unrouted loads list
- Next select a Load to work on and click on the arrow to bring up the Load Box dropdown
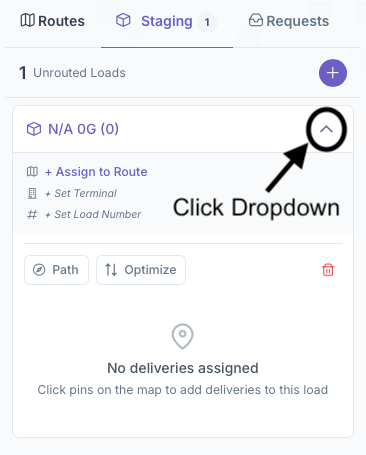
- From here a route can be assigned to the load or it can be done after, but once added, the load will be moved into the routes tab under the Route selected

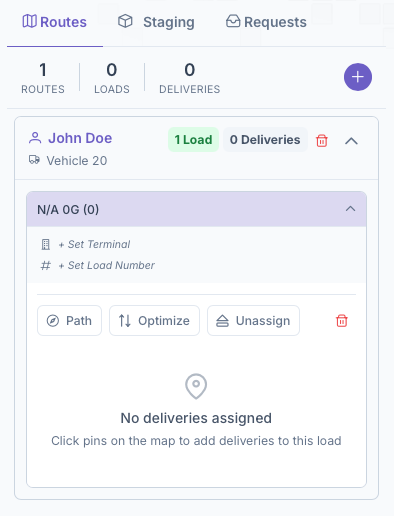
- After which, if a route was added, continue back onto the routes tab and continue there by selecting the load under the route
- Click on Set Terminal then click the check after selecting one. Just like with Vehicles, a Terminal must also be created and added to the system for it to appear on here. See the Terminals guide for a more in depth look at creating them
- Click on Set Load Number and click the check after assigning a number
With that a load has now been created and added to a route. The Final step is assigning Customers to the load and sending off the load
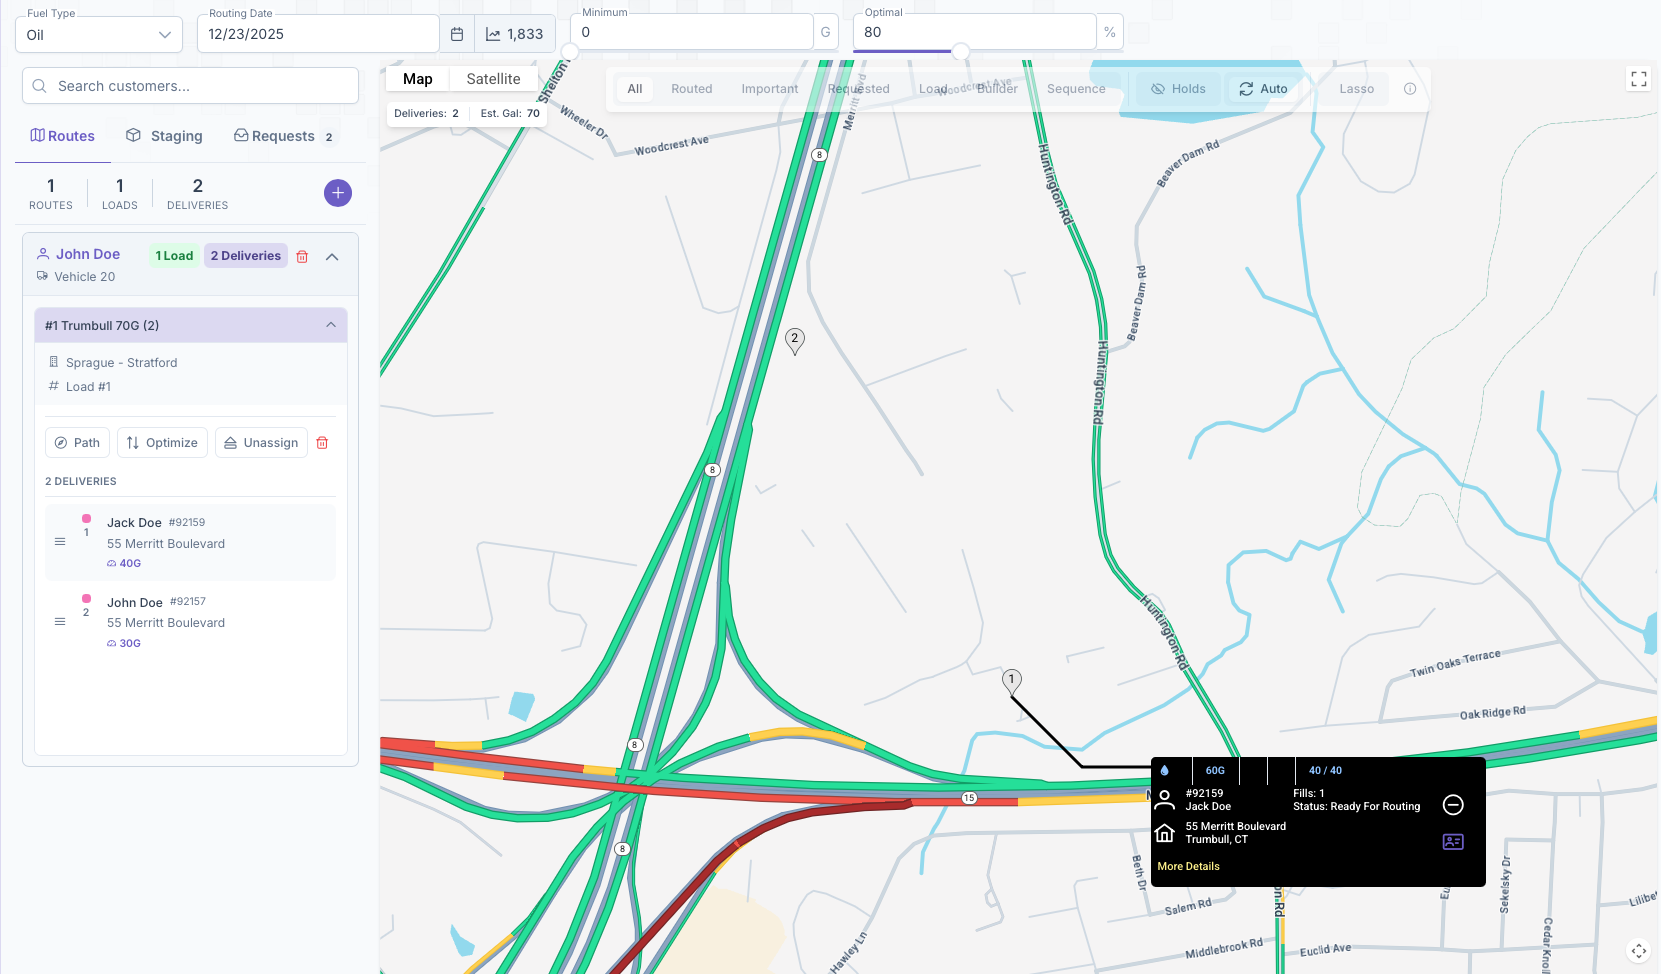
3. Adding Customers
Next is adding customers. Once a load has been created, customers can be added on to the load. Customers can be added to a load even if the load itself isn't part of a route yet. If not part of a route, adding customers must be done on the staging part of the toolbar but if the load is on a route, then it will be done on the Routes part of the toolbar under the driver.
- To begin, press the dropdown on the load to pull up the load

- Next select the customer by finding them on the map or doing a customer search

- Click on the Customer to bring up their black info card
- A plus should now appear on the box, clicking on the plus will now add them onto the load.

- Repeat the process to continue adding more customers to the delivery
Once completed, a list will appear under the loads showing all customers added. The order that they appear in is the order that they will be delivered to. This list can be rearranged by clicking and dragging the 3 bars next to the name of the customer. Once all customers for that delivery are added and arranged in prefered delivery order, the route is now ready for shipping. Clicking on the path button will create a path on the map starting with the terminal and going in order of the customers list. Clicking on Optimize will optimize the route in a matter that saves time by putting the customers in a more efficient order. If added to a route, clicking on unassign will remove the load from the route in the case that it needs to be reassigned or for any reason. The Lasso Tool from earlier can also be used here. By creating a zone around a particular area, all customers in that area can now be added to a load rather than clicking on each individually.
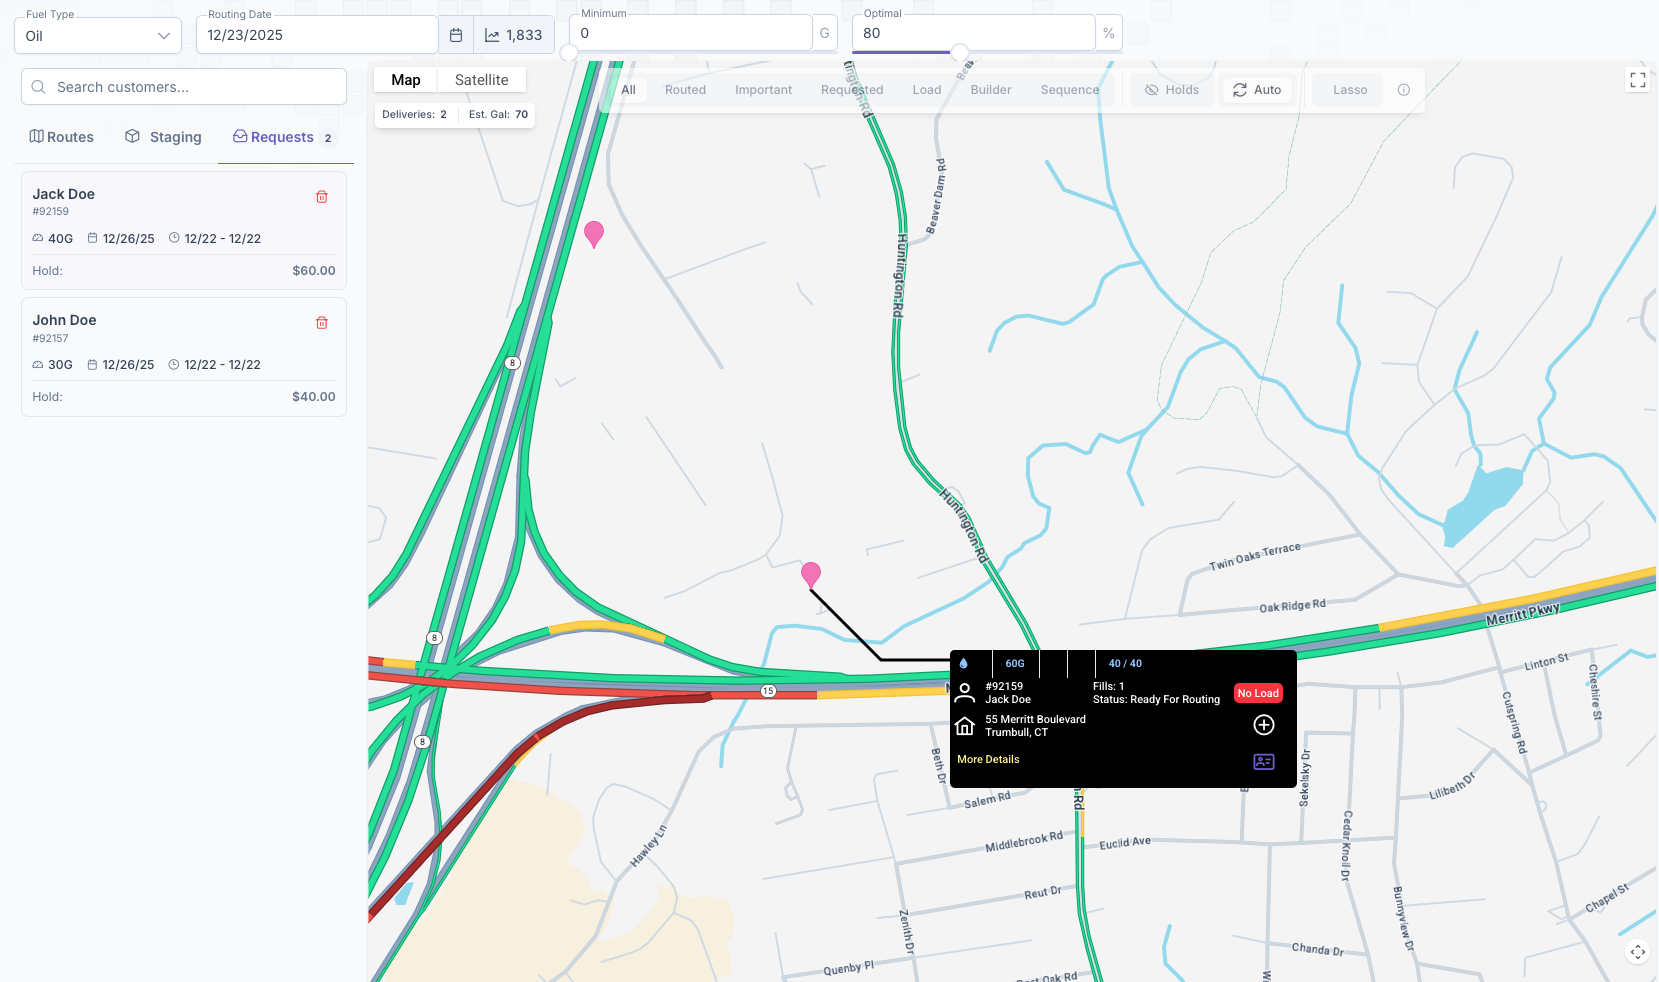
Requests
In the case of a fuel delivery request by a customer, clicking on the Requests tab will bring up all customer requests scheduled for that date. A list of customer request for that date will generate and clicking on each one will pull up ther Customer Card on the map. The next step would adding them to a load which was covered in the Adding Customers section of this page. For more detail on how to make a request, see the Deliveries page. Customer request can also be done when searching a customer on the routing page as seen above in the Customer Search portion of the guide.
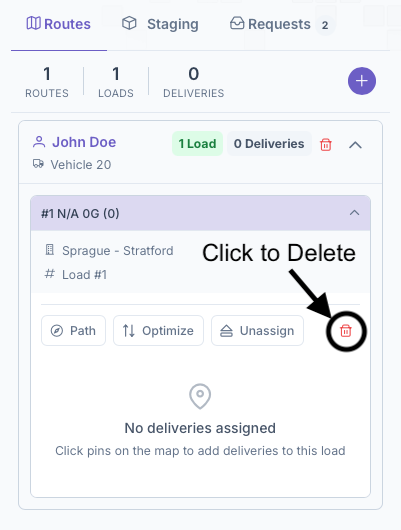
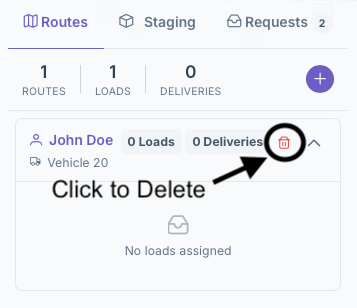
Deleting Routes and Loads, and Removing Customers from Loads
If for whatever reason a route or load need to be deleted, there are several steps that must be taken other than clicking on the garbage can icon. It begins from the end of the process and customers must be removed from a load first. The same process of adding a customer is the same for removing them.
- Open the load by clicking on the dropdown and then select the customer
- Clicking on them will open their card on the map and the minus button will appear on their card instead of a plus
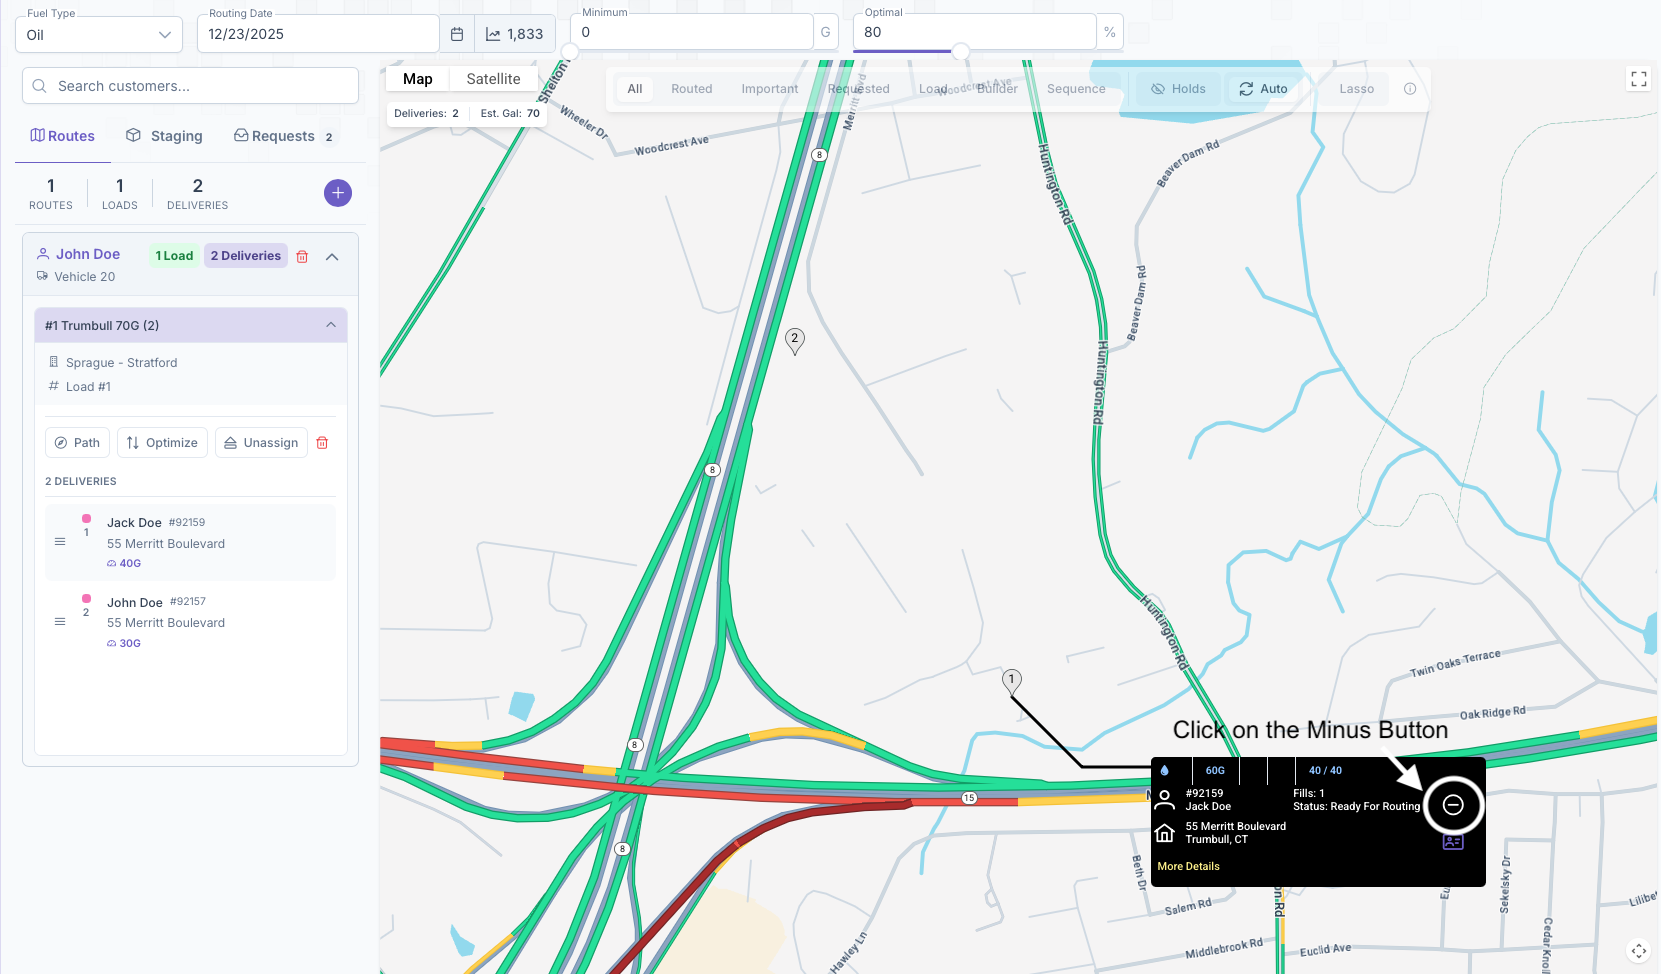
- Clicking on the minus will remove them from the load
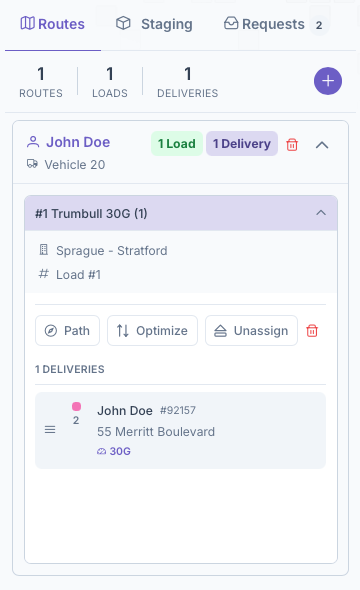
Once all customers have been removed, the load itself can be deleted by clicking on the garbage can icon on the load dropdown box. After a load has been deleted, it'll be removed from the route and now the route itself can be deleted by clicking on the garbage can icon.
No comments to display
No comments to display