Employees
- Employee Management
- Adding Employee Profile Pictures
- Deactivating Employees
- Other Employee Management Options
- Adding Employee Profile Pictures
- Payroll
- Video for Employee Management
- Fuel Drivers
Employee Management
Managing your employees access to Kozy is important. Here are all the articles you may need for building out your Employee Management.
On the Employee Management landing screen you can select Show Active Only to view only Active Employees or filter the view by clicking the filter icon in the column you wish to sort by.
Adding Employee Profile Pictures
Adding Employee Profile Pictures
Deactivating Employees
Deactivating Employees
Other Employee Management Options
Reset Password for Employee
Editing Employee
Adding Employee Profile Pictures
Adding Employee Profile Pictures
Payroll
Kozy's Payroll system and ability to track clock ins/outs allows you to use our software for payroll.
We have the ability to connect to ADP's API. If this is of interest to you and was not previously discussed please reach out to support@kozyops.com for next steps.
Shifts Schedules
Shift Schedules
If you wish to use Shift Schedules please ensure we have all of your shift options to put in the database such as 5am start time vs 12pm start time or office 8-5pm.
Employee Clock In/Out
Employee Clock In/Out
Web:
App:
- Select My Time.
- Clock In or Clock Out.
- Slide if lunch was not taken for the day.
Video for Employee Management
Fuel Drivers
Login – Accessing the App
Overview
The Login screen is the secure entry point to the Kozy Serviceman mobile application. From here, employees authenticate using their company-issued credentials. First-time users or users switching companies must scan their company’s QR code to connect the app to the correct environment.
Key Features
- Secure username and password authentication
- QR code onboarding for environment setup
- Real-time branding (company logo and name auto-load after QR scan)
- Automatic error detection and clear instructions for resolution
Step-by-Step Login Instructions
Step 1: Open the App
- Ensure you have internet or cellular data access
- Tap the Kozy Serviceman icon to launch the app
Step 2: Enter Your Credentials
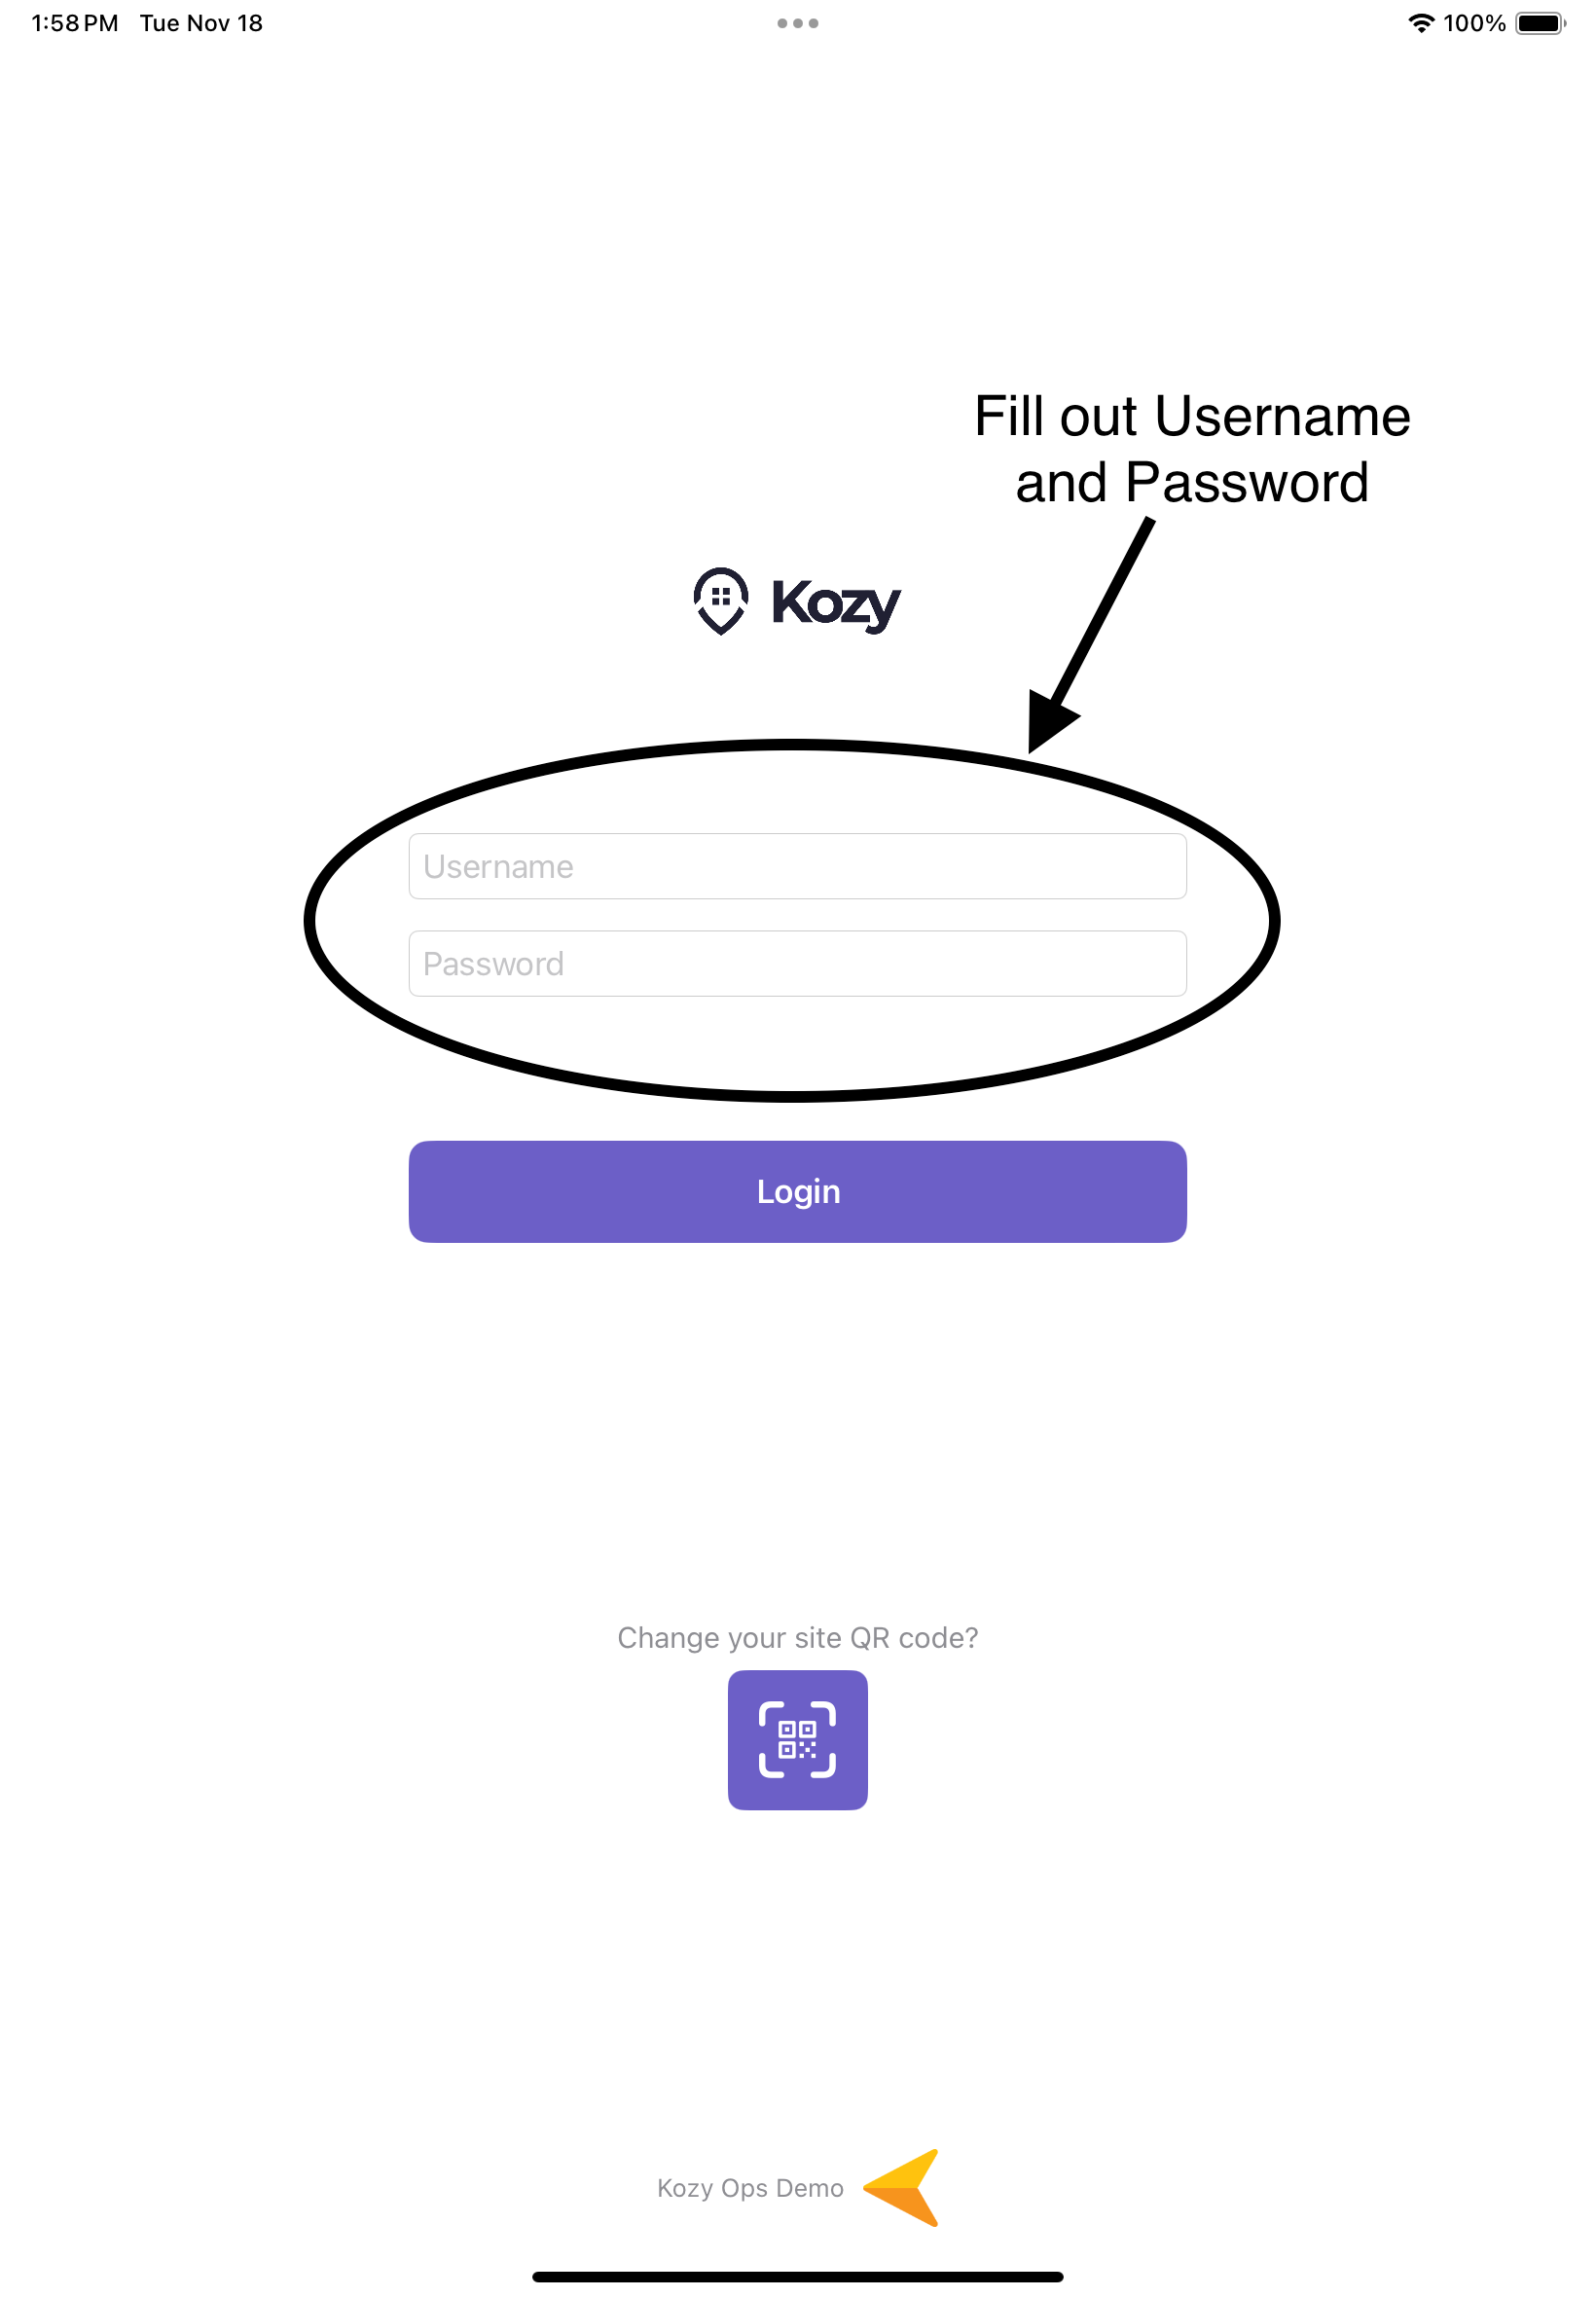
- Tap the Username field and enter your employee username
- Tap the Password field and enter your password
Step 3: First-Time Setup (QR Scan Required)
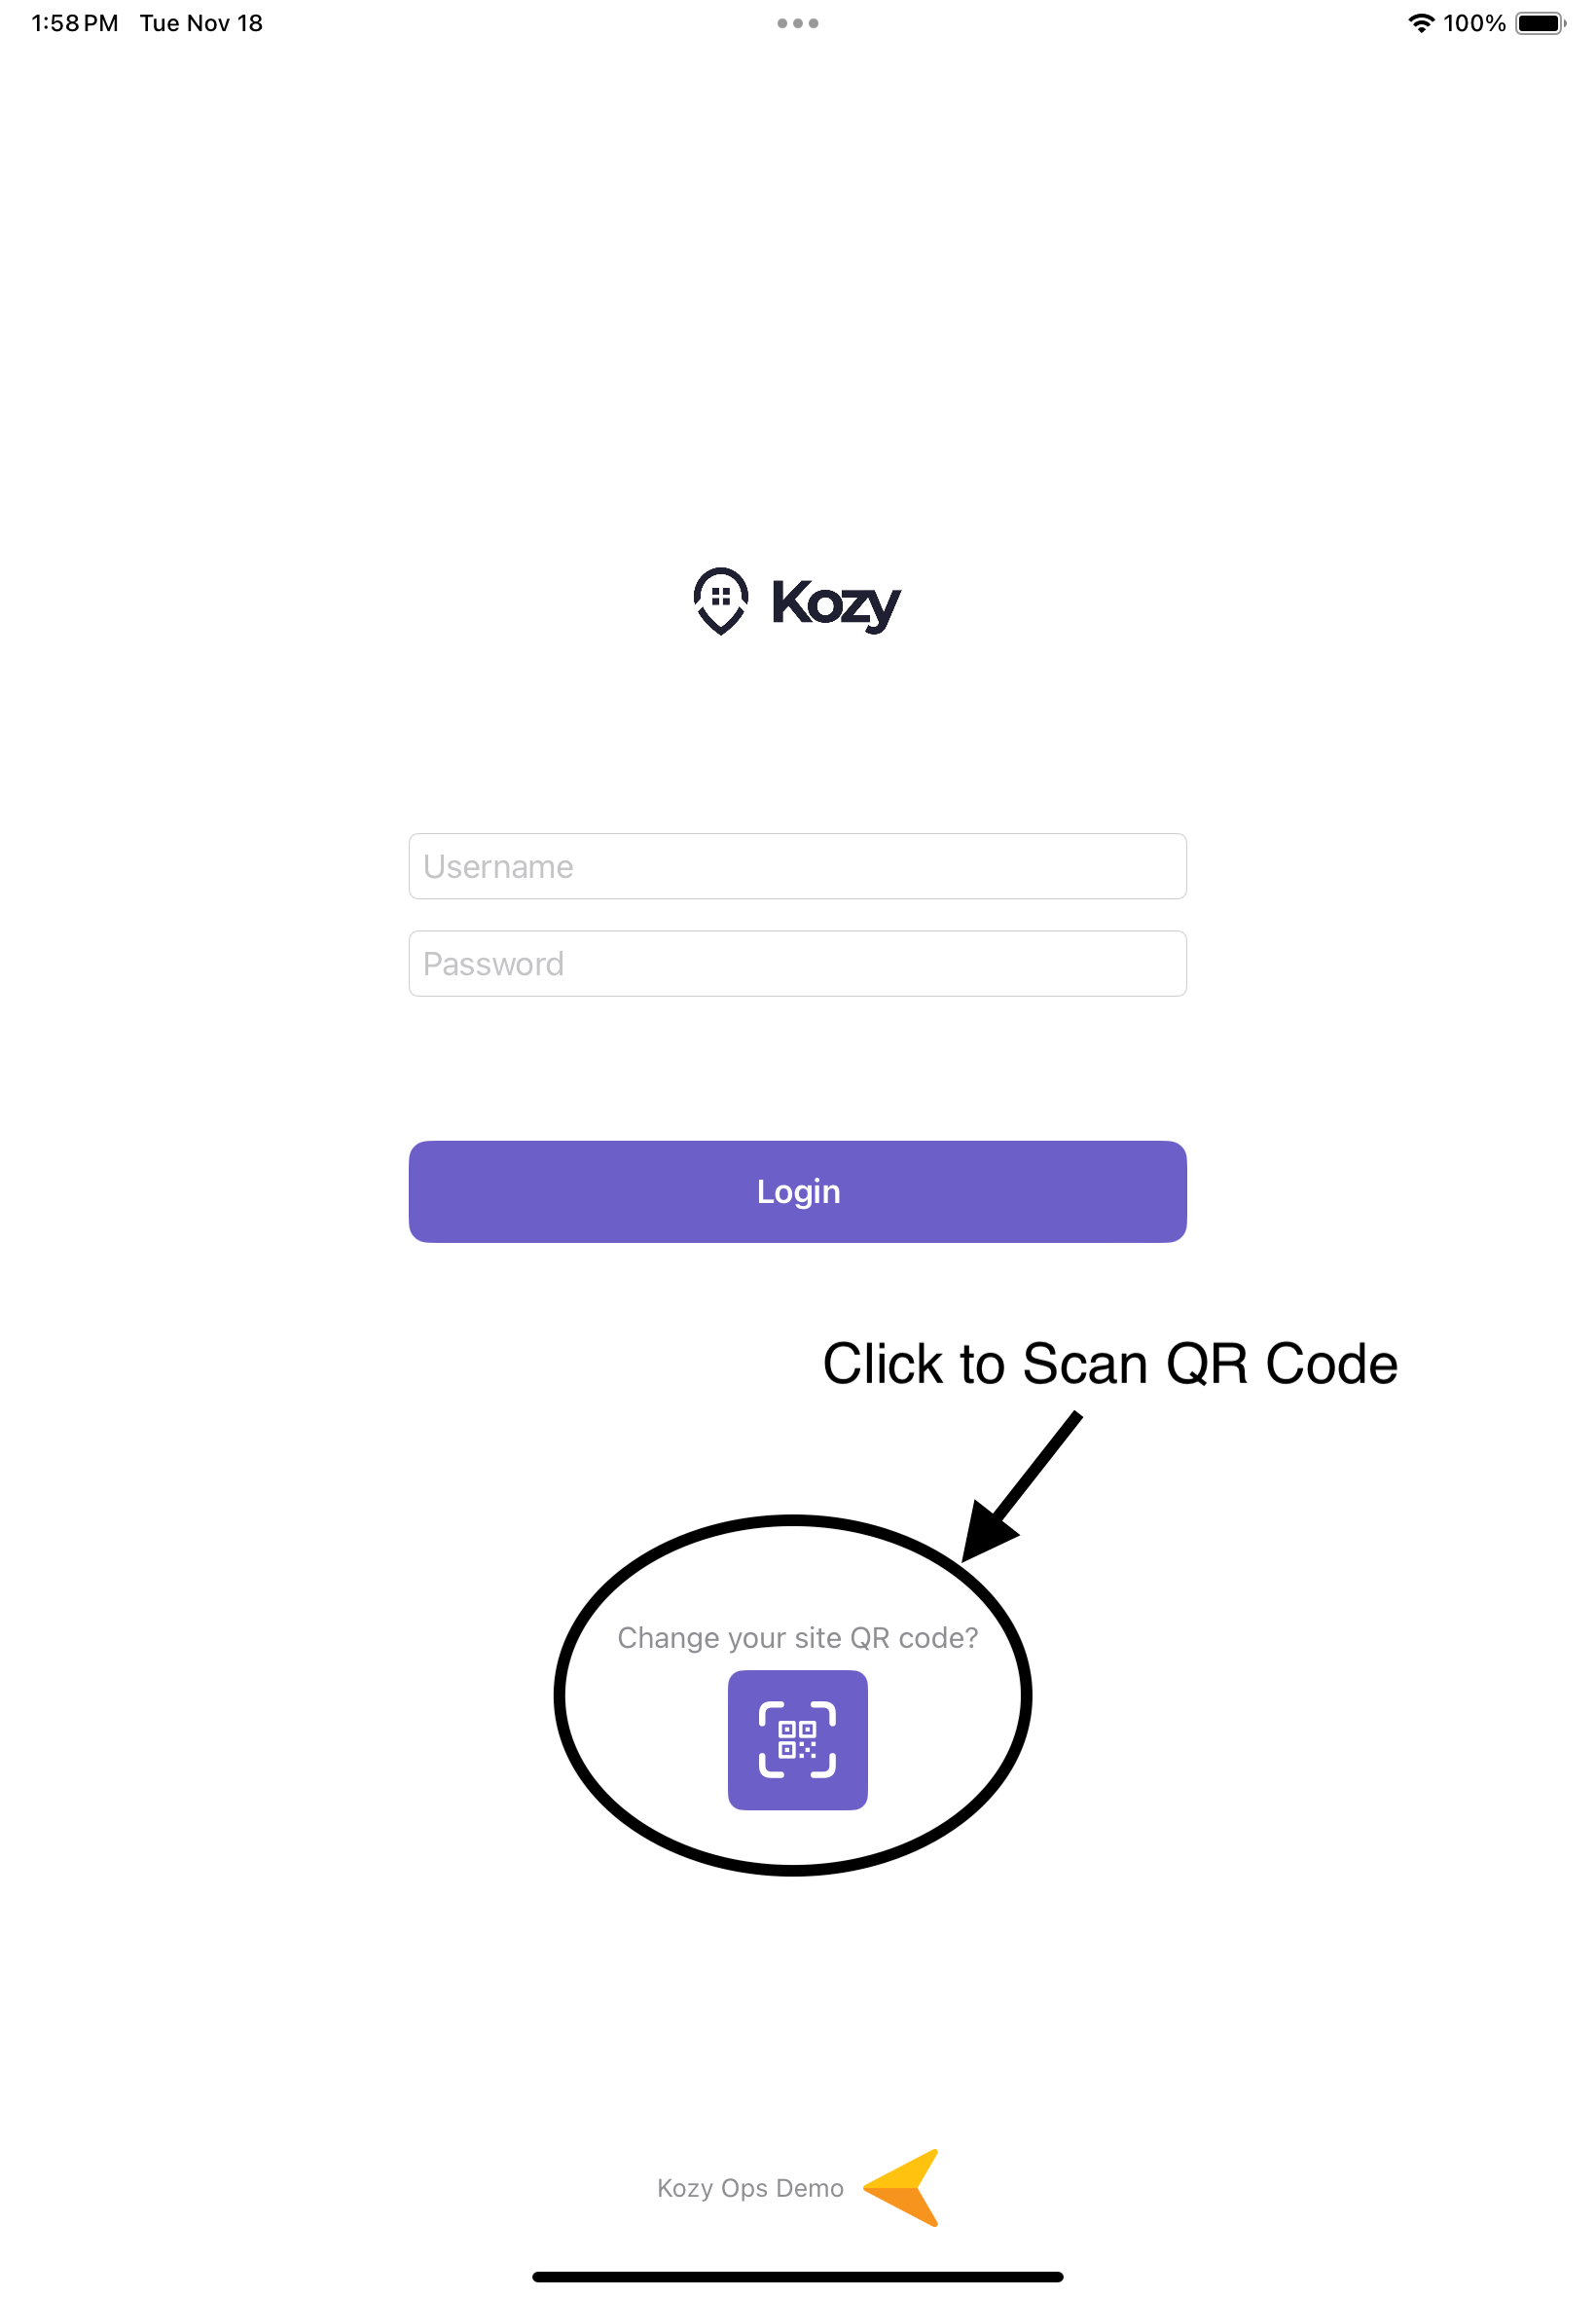 If this is your first time using the app:
- Tap the QR Code icon below the login button
- Point your camera at the QR code provided by your company or dispatcher (See QR code if not provided)
- The app will automatically configure your environment
- A company logo and name will appear at the bottom confirming success
Step 4: Logging In
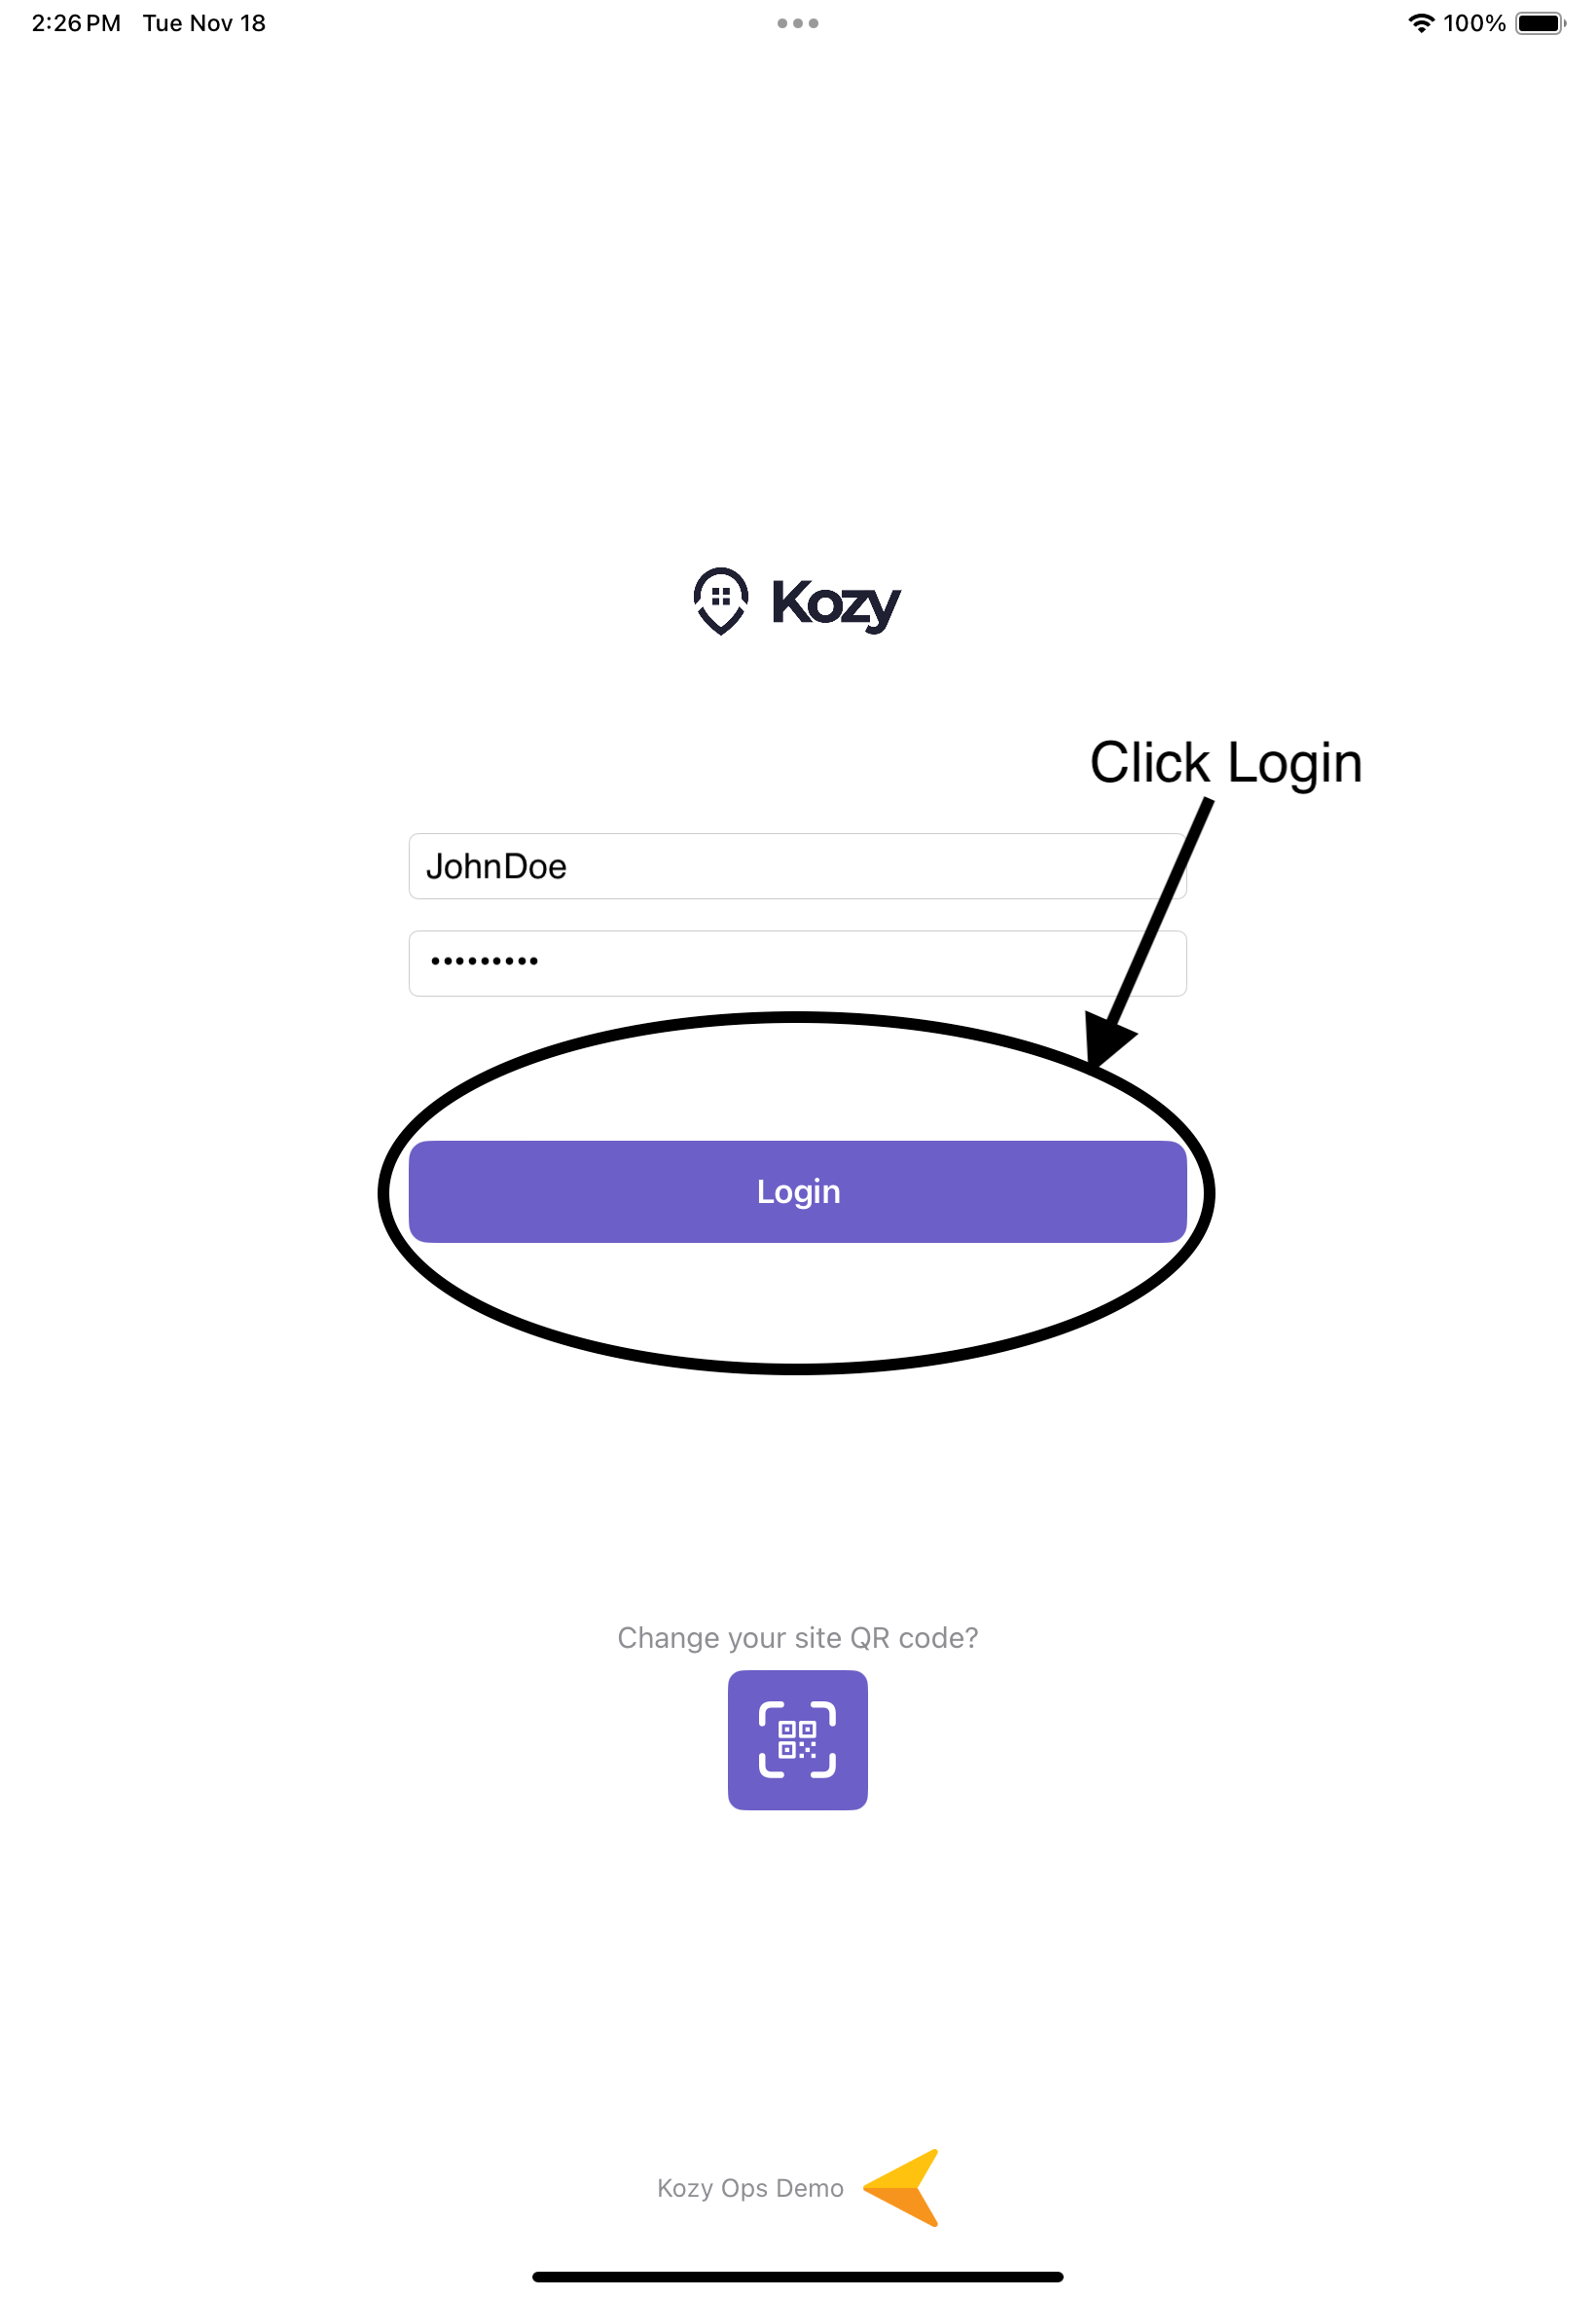
- Tap the Login button
- A loading indicator will appear while your credentials are verified
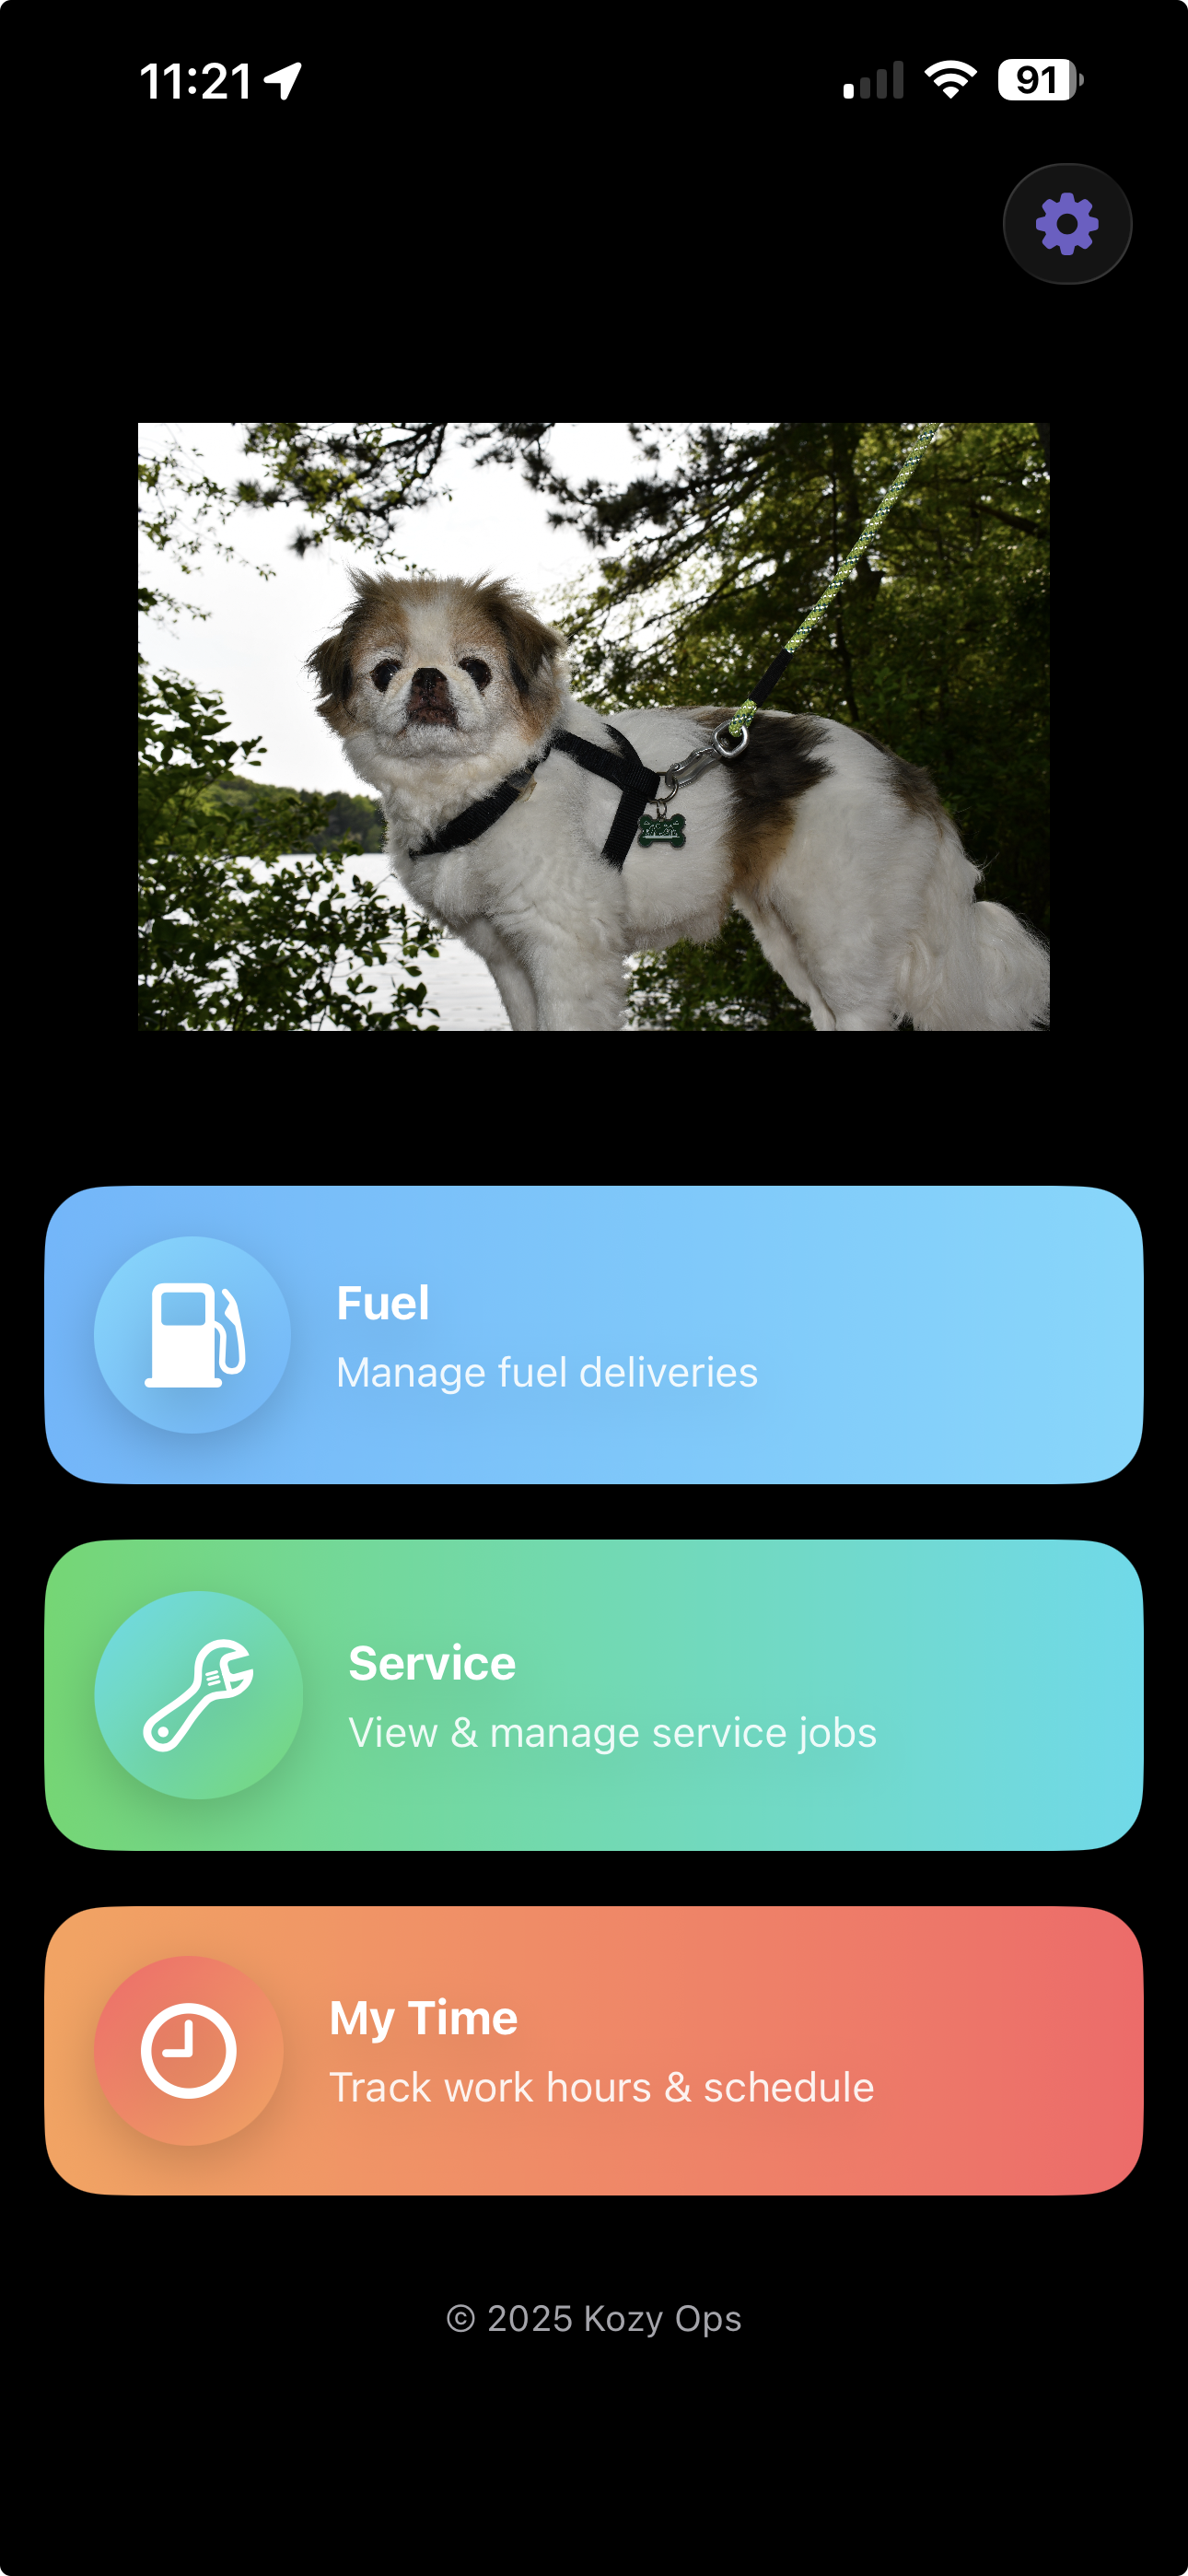
- If successful, you will be taken to the Home screen

QR code
Overview
Instructions on how to acces QR Code if not provided by Company or Dispatcher
Accessing QR Code
-
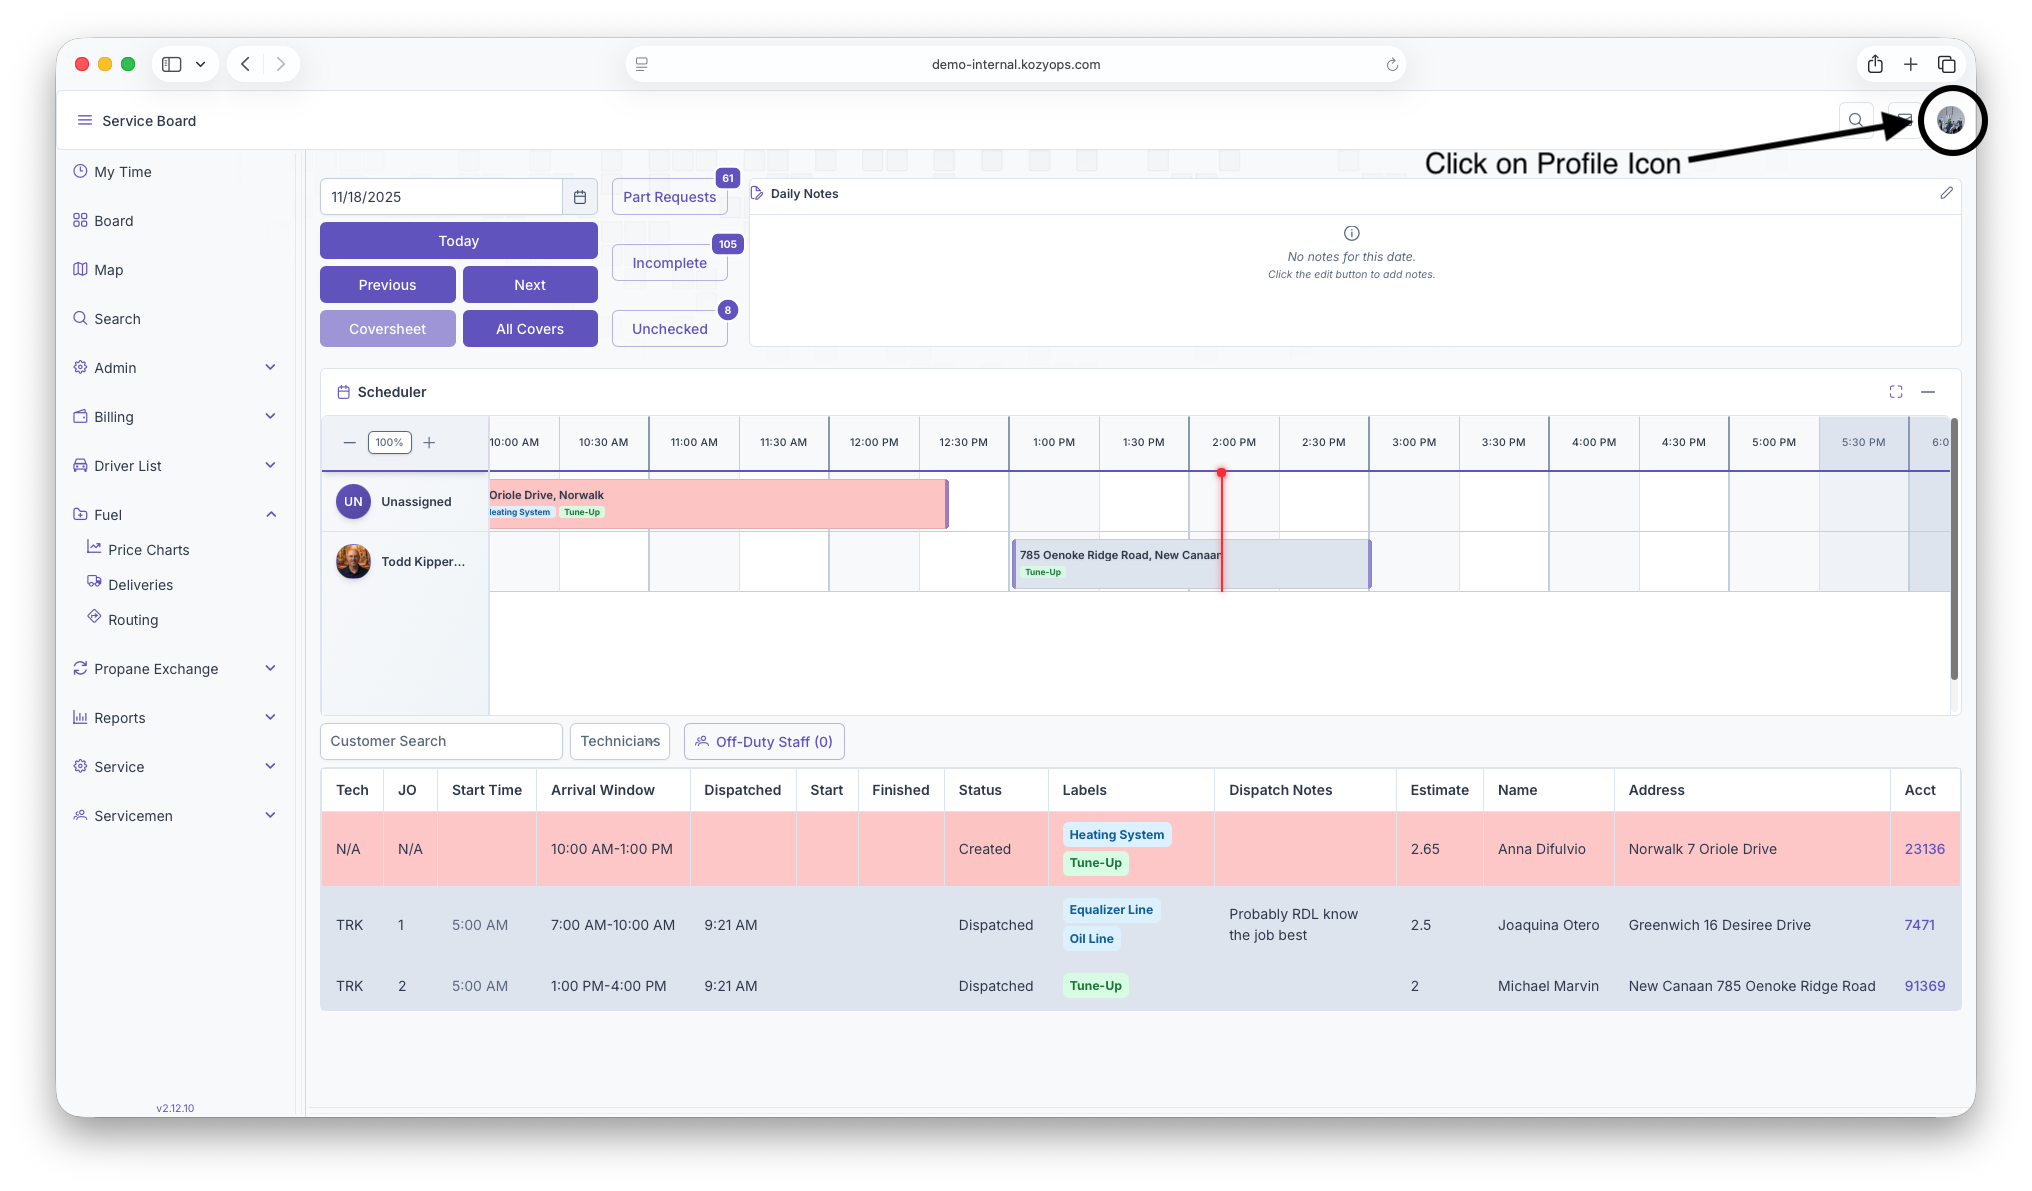
On main Webpage, click on profile icon for dropdown

-
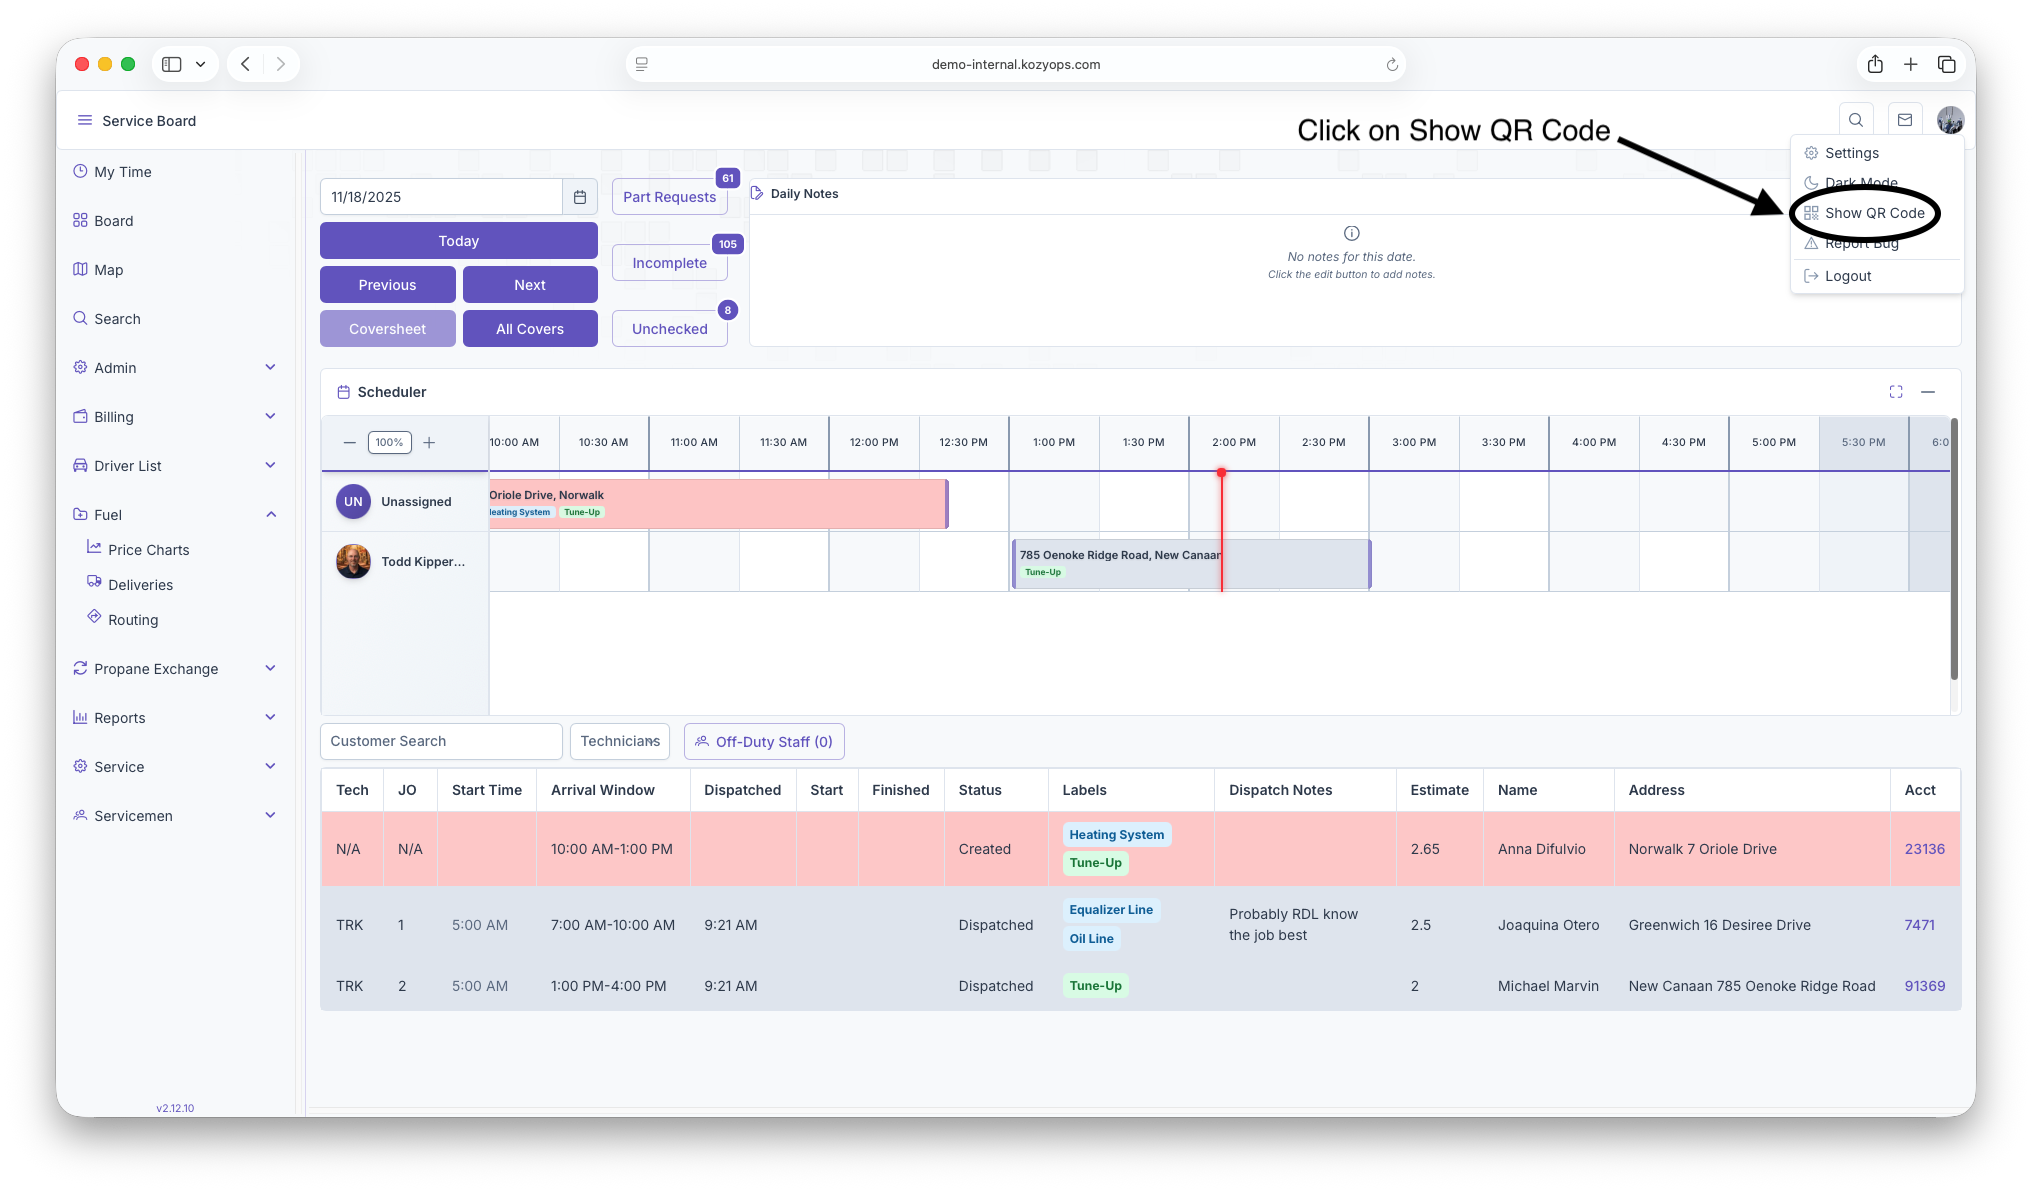
Click on Show QR Code

-
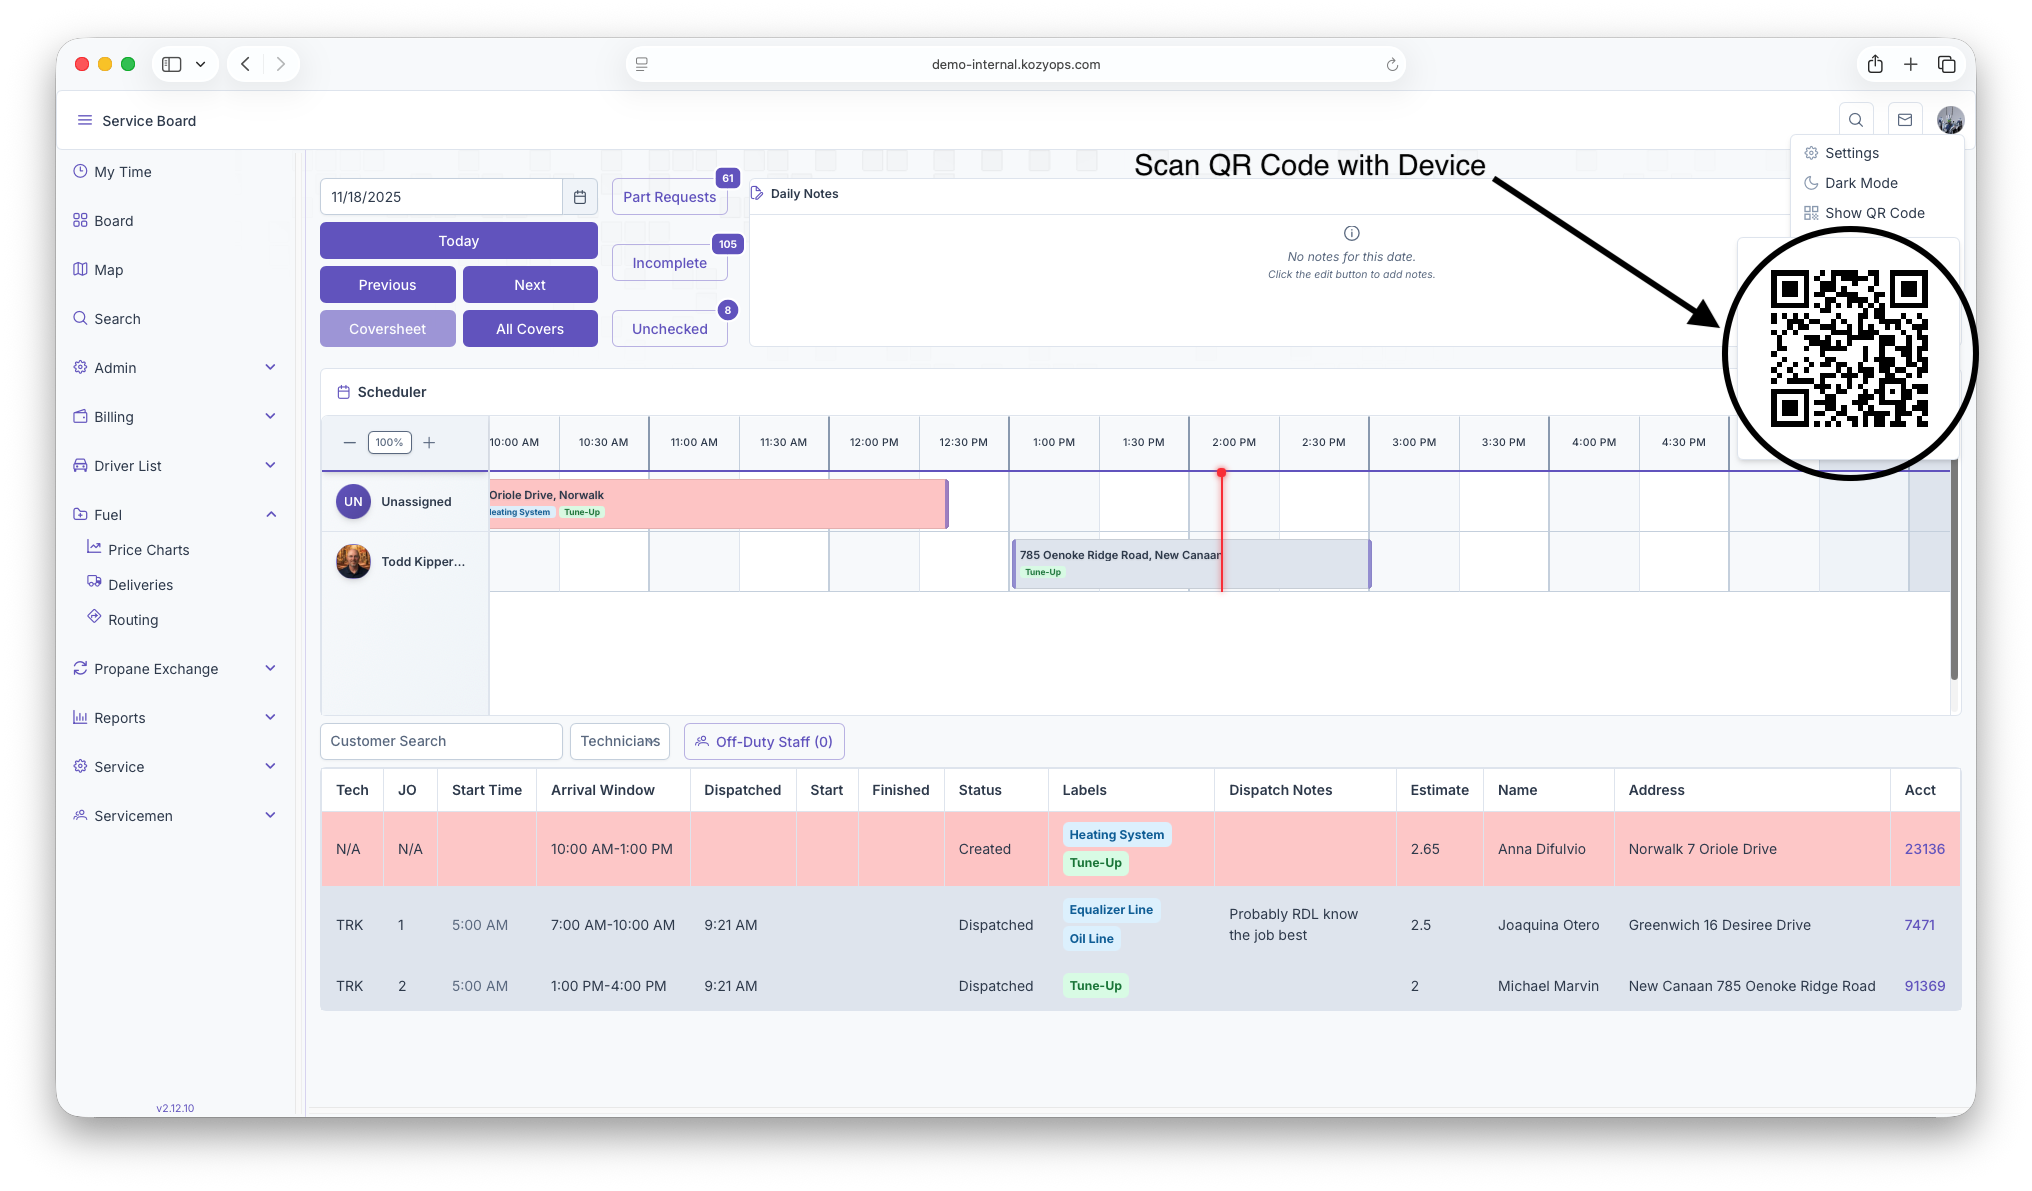
QR Code will generate and you can scan with device

Fuel Drivers Daily Life Manually Entered
Your app should already be setup with your truck for the day. You will be using the app.
1. Login to the app (if you are not already logged in).
2. IF your company tracks time in Kozy - select My Time and Clock In
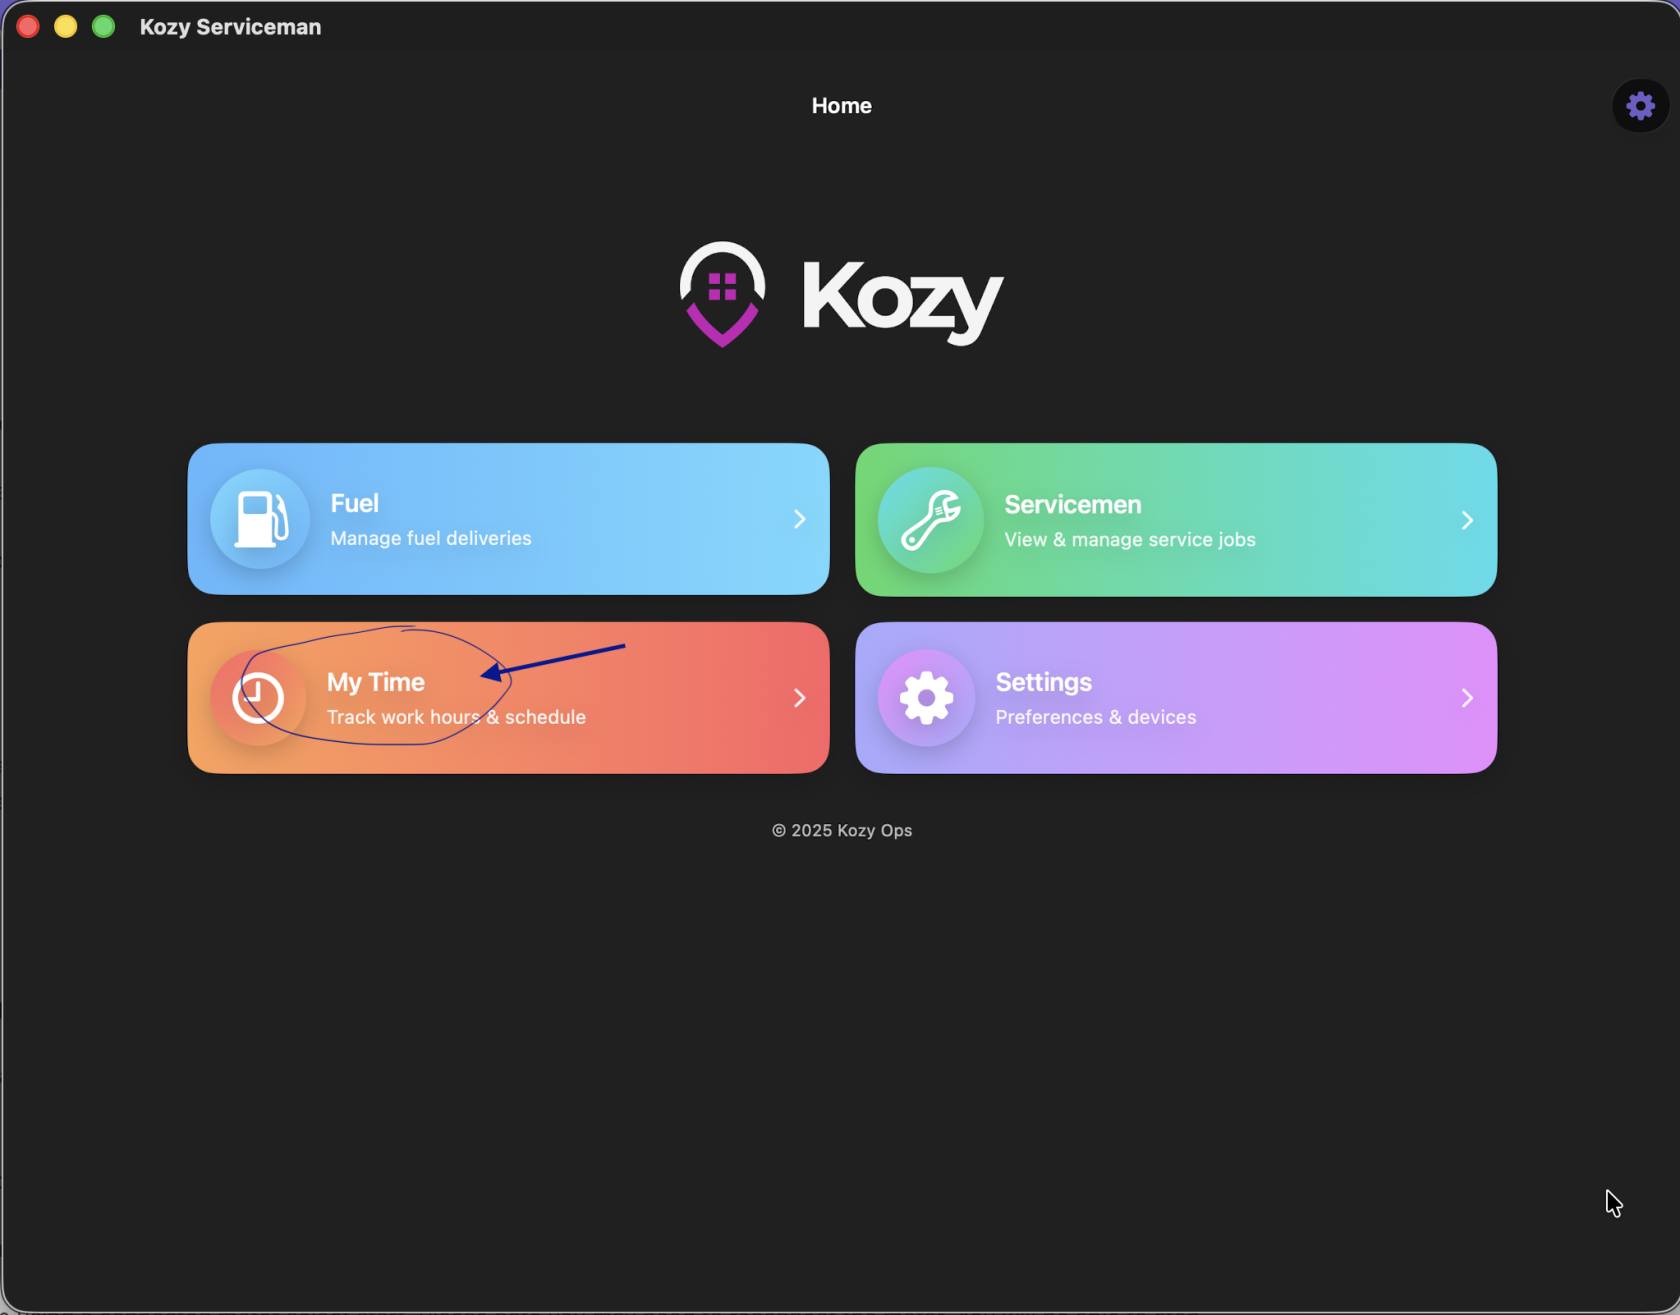
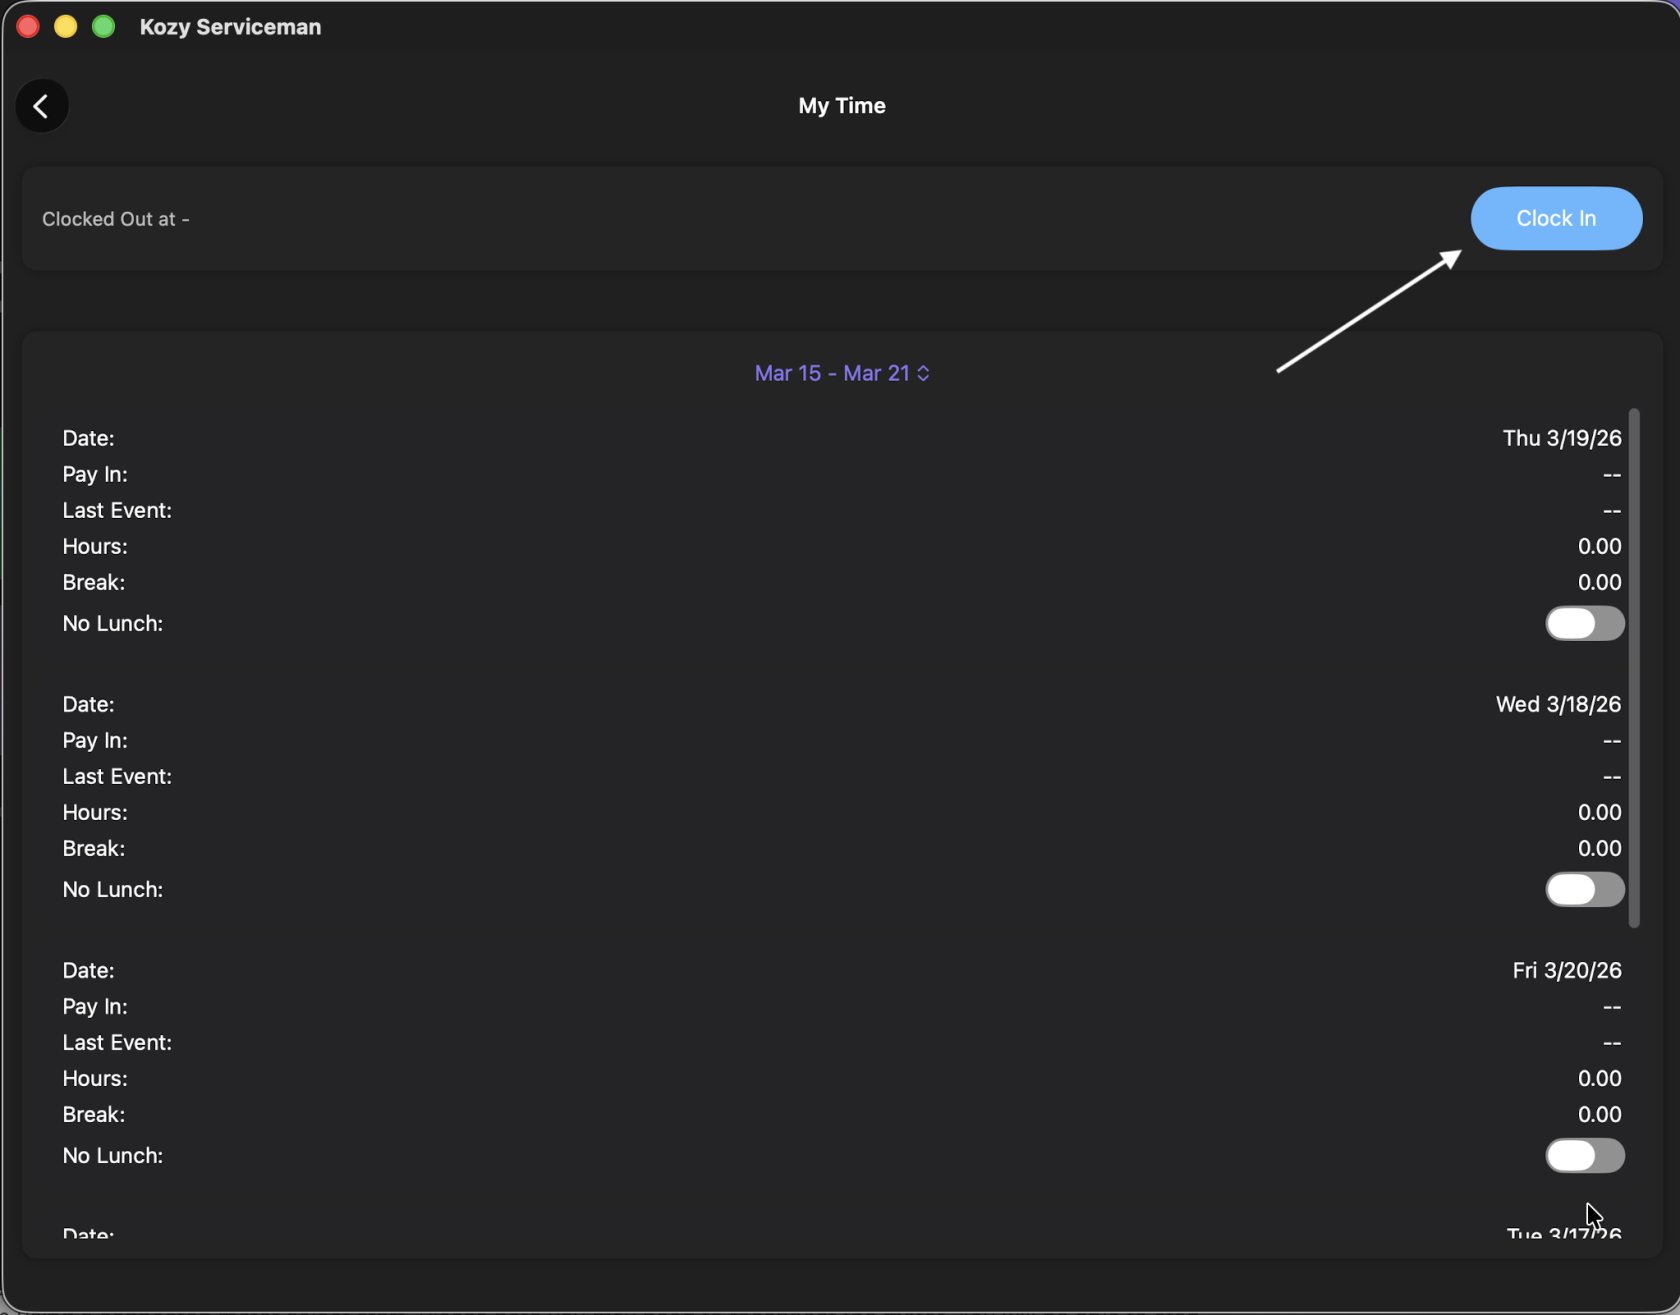
3. Hit the back button to return to the home screen.
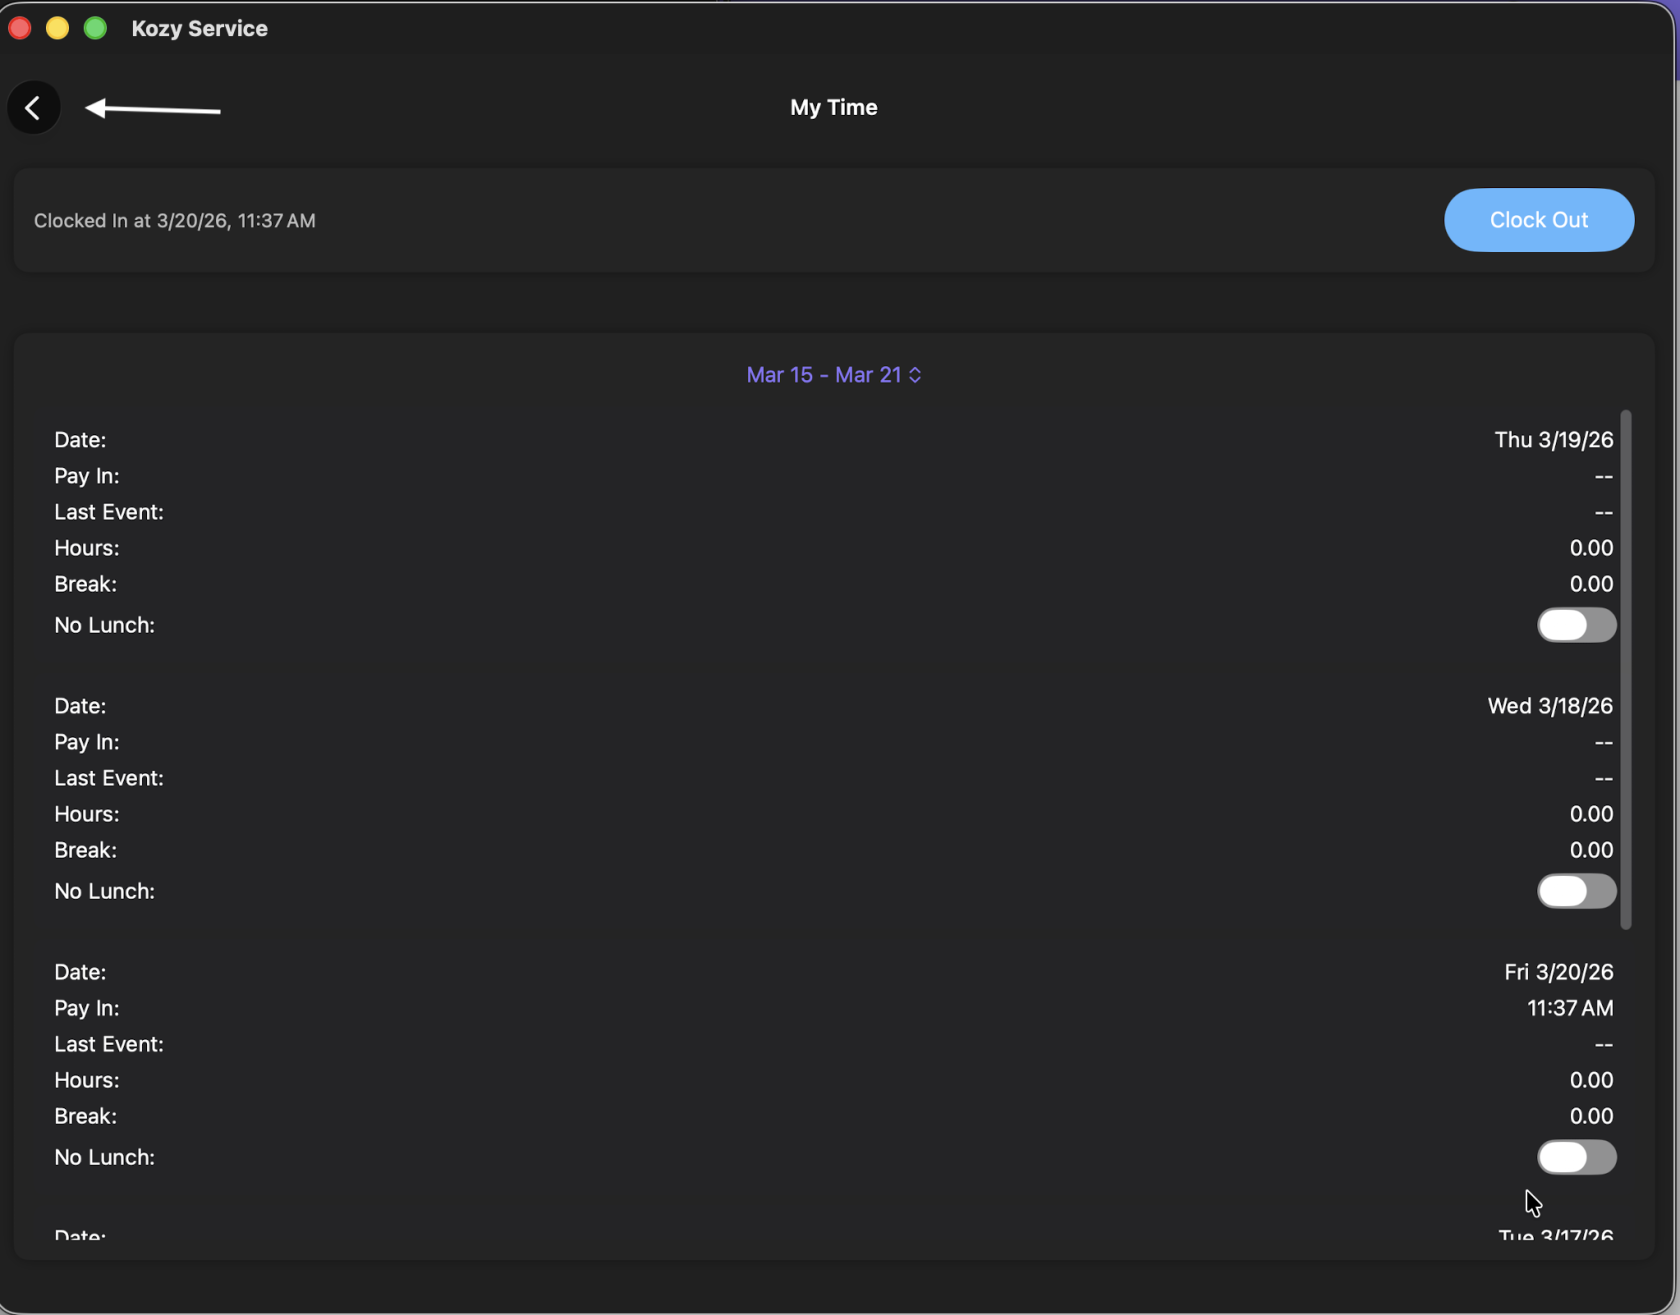
4. Select Fuel
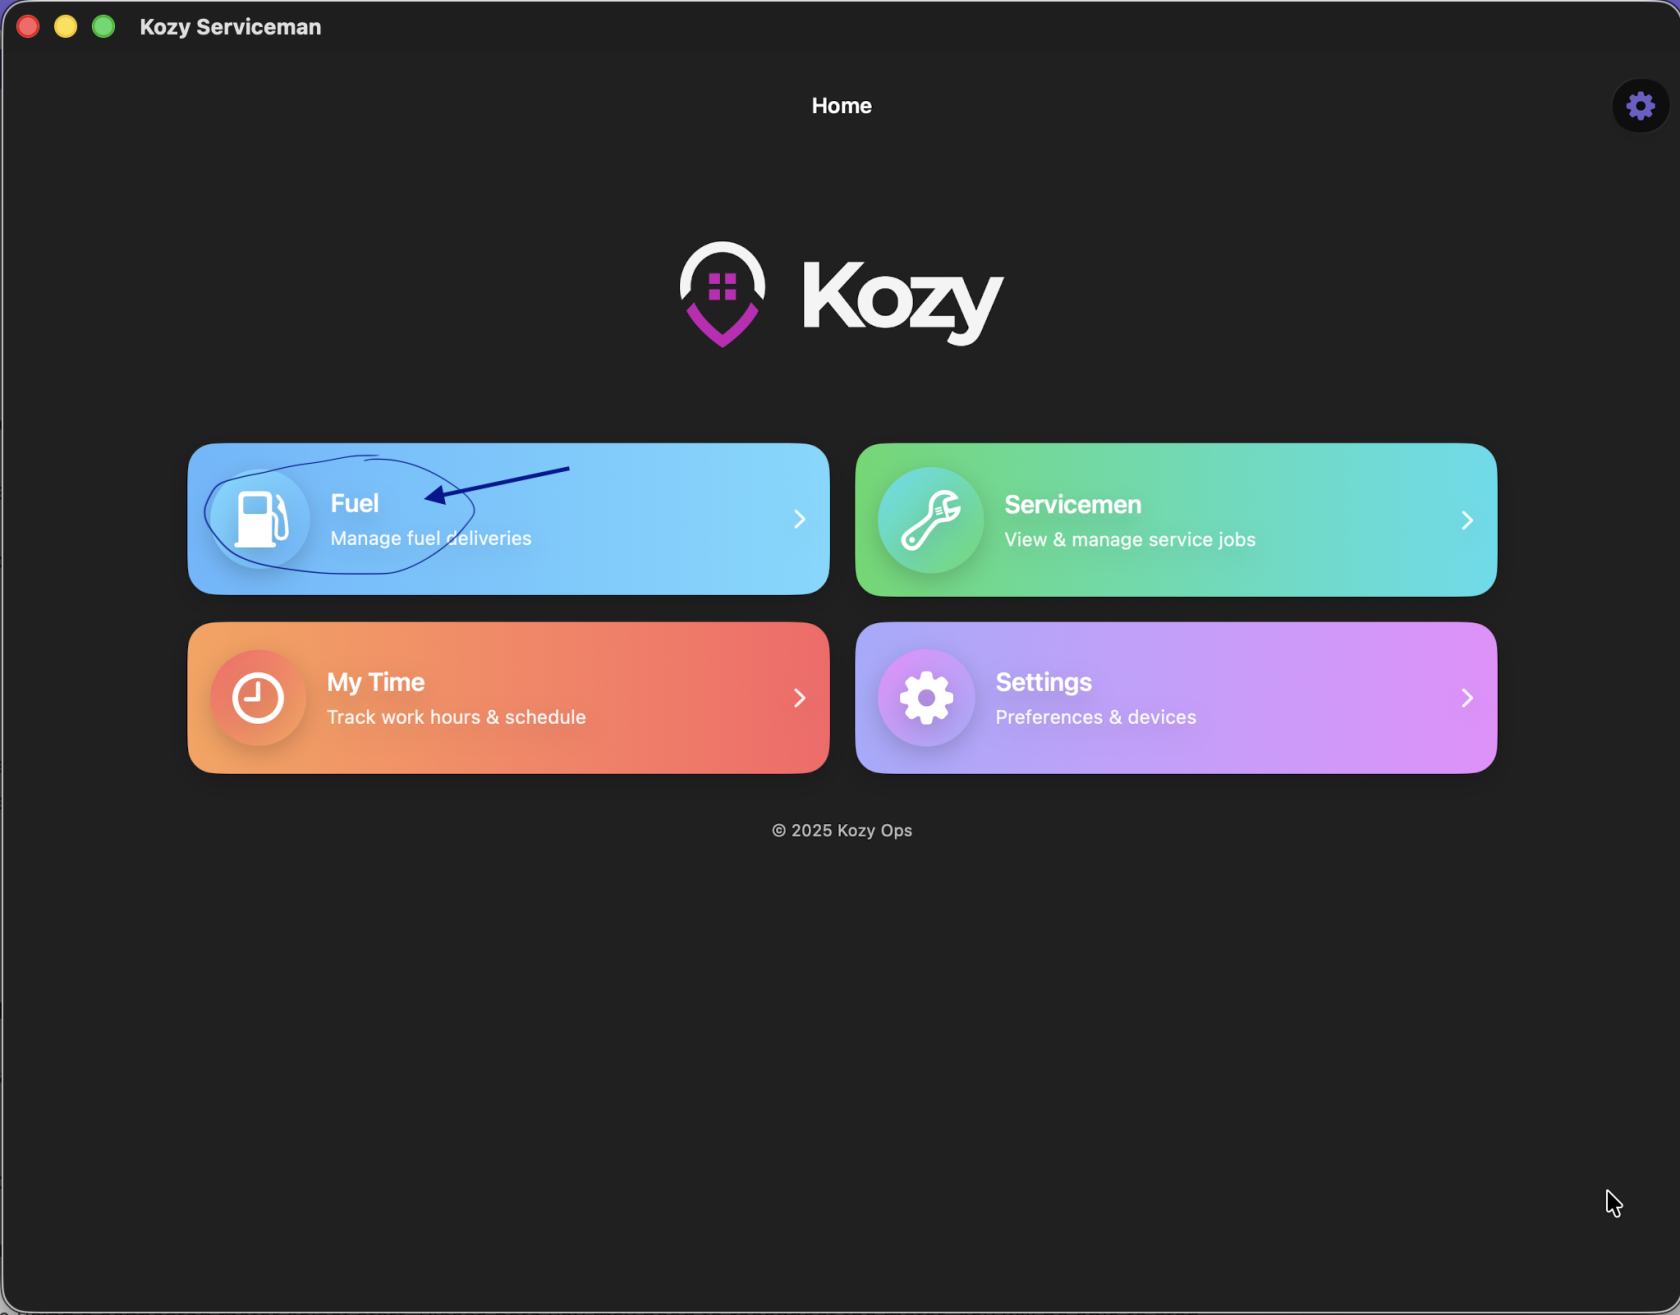
5. IF you are tracking Pre trip in Kozy - select the := icon next to the word Fuel Deliveries at the top and slide for inspection report. Click Done when completed.
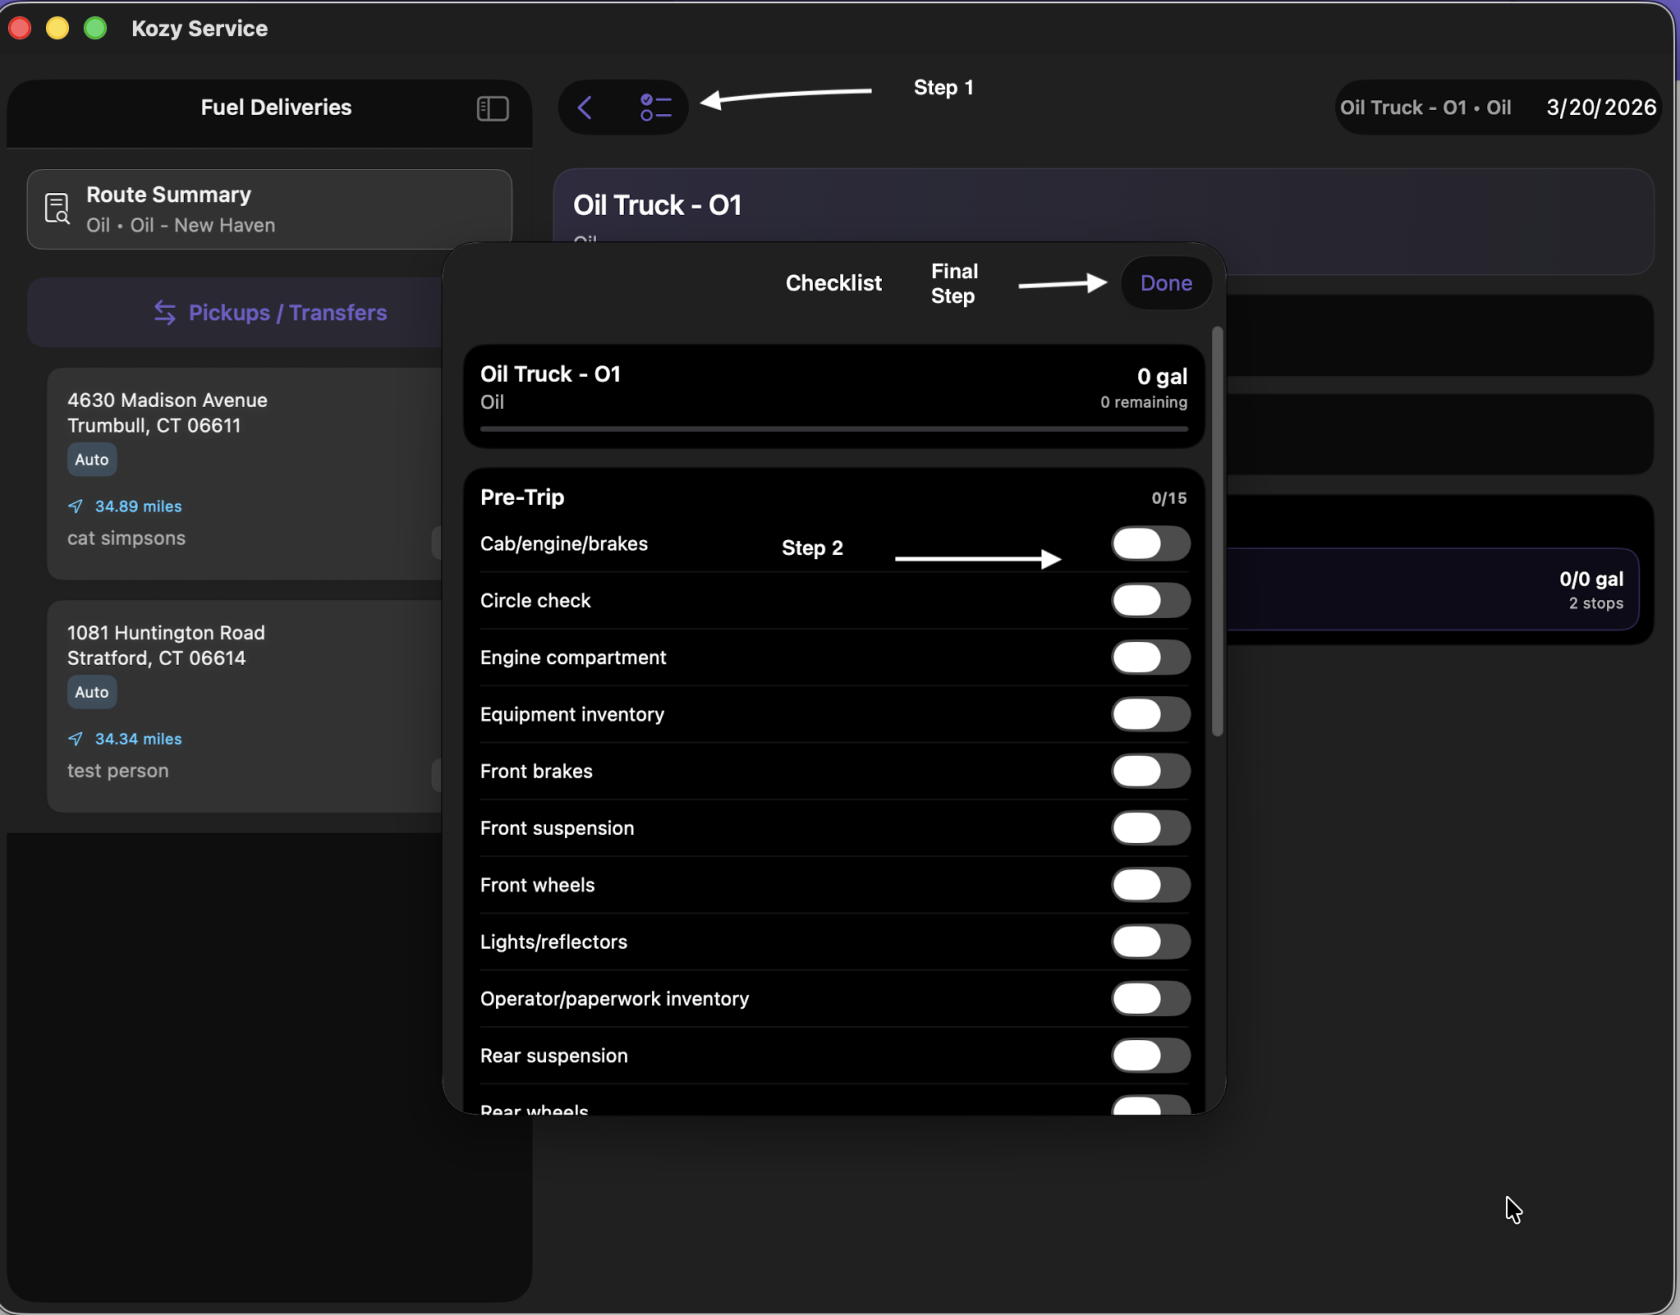
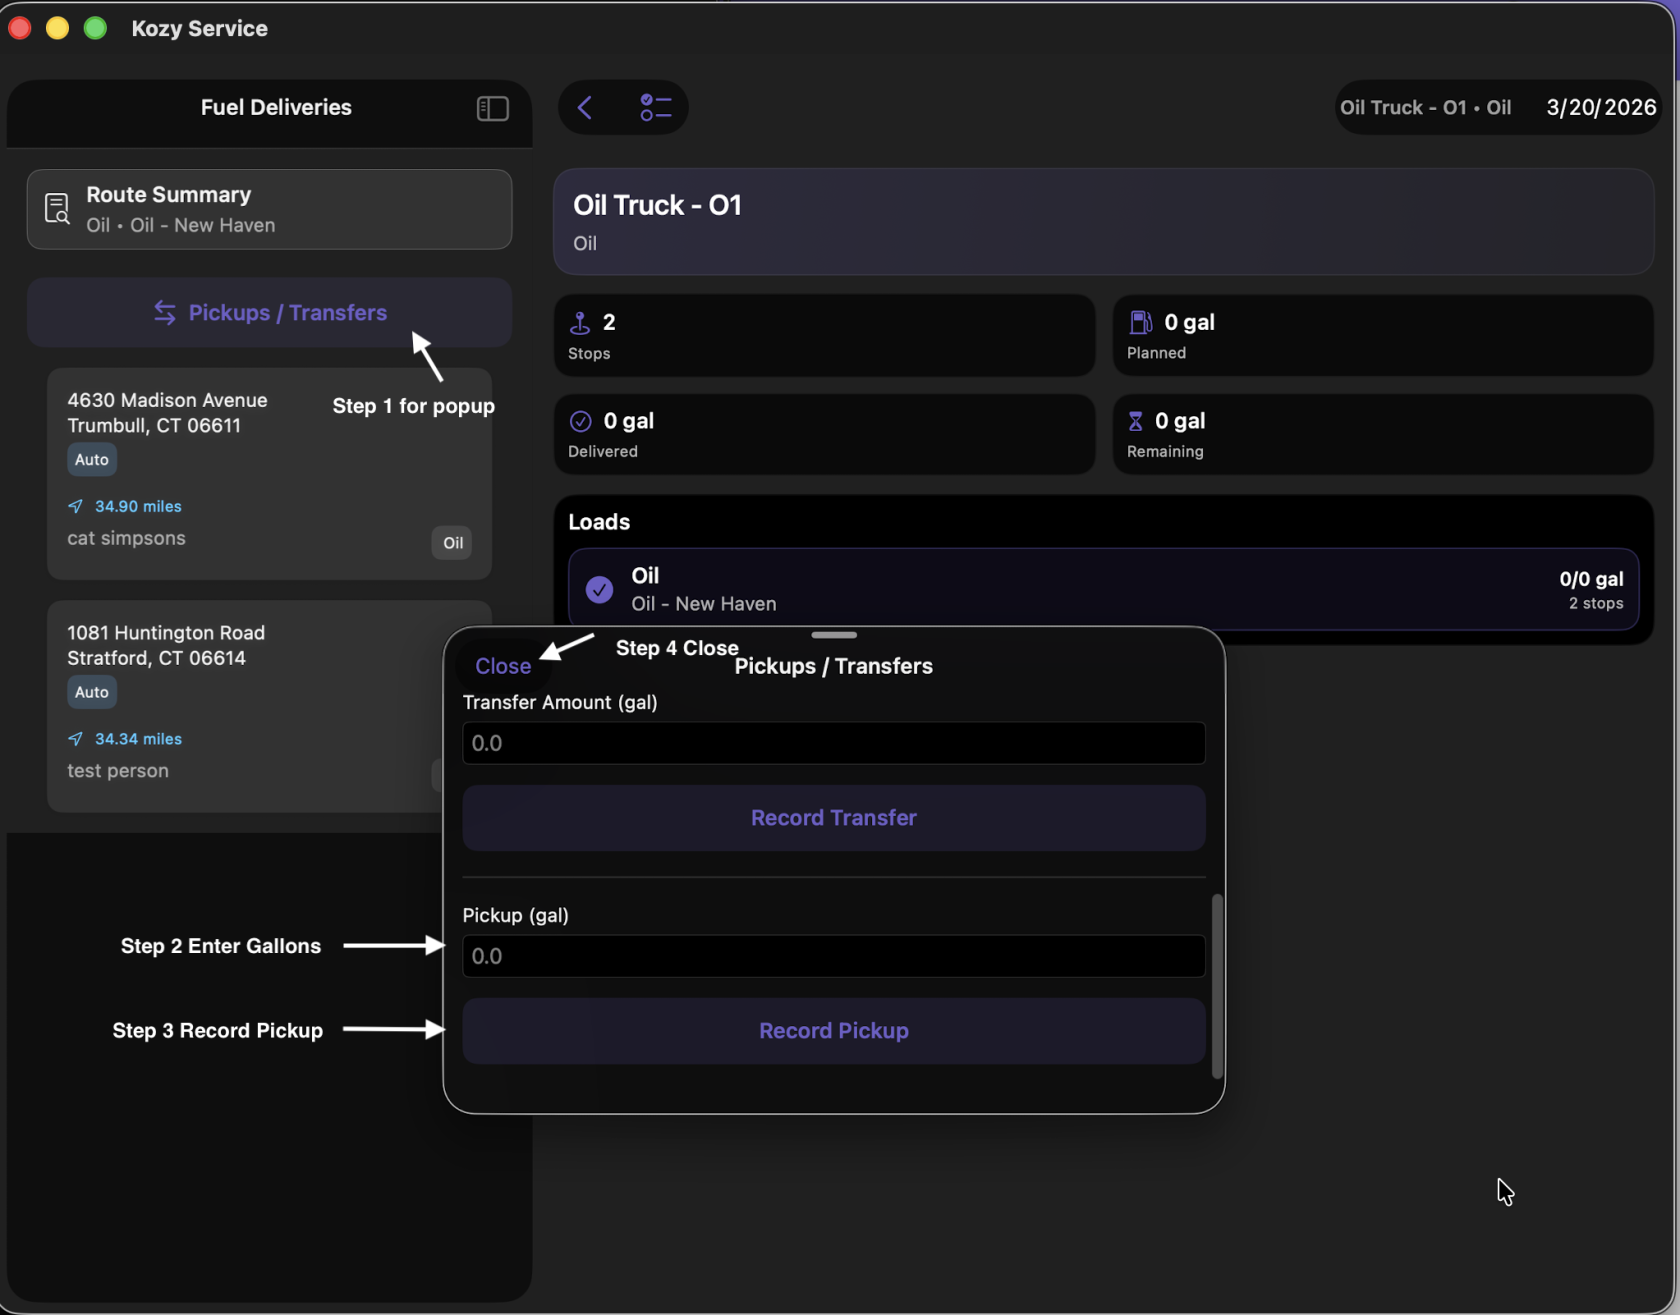
6. To Record a Pickup select Pickups/Transfers
7. The terminal you need to fill your Vehicle is at the top of the list.
8. Select Pickup/Transfers once you pickup your fuel load(s).
9. Enter how many gallons your Pickup (gal) at the bottom and Record Pickup. Close.
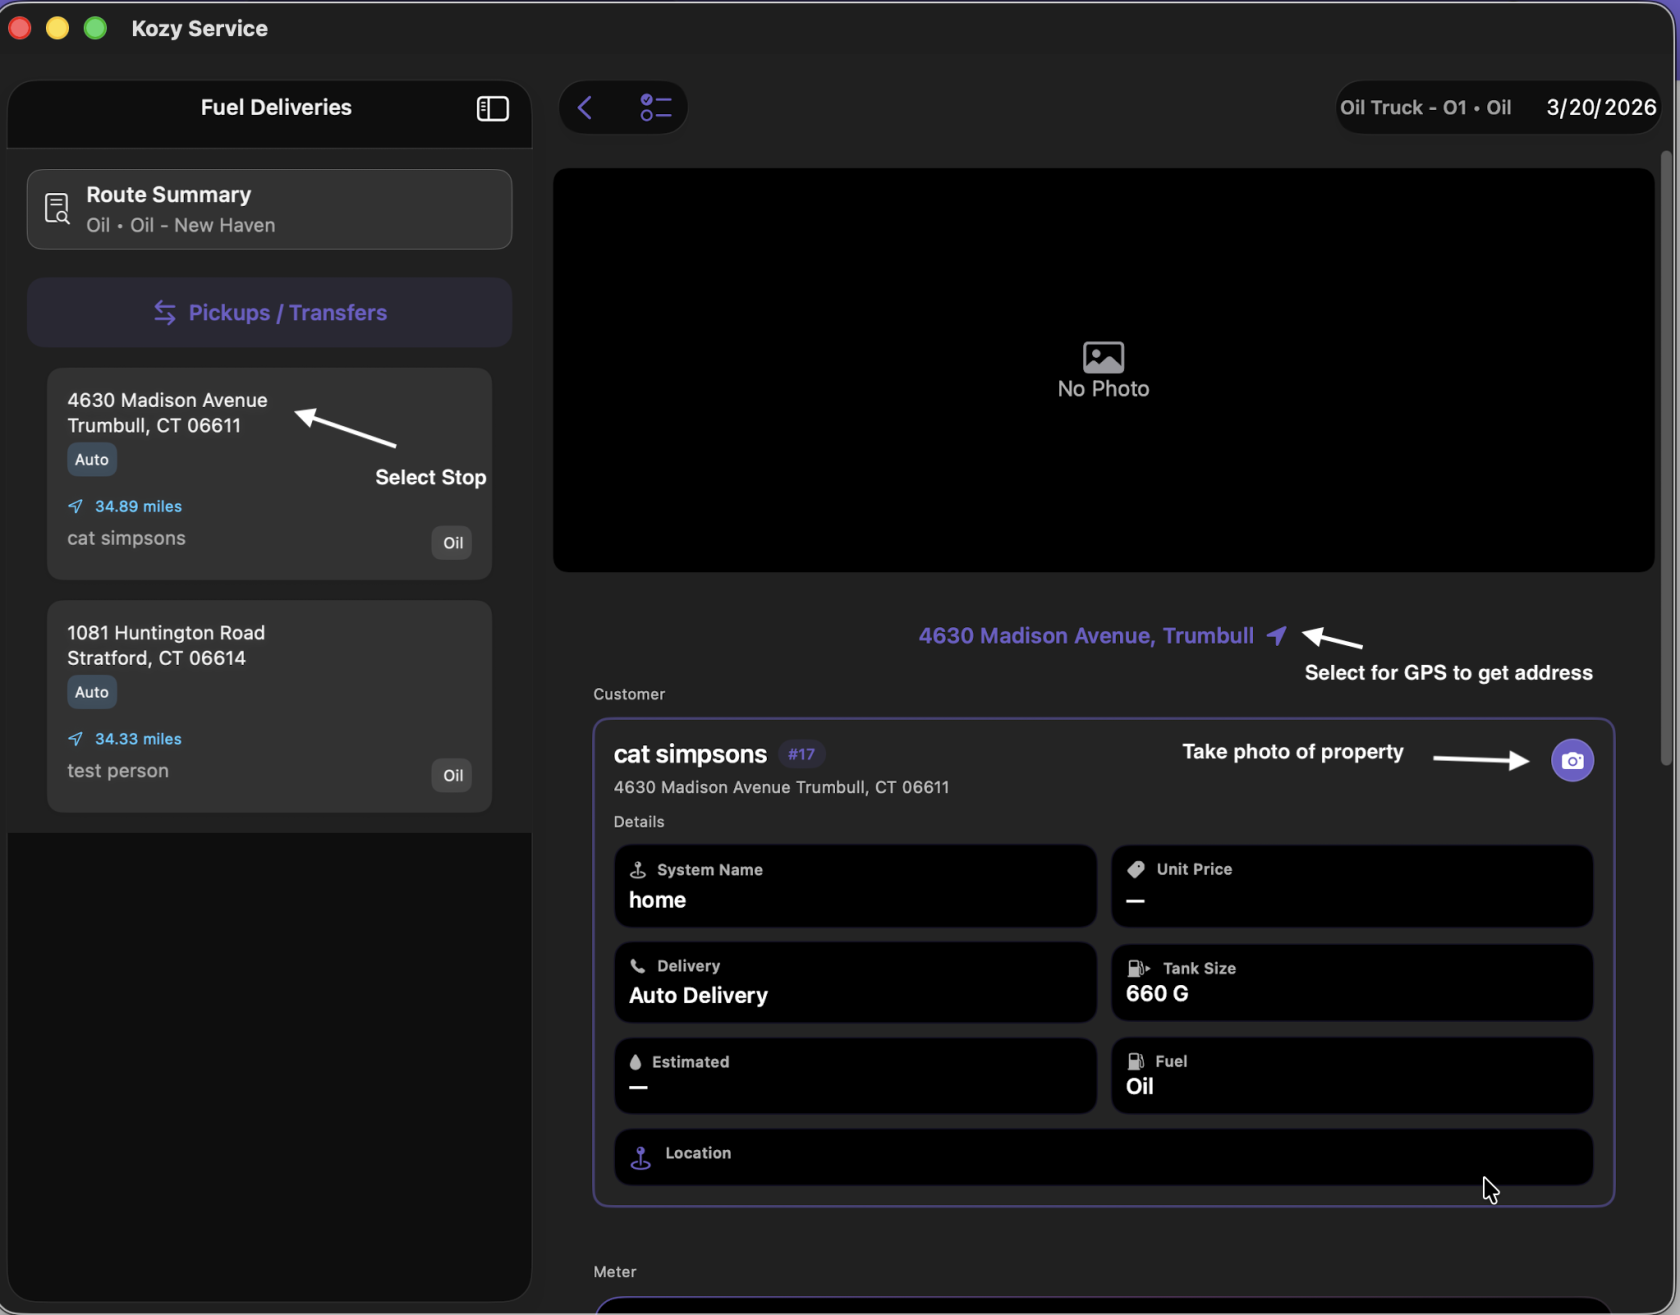
10. Select your first stop. This will show you the address (click the arrow for Google Maps to direct you), a picture of the property (if previously added) and expected delivery.
11. Scroll down to manually enter the number of gallons delivered.
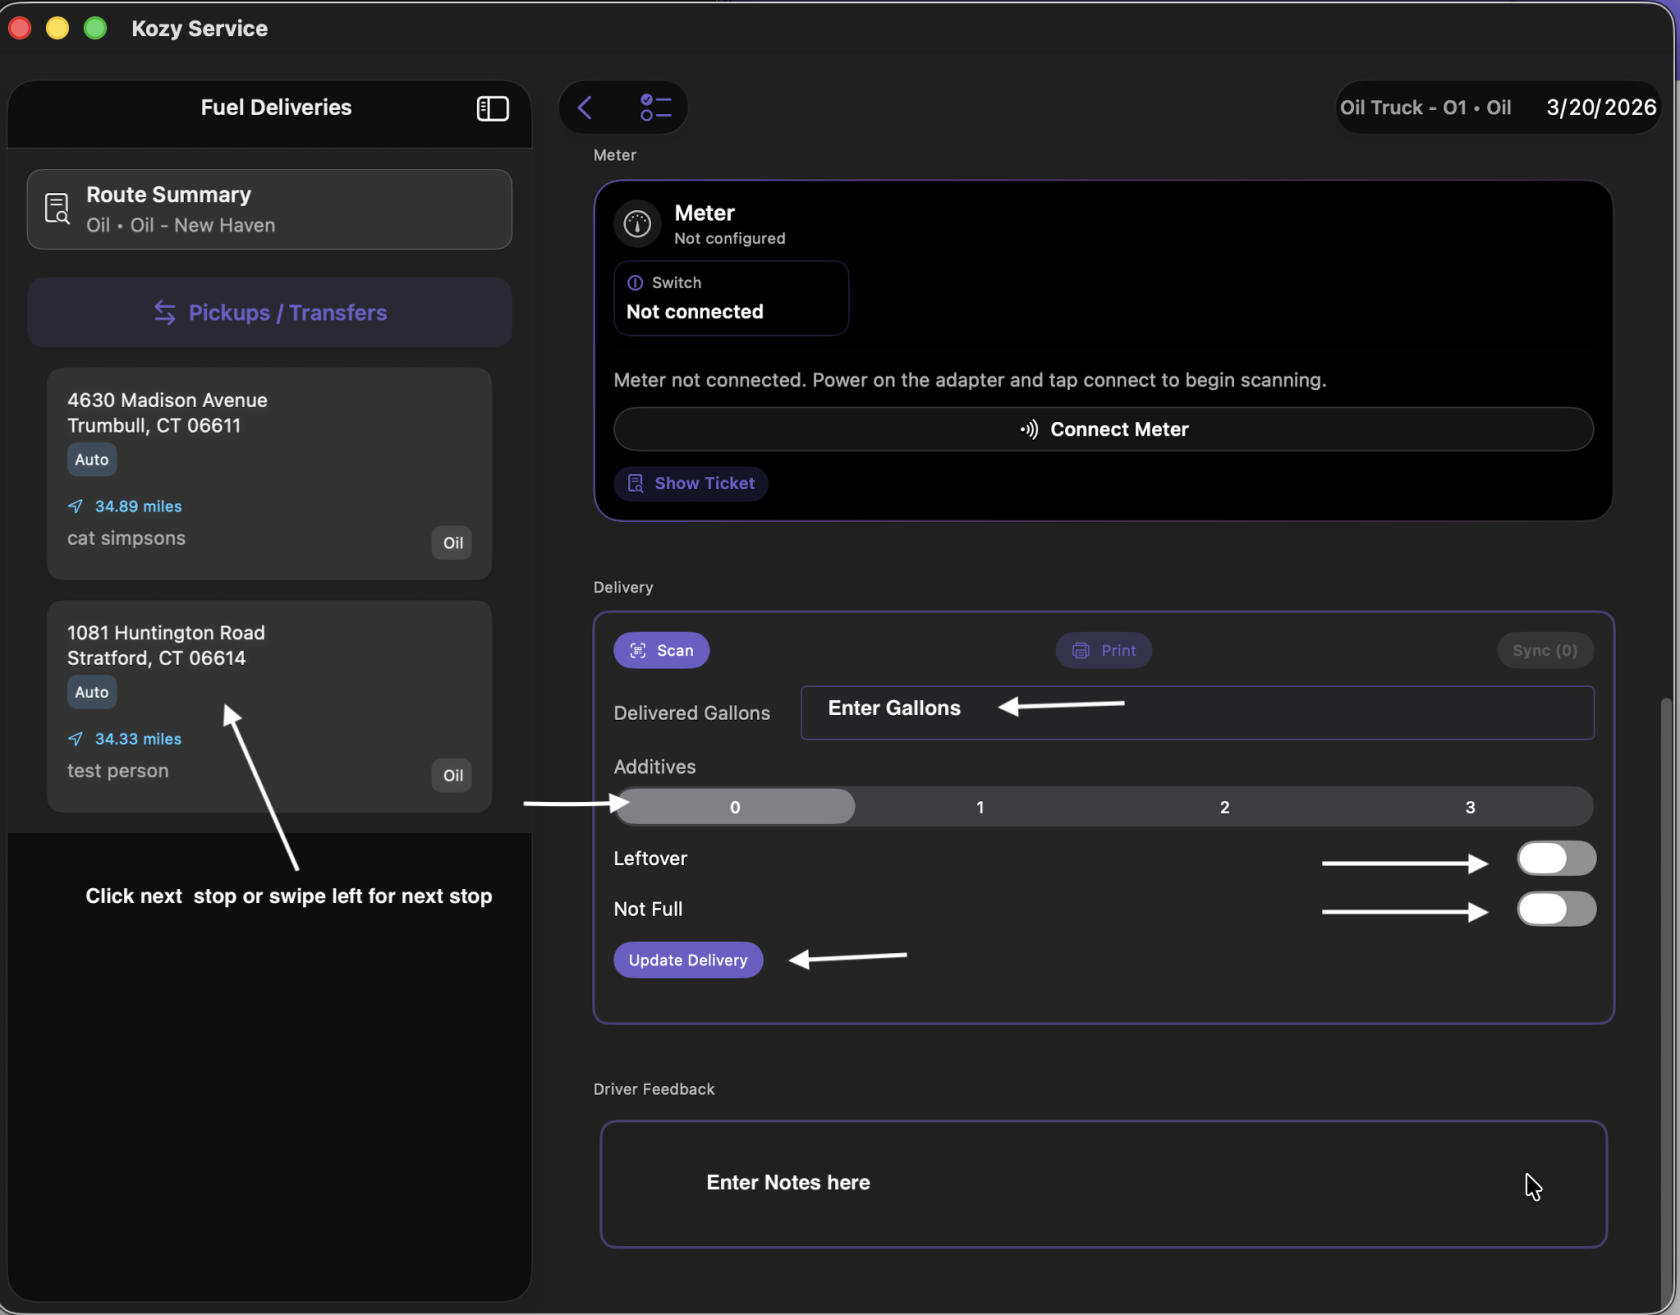
12. Scroll down to enter additives (if used), select if this is leftover or not full. Leave notes or feedback if needed.
13. Swipe left for the next stop or select the next one by hand. Repeats 11&12. Continue until all deliveries are completed.
14. IF you are tracking Post trip in Kozy - select the := icon next to the word Fuel Deliveries at the top and enter closeout details. Click Done when completed.
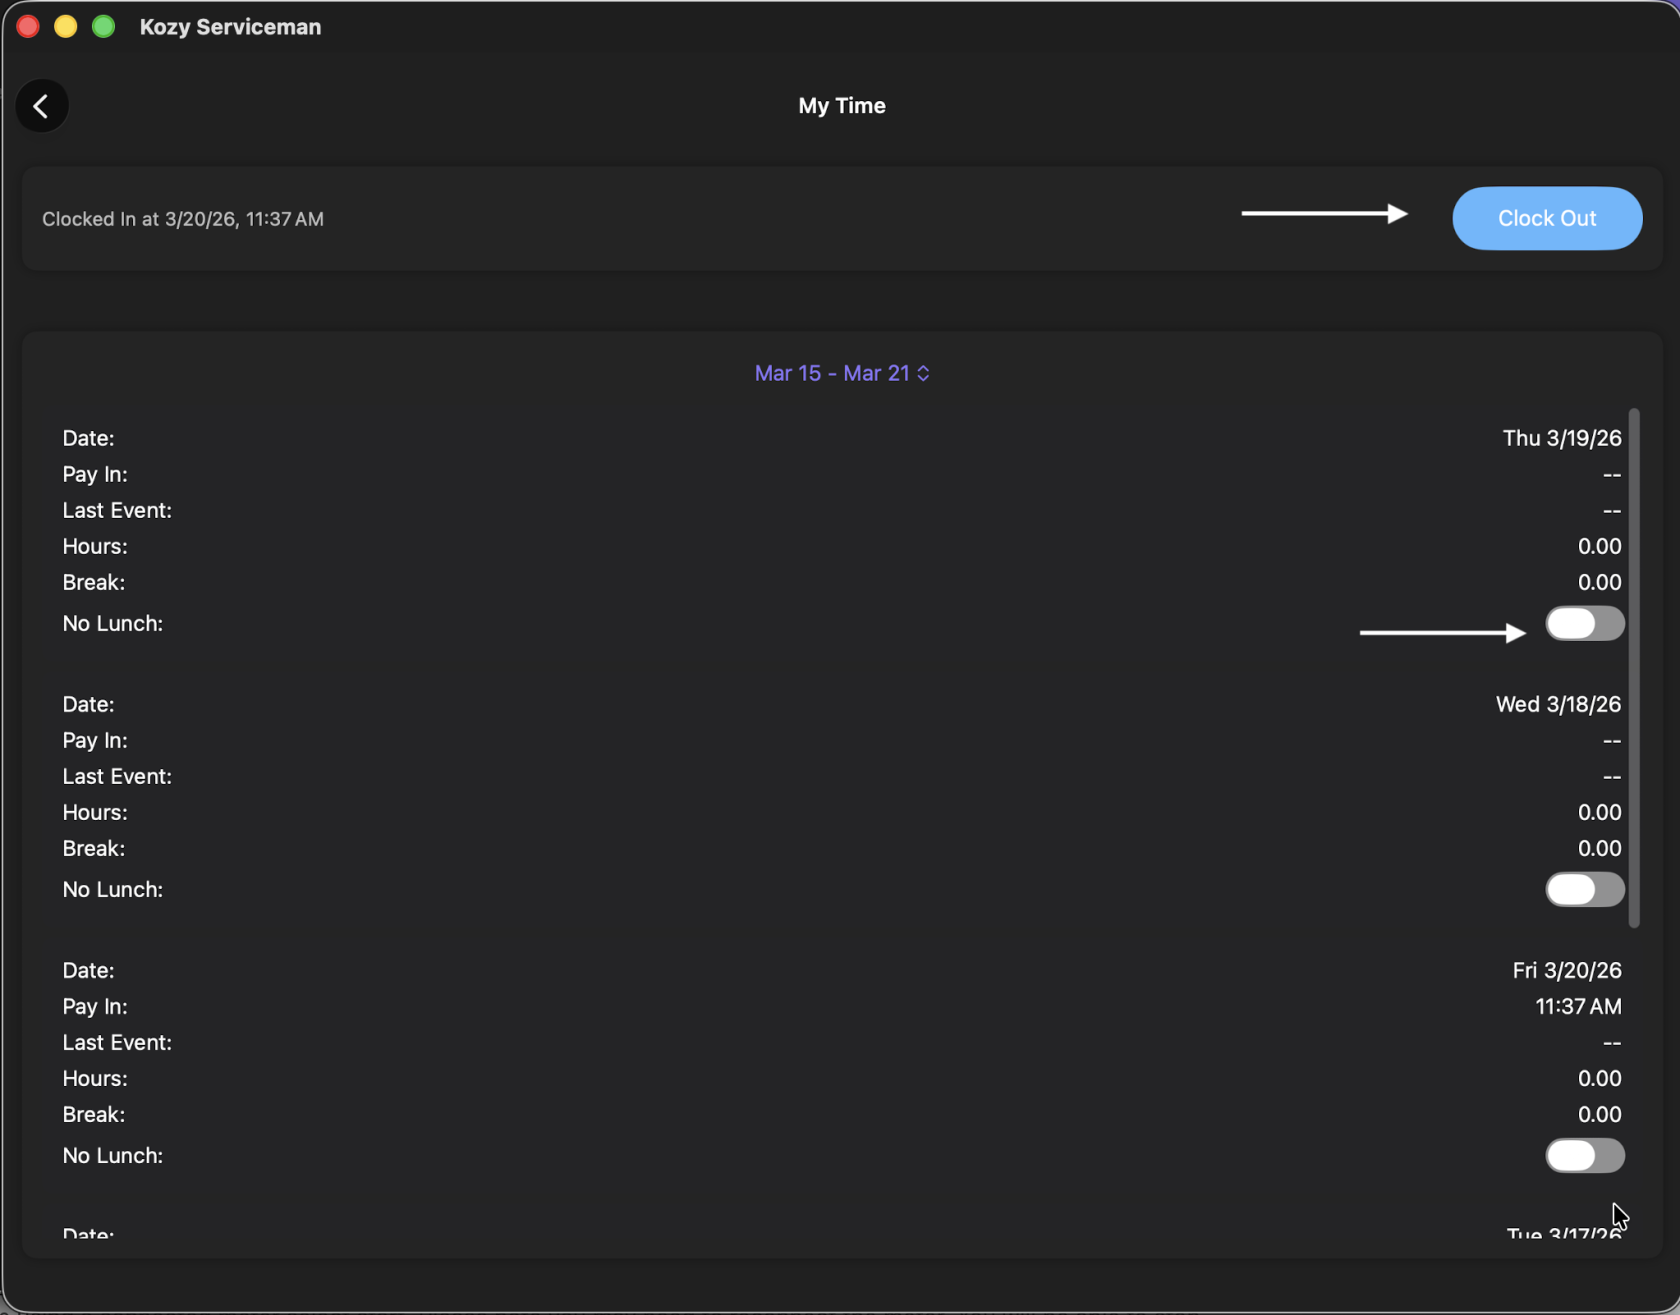
15. IF you are tracking time - from the home screen select My Time - Clock Out. Remember if you skipped lunch to select the slider for the day.
Fuel Drivers Daily Life Metered
Your app should already be setup with your truck for the day. You will be using the app.
1. Login to the app (if you are not already logged in).
2. IF your company tracks time in Kozy - select My Time and Clock In
3. Hit the back button to return to the home screen.
4. Select Fuel
5. IF you are tracking Pre trip in Kozy - select the := icon next to the word Fuel Deliveries at the top and slide for inspection report. Click Done when completed.
6. To Record a Pickup select Pickups/Transfers
7. The terminal you need to fill your Vehicle is at the top of the list.
8. Select Pickup/Transfers once you pickup your fuel load(s).
9. Enter how many gallons your Pickup (gal) at the bottom and Record Pickup. Close.
10. Select your first stop. This will show you the address (click the arrow for Google Maps to direct you), a picture of the property (if previously added) and expected delivery.
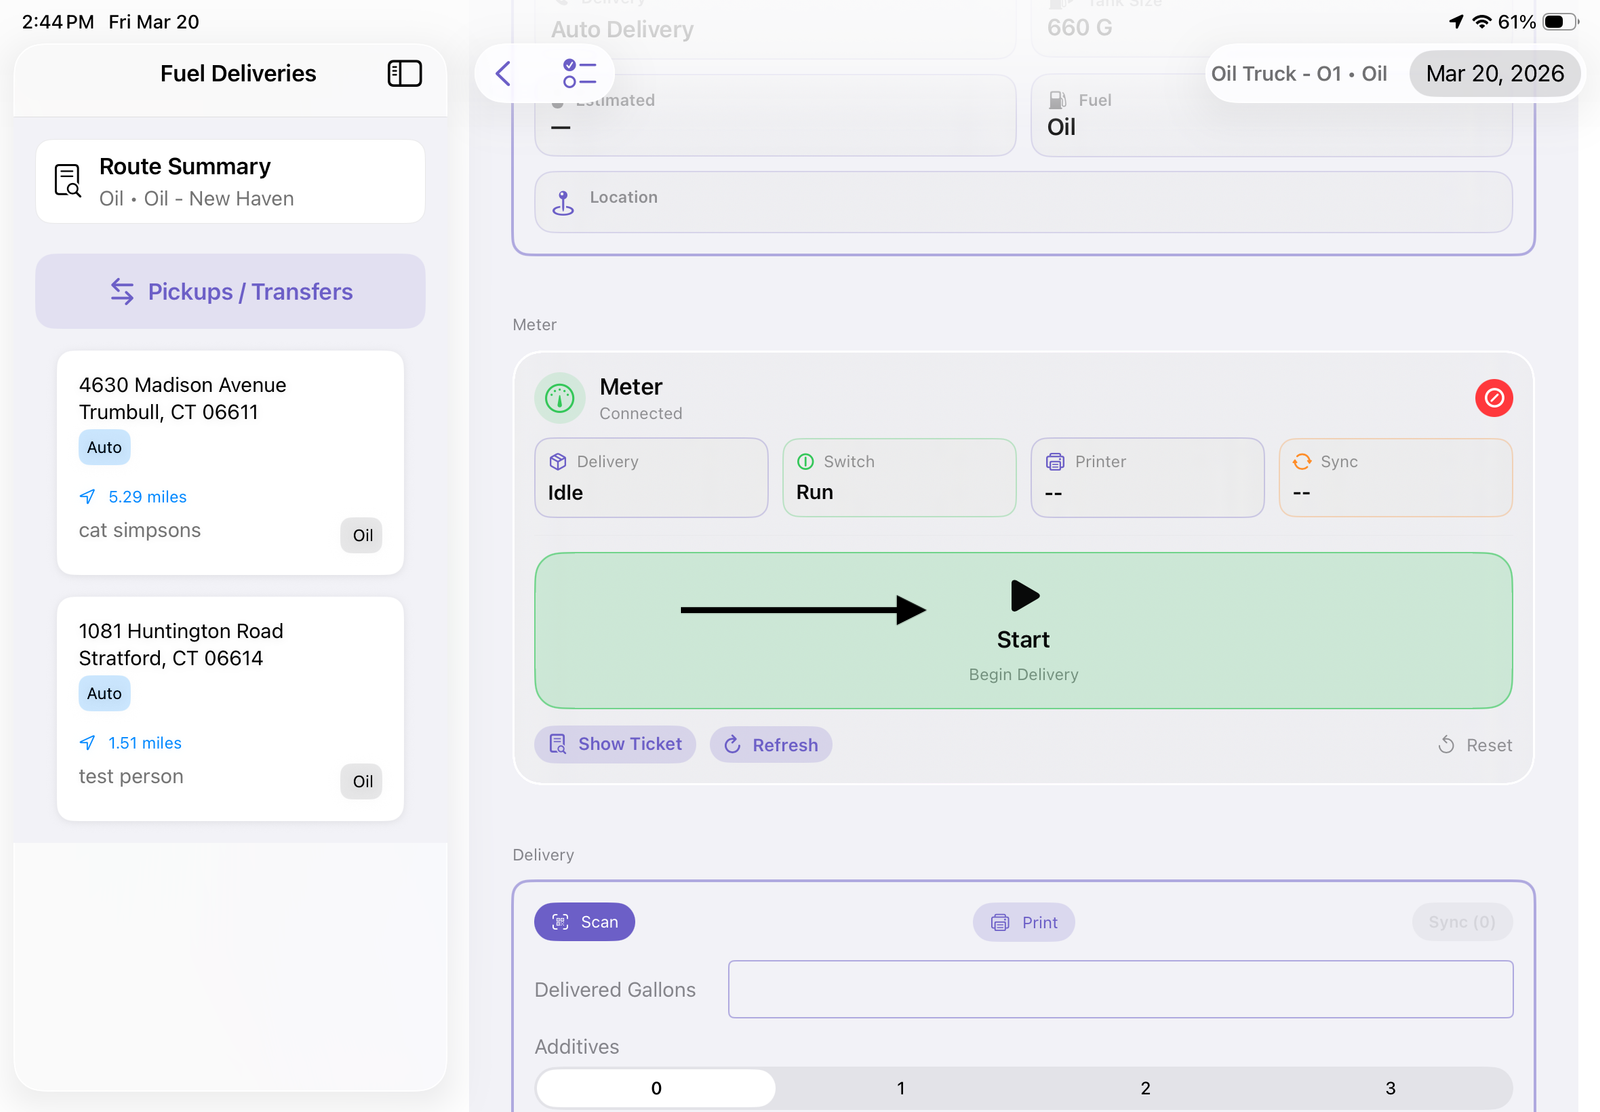
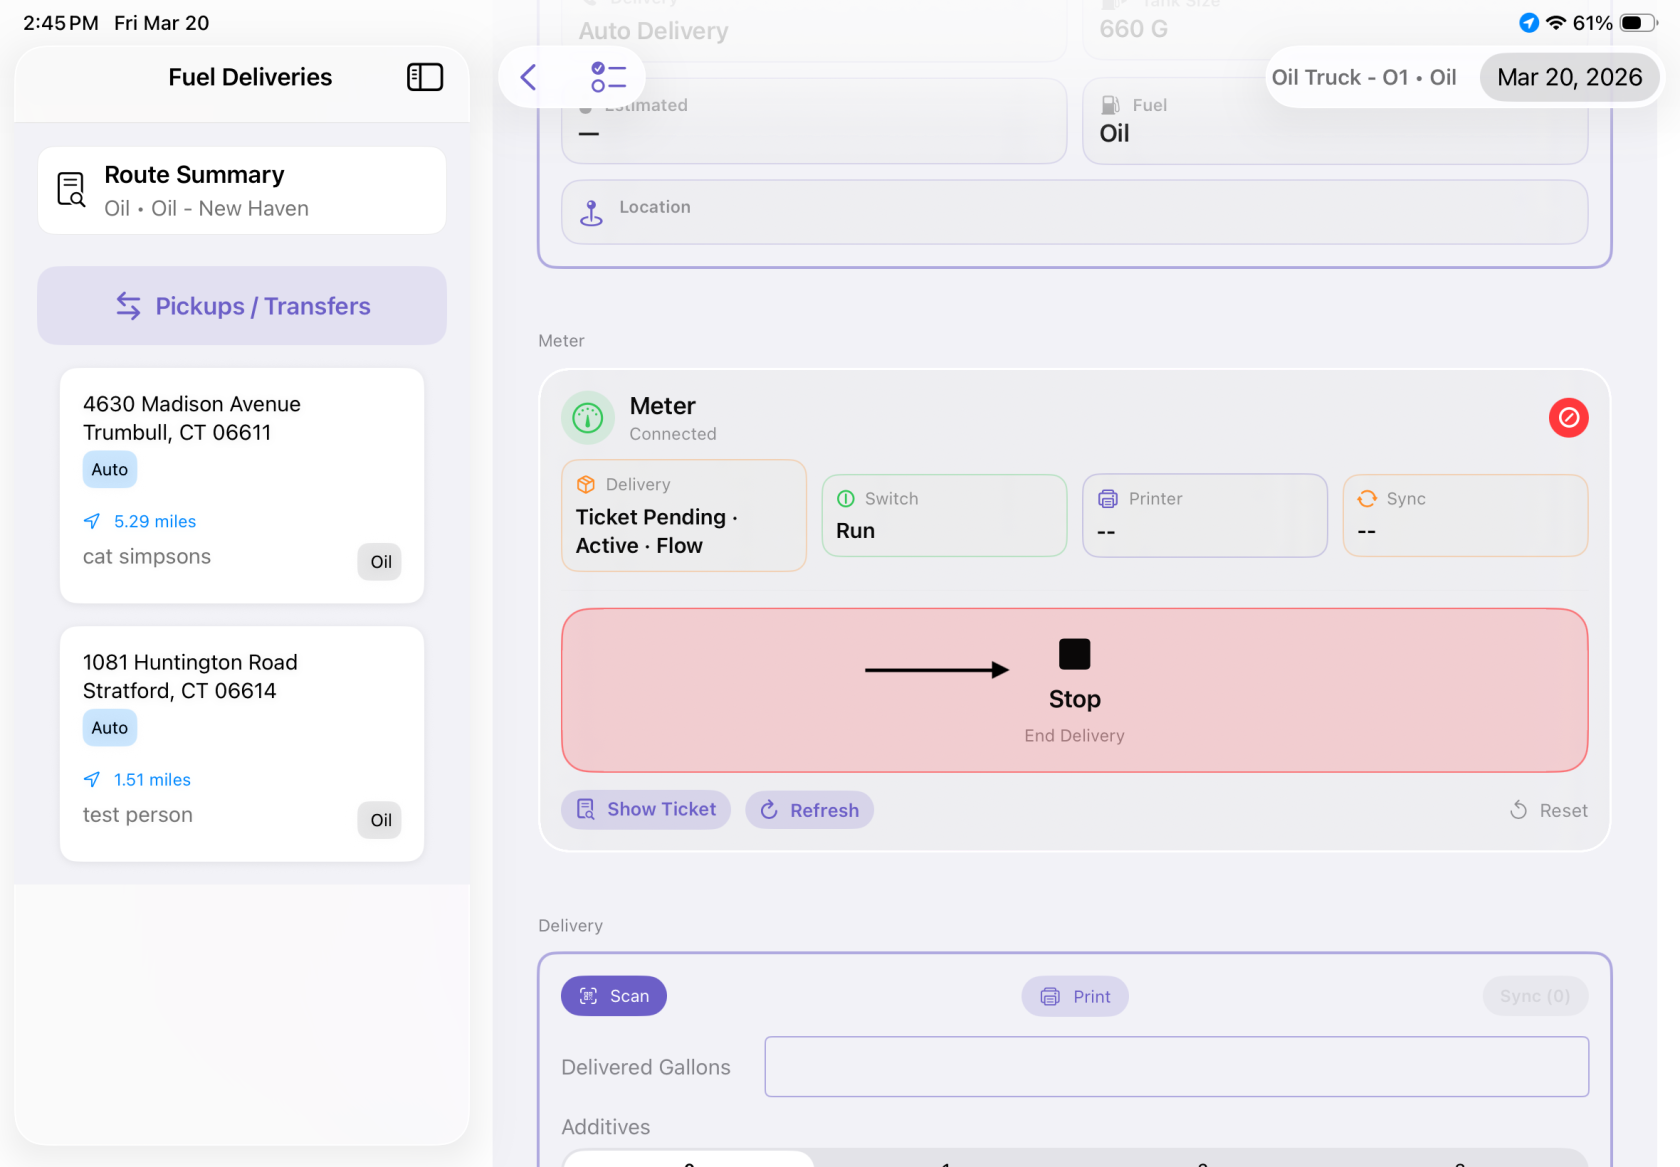
11. Scroll down to select START. Please note you may need to reconnect the meter. You will be able to stop it here as well and it will automatically fill in the delivery information.
12. Scroll down to enter additives (if used), select if this is leftover or not full. Leave notes or feedback if needed.
13. Swipe left for the next stop or select the next one by hand. Repeats 11&12. Continue until all deliveries are completed.
14. IF you are tracking Post trip in Kozy - select the := icon next to the word Fuel Deliveries at the top and enter closeout details. Click Done when completed.
15. IF you are tracking time - from the home screen select My Time - Clock Out. Remember if you skipped lunch to select the slider for the day.